
We may earn revenue from the products available on this page and participate in affiliate programs. Learn more ›
A laptop stand is a nice way to keep your computer elevated off the surface of your desk, which is good for your eyes and the long-term health of your laptop. Sure, you could buy one, but building your own allows you to customize it to your heart’s content. And by using wood—as I did here—you’ll end up with a stand that has a unique, homemade look.
If the thought of friends, family, and coworkers admiring your custom laptop stand isn’t enough to get you picking out wood, let’s circle back to those benefits. By elevating your computer, you raise the screen, which can help reduce eye and neck strain while you’re working. Ideally, the top of your display should be at or just below eye level, so you’re looking down slightly while using it, according to the US Occupational Safety and Health Administration. Much better than craning your neck up or down to see what you’re doing.
A good laptop stand will also help your computer stay cool. The central processing unit (CPU), memory, and WiFi card are typically the three biggest heat producers in a laptop, says Gregor Angus Berkowitz, a computer engineer and managing partner at GBA, a technical management consultancy in California. This heat comes from the electrical resistance in those units as they consume power to perform their processing functions.
“It’s kind of a runaway scenario where as they get hotter they become more inefficient and use more power and battery,” Berkowitz says. “If you can keep your CPU and memory cooler, it uses less power.”
Although it’s difficult to damage your computer these days by letting it overheat, your laptop’s internal temperature measurement devices will throttle the CPU and eventually shut down the device before anything catastrophic happens, Berkowitz explains. Still, a hot computer will make your life harder.
The laptop stand I designed has a rail-mounted approach, and includes holes in its side panels to ensure that air can move beneath the laptop from any direction to dissipate heat. It’s also easy to make from scrap wood, and you can modify the design to match any wood you have on hand. I didn’t actually design anything up front—I just stared at the boards I wanted to use until the final vision came to me. I’ll save you that trouble though, and you can just copy mine.
Warning: DIY projects can be dangerous, even for the most experienced makers. Before proceeding with this or any other project on our site, ensure you have all necessary safety gear and know how to use it properly. At minimum, that may include safety glasses, a face mask, and/or ear protection. If you’re using power tools, you must know how to use them safely and correctly. If you do not, or are otherwise uncomfortable with anything described here, don’t attempt this project.
How to build a wooden laptop stand
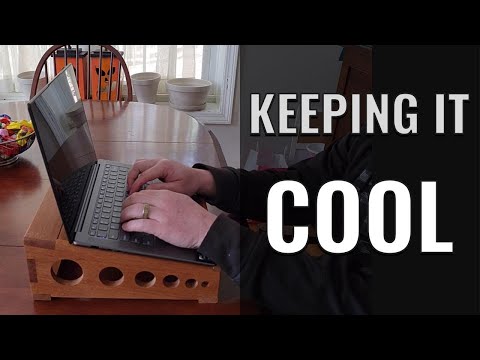
Keep your computer cool with this DIY laptop stand
Stats
- Time: 2 to 4 hours
- Material cost: $5 to $20
- Difficulty: moderate
Materials
- 1 (2- to 3-foot-long) piece of 1-by-6 board
- 5 (1- to 2-inch wide) boards 12 to 13 inches long
- Wood glue
Tools
- Table saw
- Crosscut sled
- Jointer
- Planer
- Tape measure
- Angle finder
- Marking gauge
- Orbital sander
- Router
- Sanding discs (120-, 150-, and 220-grit)
- Clamps
- Drill press (or drill)
- Roundover bit
- (Optional) card scraper
Instructions
1. Choose the dimensions and angle for your laptop stand. These measurements should be based on a few factors. The first is the size of the bottom of your laptop. The stand should be an inch or two narrower than your laptop, left to right, and an inch or so larger than it, front to back. You’ll also want to consider whether it will be dedicated to one laptop, or if multiple people might use it. I made mine 13 inches deep instead of the 11.5 it actually needed to be, for example, so the family member who requested it could keep using it if they got a larger computer in the future.
The second consideration is the height of the stand. Based on the idea that the top of the screen should be at or just below eye level when you’re sitting at your desk, calculate the height needed to raise your laptop that tall. I designed my stand to be about 5 inches tall in the back, which raises the top of the monitor about 15 inches above the desk top.
- Pro tip: Even if you don’t follow my design, Berkowitz cautions that DIY laptop stands should be fairly skeletal, leaving as much of the computer exposed as possible. Placing the laptop on a solid sheet of plywood, for instance, would be adding insulation below, preventing effective heat dissipation.
2. Mill your boards to their final dimensions. This is a project where well-milled boards are important, because there are some precise sizes and joinery involved. I wrote a guide on how to mill wood at home if you need more details, but the steps are pretty straightforward. First, use a jointer to flatten one face and edge of each board so they are at a perfect right angle to one another. Next, run the wood through the planer to its final thickness, in this case around half an inch. Then cut them to their final width on your table saw. If you don’t have a jointer, you can flatten the faces of the boards with a hand plane, or a jointer sled in your planer, and square the edge on your table saw with the help of a level.
When you’re done milling, you should have seven boards, all about half an inch thick. Adjust these dimensions as needed to fit your computer:
- 2 (12-by-5-inch) boards for the two side panels
- 4 (12-by-1-inch) pieces for the top and rear braces and the legs
- 1 (12-by-½-inch) piece for the front brace (the computer stop)
3. Cut the angle for the top of the stand. I didn’t precisely measure my angle, but I decided to settle between 15 and 20 degrees after looking at some pictures and doing some testing with my laptop. To find the right slope, I put my laptop down on the desk, then raised the back up with some scrap boards until I found a comfortable typing angle. I measured that with my angle gauge and transferred that slope to the side panels.
To cut the angle easily, and to make sure both were exactly the same, I used a tapering jig. You can buy a fancy one, but it’s easy enough to build your own simple jig with some leftover plywood.
[Related: The surprising woodworking tools you already have around the house]
Mark the line of your angle on the side panels, then position that line along the edge of the tapering jig. Run both boards through your table saw one at a time, and you’ll end up with perfectly matched angles for the laptop to sit on.
4. Plan to cut rabbets into the side panels to hold the legs, braces, and computer stop. Rabbets are slots cut into the edges of boards to hold wood together more securely than butting them together. Because one board is inset into another, this kind of joint has both mechanical strength and increased surface area for glue to adhere to.
The easiest way to cut rabbets consistently is with a table saw and a crosscut sled. Measure and mark the positions and depths of each rabbet carefully. I use my wheel marking gauge for this because it’s the most accurate and consistent, but you can use a sharp pencil as well.
Each side panel should have five rabbets, and it may help if you imagine the boards standing on edge, as they will in the final project:
- 2 on the bottom edge to hold the leg pieces
- 1 at the front of the top edge (the lowest part of the angle) to hold the computer stop
- 1 at the back of the top edge to hold the top brace
- 1 in the center of the back edge to hold the rear brace

While the rabbets for the top and rear braces should be as deep as those pieces are thick—so they fit within the original shape of each side panel—the rabbets for the computer stop and legs should be about half the width of those pieces. This means they’ll sit a quarter inch or so higher than the edge of the side panels. Check the photo above if you need a visual guide.
- Note: You may want to test a few board thicknesses for the computer stop—it should rise above the side panel enough that the front of the laptop catches on it, which will vary based on the model you have.
5. Cut the rabbets. To ensure that the cuts remained consistent across both side boards, I taped the two together with painter’s tape, keeping the edges perfectly flush, and cut them at the same time. Use a flat grind blade on your table saw if you have one, and use multiple passes to cut out each rabbet.
6. Drill ventilation holes in the side boards. When most laptops get too hot, internal fans kick on to circulate the air and move the heat away from delicate electrical components and out the back or bottom of the computer. Some laptops have passive cooling devices like heat pipes—small pipes filled with water or another coolant under a slight vacuum—that carry energy to a fan or radiator at the back of the computer. Whatever the case, if your stand simply traps that heat underneath the device, you’re not doing it any favors.
In order to keep the air flowing beneath my laptop stand, I added openings in the side panels. The easiest way to do this is to drill some holes with a 1.5- to 2-inch Forstner bit, or route out some slots. I decided to get fancy with mine, however, and drilled a series of holes, decreasing in size from 2 inches down to half an inch. These approximately follow the angle of the taper, creating a cool effect that didn’t take a ton of time… OK, that’s a lie—it took over an hour, between planning exactly which bits I wanted to use, how far apart to space the holes, and then drilling. Not to mention the increased sanding time. But I think the end result was worth it.
7. Round over all the exposed corners. This step takes some planning. You’ll want to round over all the outside edges of all the pieces, but not the edges that will be inside a rabbet. Otherwise you’ll get an awkward gap in the corners of the rabbets.
[Related: A beginner’s guide to Shapr3D]
Mark the edges you want to round over, as well as the ones you don’t, and try not to talk yourself into adding more roundovers in the heat of the moment when the router is in your hand. I did a few too many, and while the stand is structurally fine, the little gaps just mock me every time I look at them.
Use a router and whatever size roundover bit you have that makes sense with the aesthetic you’re going for. A router table is even better for this, if you have access to one.
8. Sand. Sanding small projects like this gets tricky once they’re assembled, especially the interior parts. That’s why it’s a good practice to sand all of your pieces before assembly, even if you know you’ll have to do a bit more sanding later to clean up the seams. I’m lucky enough to have access to a drum sander at my local makerspace, so I used 120-grit sandpaper in that and finished this step in no time, with no hand cramping. Those of you without access to a drum sander, pick up that orbital sander and get cracking.
9. Laptop stand, assemble! I spent a lot longer than I’ll care to admit thinking about the best way to clamp this project together so it would remain square. My concern was that it would twist into a parallelogram instead of a proper rectangle when looking from the top down, losing the nice 90-degree corners. This honestly wouldn’t have been the end of the world, but I feel like I’m better than that at this point.
Debatable, but I wanted to do it right.
Ultimately, I decided to assemble the stand in two stages. The first stage was to get the three support boards glued into place, and then I would attach the legs once those were dry. I glued and clamped the rear brace first, using the computer stop as a reference to keep the front from folding in. Then I glued the top brace and computer stop into place, and adjusted everything so the diagonals from corner to corner of the stand were all the same length—that’s the best way to know that a box is actually square.
Once the supports were dry, I glued and clamped the legs in place.
I’m sure there’s a jig you can build to make this clamping process easier if you’re making a lot of laptop stands, but when the glue dried, I was only a sixteenth-inch off corner to corner, which is well within tolerances for this project.
10. Clean up any glue squeeze-out or residue. No matter how diligent you are with cleaning up glue while it’s wet, there will probably be some stains left over. Clean those up in whatever way works best for you. Sandpaper is the most accessible, but a chisel can be useful to get into those hard-to-reach nooks and crannies. I’m also partial to using a card scraper, though that takes quite a bit of practice to learn to use well—I’m still not great with one.
11. Apply your favorite finish. Follow the manufacturer’s instructions on the bottle. I like spray-on polyurethane or shellac for a project like this, because it’s fast, easy, and the spray can get into those hard-to-reach areas better than brushes typically can. If you use a spray-on finish, be careful not to linger in one place—this will help you avoid getting runs or drips that you have to sand off. For a perfectly smooth finish, rub the final coat down with a piece of brown paper bag.
Once the finish is shined up to your liking, you’re done. Plop it down on your desk, elevate that laptop, and listen to the far quieter hum of a laptop fan that isn’t constantly on the verge of overheating. Your ears will thank you, your patience will thank you as you avoid annoying computer slowdowns, and your newly comfortable computer components will thank you too.
