Pretty much everybody has shelves in their home. But not everybody has shelves that make their friends stop, step back, and say, “Now, wait one minute. How on Earth are those things attached to the wall?”
Though they may seem like magic, so-called floating shelves are a straightforward woodworking project—the trick is hiding the hanging brackets inside the wood. There are numerous ways to make floating shelves, but the one I tackled in my house features a piece of 2-by-12 construction lumber and some dowels.
No part of the build is particularly complicated, but this project does have some steps that require precision. Accuracy here is important for strength, but also helps hide the wall-mounting method. Observant guests might be able to see the seam in the shelf that spoils the illusion, but it’s pretty well concealed.
So the next time you need shelves, consider trying to make them float. Here’s the spell.
Warning: DIY projects can be dangerous, even for the most experienced makers. Before proceeding with this or any other project on our site, ensure you have all necessary safety gear and know how to use it properly. At minimum, that may include safety glasses, a facemask, and/or ear protection. If you’re using power tools, you must know how to use them safely and correctly. If you do not, or are otherwise uncomfortable with anything described here, don’t attempt this project.
Stats
- Time: 2 to 4 hours
- Cost: $50 to $80
- Difficulty: Moderate
Tools
- Miter saw
- Table saw
- Jointer
- Planer
- Hand plane
- Drill
- ¾-inch auger bit
- 5/16-inch drill bit
- ¾-inch Forstner bit
- Painter’s tape
- Orbital sander
- Sanding discs (60-, 80-, 120-, 150-, and 220-grit)
- Level
- Speed square
- Tape measure
- Pencil
- Center Finder marking gauge
- Stud finder
Materials
- 1 (8-foot) 2-by-12-inch board (adjust for the width and length of shelf you need)
- 2 (48-inch) ¾-inch dowels
- Wood glue
- 6-inch-long ⅜-inch lag bolts (one for every spot your shelf crosses a stud)
- 1 (¾-inch) wood screw per shelf
- Wood stain
- Staining pad
- Spray-on polyurethane
How to build floating shelves
1. Mill your lumber to size. Construction-grade wood is meant to be hidden inside walls and in ceilings, so it doesn’t matter what it looks like. It generally needs to be cleaned up before you build a visible project out of it. We have a full guide on how to properly mill wood, but the basic steps are simple.
First, flatten one face. If you have access to a large enough jointer, you can use that. If you don’t, you’ll need to use a flattening sled on your planer or grab a hand plane to flatten one side. I used a hand plane because the board I bought was already pretty close to flat and it was a good opportunity to practice.
Once one side is flat, joint one edge, either on your jointer or using a jointer sled on your table saw. From there, run the board through your planer to flatten the second face, and trim the remaining rough edge to width on your table saw. Finally, cut the two ends to length on your miter saw.
The final dimensions of each of my shelves was 10.5 inches deep, 4 feet long, and about 1 ⅜ inches thick.
2. Measure where the studs will fall on the back of each shelf. This step will save you headaches later. Locate the studs in the wall with a stud-finder (or whatever method you prefer). Then figure out where exactly you want each shelf and mark the location of the intersecting studs on the back of each board. Knowing where the studs are will help in two ways. First, it’ll be easier to pre-drill holes for your lag bolts later. Second, when you’re drilling the holes for the support dowels in Step 3, you can space them out so they won’t interfere with the bolts.
While marking for the studs, use a center line marker to draw a line along the back of each shelf. You’ll use this as a reference for the dowel and lag bolt holes later on.
3. Measure for the support dowel holes. These floating shelves are held up by dowels buried inside the wood. You’ll have to drill holes for these dowels.
On my 4-foot shelves, I spaced the five dowel holes out about evenly on the back of each shelf, starting about 3 inches from each end and marking each location on the center line drawn in Step 2. These holes don’t have to be perfectly spaced out, so adjust as necessary to stay at least 2 inches away from the stud marks. This will make installing the shelves easier because the dowels won’t be in the way.
4. Drill the dowel holes. The most important thing when drilling these holes is to keep them straight and level. I recommend building a jig to keep the drill bit perpendicular to the back of each board. That said, I did not build a jig. Instead, I set my speed square on the top of the shelf directly above where I wanted the hole, overhanging the back by about 3 inches. Then I used my combination square to set it perpendicular to the board. The speed square served as a visual reference to keep the auger bit straight. It worked, but I feel like there was too much room for error. If I ever make these again, I’ll build a jig.
Drill the holes about three quarters of the way through the board. On my shelves, that meant about 8 inches. If your bit won’t reach that full depth, you’ll have an opportunity to deepen the holes later.
(Optional) 5. Shape the edges of your boards. If you want to shape the edges of your shelves, now is the time to do it. A simple option is to cut a bevel on the bottom of each shelf with your table saw, which is what I did. I chose this because the bevel gives the illusion that the shelves are thinner than they really are.
[Related: The surprising woodworking tools you already have around the house]
6. Sand everything smooth. As with most woodworking projects, sanding is the first step to a beautiful finish. Start with 120-grit sandpaper in your random orbital sander, then move to 150-, 180-, and finally 220-grit, which is what most finishes suggest you do. However, double-check the finish you’re planning to use to see if they have different sanding requirements, and follow those instructions.
- Pro tip: Scribble lightly with a pencil all over the top and bottom faces of your boards before sanding. As you sand, the pencil marks will disappear. This will help you see where you have and haven’t sanded, which can be easy to lose track of on large projects like this.
7. Cut the back of each board off. A floating shelf is really two pieces: the hanging board with dowels sticking out of it that attaches to the wall, and the shelf board that slides onto those dowels. To make the hanging board, use your table saw to cut the back 2.5 inches off of each board. The actual amount you remove can change depending on the size of shelf that you’re building. Mine were wide, somewhat heavy shelves, so I wanted beefier hanging boards.
Take your time with this cut—you want it as even as possible so the two pieces fit back together seamlessly.
(Optional) 8. Deepen your dowel holes. If you need to deepen the dowel holes from Step 4, now is the time. The existing hole should keep the drill bit straight now, so you won’t need to worry about any kind of guide or jig.
- Caution: Be careful not to drill out through the front of the shelf. You can put a piece of painter’s tape on your drill bit to give yourself a visual reminder of the proper depth.
9. Drill pilot holes. If you’re confident in your measurements from Step 2, you can drill pilot holes for your lag bolts into each hanger board now. Otherwise, you can wait until you actually install the shelves. I used a 5/16-inch bit for the pilot holes, and a ¾-inch Forstner bit to countersink space for the bolt heads.
Also drill a small pilot hole for a single wood screw with a 5/32-inch drill bit in the bottom of each shelf board, directly into one of the middle dowel holes.
10. Cut your dowels to length. First, measure the depth of your dowel holes. I did this by sticking a small scrap of wood into each hole and marking where it protruded. Then I measured that distance and subtracted a quarter of an inch. Subtracting a little bit of length will make your dowels shorter and add some room inside the hole to ensure you can push the two boards tight together.
Then cut the dowels to length. You can do this with a crosscut sled on your table saw or with a hand saw.
- Caution: I do not recommend cutting wood this small on a miter saw. Kickback from cutting small stock with my miter saw is the only time I’ve needed stitches from woodworking, so I avoid doing it now.
11. Sand the dowels to fit. In a perfect world, all ¾-inch dowels would be the same size and you wouldn’t need to sand them down. We do not live in a perfect world. One of mine slid easily into the ¾-inch holes. The other didn’t fit at all.
If your dowels don’t slide into the hole, you’ll need to make them fit. If you have access to a lathe or a drill with a chuck big enough to hold your dowels, this is easy. Simply attach the dowel to the tool, spin it up, and rub sandpaper against the dowel as it turns. Don’t overdo it—test-fit regularly until the dowel slides in without much force, but holds snuggly in place with friction.
Otherwise, sand them down by hand with 60- or 80-grit sandpaper until they fit. I’ll warn you—this is the worst woodworking task I’ve ever undertaken. And the numerous blisters on both my hands recommend that you wear gloves while you do so. Or better yet, have the foresight to find dowels that already fit.
- Pro tip: Now that I’m older and wiser, I’d recommend going to the hardware store with a scrap board you’ve drilled a ¾-inch hole in. Test-fit the dowels to find ones that slide into the hole as they are. This will save you a ton of time.
12. Glue the dowels into each hanging board. Once the dowels are the right size, glue them in place. Have rags or paper towels on hand because this is messy. Smear a thin layer of wood glue on the bottom 2 inches of a dowel, add a few drops of glue into the hole in the hanging board, and push the dowel in from the front (the face that will touch the shelf board) until it’s flush with the back of the hanging board (the face that will touch the wall). Immediately wipe all of the glue away. Any glue on the shelf or dowels will interfere with the fit of the shelf board.
- Pro tip: I’ll admit, I didn’t come up with this tip—that honor goes to my wife. Slide the shelf board part-way onto the dowels while they’re drying to help hold them at the angles you want them. This will make installing it later easier. We had some trouble after the glue had dried because one of the dowels had moved slightly in its hole.
13. Stain and finish the shelves. Once the dowels are dry, finish them to your liking. I used Minwax Natural Oak stain to match another piece of furniture we have in the room. You can use a rag or brush to apply stain, but I prefer staining pads. They’re faster and cleaner than any other method I’ve tried.
Once the stain is dry according to the manufacturer’s instructions, apply your chosen finish. My preference is spray-on polyurethane because it’s quick and easy. I applied three coats to the bottom and sides of each shelf, and five coats to the top, because that’s where the wear and tear will happen.
14. Install the shelves. Ideally, this is a two person job. If you haven’t drilled pilot holes in the hanger board for the lag bolts yet, measure and do so now. Once the pilot holes are done, have one person hold the hanger board in place, using a level to get it straight. Then have the second person drill through those pilot holes into the studs in the wall.
[Related: Build a floating key organizer cabinet you’ll love coming home to]
Once the holes are drilled, screw the lag bolts into the studs using a 9/16-inch socket on your drill.
When the hanger board is secure, slide the shelf board over the dowels. Again, this is easier with two people, one working on each side of the shelf. Wiggle the dowels as needed to get them lined up with the holes, and slide the shelf board into place. We had to sand some dowels down even more to get them all to fit.
Finally, install the small wood screw into the pilot hole you drilled in Step 9. While the dowels should hold the shelf board in place with only friction, this is a simple safety feature to prevent the shelf from sliding apart.
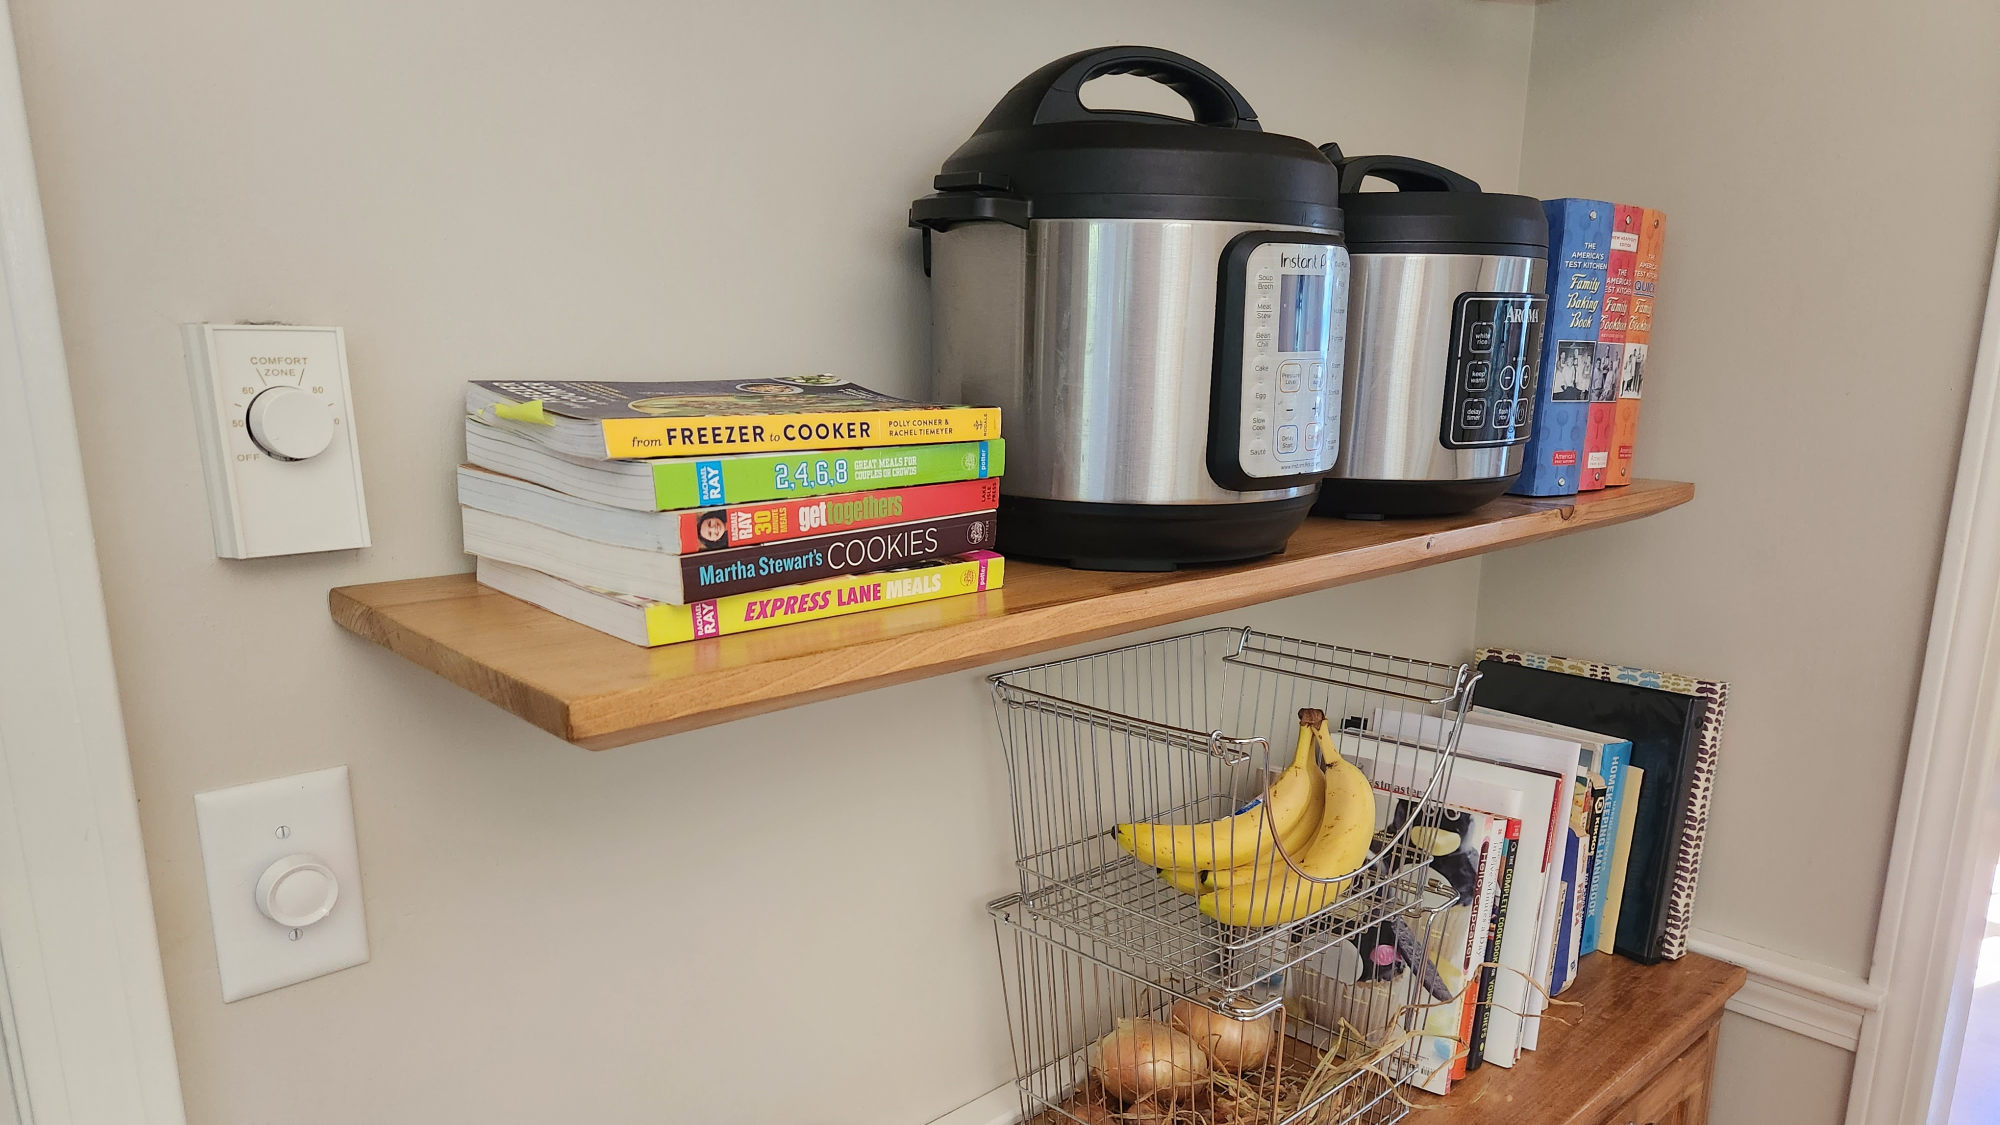
And you’re done. Load your shelves up with whatever you need to store, and be prepared to amaze your friends with your magical shelving powers.
