A table saw is one of the most useful and versatile tools in any workshop. A good one makes straight cuts fast and easy, and if you venture into building or buying jigs, you can cut joinery, straighten board edges, and even cut coves in boards. But like any tool, table saws require routine maintenance. Over time, parts of your saw may start to drift out of alignment, and those straight lines and right angles you’ve taken for granted will become less so.
Fortunately, a return to square is a relatively quick process and requires only a few tools. In about an hour, you can get your table saw back to—or better than—factory quality.
But before we get into the specifics of exactly how to tune up a table saw, I’ll note that I have the Dewalt 7491RS job site table saw, so all of my specifics are based on that tool. Most saws have similar adjustments, but check your manual if you have any questions about your saw.
Stats
- Time: about an hour
- Material cost: $25 to $50
- Difficulty: Easy
Tools
- An allen wrench set
- A Phillips-head screwdriver
- A flathead screwdriver
- A cleaning brush (old toothbrushes also work great)
- A shop vacuum
- A digital angle gauge
- A combination square
Materials
- Compressed air
- Dry lubricant (or whatever lubricant your saw manual recommends)
- Paste wax
Instructions
1. Unplug your saw. A plugged-in table saw is a dangerous table saw. Never work on your saw, or any tool, while it has any connection to power. You don’t want to risk an electric shock or accidentally turning the saw on when your hands are in the danger zone.
2. Remove the throat plate and blade. First, raise the blade as high as it will go, and then remove the throat plate. This is the piece the blade juts out of, and there should be a locking screw holding the plate in place. Simply unlock the screw and pull it up. Then loosen and remove the arbor nut to take off the blade, using the wrenches that came with your saw.
- Note: The arbor nut holds the blade in place, and you may have to turn it right instead of left to get it off. This type of reverse threading keeps it tight while the blade spins.
3. Clean the arbor and surrounding gears. Sawdust collects just about everywhere in a table saw, and can impede performance over time. Using a brush, compressed air, and a shop vac, clean all of the sawdust out of the arbor (the shaft that holds the blade), arbor nut, and drive gears. On many saws, you can reach these from the top, but you may get better access by crawling underneath. If you’re feeling motivated, or your saw is particularly dirty, you can take off the motor and belts to more thoroughly clean around them. If you do remove any belts or drive systems, take at least one photo beforehand so you have a reference for how to put it all back together.
- Pro tip: If you have areas with stubborn pitch or residue, try using mineral spirits as a cleaning agent.
4. Lubricate the arbor and gears. Once these areas are sawdust-free, lubricate them liberally, per your manufacturer’s instructions. I use a spray-on “dry” lubricant. Then reinstall the blade and throat plate.
5. Clean and lubricate the other gears. Once the engine and drive gears are clean, move on to the ones that control the height of the blade, as well as those that let you adjust your fence, if applicable. Scrub them free of any sawdust and residue with your brush, air compressor, and mineral spirits as needed. Once they’re clean and moving easily, lubricate them, working the gears back and forth to ensure that all of the teeth are well coated.
[Related: Up your table saw game by building this floating key organizer]
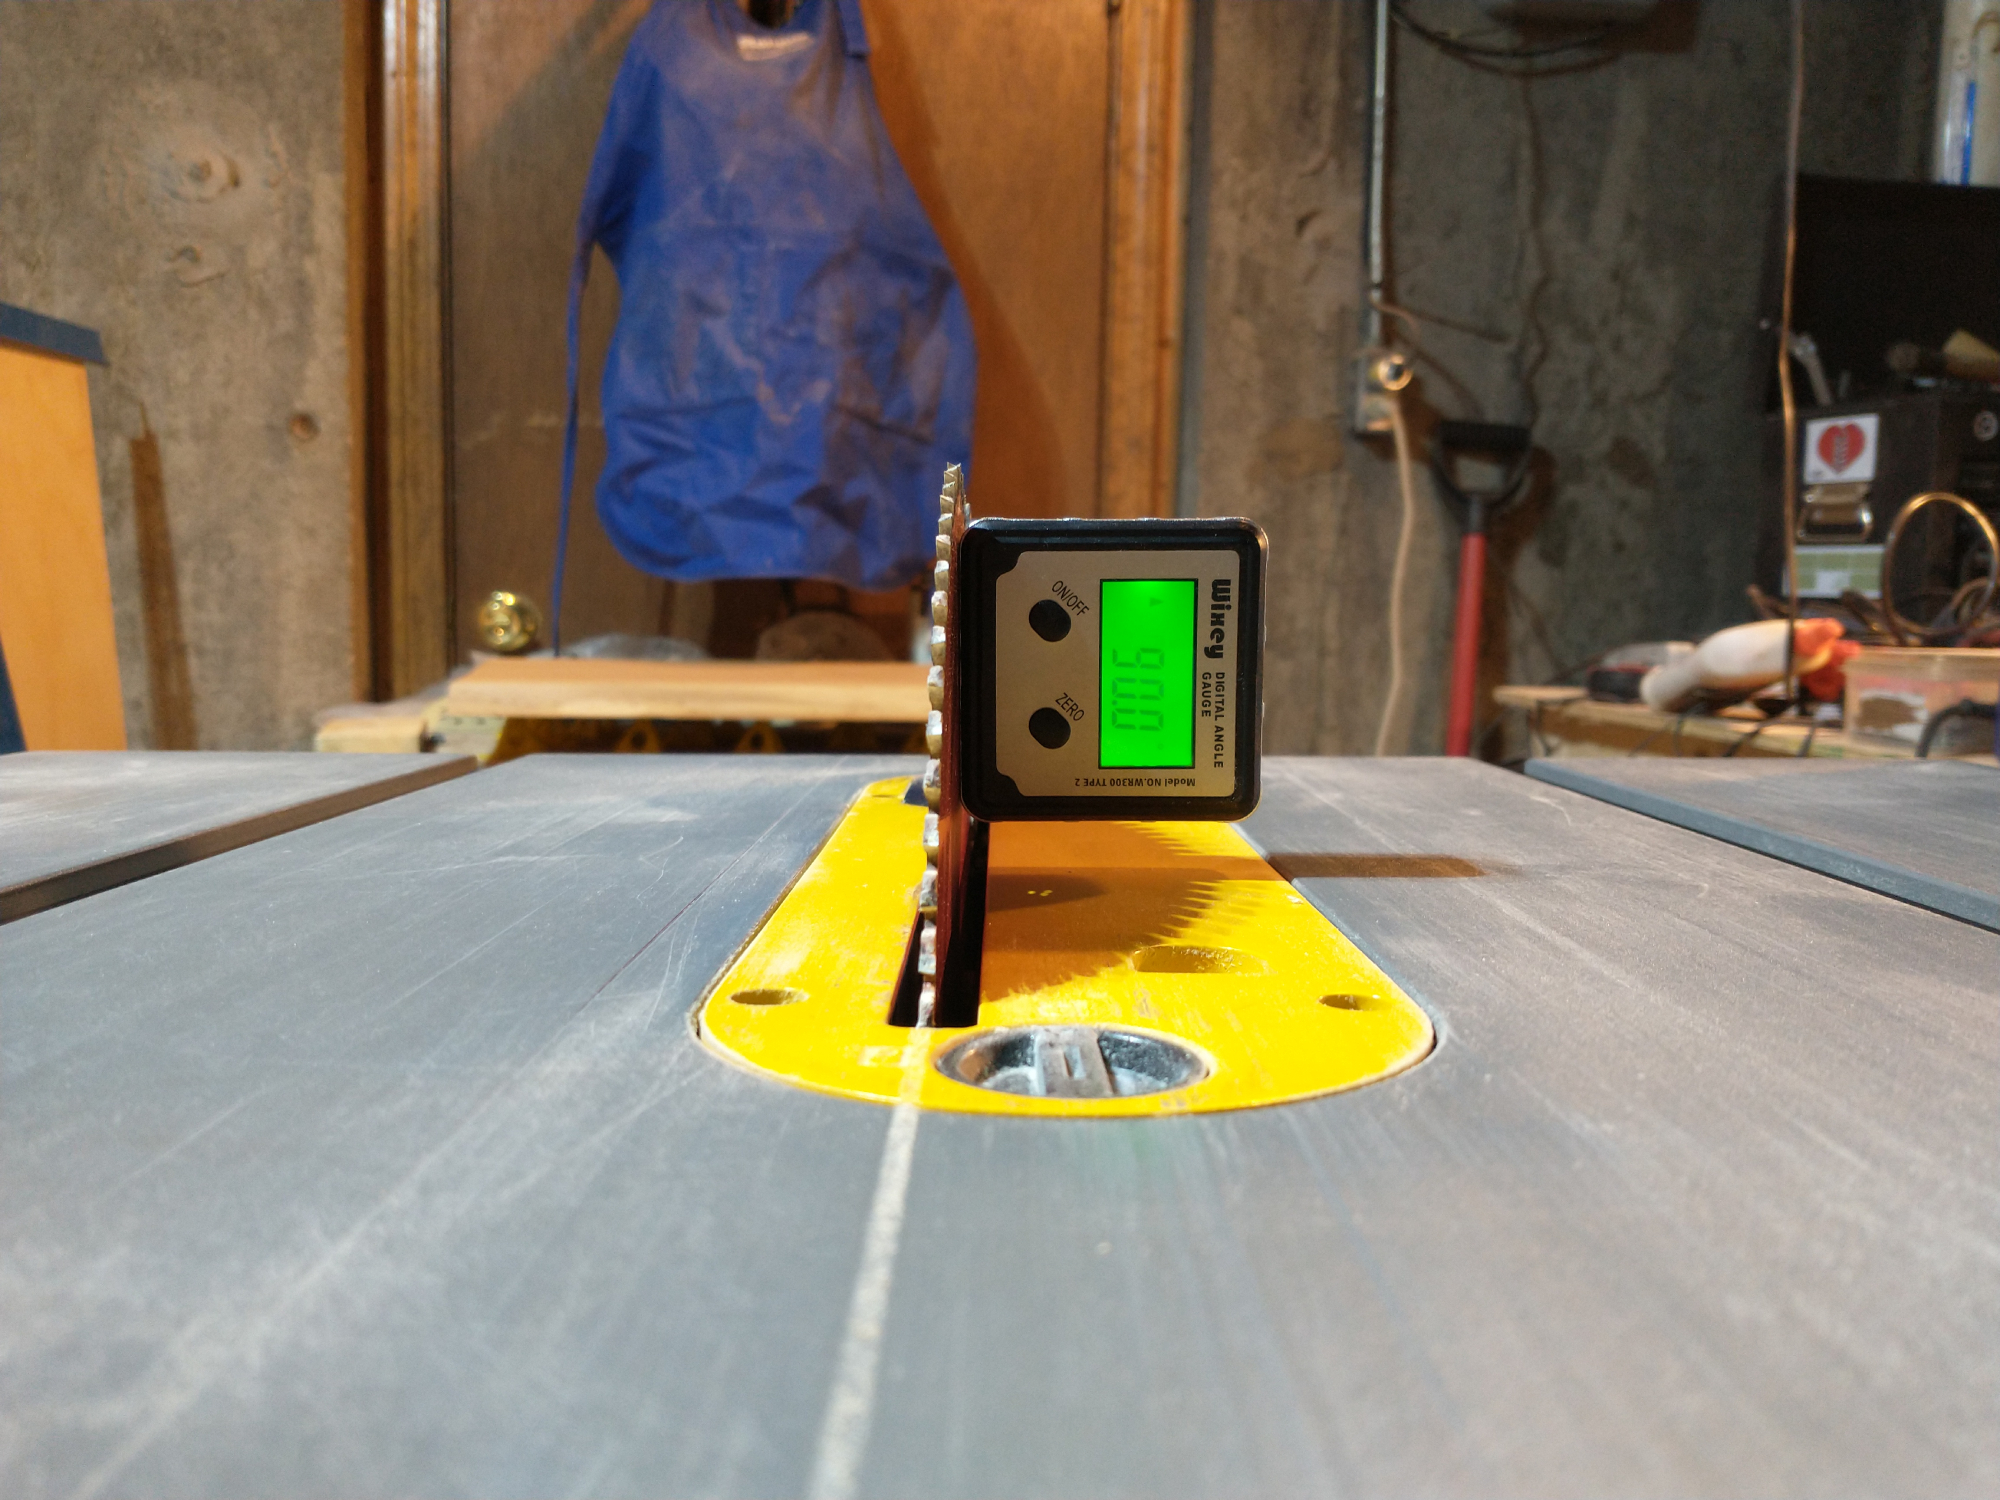
6. Set the blade to 90 degrees. Getting a perfect right angle between your tabletop and saw blade is the most important adjustment you can make. Cuts made at more or less than 90 degrees won’t fit tightly together, and can result in projects that are all but impossible to square up. Fortunately, this is a relatively easy fix.
The best way to check your blade alignment is with a digital angle gauge. Simply place the gauge on your tabletop and zero it. Then hold the gauge against the fully-raised saw blade, avoiding any of the teeth if possible. The gauge will display the angle of your blade in relation to the tabletop.
If you don’t have a digital angle gauge, you can use a speed square. Set the flat of the square against the tabletop and press the other edge against the blade. If you can see daylight between the two at the top or bottom, you don’t have a 90-degree angle.
Actually adjusting the blade is simple: Tilt the blade with the bevel adjustment until the digital gauge reads 90, and lock it in place. This is now the new position of your 90-degree angle. Then use an allen wrench or screwdriver to point the bevel marker at the “0-degree” dash. Now whenever you return the blade to zero, it will form a 90-degree angle to the table top.
7. Adjust the bevel stops, if you have them. Many table saws have bevel stops, which are pieces of metal that allow you to push the bevel adjustment all the way to one side for 90 degrees, and all the way to the other side for 45 degrees. If your saw has these, adjust them now. On mine, this is as simple as using an allen wrench to turn an oval-shaped piece of metal until it touches the bevel arm in the 90-degree position. Then I move the blade to 45 degrees, checking with my angle gauge, and set the 45-degree bevel stop. This allows me to quickly position the blade at 90 and 45 degrees, the two most common angles, without having to look and micro-adjust.
8. Square the blade to the miter slot. The next most important adjustment on your table saw is aligning the blade and fence to the miter slot to ensure that you’re getting square rip cuts as well as bevels. Checking the alignment is straightforward with a combination square. Press the flat of the square to the edge of the miter slot, and then extend the ruler until it touches one of the teeth of the blade on the infeed side. Slowly spin the blade so that the same tooth is on the far outfeed side, and check the distance with the combination square there. The blade is properly aligned when the combination square touches the tooth in both positions. If the ruler touches the tooth in one location, but there is a gap at the other, or it pushes the combination square away from the miter slot, your blade needs adjustment.
On my saw, there are two hex-head screws below the outfeed side of the table. If yours does too, or has something similar, loosen them slightly with an allen wrench or appropriate tool, allowing the blade box to move left and right. Move the edge of the blade box toward the miter slot if there is space between the ruler and blade, or away if the ruler is pressing into the blade. Repeat your alignment check and adjustments numerous times until the end of the ruler touches the tooth on both the infeed and outfeed side. Then lock the screws back into place.
- Note: If you have a saw that doesn’t have miter slots, you can align your blade to your fence using the same technique. Just press the flat of the square against the blade and the end of the ruler against the fence. And you should also probably consider upgrading your saw—miter slots are invaluable.
9. Square the fence to the miter slot. Squaring the fence to the miter slot follows the same basic process as the blade. Press the flat of the combination square into the miter slot on the infeed side of the table, and then extend the ruler until it’s just touching the fence. Then slide the square to the outfeed side of the table. Lower the blade if you need to get it out the way. The ruler should touch the fence the entire length. If it doesn’t, the miter slot and fence are not square.
Adjust the fence by loosening one of its mounting hex screws on the infeed or outfeed side and bumping the fence over by hand as needed. Check and adjust as many times as you need to for a perfect alignment.
10. Recheck everything. Sometimes when you’re adjusting one element, another moves. Before you call it a job well done, recheck all of your alignments, and check that the blade and fence are actually parallel to one another. Readjust your blade and fence as needed.
11. Wax the tabletop. This is the final step and will both protect the table top and allow the wood you cut to slide more smoothly over the surface. Using a clean rag, apply a thin layer of paste wax to the table top and working edge of the fence. Let the wax rest for 10 to 15 minutes, then buff it out until the entire surface is smooth.
When you’re done, plug the saw back in and turn it on. Listen for any strange noises and look for wobbling in the blade. I always let my saw run for a full minute or more after I’ve worked on it before running any wood through to make sure that I put everything back together properly.
When you’re sure it’s all running as it should, get back to cutting! There’s nothing prettier in all of woodworking than a crisp right angle hot off the saw.
Update, January 25, 2022: A previous version of this story suggested squaring the blade to the fence. While this is possible and may be your only option if your saw doesn’t have a miter slot, squaring both the blade and fence to the miter slot is a more accurate and consistent measurement.
