We’re going to come right out and say it: These clamps are just two pieces of wood bolted together. Not every DIY project has to be elaborate and beautiful—sometimes you just need to slap together something that’s purely functional. Need to hold something in place? Quickly? Great, that’s exactly what these do.
If you’re trying to cut a long piece of wood by yourself, these clamps fill the middle ground between screwing one end of the board to your work surface and actually buying clamps. What’s good about these, too, is that if you’ve got enough scrap wood and random hardware, you can build them for free.
Stats
- Time: 5-15 minutes per clamp
- Cost: $10 or less
- Difficulty: easy
Materials
- 2 (at least 16-inch) pieces of 2-by-4
- 2 fully or mostly threaded carriage bolts (minimum size: 8 inches long, 3/8-inch diameter)
- 4 nuts (same diameter as the bolts)
- 4 washers (same diameter as the nuts and bolts)
Tools
- Circular saw (or miter saw)
- Drill
- Wood drill bit (same diameter as the bolts)
- Measuring tape
- Square
- Pencil
- Sandpaper
- Wrench
Instructions
1. Prepare the 2-by-4s. Yes, you could buy a full, eight-foot 2-by-4 for this, but odds are you have some scrap pieces lying around from other projects. I’ve got so many I’m saving “just in case I can use them for something” that it’s almost embarrassing. You could also work with a single piece of wood, but this project is much easier if you start with two separate pieces. If you don’t have two, roughly cut a longer piece in half. Each piece should be a minimum of 16 inches long, just to make them easier to work with—they’ll eventually be cut down to nine inches each.
- Tip: If you’re using scrap wood, it may not be in the greatest shape. Take a minute to pick the best bits to use for the two jaws of your clamp, even if you have to cut both ends. Try to avoid any beat-up sections and look for knots, too. These are hard to drill through, so it’s important to ensure there aren’t any in the spots you’re planning to put the bolts (centered, about 1 1/2 and 5 inches from the back end of each jaw).
2. Cut the front of the clamps’ jaws. Once you’ve selected a nine-inch portion of each piece of 2-by-4, draw some guide lines with your pencil and decide which end of each one will be the front. If that end is already cut, great, you’re done. If it’s not, cut straight across the wood with your saw.
- Tip: The next step involves cutting the front of each jaw at a 45-degree angle, and it’s much safer to do so with a longer piece of wood. Cuting a nine-inch piece of wood can be more unstable and might mean one of your hands is pretty close to the saw blade. That’s why we’re cutting one end at a time.
3. Cut the front of the jaws at a 45-degree angle. This will help you properly put the clamps back together if they come apart. They might ultimately fit together in any configuration, but if they don’t, it’s easier to have a point of reference like this. Set your saw at a 45-degree angle and line it up so it’s not cutting directly to the bottom corner. There should be at least 1/4 inch of vertical wood on the front of the jaw before the angled cut starts. Cut each piece of wood like this.
4. Finish the clamp jaws. Once the front of the jaws are set, return your saw blade to its starting vertical position and cut along the lines you’ve marked as the backs of your clamp jaws. Make the cuts. When you’re done, you’ll have two jaws, each nine inches long, with angled fronts.
5. Prepare to drill. Stack the two wooden jaws together so the angled ends come together in a point. If you want to lash them together somehow, either with string or rubber bands, you may do so, but you should be able to hold them together with your hands. Find the center of the wood (1 3/4 inches on a 2-by-4), and use your square to draw a straight line dividing the top jaw in half, lengthwise. Then, mark the wood 1 1/2 and 5 inches from the back of the jaw.
6. Drill the bolt holes. Holding the wood tightly together (if you haven’t otherwise secured them in place), drill through both pieces of wood at the same time, exactly where you marked at 1 1/2 and 5 inches. Doing both at once will ensure the holes aren’t misaligned in any way.
7. Sand down any rough edges. It’s just much nicer to touch these if they’re not jagged and splintery. You can sand every surface, if you want.
- Tip: Wrap the sandpaper around a small block of wood or use gloves to avoid any sharp pieces of wood from puncturing the sandpaper and your hand.

8. Insert the bolts. We’re using bolts that are a minimum of eight inches long so there will be enough space between the 2-by-4 clamp jaws to hold another 2-by-4. Shorter bolts mean less space. Thread one nut onto each bolt, going as far up as you can. Stop when you can’t thread it any further. Now, put a washer on. Put these through the bolt holes and once they’re through, put washers on the other ends. Then, thread on the other nuts.
- Tip: You can also use wing nuts on the bottoms of the carriage bolts, because they’re easier to tighten by hand.
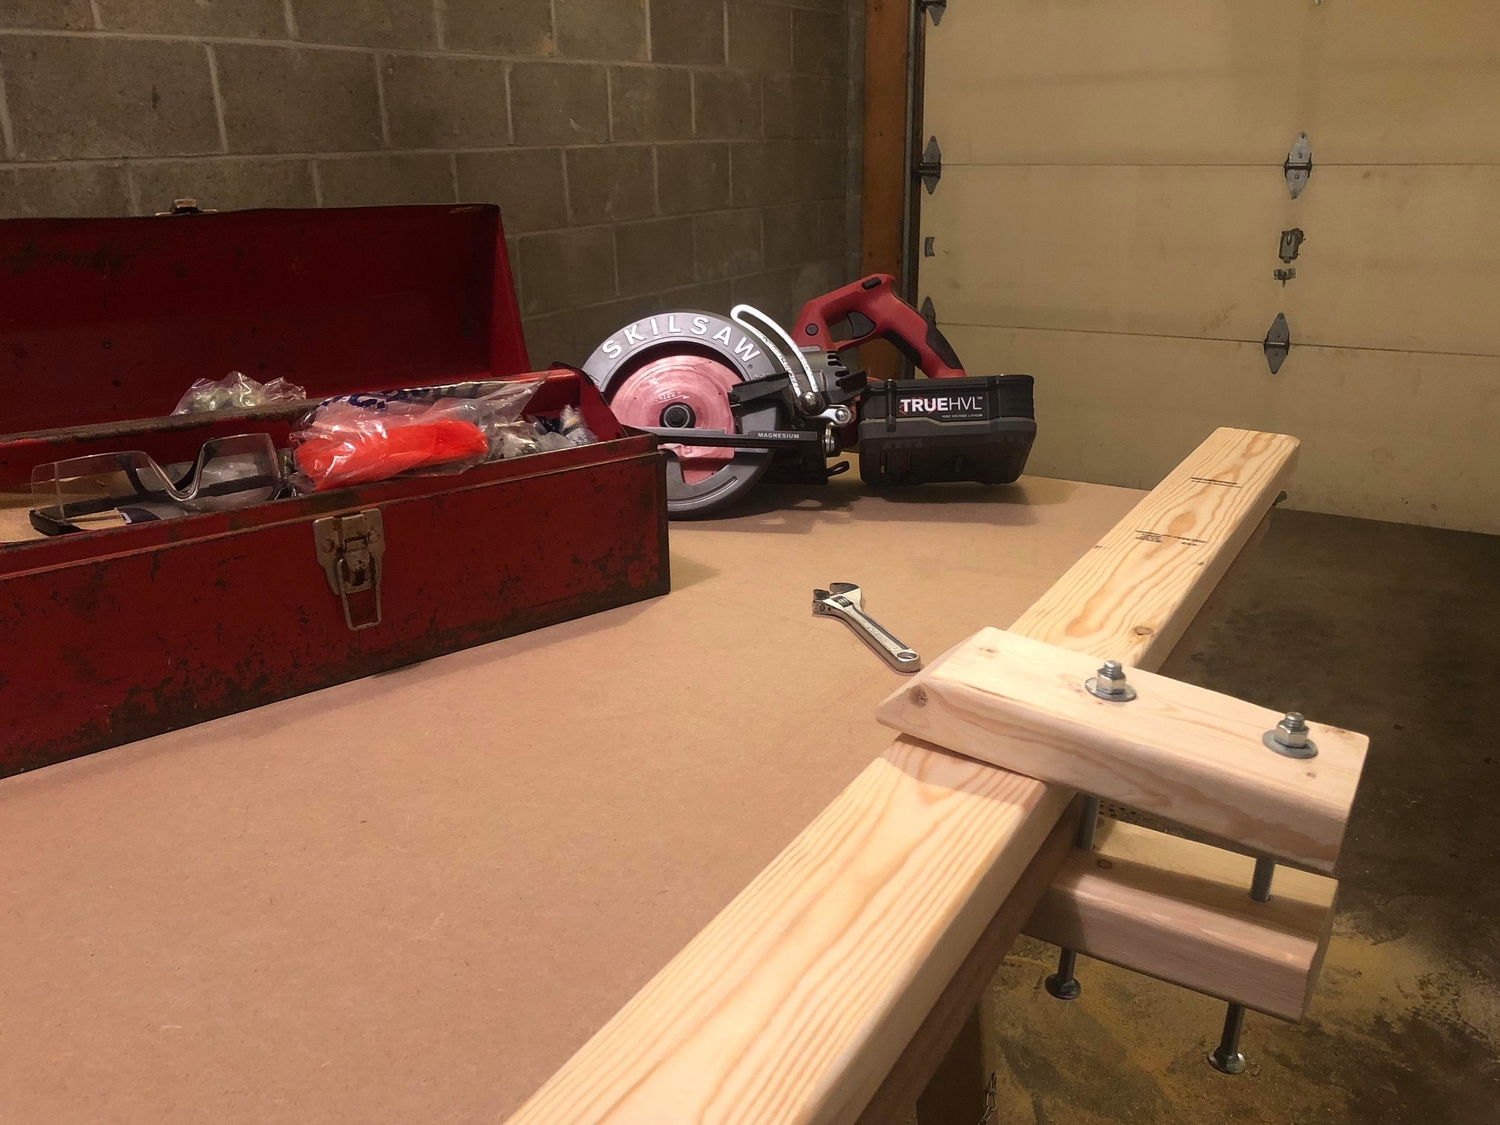
There. You’re done. The best way to use these is with the heads of the bolts facing down. You should be able to hand-tighten the nuts to adjust the clamp’s jaws, but if you need more torque, use a wrench. Quick and (very) dirty is how these guys roll.
