When you unwrap a shiny new gadget, you want to start using it as quickly as possible. But first—in order to keep your data safe, ensure your hardware lives a long life, and reduce the chance of mishaps later on—you’ll want to follow our guide to setting up your device.
These seven steps will back up your vital files, protect your security, and make sure you keep only the apps you really want. Here’s our advice on what to do as soon as you’ve unboxed your new piece of tech.
1. Apply any available updates
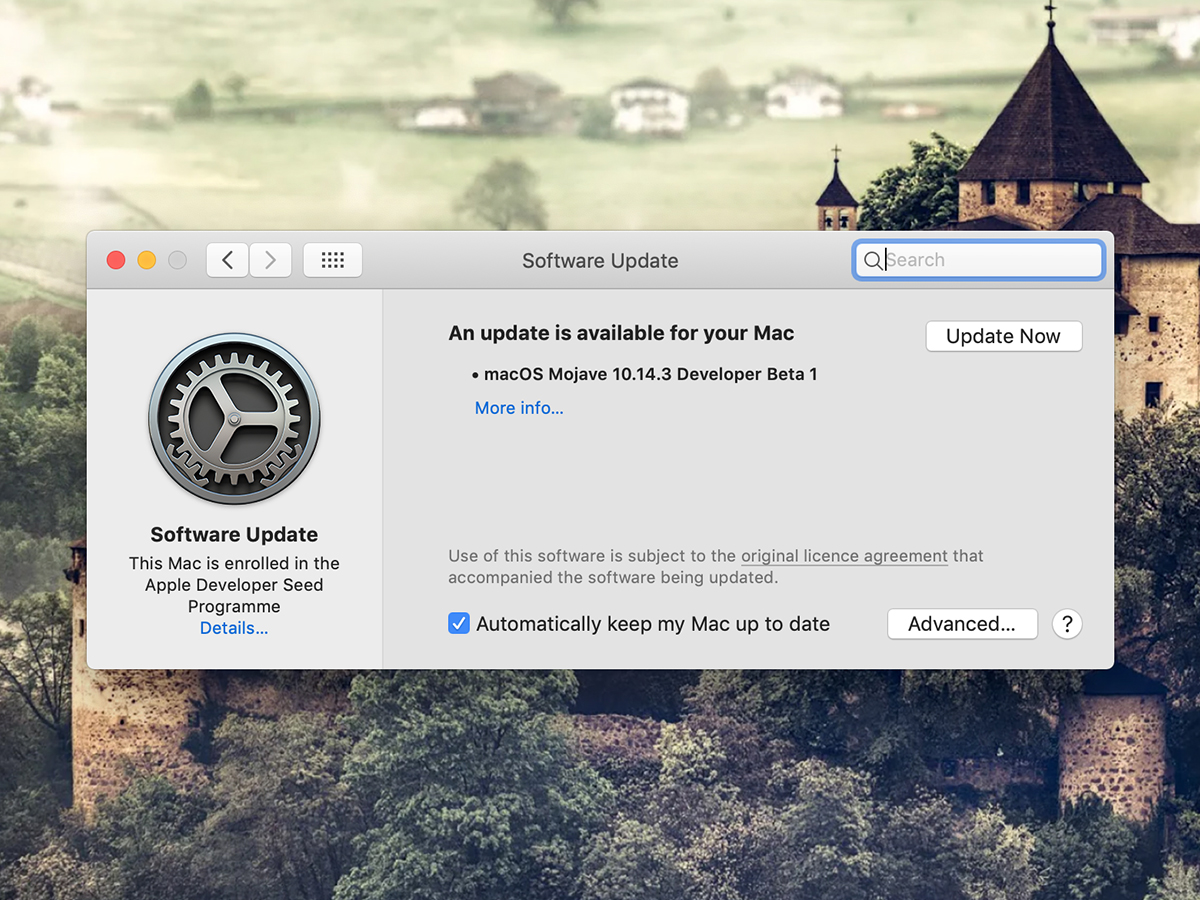
When you unwrap a new toy, you want to start playing with it as soon as possible, not twiddle your thumbs waiting for updates to install. But there are a couple reasons why you should swallow your anticipation and take this vital step.
First of all, the latest updates for your iOS, Android, macOS, or Windows device will include the most up-to-date security patches. Until you’ve worked your way through all the waiting updates, you’ll leave your new hardware vulnerable to outside threats.
Second, the latest updates also improve compatibility with other devices. If your new laptop won’t send files to your old printer, or you just can’t get your new phone to talk to your speaker system, a software update might solve the problem. Even better, you should go ahead and install that update right away, before problems crop up.
On iOS, you’ll find potential updates in Settings > General > Software Update. On Android, look for Settings > System > Advanced > System update. For macOS, open the Apple menu, then hit About This Mac > Software Update. And on Windows, tap the cog icon on the Start menu to open the Settings pane, and then pick Update & Security. For other gadgets, the instructions that came with them should explain where to find updates.
2. Protect against physical access

When anyone other than you gets their hands on your tech, they can expose your data, damage your hardware, or compromise your files. To prevent this, you need to protect your devices against two types of threat: physical access and remote access.
The person physically accessing your stuff could be anyone from a careless niece stumbling across your phone to a determined thief swiping your laptop. In either case, it’s essential that you set your gadget to lock automatically, and protect it with a password, PIN code, fingerprint, face scan, or another proof of identity.
On iOS, you’ll see these options under Settings > Face ID & Passcode (or Touch ID & Passcode on older devices). On Android devices, go to Settings > Security & location > Screen lock to review the available options. With macOS, open the Apple menu and choose System Preferences > Security & Privacy > General. Finally, on Windows, click the cog icon on the Start menu to reach Settings, and then pick Accounts > Sign-in options.
On these same menu screens, once you set a PIN code or trusted fingerprint (or whatever the other options are), you can decide how quickly the gadget should lock itself when it’s not in use. To be on the safe side, set this time period to be as short as possible.
3. Protect against remote access

After protecting your device from anyone who might have it in their physical possession, turn your attention to threats that arrive over the internet. This could be hackers actively trying to force a connection to your device, or dodgy apps that try to install malware, or browser extensions that want to force advertising on you.
Thankfully, iOS and Android are both very secure operating systems. As long as you only install apps through the Apple App Store and the Google Play Store, you shouldn’t need to set up any additional protection. Still, it’s worth double-checking the reviews and descriptions before you install any app.
As for computers, for the most part, macOS and Windows also come with safe-enough protections. For example, macOS places very tight restrictions on the abilities of third-party applications, while Windows comes with its own Windows Defender anti-malware tool, which should be enabled by default. That said, computers tend to face more threats than phones. So carefully choose the email attachments you click and the browser extensions you install.
Despite these built-in protections, extra-cautious consumers might want to install a third-party antivirus program. Examples include products from Norton, which cost $30 to $55 per year; Avira, which has a broader price range of $0 to $100 per year; and Malwarebytes Premium, which costs $40 to $60 per year and boasts a recommendation from product-review site Wirecutter. Those are just a few of the existing options—for a deeper dive, check out the independent tests from AV-Comparatives and AV-Test.
4. Back up your data
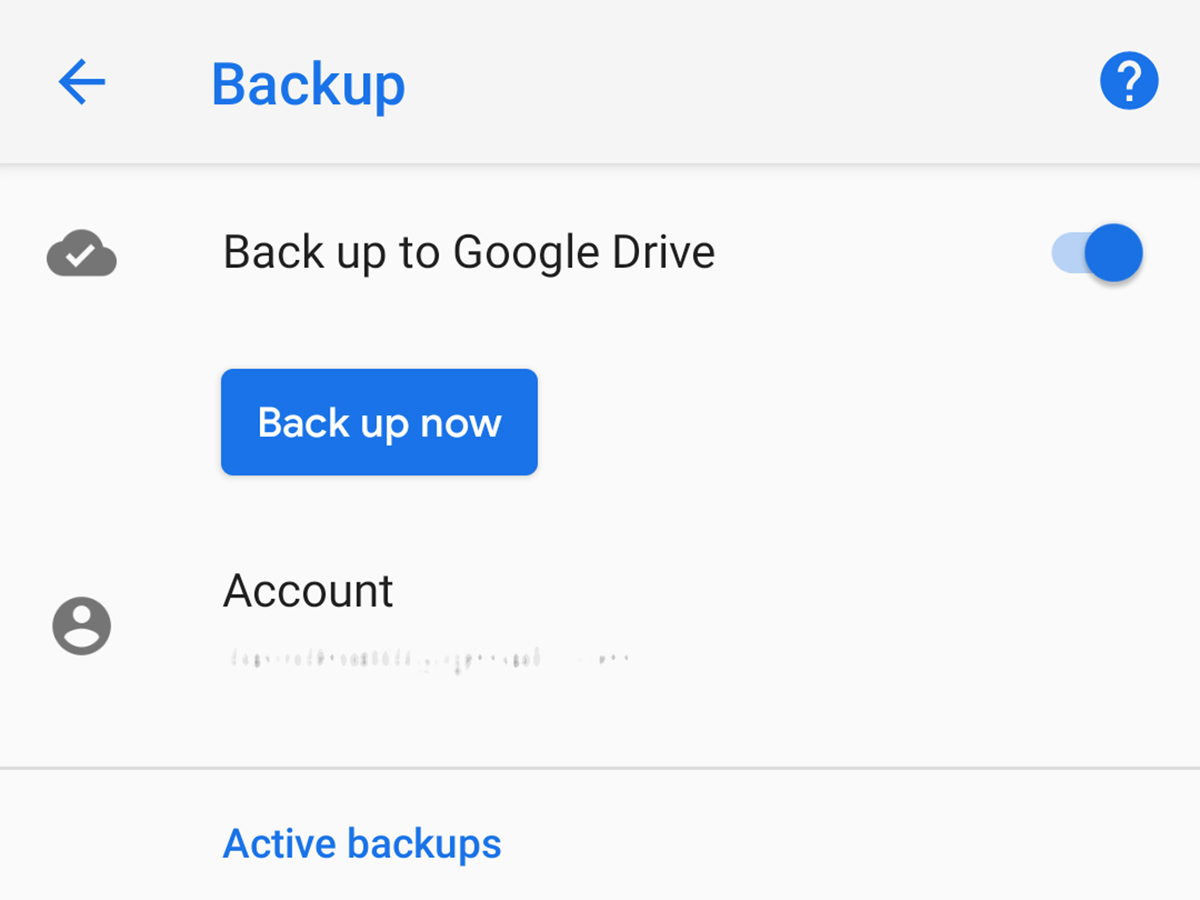
You’ll have a far easier time establishing good backup habits with a new phone or laptop than you would attempting to save everything once you’ve already created in a couple years of data. With that in mind, now is the perfect time to start saving your information so it will remain available even if your new hardware bites the dust.
Thankfully, today’s operating systems come with excellent backup options to protect all your key data, from texts to photos. On iOS, open Settings, tap your Apple ID name, and choose your iPhone or iPad to review the backup options: You can save your data to iCloud or to any computer that has iTunes. On Android, open Settings > System > Advanced > Backup to send copies of your information to your Google Drive account.
On Windows, you can use OneDrive to save files to cloud storage or File History to preserve them on an external device. Either way, you can find both these options in Settings > Update & Security > Backup. Similarly, macOS offers both cloud and local storage, through iCloud and Time Machine respectively. Look for these options in System Preferences, under either the iCloud or Time Machine pane.
When you’re choosing between cloud and physical storage, think about how much data you want to save. The former might make you pay to get enough room: Prices start at $1 a month for 50GB with iCloud, $2 a month for 100GB with Google Drive, and $2 a month for 50GB with OneDrive. With local storage, on the other hand, you can buy an external hard drive and copy your files manually.
5. Set up separate user accounts
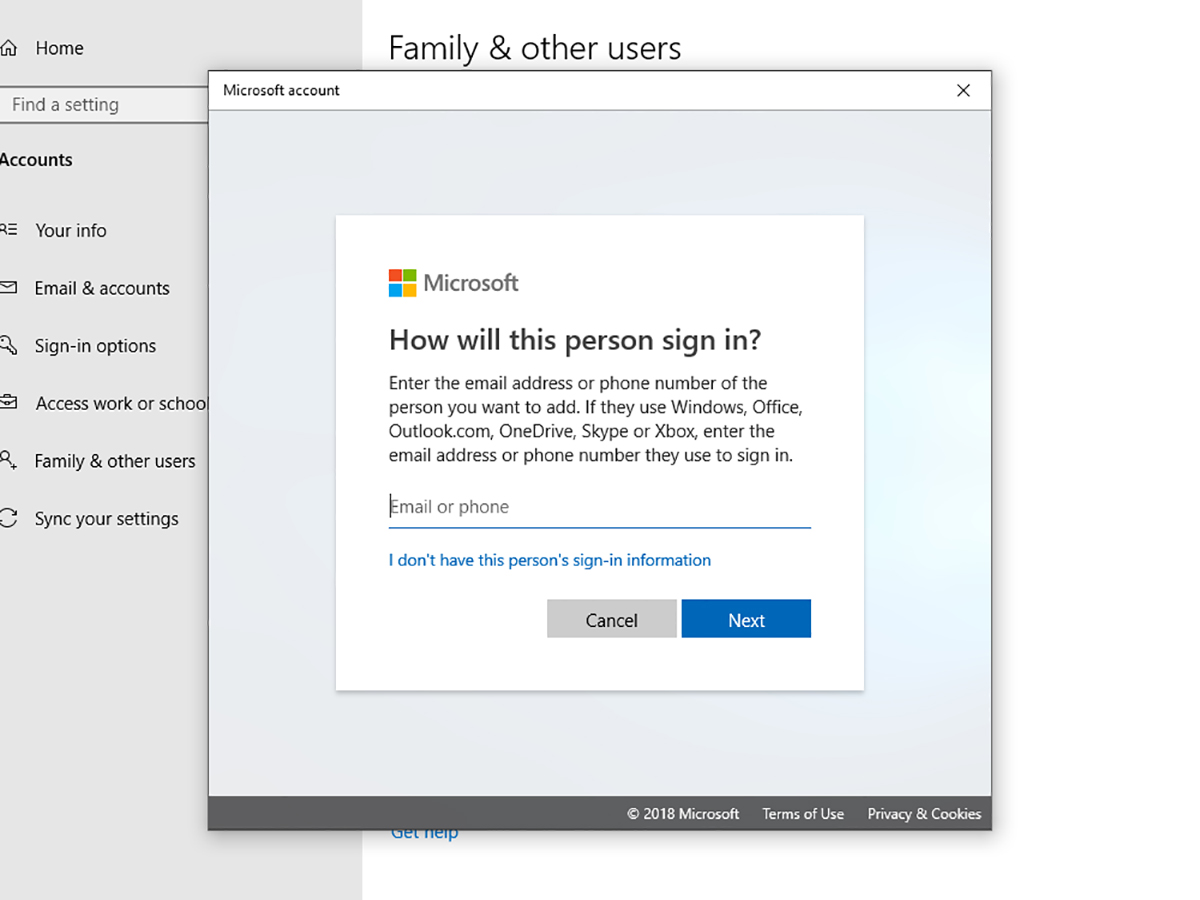
This step applies primarily to computers: If you’ll be sharing a machine with multiple people—family members, housemates, and so on—create a user account for each of them right at the start. Once you do, each person can customize the machine just the way he or she likes, while keeping all documents and photos separate from others’ data.
When you set up a computer for the first time, both Windows and macOS will ask you to identify the first user. Assuming that’s you, the next step is to provide your Microsoft or Apple ID details, or establish an account if you don’t already have one. This will help sync data from your other devices, such as an iPhone or iPad (for Macs). After you’ve signed in with the first account, add others for the rest of your team.
On Windows, you can create a new account by heading to Settings > Accounts > Family & other users. If you want the option to set limits or parental controls on this new account, then select Add a family member. If you’re not related to the user, just hit Add someone else to this PC.
Over on macOS, open the Apple menu and select System Preferences > Users & Groups. To add a new user—which you can restrict with parental controls or not—click the plus icon in the lower left hand corner. Just be aware that you might have to re-enter your Apple ID password again before you can make these changes.
6. Find your way around
Now that you’ve gotten all of your digital chores out of the way, you’re ready for the fun stuff. Make sure you know about all of the capabilities of your new gadget—even if you think you know your way around. For example, say you’ve upgraded to a new iPhone from a pre-2017 handset: You’ve suddenly gained the ability to play with Memojis and Animojis (and can exploit your new ability by launching Messages, looking at the keyboard toolbar, and tapping the monkey icon).
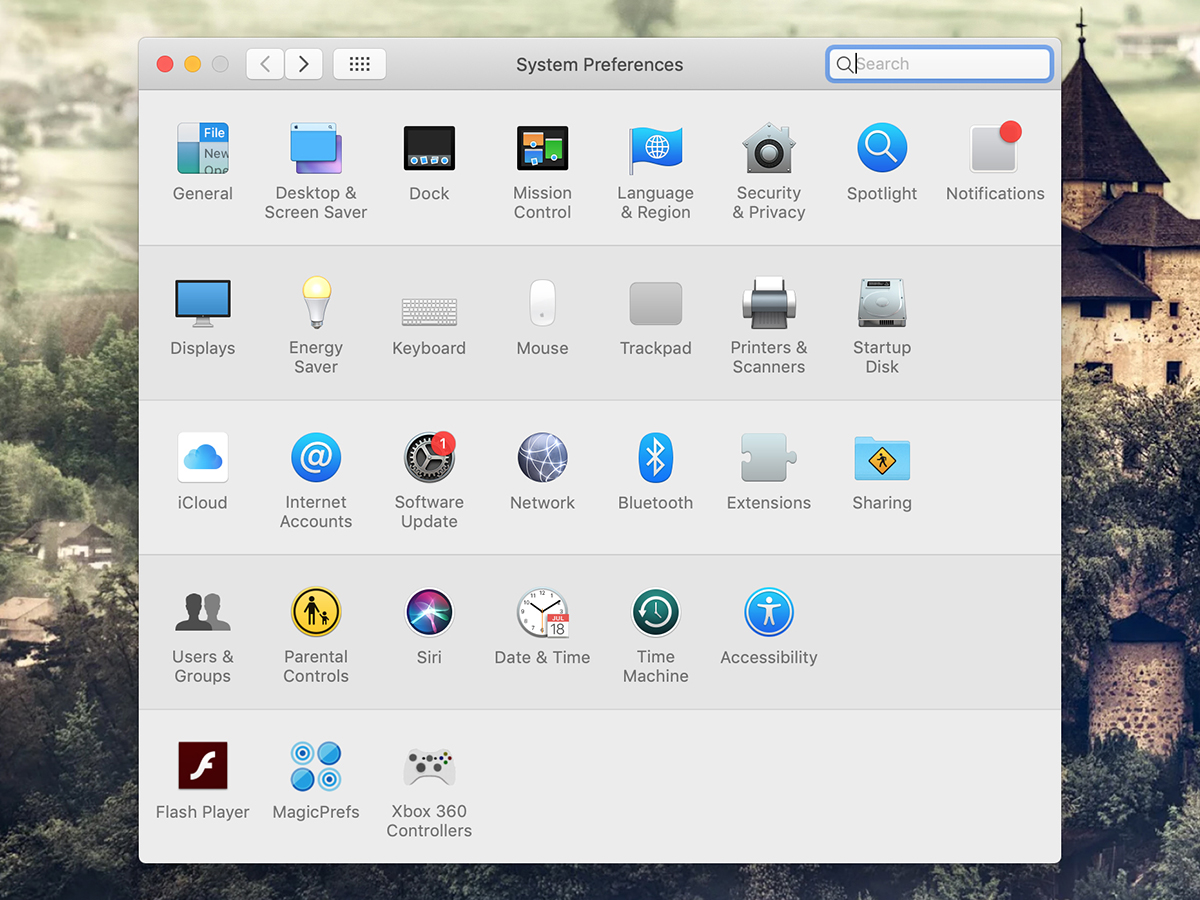
While you’re exploring, check out the settings screens to make sure your new gadget has the configuration you want. These panes let you change everything from the wallpaper to the notification sounds. On both iOS and Android devices, Settings appears as a separate app. On Windows, click the little cog icon on the left of the Start menu; on macOS, open the Apple menu and click System Preferences.
Also check out the apps that come with your new gadget, before rushing to download new ones (more on that in the next section). Both Windows and macOS come with their own email clients, web browsers, and photo managers, while Macs also offer a complete office suite of Pages, Keynote, and Numbers.
Don’t be afraid to experiment, whether that’s with customization options or native apps. It’s worth spending some time setting up your device the way you want it—after all, you plan to enjoy using it for a long time to come.
7. Find the best apps and remove the worst
Once you’re comfortable with the software that comes with your gadget, you can start adding new apps to the mix. Remember to show some restraint though—otherwise you’ll quickly weigh down your new gadget with dozens of programs you don’t really open that often.
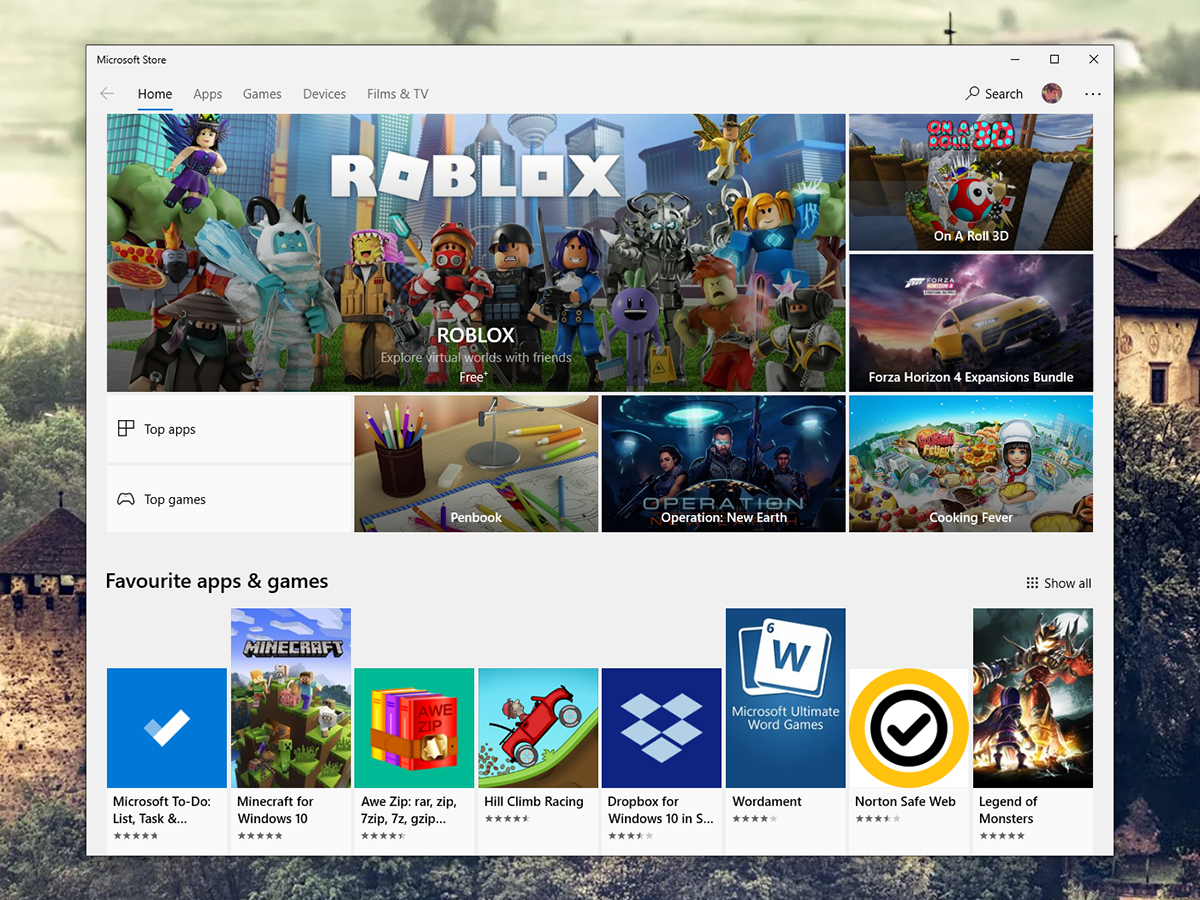
To see what takes your fancy, fire up the Play Store on Android, the App Store on iOS or macOS, or the Microsoft Store on Windows. In each case, you can browse through apps by category, or review the most popular options. For more information, check out this guide to picking good apps and avoiding bad ones.
While you’re playing with apps, take the time to remove any unnecessary ones that came with your device. These usually promote the manufacturer’s own services, but if you don’t use them, they’ll just take up space.
To uninstall an app on iOS, tap and hold on the icon until it begins to shake, and then tap the small cross. On Android, tap and hold an app’s icon and drag it up to the Uninstall banner at the top. If you’re on Windows, head to Settings > Apps. With macOS, you can drag the relevant icon from the Applications folder in Finder to the trash. If you see that app in the Launcher interface, you can also rely on an alternative method: Click and hold the app’s icon in Launcher until it shakes, and then click the small cross that appears in the corner.
