In the first part of this series, we covered the “nuts and bolts” for assembling a workable iPhone app development platform. Now that our desktop is cluttered with a mess of cables, it’s time to roll up our sleeves and start cobbling some code together.
First things first, however. There are two things you must accomplish before you can start developing that next great American App. One is free, but for the other one you’re going to have to pony up some cash.
- Become a Registered iPhone Developer. This one’s free. Yup, go do it now; then you’ll be able to download the free iPhone SDK (software development kit; at this time the latest version is 2.2.1). Please note, as mentioned in the first part of this series, you must also have an Intel-based Mac and Mac OS X 10.5.5 for using this iPhone SDK. Furthermore, you will have to make a choice between being either a single-entity developer (e.g., Dave Prochnow) or a corporate developer (e.g., Microsoft Corporation). If you elect to pursue the corporate route, you will be asked to furnish documentation of incorporation (e.g., a Federal TIN, partnership, LLC, or S corporation documentation).
- Subscribe to the iPhone Developer Program. This subscription will cost you either $99 (plus sales tax) for the Standard Program, or $299 for the Enterprise Program. Most folks will easily fit into the Standard Program $99 subscription. After you’ve made your choice, you’ll be whisked to the Apple Store, where a credit card transaction will have you quickly subscribed to the iPhone Developer Program for one year.
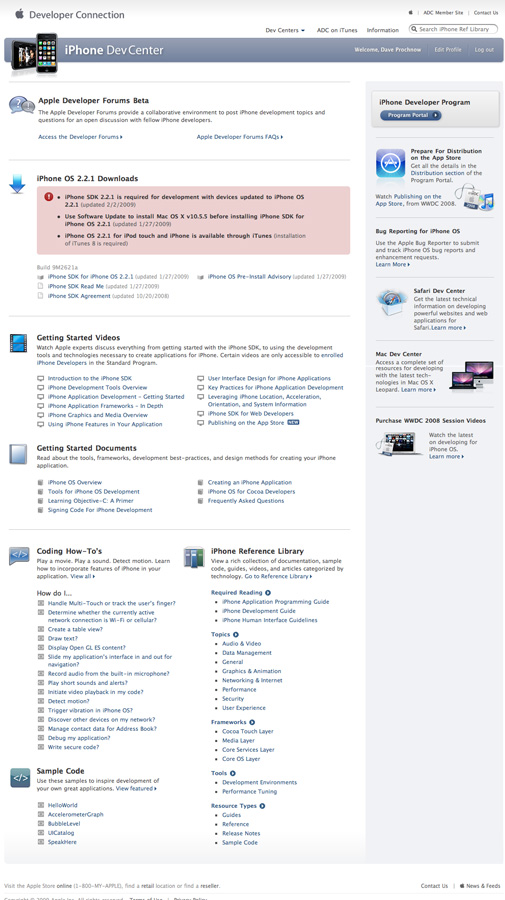
Once you have your registration and your subscription, log into the iPhone Dev Center and begin downloading everything in sight: SDK, videos, sample apps, and documentation. Sure, you might already know some of this stuff, but the more knowledgeable you are about the iPhone, the easier it should be to develop your app.
Notice that I said it “should be” easier. That’s because, if you lack a solid footing in the Objective-C programming language and Apple’s Cocoa development environment, you could experience a very painful learning curve.
Luckily, there are a couple of tricks and tips that can help minimize this learning curve:
1. Don’t reinvent the wheel. Find an Apple sample app that closely mimics your app—either in appearance or function. Then strip out the Apple stuff and integrate your own code into this working sample shell.
2. Learn from others’ mistakes. Go grab a couple of apps from the iTunes App Store that are representative of your competition. Use what they did right, and seriously avoid what they did wrong.
3. Mine the superhighway for clever programming tricks. When you’re stumped (and you will be… several times or more!), search the web for a code snippet or fragment that deftly handles a problem similar to yours.
4. Innovation is the mother of all apps. Don’t follow the masses (how many crude bodily-function-oriented apps does the market need?)—rather, start a new trend.
Instructions
Learning a whole new programming system can be a lot like getting a sip of water from a fire hose. So take your time and, once you have a solid footing in Objective-C and Cocoa touch programming, it’s time to venture out on your own.
In very general terms, your app development cycle should look something like this:
1. Spitball your app concept. Use big, broad brushstrokes and create a beginning app design document. Slowly flesh in all of the details of your app. Consider graphics, multimedia, fonts, colors, layout, organization, program flow, and app goals. The more detailed this document becomes, the better your app will work.
2. Install the SDK. Inside this massive 1.5GB-plus download is the complete Apple Xcode Cocoa development environment. Supporting Xcode is a fistful of utilities, documentation, and Mac OS sample code. If you wish to experience the full flavor of iPhone development, you will need an active net connection for downloading sample code and additional reference library materials. This web connection is not mandatory for Xcode operation, however.
3. Open Xcode and create your project. There are several project templates in Xcode that will ensure that you don’t botch this step.

4. Build your interface. What could be easier than drag-and-drop interface design? Integrated into Xcode is a visual development utility called Interface Builder. Inside Interface Builder you can develop the complete look and feel for your app without writing a single line of code.

5. Code it. If Interface Builder is the skeleton and flesh of your app, code is the blood and nervous system. Without code, your app is just a pretty lifeless blob. Write it tight and write it clean.
6. Build it and it will run. Your first level of app testing should be performed with the Xcode-friendly iPhone Simulator. When you select Build and Go in your project, Xcode will compile your code and automatically launch iPhone Simulator. This Xcode utility is ideal for quickly evaluating the basic flow of your app, but it is not a substitute for actual testing on both an iPhone and an iPod touch. In fact, this would be a good time in the development of your app to create a “test team” for your project. In order to add testers to your project, you must obtain a Provisioning Profile from the iPhone Program Portal. Access to this portal is granted with your iPhone Developer Program subscription. Use this capability wisely. Have your project testers write and orchestrate testing scenarios for your app. This process will be simplified with the creation of a full-bodied app design document from Step 1.
7. Get testy. In order to test your app on a real iPhone and iPod touch, you must code-sign your app. These certificates are obtained from the same iPhone Program Portal that you used in Step 6. Getting your app to successfully code-sign and load on a real device can be difficult. Here are four tips to guarantee your app will run on a test device:
- While Apple assures us that this type of “direct” coding is unnecessary, I found that it is almost always necessary: rather than rely on your bundle ID from the info.plist, insert your actual app ID from the iPhone Program Portal into the bundle ID field of the info.plist.
- Code-sign your app under the Any iPhone OS Device key of the Build list from your Target’s Get Info button.
- Code-sign your app in the same Target info location with the Code Signing Identity key (located right above the Any iPhone OS Device key).
- Select Build—not “Build and Go”—from the Build menu.
Once you have a successfully compiled app bundle (the icon for this bundle might have a white international “no” symbol—the circle with a slash through it), send it and the appropriate Provisioning Profile to your tester(s).
8. Fine-tune. After all of your testing has been successfully completed, use special Xcode utilities for measuring and tuning your final app. This final step will ensure that your app will be a good citizen of any iPhone and iPod touch.
Coming up, our third and final episode will take this little piggy to market! Watch the Apple iTunes App Store and monitor our progress.