Your smartphone isn’t the only device you can unlock with your fingerprint or face. These biometric markers also provide access to your computer—as long as you own, or are willing to invest in, the right hardware.
This unlocking method is faster and more convenient than typing a mix of letters and numbers: When you reach the login screen, simply look at your webcam or put your finger on a sensor to open your account. However, even with these methods at your disposal, you should still protect your computer with a strong password. If the biometric method ever fails, this code will serve as a reliable backup.
Here’s how to activate biometric security on Windows and macOS computers.
On Windows
At the moment, Windows machines give you more sign-in options than macOS ones do, under an initiative Microsoft calls Windows Hello. However, thanks to the hardware that these methods require, not all computers can handle them. To log into your account via fingerprint, you need a machine with an integrated fingerprint scanner, and to take advantage of Windows Hello face recognition, you need a specific type of webcam.
Required hardware
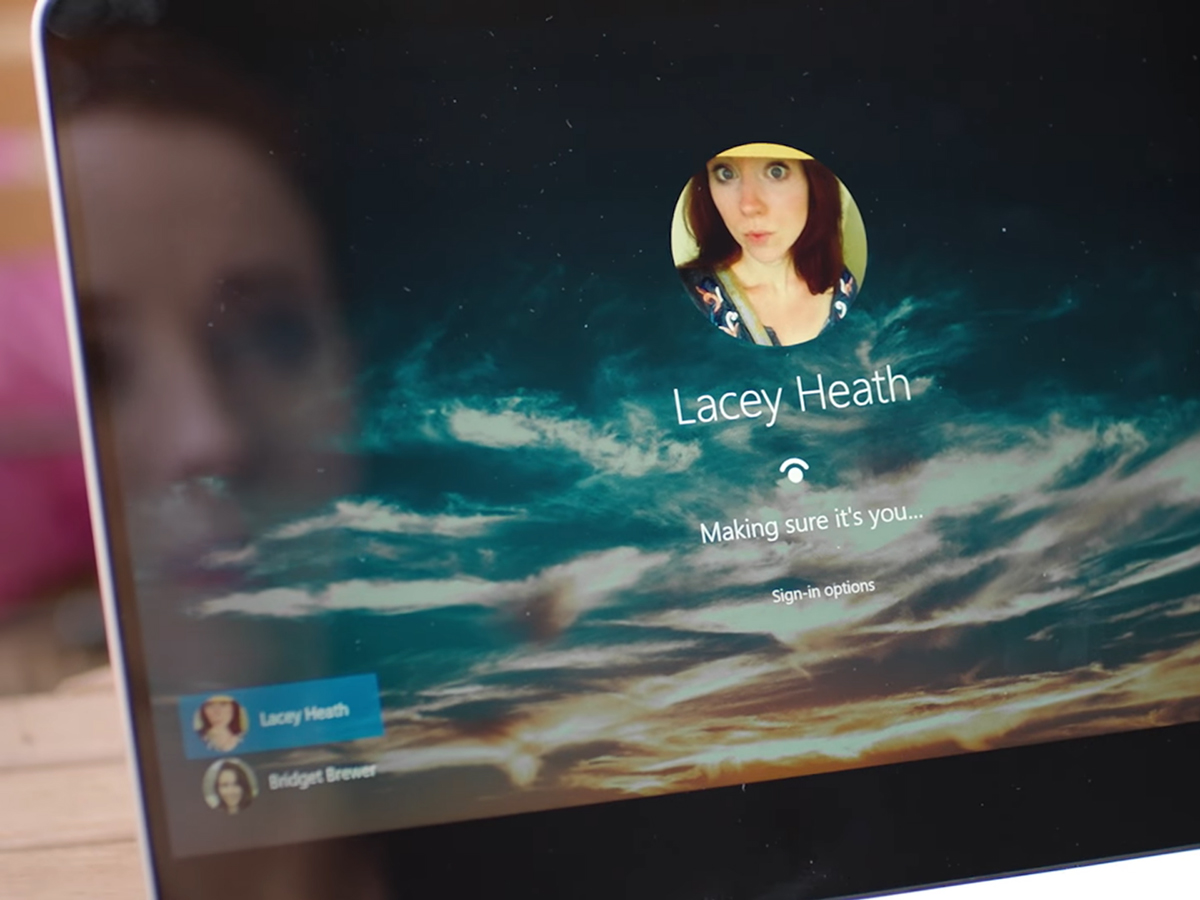
This means your first step should be to check whether your existing hardware works with Windows Hello. Open Settings by clicking the cog icon on the Start menu. Then chooe Accounts > Sign-in options. If you see Face or Fingerprint options on this page, then you’re in good shape. Otherwise, you’ll see a message along the lines of “Windows Hello isn’t available on this device.”
If fingerprint sign-in is really important to you—or you’re already shopping for a computer replacement—then look for a new machine with Windows Hello support, such as Microsoft’s own Surface Book 2. Non-Microsoft computers can also support this technology, and if they do, their descriptions and specs should prominently mention this ability.
Alternatively, keep your existing computer and upgrade it with a Windows Hello-enabled fingerprint canner or webcam. For example, the Microsoft Modern Keyboard ($91 on Amazon) has a fingerprint sensor built into one of the keys, and the Logitech Brio webcam ($174 on Amazon) supports facial-recognition unlocking.
Setup
Once you’ve assembled the hardware you need, go back to Settings > Accounts > Sign-in options. You can enable Windows Hello access from here—as long as you have a system password protecting your user account. If you haven’t set one up yet, then look under Password and hit the Add button.
Next, you can start setting up face or fingerprint recognition. For the former, look under the Face heading and select the Set up option. Hit Get started and look directly at your webcam. When a preview appears on screen, use it to move your head to the correct area. The blue status bar will indicate when the computer is done memorizing your mug.
The process is similar for fingerprint recognition. This time, head to the Fingerprint heading and click Add, then follow the instructions on screen. These will prompt you to swipe your finger across the sensor several times, until Windows gathers enough information to ensure an accurate match.
For both these log-in methods, Windows Hello will prompt you to set up a PIN code you can type in if the biometric authentication fails. If that happens, you’ll be able to log in with either your password or your PIN, but the PIN code is a little easier to remember. However, it can only unlock the computer you’re using, so it won’t provide access to any other part of your Windows account (such as OneDrive online storage).
To change anything about the way that Windows Hello works, go back to Settings > Accounts > Sign-in options. For example, you can determine whether the computer should automatically unlock when it sees your face, or require you to click a user account first. You can also avoid accidental unlocks by enabling the option labeled Require turning your head left and right to unlock the screen. This also makes it harder for snoops to fool your computer’s face-recognition technology with a photograph of you.
On macOS
At the moment, macOS doesn’t let you unlock your computer with your face (even though Apple’s iPhone X offers Face ID as a key feature). However, you can log in to an Apple computer with Touch ID technology—as long as that computer is a newer model of MacBook Pro equipped with an integrated Touch Bar, a thin touch-sensitive panel located above the keyboard.
On top of unlocking your Mac, Touch ID can also open password-protected Notes, the Passwords section of Safari, and several security sections of the System Preferences panel. It also has its limitations: It only works when you’re logging in after your Mac has been sleeping. If you’ve restarted the computer or logged out, you’ll need to enter your account password to access the machine.
Required hardware
In addition to enabling Touch ID, the Touch Bar also displays a selection of shortcut keys that changes based on the program you’re using. For example, when you’re working with an image editor, you might see color-selection tools appear. However, this feature only comes on certain versions of new MacBook Pros. The 15-inch version of the laptop ($2,400 and up) automatically includes that feature, while it’s an optional part of the 13-inch version ($1,800 for the Touch Bar-equipped model).
Setup
To set up Touch ID on your MacBook Pro, start by opening System Preferences. Select Touch ID followed by the large Plus icon, and then enter your account password to prove that you have authorization.
Now you’re ready to add your first fingerprint. Place your finger on the Touch ID button on the far right of the Touch Bar, but don’t press down. Each time you lift and lower your finger (the computer will provide prompts to guide you through this process), remember to make small adjustments to the position of your digit. This will help the machine better recognize you later.
If you’d like to use more than one finger to log into your computer, then add more fingerprints through the same panel. Your registered fingerprints will appear on screen, with tick boxes below each one. You can use these boxes to enable Touch ID as an unlocking mechanism, as well as a payment-authorization method for Apple Pay and any purchases you make on iTunes or the App Store.
