First announced in June, iOS 17 has now reached the public beta stage. That means anyone with a compatible iPhone can install an early version of the operating system ahead of its official launch later this year.
In general, beta software isn’t fully finished and optimized, so you should expect some bugs along the way. Apple recommends only using betas on “non-production devices that are not business critical”, and you should absolutely make sure you’ve backed up all of your data before installing it.
This might sound a bit scary, but the benefits of putting up with a few bugs are that you get access to iOS 17’s cool new features ahead of time.
How to sign up for the iOS 17 public beta
The iOS 17 public beta will run on the iPhone XS (2018) and later models. On your mobile device, use Safari to head to the Apple Beta portal, and tap Sign up. You’ll be registering for early access to the operating system using your Apple ID. If you’ve previously tested beta software on an Apple device, choose Sign in instead.
Before you can enroll your device, you’ll need to agree to a lengthy list of terms and conditions explaining the risks of installing beta software—this is standard practice. When you reach the enrollment page, tap Open Beta Updates. This will take you to your phone’s Settings app, where you’ll be able to select iOS 17 Public Beta. Your iPhone will start downloading the software and you’ll get a notification when it’s ready to install.
[Related: Duck yeah, Apple’s next autocorrect update makes it easier to swear]
To get back to this screen, go to Settings > General > Software Update > Beta Updates. From that last menu, you can leave the beta at any point by choosing Off.
To leave the Apple Beta program completely, so you no longer have the option of switching to beta software, head to the unenrollment page in Safari on your iPhone, and tap Leave Apple Beta Software Program.
But before you decide to drop Apple’s public beta program, make sure you try out some of the most fun and useful features iOS 17 has to offer.
1. StandBy mode
StandBy mode turns your iPhone into a smart display of sorts, showing glanceable information such as the time, weather forecast, and your photos whenever you’re not using the device. If you’ve got an iPhone 14 Pro or Pro Max, the information will always be visible, but if you have an older model, you’ll need to tap on the screen to see it.
This feature is enabled by default, but you can head to StandBy in Settings to turn it off if you don’t like it. There you can also customize notifications, and turn night mode on or off, which applies a red tint in low light.
StandBy kicks in automatically every time you lock your iPhone, charge it, or put it at an angle (so not flat on a surface) or in landscape orientation. Swipe from left to the sides to move between your other screens, and long press on a widget to customize it.
2. Offline Maps

It’s taken a while, but Apple Maps has finally caught up to Google Maps in letting you save particular map areas so you can use them offline. This feature comes in handy if you’re abroad, want to save your data, or are heading to a place where you know the phone signal will be patchy. The maps you save locally to your phone will include all the data you can find on an online map, except live traffic information. This means you’ll still be able to look up opening times for stores, for example.
In Apple Maps, press and hold on your profile picture, then tap Offline Maps: You can then see maps you’ve downloaded or choose Download New Map to save a new area. The platform will automatically update your saved maps in the background whenever there’s a new version of Apple Maps.
The Offline Maps menu will also allow you to opt to download maps over cell networks and WiFi, or WiFi only, and force Apple Maps into offline mode whenever there’s no phone signal.
3. Live Voicemail
Live Voicemail shows a real-time transcription as someone is leaving you a voicemail, which lets you decide whether you want to pick up the call or deal with it later. If you think it’s important, tap Pick up to stop the voicemail and take the call. But if you decide it can wait, you can tap the voicemail icon (two underlined circles) to see the transcription and find out what the call is about before you dial.
This feature is on by default when you install iOS 17, but you can turn it off via Phone and Live Voicemail in Settings.
4. Camera Level
There’s a new Level feature for the default Camera app in iOS 17 that will help you frame and line up your shots. To enable it, tap Camera in Settings, then turn on the Level toggle switch. If you previously used the Grid feature in iOS 16, Level will be on, but you’ll now be able to toggle both features separately.
To use the Level feature, head to the Camera app. Whenever you’re trying to take a photo, three gray lines will show up next to each other in the center of the frame, and the one in the middle will tilt as you angle your phone. You’ll know the shot is leveled when the middle line aligns with the ones on either side—they’ll turn yellow and disappear so you can take the photo.
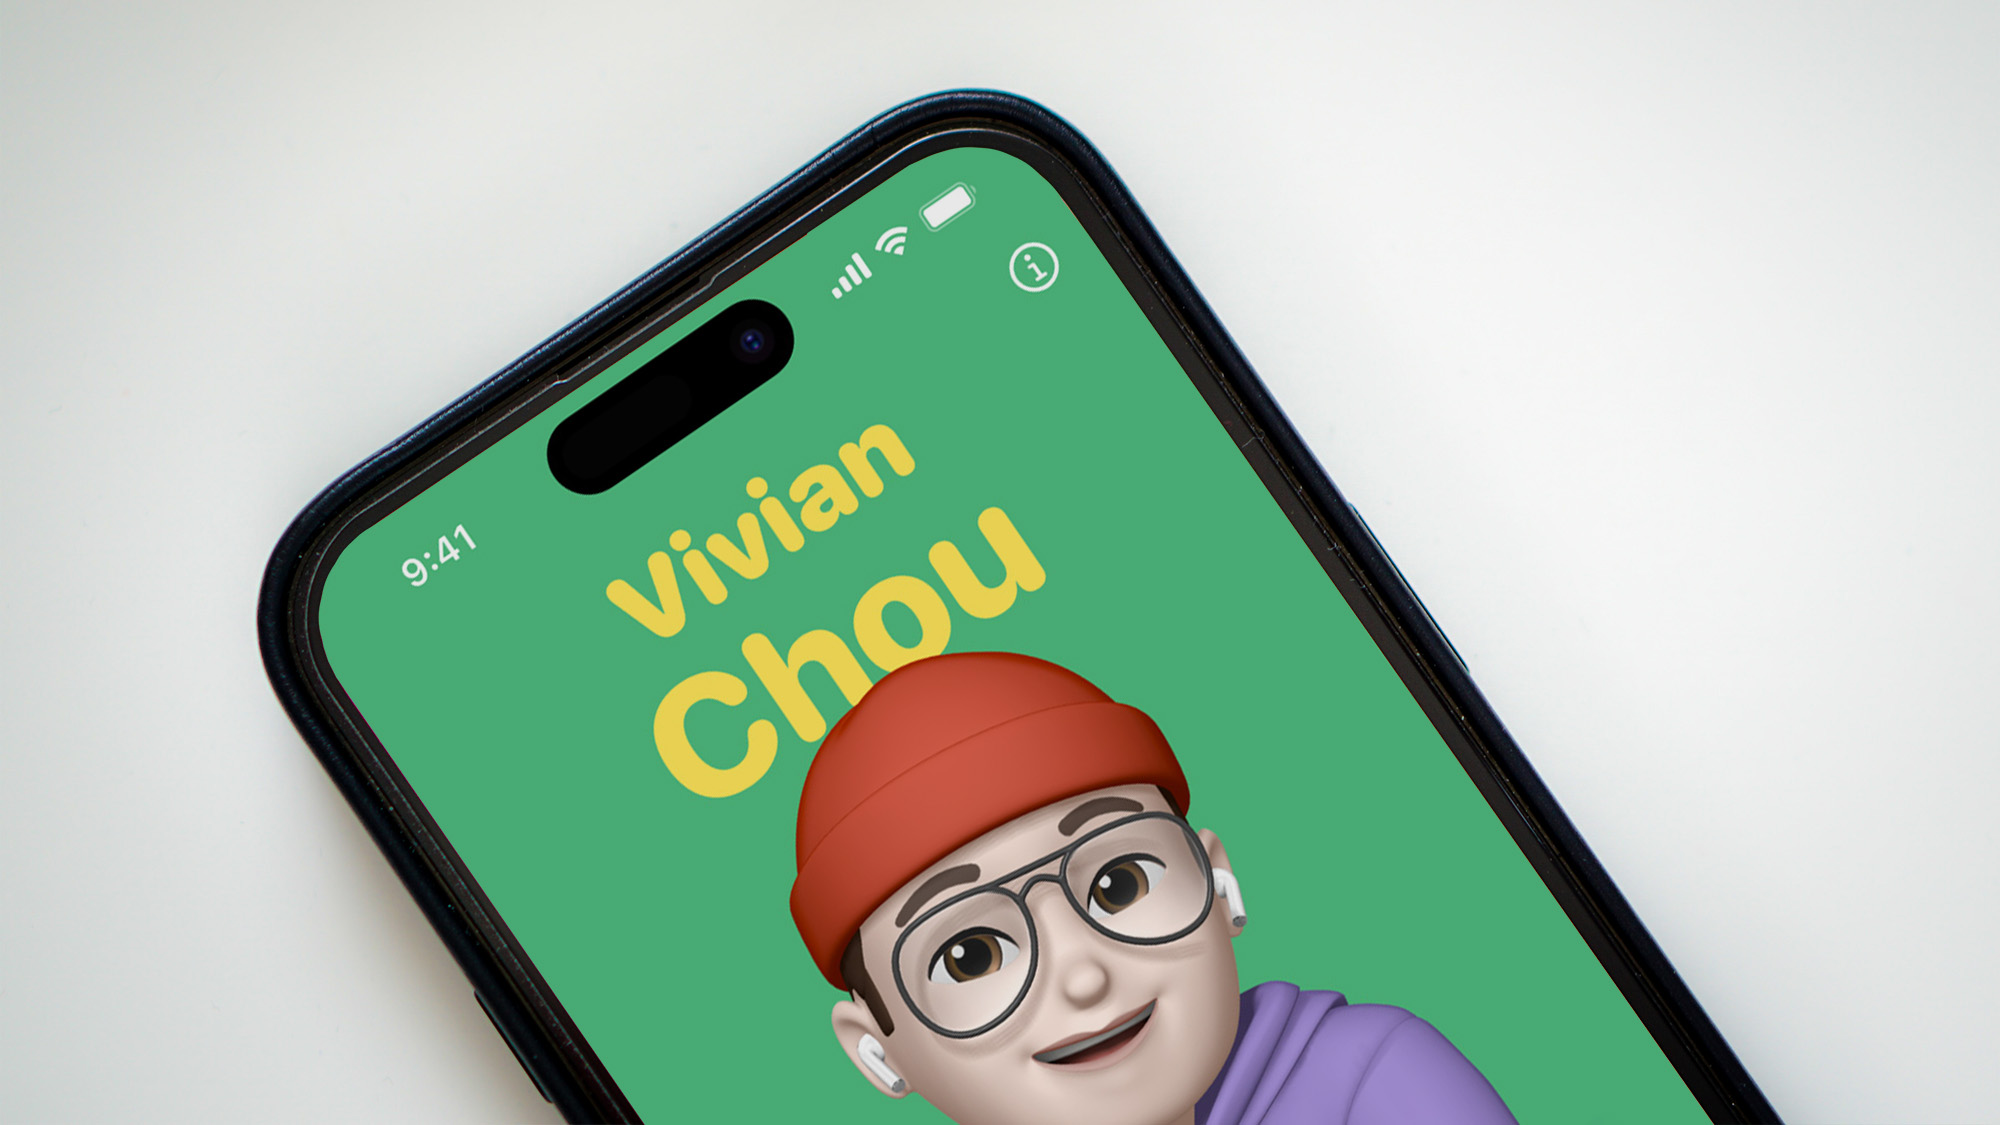
5. Contact Posters
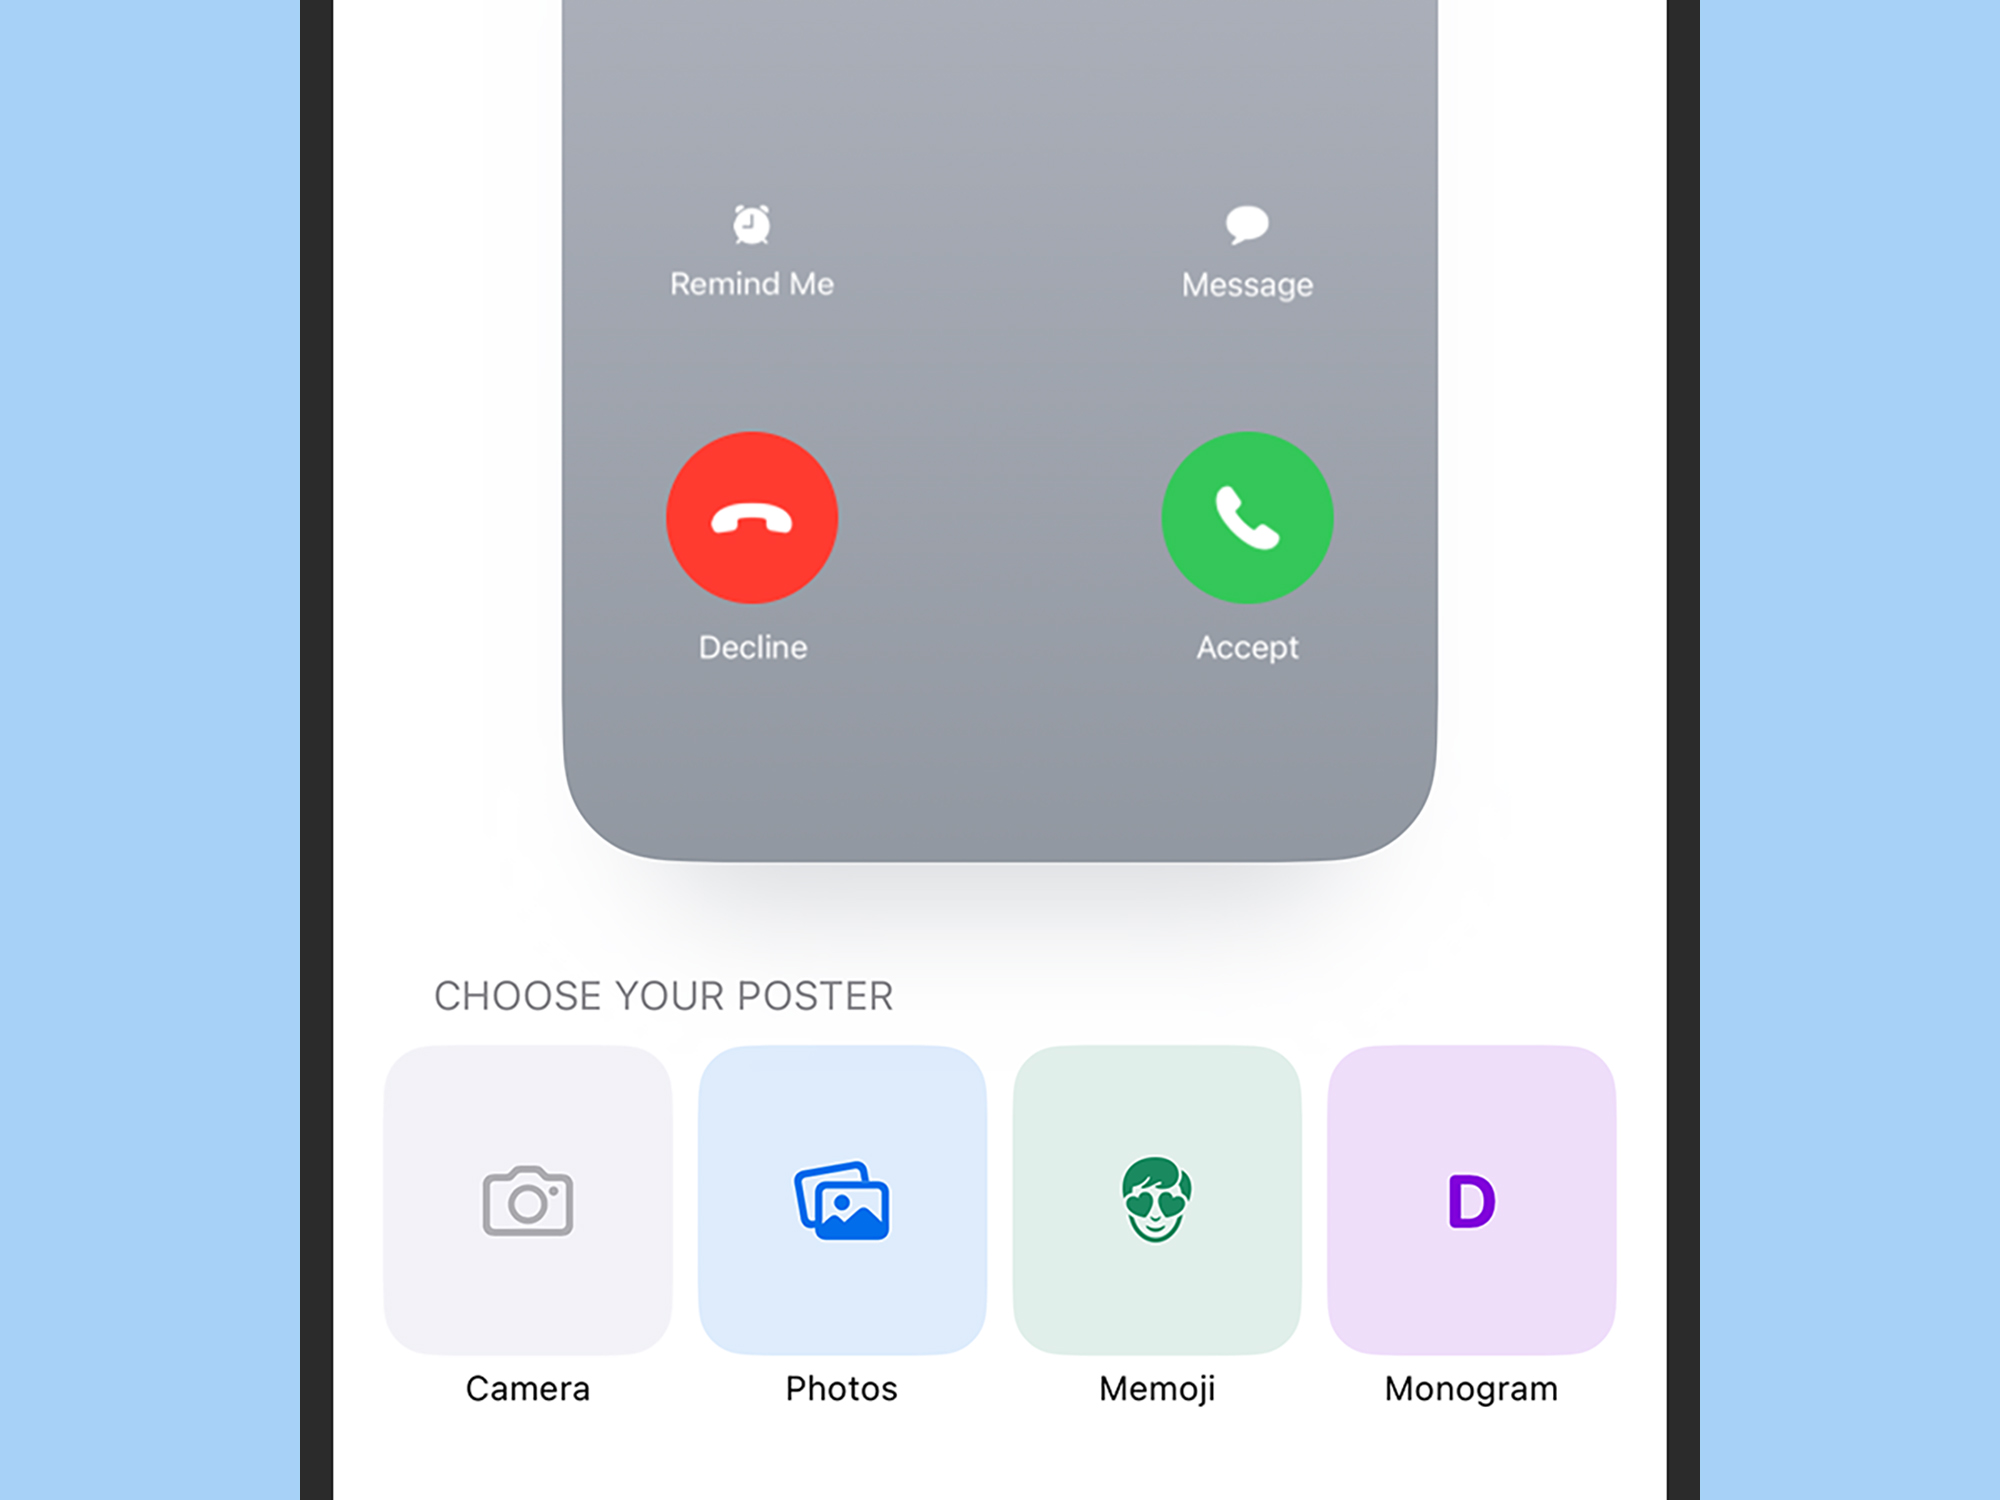
iOS 17 lets you make your own Contact Poster, a graphic that shows up on people’s phones when you’re calling them. You can pick an image (or your memoji), and customize the text font and background.
If you see a message prompting you to Update Your Name and Photo when you install iOS 17, you can tap it to set up your Contact Poster. Otherwise, you can get to the same settings later by opening Contacts, and tapping My Card then Contact Photo & Poster.
You’ll be able to have several Contact Posters set up with different combinations of colors, images, and fonts. From the same screen, you can set your Contact Poster to only appear for people actually listed in your contacts, rather than everyone you call.
6. Personal Voice
iOS 17 has a new accessibility feature called Personal Voice that lets your iPhone speak in your voice. It has the potential to be hugely useful for those with disabilities or degenerative diseases that affect their ability to talk. Once you save your voice to your device, you can type out text and have your phone read it in your voice in apps such as FaceTime.
[Related: Simple accessibility settings that will make your smartphone easier to use]
You’ll need to record about 150 phrases with your iPhone so that it can synthesize your voice, but you don’t have to do this all in one go. To get started, head to the Accessibility section of Settings, tap Personal Voice, and then Create a Personal Voice. Note that all the data supporting this feature will only live locally on your device.
