
Whether you’re speeding up tedious paperwork or crafting a unique handmade gift, rubber stamps still have an irreplaceable role in our increasingly digital world. But the ones at craft stores offer a limited selection of generic messages, and ordering a custom design can be pricey. So make your own. A few inexpensive materials are all you need to create a one-of-a-kind piece of art that you (or its lucky recipient) can use again and again.
Stats
- Time: 45 minutes
- Cost: about $25
- Difficulty: Moderate
Materials
- A stamp design, preferably printed on paper
- Translucent tracing paper (or parchment baking paper)
- One block of stamp rubber
- A scrap of wood
- Wood glue
Tools
- A pencil
- A carving tool with a variety of tips
- A permanent marker
- An ink pad
- (Optional) hand saw
- (Optional) sandpaper
Instructions
1. Choose a design. The artwork you use should only feature one color other than the background, because the finished stamp will only be able to convey positive and negative space.
- Pro tip: If this is your first stamp-making experience, try to go with a simple, chunky design rather than one that features thin lines or lettering—these are some of the toughest elements to carve. You can also find a huge selection of free clip art online if you aren’t up to drawing your own design.
2. Size your design. Make sure it matches the desired dimensions of your finished stamp—roughly 4 square inches is a good size to start with. If possible, print out your design at the desired size or render it on another flat surface, like a tablet.
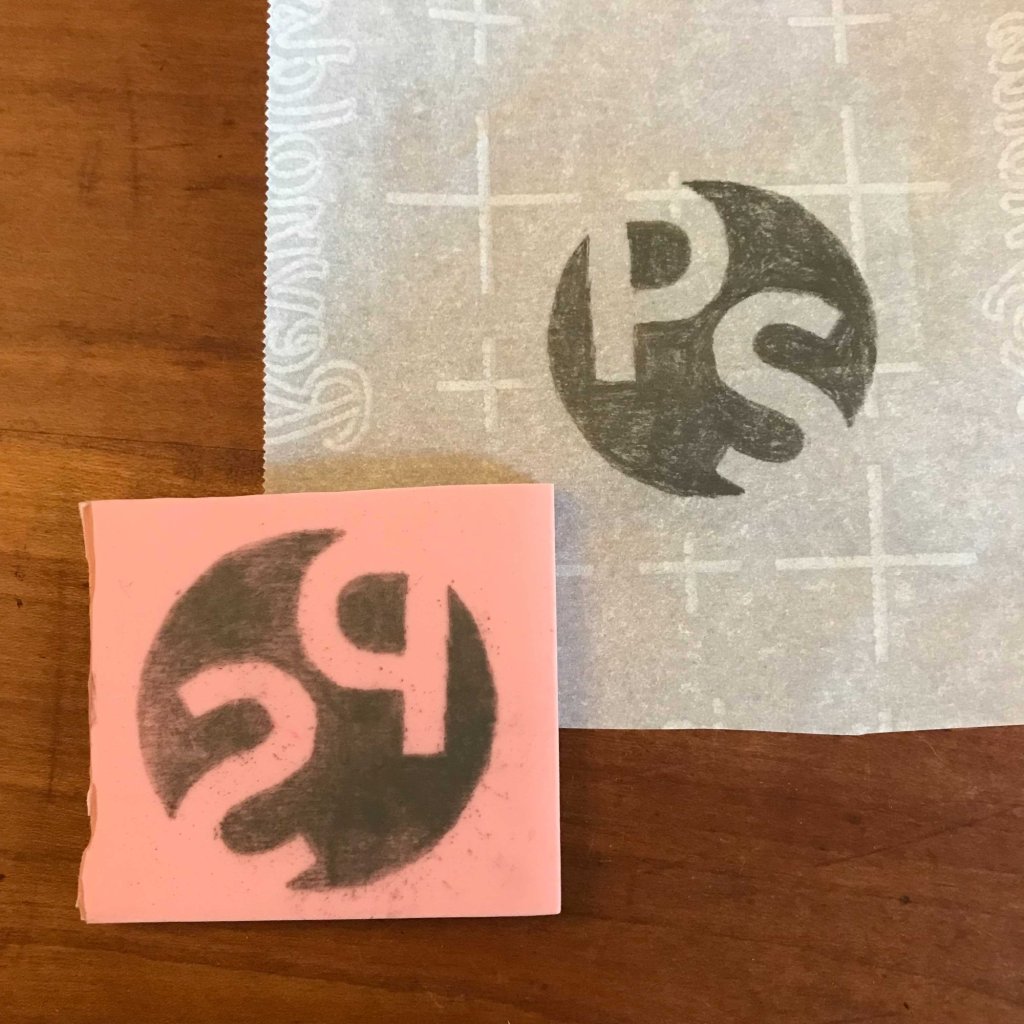
3. Trace your design onto parchment paper with a pencil. Lay a piece of translucent paper over your design and use a pencil to fill in the areas that you want to be inked by the finished stamp. Go over the design a few times to ensure all the “positive” areas of the design are covered in graphite, while all the “negative” areas are free from extra marks or smudges.
4. Transfer the design onto the carving rubber. Next, position your design near a corner of your carving block, to keep the rest of the rubber free for future stamp-making. Then, firmly press the design onto the carving block, pencil-side-down. Rub the parchment paper firmly with your hand to ensure as much graphite as possible transfers onto the block. When you lift the paper, you should see a mirror image of your design on the surface of the rubber.
5. Prepare your carving tool with the thinnest point available. Speedball makes the most widely available carving tool, so you’ll likely end up with their red plastic one. The back of its handle unscrews, and the spare carving points can be stored inside it. Each carving tip (aside from the knife) features a sharp U-shaped blade perfect for gouging rubber.
6. Begin carving the rubber. Starting with the outline of your design, begin slicing away any blank rubber that borders the graphite-coated areas. Your cuts should only sink a few millimeters into the material. It’s easiest to hold the tool itself steady while turning the rubber block beneath your hand to navigate the blade into tight corners and fine-tune small details.
- Warning: Be very cautious—you can always carve away more rubber later, but you can’t put it back once it’s gone.
7. Cut your stamp off the rubber block. Switch to your knife tool and separate the area bearing your design from the rest of the rubber. This will make the stamp easier to maneuver as you carve further.
8. Remove larger areas with bigger carving tips. After all your outlines between graphite and blank rubber have been carved, switch to a slightly larger tip and go over them again. Be sure to only remove blank rubber, leaving the design itself intact. Carve a little deeper, but don’t cut any farther than about a third of the way into your rubber block.
Continue switching to progressively larger carving points and removing more and more areas of blank rubber from the surface of your stamp. Eventually, only your graphite design will protrude as a level surface—the rest of the rubber should be indented where you carved the blank areas away.

9. Test your stamp. It’s time to give your stamp a trial run. Brush away all excess rubber crumbs and pat ink onto the stamp with your ink pad. Press the stamp onto a piece of scrap paper and analyze the design it produces. There will likely be extra black lines around the design’s edges where you haven’t carved quite deep enough.
10. Adjust the stamp to perfection. Using your test stamp as a reference, return to your smallest carving tool and remove any excess rubber. You may have to perform multiple test stamps before you’re satisfied with the finished design.
11. Cut a piece of wood for your stamp’s backing. This step elevates your homemade stamp from a chunk of rubber to a stylish finished product. If you’re comfortable doing so, use a hand saw to cut a scrap of wood to roughly the size and shape of your stamp, leaving a small margin (about 1 centimeter) around all sides. If you’d rather someone else do this, some home goods and lumber supply stores will do it for you. A hobbyist woodworker or commercial wood shop may also let you rummage through their offcuts for a suitable piece. If you don’t have access to these resources, your nearest arts and crafts store likely has some small precut wood pieces that you can use.
12. Stamp the wood. Once you’ve got your hands on a good chunk of wood, ink up your stamp and press it firmly onto the top of the wood piece. This will let you preview what the stamp will look like. Since wood often isn’t completely smooth, you may need to fill in your design a bit with a permanent marker. Try to stamp it in the exact center of your wooden base, as this is where you’ll be attaching the rubber stamp to the underside.
- Warning: If your wood is too rough for your liking, use sandpaper to buff it smooth. Brush away any excess wood dust before stamping your design on top.
13. Attach the finished rubber stamp to its backing. Finally, use strong wood glue to secure the rubber stamp to the bottom of its new wooden base. This wooden topper will allow you to apply even pressure to the stamp whenever you use it, as well as line up your design exactly where you want it to go. Now get a-stampin’.
