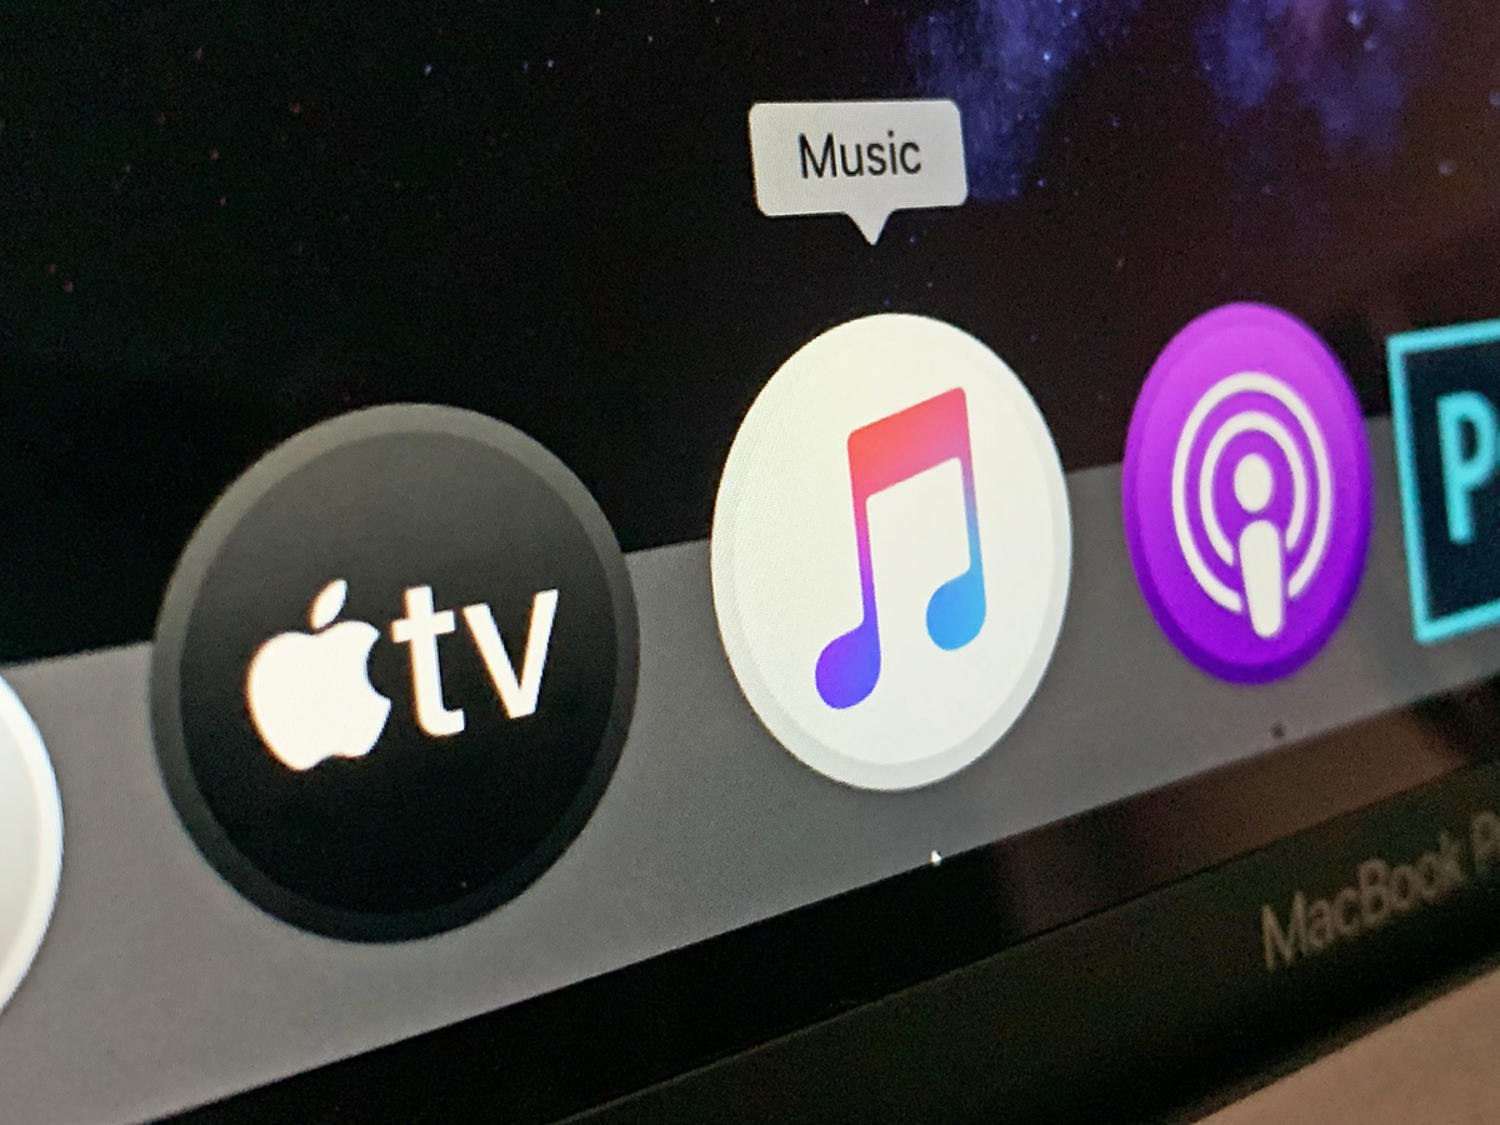
With the arrival of macOS Catalina, iTunes is no more—on the Mac, at least. The long-running app that once housed all content for Apple devices has now been replaced by three separate and specialized apps: Music, TV, and Podcasts.
These apps aren’t hugely different from what iTunes used to be, but it might take you some time to get your bearings and discover all the functionalities that will allow you to make the most out of them.
Lucky for you, that’s where we come in.
Show the iTunes Store
Apple Music does give you a lot for your $10-a-month subscription, but iTunes isn’t completely dead yet—it lives on in the form of the iTunes Store, where you can still buy digital music, TV shows, and movies to keep forever.
So if you prefer the old-school way of building up your music library, find the iTunes Store by opening the Music menu, clicking Preferences, heading to General, and checking the iTunes Store box.
A new entry will appear on the navigation pane on the left, giving you instant access to the iTunes Store with a single click. You can also get to the store by right-clicking on tracks and albums and choosing Show in iTunes Store.
Get lyrics alongside your tunes
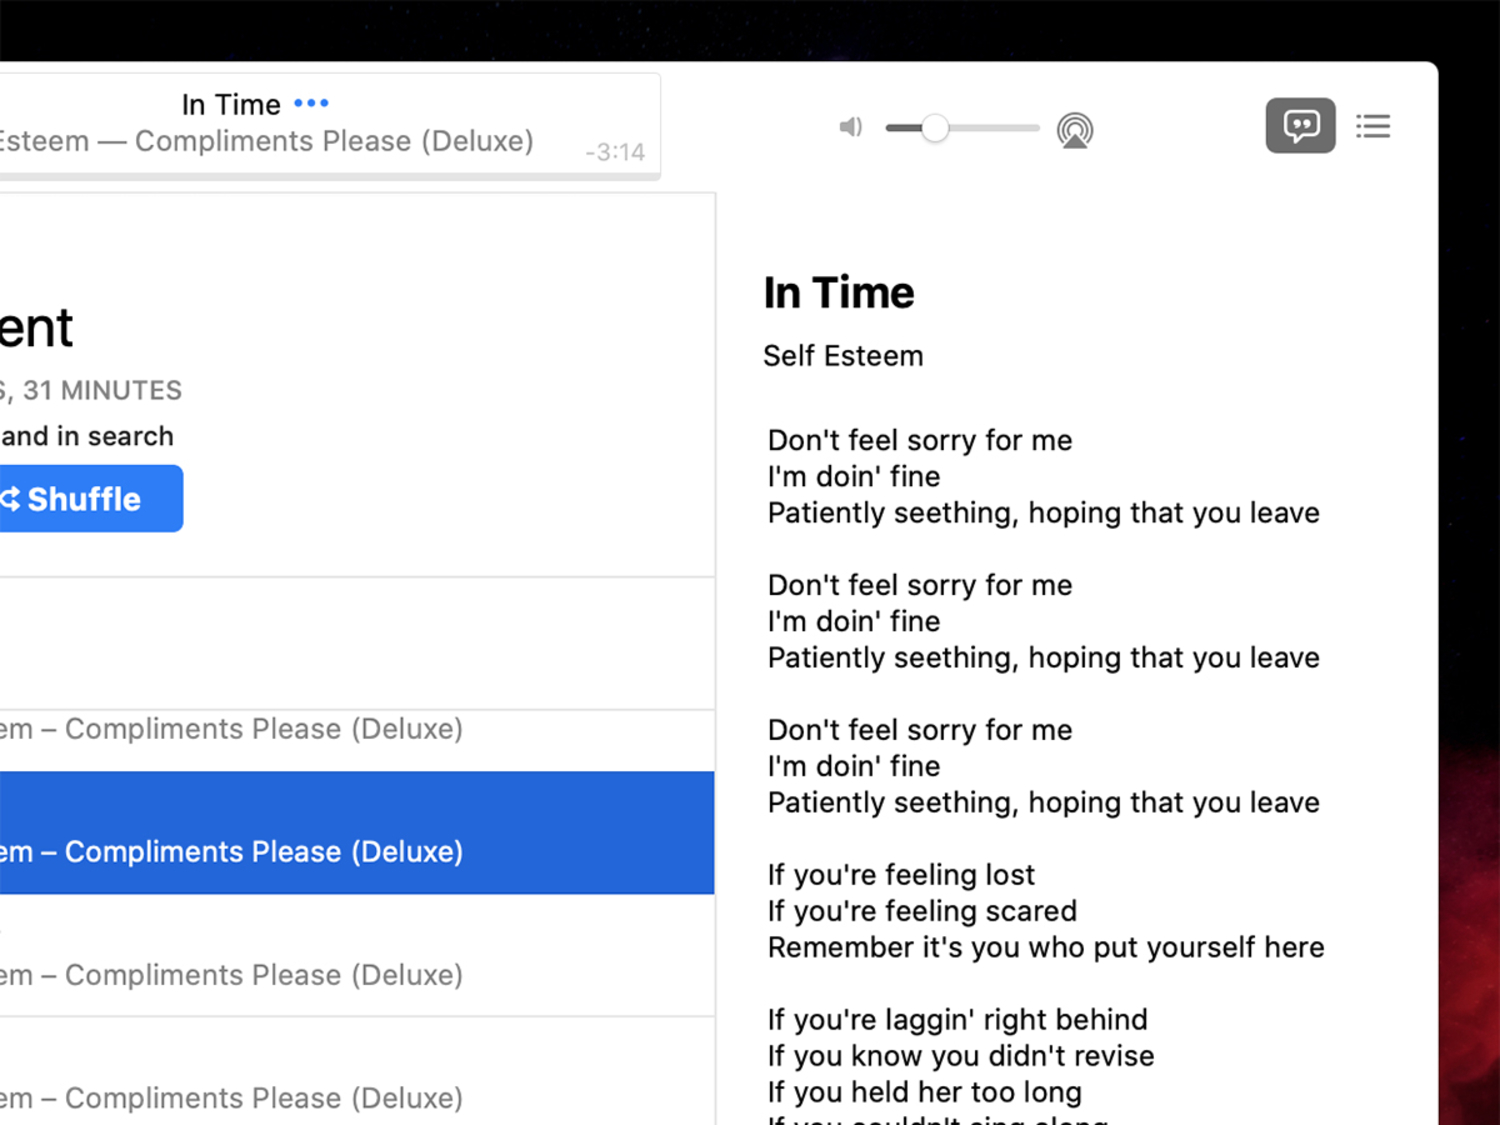
Like the Apple Music mobile app, the Music app on macOS Catalina is able to show lyrics alongside your tunes—perfect for those impromptu karaoke parties. To see the lyrics pane, click the small speech bubble icon up in the top right-hand corner of the interface.
Alternatively, open up the View menu and choose Show Lyrics. Unfortunately, the lyrics won’t scroll along in time with the music: you’ll just get them all up on the screen at once.
Improve your Apple Music recommendations
The whole point of the Apple Music streaming service is to offer a better experience, and you can improve it even more by helping the algorithm make better suggestions. That way, you’ll get new music that is closely aligned to your taste. For example, click Music, Preferences, and Playback, then check the Use Listening History box. This will tell Apple Music to use the tracks you listen to on your Mac to inform its future recommendations.
You can also “love” tracks: click the little heart icon next to any song to tell the service this is a tune that you’re particularly fond of. If you come across a track that you’re not a fan of, choose Song, then Dislike while it’s selected. These “loves” and “dislikes” all influence the recommendations you’ll see on the For You tab.
Give Apple TV Plus a try
The first time you open the TV app, you’ll be invited to try out Apple TV Plus free for a week (it costs $5 per month after that). It’s worth trying just to see how much you can binge-watch in seven days, but it’ll also give you a better idea of how the new TV app for macOS Catalina works.
From the Watch Now tab, you can check out everything Apple TV Plus has to offer, including its original series The Morning Show and See. As you click around, you’ll see you can stream episodes and movies straight away, or download them to your Mac for offline viewing.
Find your old library
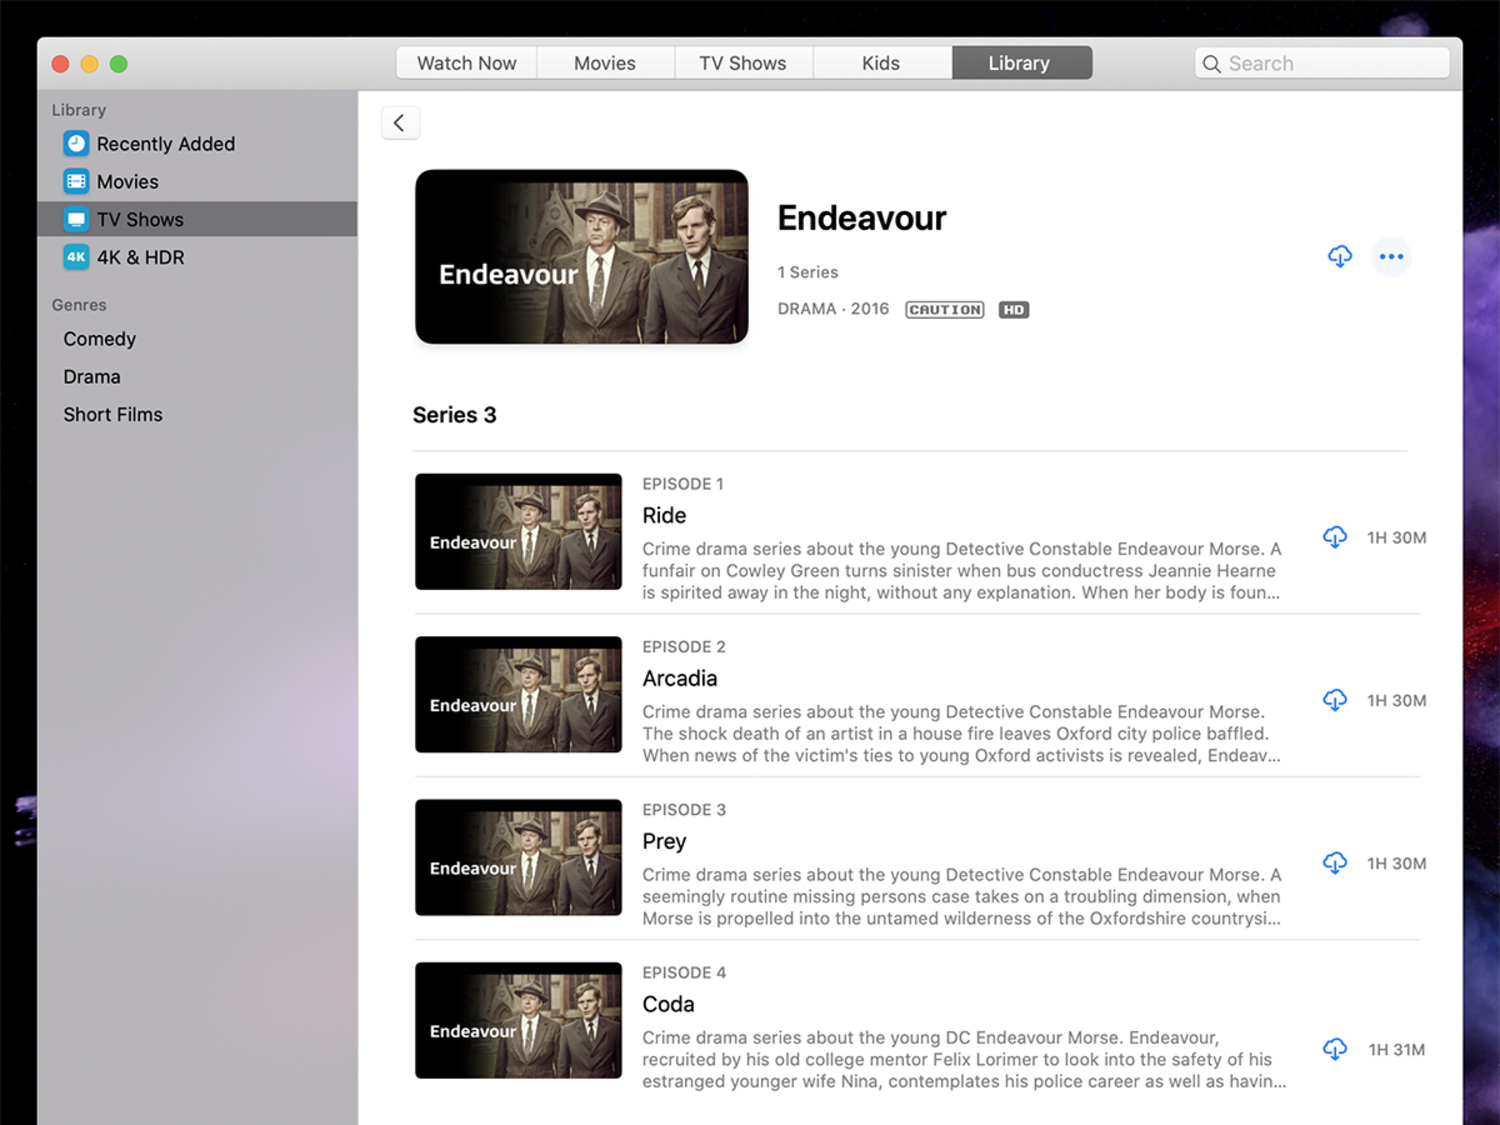
The movies and TV shows you previously purchased from iTunes haven’t gone away in this brave new world of instant streaming.
Open up the Library tab to view your purchased media: double-click anywhere to start streaming, or click the cloud icons to download content to your Mac (just in case the Wi-Fi cuts out). Once you go back to the Watch Now tab you’ll see movies and TV shows you’re currently watching—both from your library and from Apple TV Plus.
Click the Movies or TV Shows headings at the top of the TV app to purchase new videos directly from Apple—it’s the same as the store in the old iTunes app, only cleaner and less busy. You can also use the search box in the top right-hand corner to look for particular films or shows.
Subscribe to new channels
Apple is keen to make the TV app your one-stop shop for all your digital video needs, and you can add extra channel subscriptions on top of or instead of an Apple TV Plus subscription. Click Try Apple TV channels under the Watch Now tab to see what’s available, and to sign up for new channels (the prices are displayed at the top, though free trials are available with all of them).
You can subscribe to Starz, Smithsonian Channel Plus, MTV Hits, HBO, and CBS All Access. Again, as with content from Apple TV Plus and your own purchased (or imported) library, the Watch Now tab will show everything you’re currently watching across all channels.
Find something new to listen to
When it comes to the new Podcasts app in macOS Catalina, you’ve got several different ways to discover new content. Open up the Browse page, and you’ll be able to go through categories, including newly launched podcasts.
If you want recommendations from Apple staff, you’ll find podcasts on specific topics, like TV or history, under the Curated Collections heading. To see what’s proving popular with other users, click the Top Charts link.
Change podcast playback speed
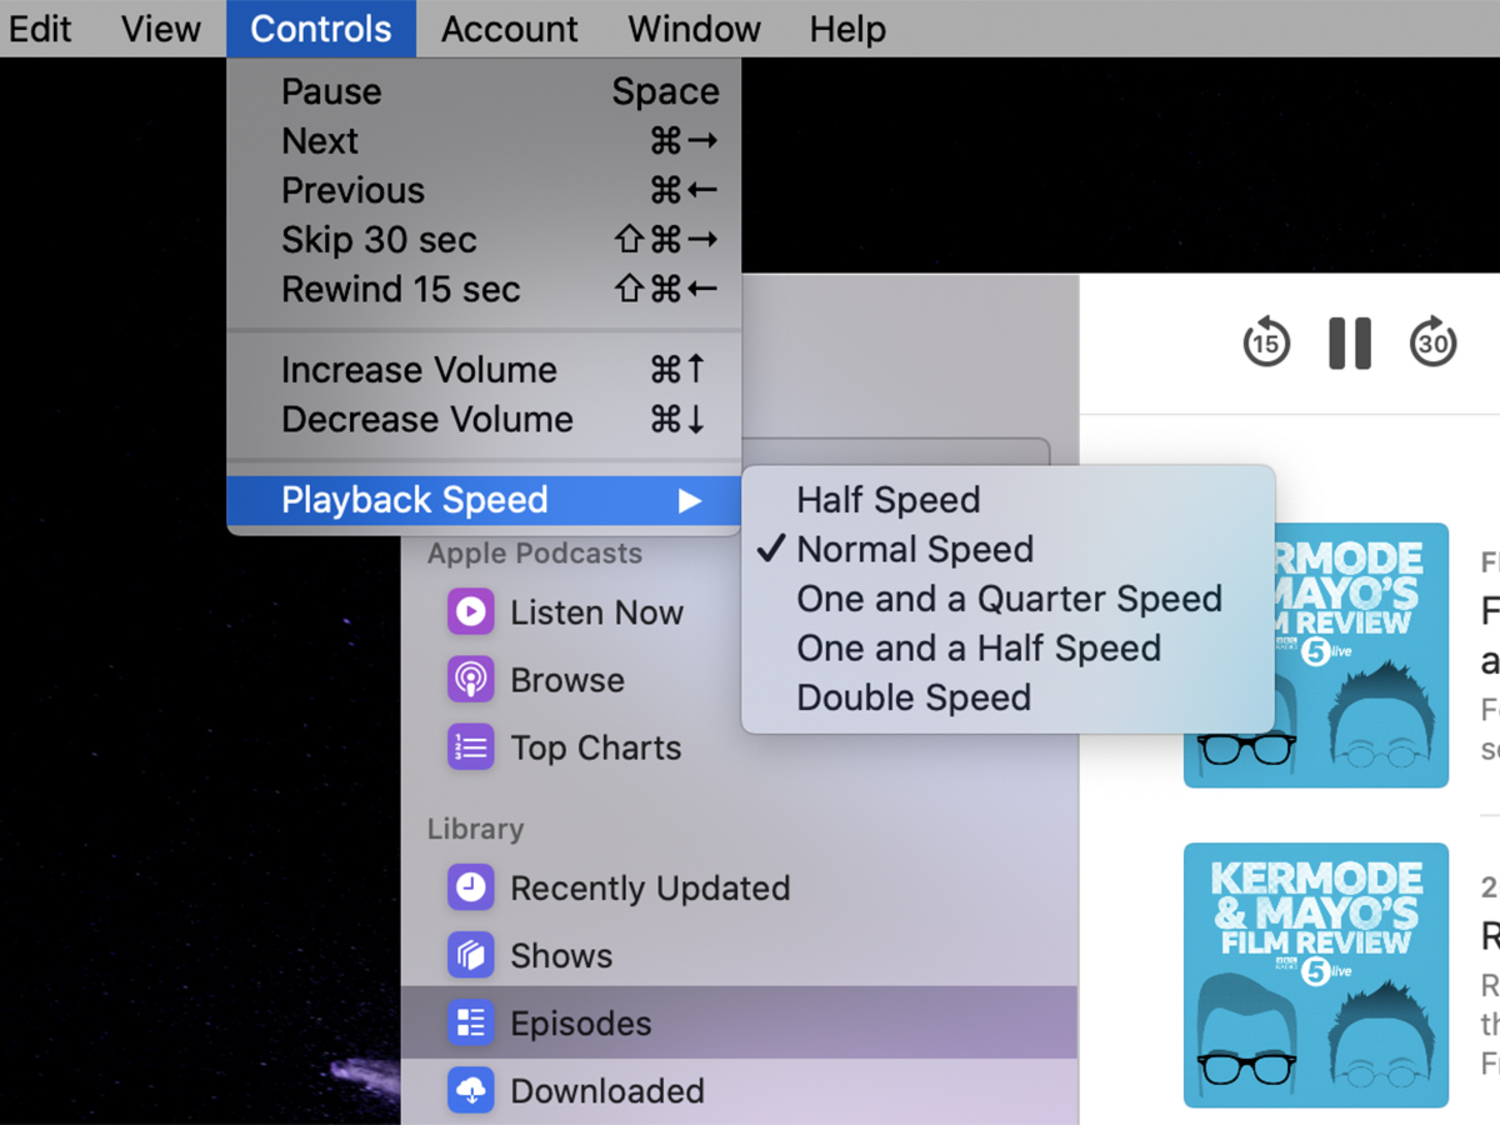
Like many other players, the new Podcasts app lets you adjust the speed at which you’re listening to. If you’re working your way through a backlog of episodes, you can speed through them much more quickly. The Podcasts app adjusts the pitch automatically to avoid having everyone speak with a high-pitched squeal as the speed increases.
With a podcast playing, click Controls, then Playback Speed, and make your choice—you can go down to half speed, or up to double speed, with a few steps in between. To go back to normal, select Normal Speed.
Head to the Finder to sync iPhones and iPads
One of the biggest changes in the new Music, TV, and Podcasts app is that the device syncing options have been cut out. They haven’t gone far though—if you want to sync an iOS or iPadOS device with your media library, you’ll need to head to the Finder rather than any of the three new apps.
For the first sync, you’ll need to connect your device to your Mac with a USB cable, which will cause it to show up in the left-hand navigation pane in Finder. Click on the device, confirm that you trust it (if prompted), and you’ll get access to the familiar syncing screen.
Not much has changed on this screen from iTunes—you can choose to sync some or all of your music, movies, TV shows, podcasts, books, audiobooks, and photos. You can also (under the General tab) have this device sync wirelessly with your Mac in future.
