Children have such active imaginations that anything can be a toy, even if it’s not supposed to be. So it’s no surprise that young students have been able to create entertainment out of perhaps the most abundant classroom resource—paper.
School and work might look a bit different right now, but fun doesn’t have to. Just grab a sheet of printer or notebook paper, maybe a pair of scissors, and start folding.
How to make a paper football

This dense little triangle looks kind of like the ol’ pigskin, and it’s hefty enough to travel several feet if you’ve got a strong flicking finger.
1. Fold the paper in half lengthwise. Then, unfold.
2. Fold the long sides in. Make each side touch the center crease.
3. Fold the paper in half lengthwise again. When you’re done, you’ll have a long strip in front of you.

4. Fold one corner down. Grasp the top right corner of your strip and fold it down until it touches the opposite edge. You’ll get a triangular fold.
5. Fold the triangle down. Square off the folded end of the strip by bringing the triangle down.
6. Repeat steps 4-6. When you redo Step 4, bring the top left corner to the right edge. Keep folding in this pattern until you have a small rectangle of excess paper left at the end of the strip.
7. Fold the excess paper. With the longest edge of your shape facing you, fold the top left corner down. When you’re done, you’ll have something close to a triangle.
8. Stuff the excess paper into the folded football. It might take a little work, but the excess paper will fit neatly inside the pocket in the body of the “ball.”
Now, choose an opponent, learn the rules of paper football, and pretend your kitchen table is a packed stadium. Or just make a target and take aim. Just don’t flick it directly at anyone’s face.
How to make a fortune teller

This craft is one of the more difficult on this list, but we’ve placed it high up because of how common a tool it was for trying to find out if your crush liked you back, or if you were going to pass the next test. Before you start, make sure your paper is square.
1. Fold one corner to meet the other. Then fold the resulting triangle in half. Unfold everything—this will help you identify the center of the paper in the following steps.
2. Fold each of the paper’s four corners so they meet in the center.
3. Flip the square over.
4. Fold each of the four corners in to meet in the center.
5. Fold the paper square in half. Keeping the folds you just made on the inside, fold it like a hot dog bun or a taco shell. Open it up and fold it in half again, this time, perpendicular to the crease you just made.
6. Open it up. With the creased side (where the hot dog would rest) facing down, slide your thumbs and index fingers under the square flaps on the outside and slowly push the top corners together. The outside flaps will raise and once your fingers are in position you’ll be able to open the fortune teller in two directions.
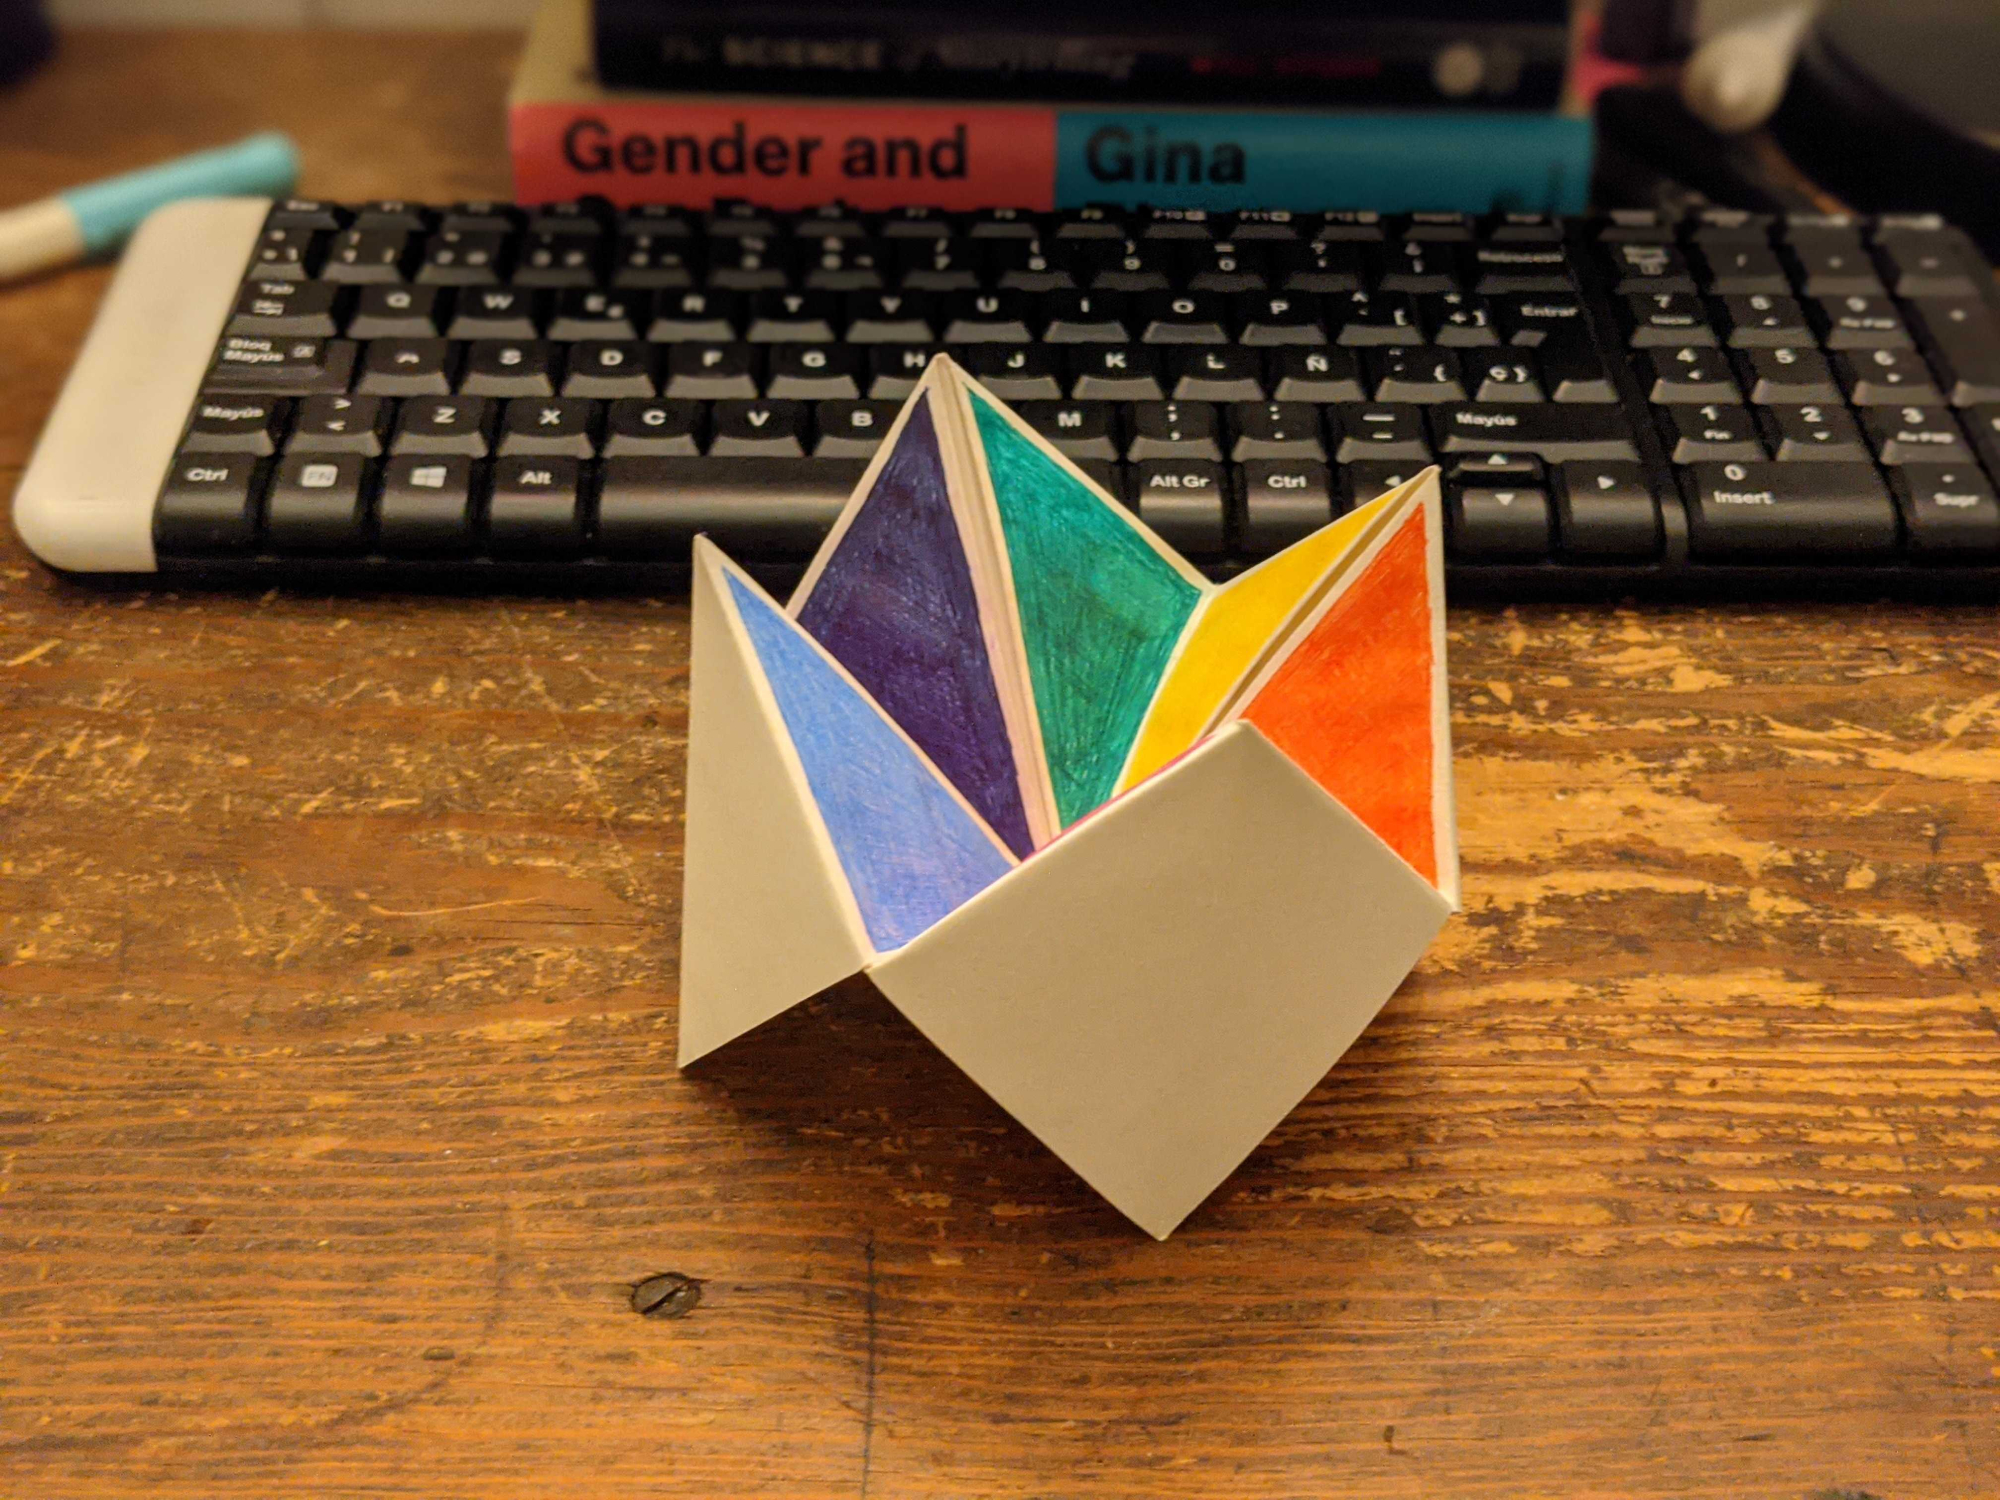
7. Decorate. There are many ways to trick out your fortune teller, but we gave gave each of the eight inner triangles its own color.
8. Write the fortunes. Flatten the fortune teller so the triangular flaps are on top. Unfold each one and write two fortunes—one of the left and one on the right. On ours, each large triangle has two colors on the back. We wrote one fortune for each.
Now, reassemble the fortune teller, slip it back over your fingers, and turn to whoever you’re with. Ask them to choose a number, open it that many times (alternating directions), and have them pick a color. Flip over the corresponding panel, revealing their fate.
How to make a paper helicopter

Real helicopters are marvels of engineering, but these are not. Still, they’re fun to drop and throw. Scissors will give you cleaner cuts and a more streamlined look, but we were also successful just tearing the paper with our bare hands.
1. Cut rectangular strips of paper. Slicing down the length of your sheet, make as many strips as you want, each 1 to 2 inches wide.
2. Fold one strip into approximate thirds. Once you’ve done so, unfold one layer, leaving a double layer of paper on one end.
3. Cut the helicopter’s blades. Snip down the center of the single layer of paper, lengthwise, but stop about a ½-inch from the double layer.
4. Fold the blades out in opposite directions. Bam: helicopter.
These little whirligigs will fly to varying degrees with no further accessories, but you can add paper clips for weight and stability or experiment with different types of paper and blade designs.
How to make a pirate hat

Cosplay can be fun, and few characters are more classic than pirates. Don’t blame us if once you don this sweet headgear, you start feeling an insatiable urge to sail the seven seas.
1. Fold the paper in half. Fold it width-wise, so the short sides touch.
2. Fold the paper in half the other way. Make the new shorter sides touch. Then, unfold this step.
3. Fold the corners on the crease down so they meet in the middle. When this is done, you’ll have a strip of paper left over on the bottom. If you fold the open side, you won’t be able to do the next step.
4. Fold the bottom flaps up in opposite directions. These will form the hat’s brim.
5. Open the hat.
A hat made from one sheet of printer paper will fit a kid’s little head, but you’ll need something bigger if you’re looking to join the fun as an adult. Try a sheet of newspaper. Or don’t, if you like the silliness of wearing a tiny hat.
How to make a paper boat

The paper pirate hat is so versatile that any swashbuckling seafarer can whip it right off their head and turn it into a worthy watercraft. Follow the directions for making a paper hat, then continue here.

1. Form a square. When you open the hat, keep pushing in from both ends until it becomes a flat square. Make sure the loose pieces overlap each other so the whole thing lays flat.
2. Fold the square into a triangle. Take the part of the square with the hat’s brim on it and fold it up on both sides.
3. Open the triangle and turn it into another square. Like you did in Step 1, push in on both ends until you’ve flattened it into a square.
4. Open the flaps and push up from the bottom. Getting the boat to form properly can take a bit of work, but when you’re done, it’ll have a small sail in the middle.
We suggest setting out in the sink or tub, but you can take the little ship outside if you want. Just don’t send it off down the street during a torrential downpour. Storm drains are no laughing matter. Even if we all do float down there.
