Long before the invention of gunpowder, ancient armies used siege engines to hurl all sorts of terrible, yet creative, missiles. The Carthaginians put poisonous snakes in clay jars and then launched them at enemy ships. The Romans preferred to throw bags of bees at their foes. And the Mongols invoked an early but gruesome form of germ warfare by tossing plague-infested corpses over the walls of castles they were besieging.
While reading about the bad old days, it struck me that a replica Roman legion–style catapult might be just the thing to bring excitement to my neighborhood block party. I looked up books by original Roman and Greek catapult engineers on the Internet, then designed my model. It’s fairly authentic, although I did use modern tools and materials.
The power behind this catapult’s arm is a spring made from twisted rope. (The ancients used linen and horsehair, but I found that natural fibers like hemp and sisal, which stretch less than nylon rope, are also excellent for catapults.) When it’s fully wound, the rope places immense stress on the entire structure, so it’s important to build the wooden frame solidly. Without the pair of cross-braces I added, the machine could implode when the spring is tightened.
I didn’t use my catapult for warfare, but I did try flinging baseballs, burritos, and even beer cans.
The powerful spring also makes it difficult to quickly release the throwing arm. A little mechanical device called a panic snap, available at hardware stores, makes a fast, controllable trigger. It disconnects easily because its latching mechanism is separate from the load-bearing structure.
But even with a good trigger, hurling the ammo properly can be tricky – something you learn early on when figuring out how to build a catapult. Let go too early, and it shoots straight up. Too late, and it plows into the ground in front of you. Try attaching a cord to the projectile and then looping the other end around a peg in the top of the throwing arm. The longer the loop, the farther a missile will fly.
I didn’t use my catapult for warfare, but I did try flinging baseballs, burritos, and even beer cans. (As it turns out, baseballs and burritos work well as ammo, but full cans of beer? Not a great idea.) My tactics may not have won any battles against the Romans—but I had a lot more fun.
How To Build
You have a lot of leeway as to how to build your catapult. The drawings and instructions that follow will provide you with important pieces of information, but quite likely you’ll still need to figure out some of the dimensions on your own. However, that’s okay because this is a DIY project—tweaking it is part of the fun of making it.

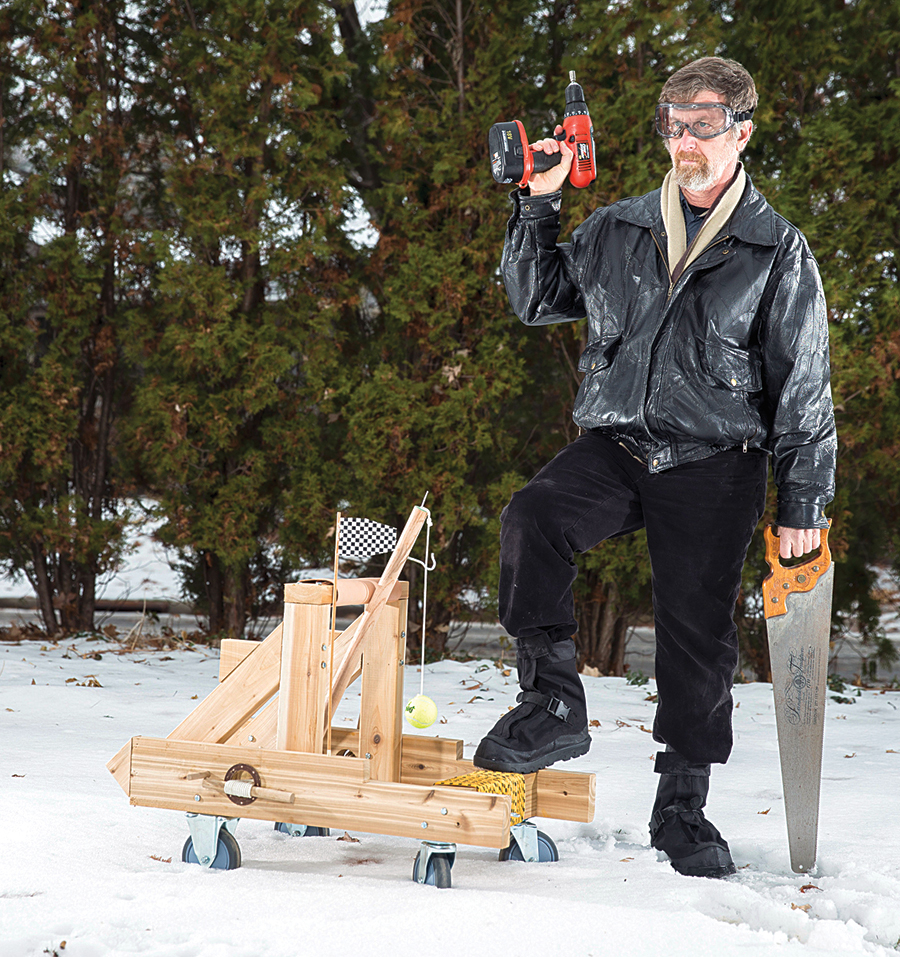
The catapult perspective drawing shows the quantity and dimensions of the wooden pieces I used to build the catapult’s frame. I used good-quality cedar because it weathers well and looks authentic, but any type of softwood will be fine.

Build a sturdy wooden frame, using the drawings as guides. Use 3-inch lag bolts to connect the frame to the crosspieces with at least two screws for each connection. To attach the angled support pieces to the upright pieces, you’ll need a couple of 4 ½-inch and a couple 5-inch lag screws.
Place a piece of foam padding on the top crosspiece to cushion the impact of the throwing arm.
Wheels are optional. I used 5-inch casters mounted to the front and back crosspieces, but if you choose, you can forgo mobility and opt for solid wood blocks instead.
Attach a screw eye to the throwing arm and pound a 2-inch finish nail in the center of the arm’s top. Attach a panic snap to the top of the rear crosspiece, in the center.
The catapult’s power comes from a skein of rope that you must loop back and forth. Center the washers on the spring holes, as shown in the photo, insert ¾-inch-diameter pegs into the washers, and wrap the rope around the pegs. Insert the throwing arm through the center of the skein and then rotate the pegs in the direction opposite to the flight of the projectile. This adds tension to the spring. The more you twist, the farther the projectile will travel, but too much tension may break the pegs, or even the frame.
To fire the catapult, attach your projectile to a short length of rope (experiment to find the length that works the best) and tie a loop in the opposite end of the rope. Push the throwing arm down so it rests against the rear crosspiece. Place the projectile loop over the nail on the top of the throwing arm and attach the panic snap to the eye-screw on the throwing arm. Stand well clear of the rotational axis of the throwing arm. Then pull down on the panic snap collar to fire.
Send photos and video of your creation to historystrikesback@popsci.com.
WARNING:
Keep body parts clear of the throwing arm and remember to wear eye protection. And when choosing projectiles, exercise common sense.
This article was originally published in the March 2015 issue of Popular Science, under the title “The Roman Catapult Revived.”
