
Tom Riti wanted a new pedal boat. The retired TV-production teacher and his wife, Lori, had just moved from Florida to Virginia, and were looking for a craft to explore the surrounding bay and back channels with.
So, like most folks in his position, Riti started shopping around online. But rather than heading right to the Cabela’s website, Riti, who calls himself a “DIY-er with an itch,” landed in the Popular Science Google Book archives. There, in the August 1948 issue, he found the instructions for a “Bicycle Boat Built For Two.” The design wasn’t perfect—he wanted a motorized vessel, not a pedal-assisted one, and he needed it to be heavy-duty enough to withstand ocean waters and winter temperatures. But Riti felt like he’d found a diamond in the bowels of the internet.

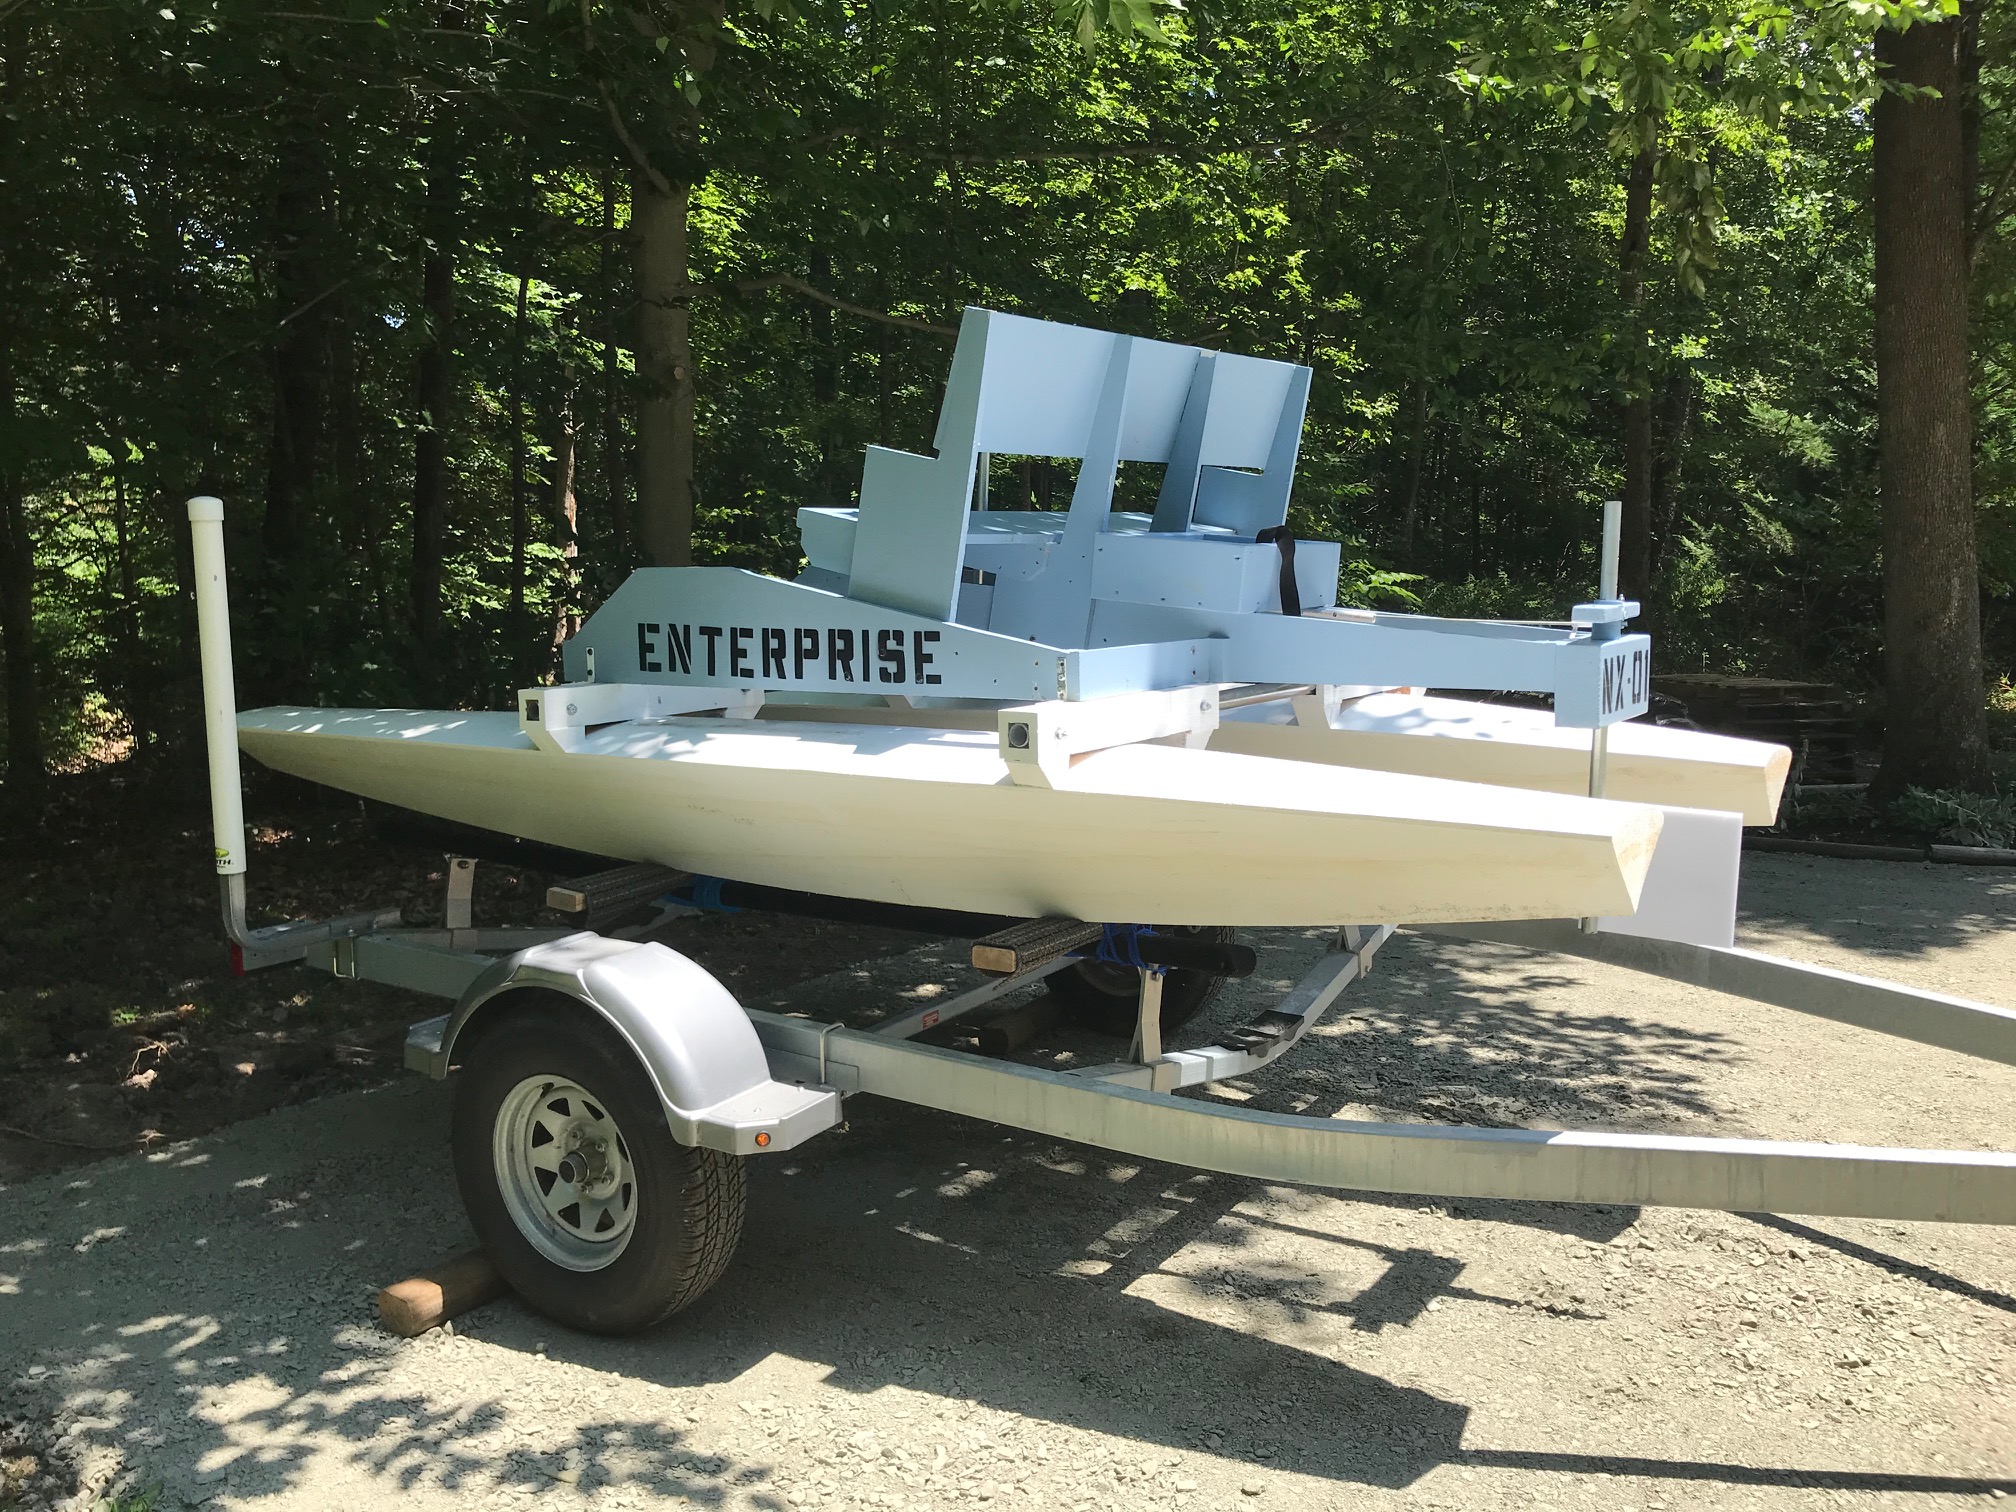
Ten months later, Riti and Lori are pulling donuts in the Chesapeake Bay in their new wooden catamaran, named the Enterprise NX-1. “She turns heads,” he says of some of their recent joyrides. “People have been out on the dock, pulling their cellphones out.” The project took him a little more than six months start to finish, mainly because he had to make some adjustments to the original design (republished below).
For starters, Riti added more volume to the pontoons—the two flat hulls that prop up the boat and stabilize it—and bulkheads so they could hold a heavier load. While the magazine article suggested 8-by-4-foot pieces of plywood for the pontoons and 8-by-1-foot pieces of plywood for the bulkheads, the modern-day builder went for 25 percent more. He used buoyancy charts to calculate the exact dimensions he needed, then tied the boards down with ratchet straps to bend them into the rounded, catamaran shape. He also weatherproofed the vessel with a layer of paint, Gorilla glue, and finally, Flex Seal. This turned out to be cheaper than his initial plan to coat the boat with fiberglass.
But the experiments didn’t end there. Even after he got the boat on the water in June, Riti made tweaks to make it float, balance, and run better. He assembled a rudder system to pair with the trolling motor he’d salvaged, and installed a new RV battery to keep the vessel running at top speed for three-hour stretches. He noticed that it was top-heavy, too, so he flipped the pontoons so they pointed toward the stern, not the bow.
Building a catamaran from scratch might not be a feasible winter activity for everyone. But Riti notes that this was his first time dipping into the world of nautical design. He’s been a lifetime DIY-er—as a kid, he remembers devouring piles of Popular Science and Mechanics Illustrated issues, to the point where his parents worried he was going to “turn the lawnmower into a hovercraft”—and plans to build a Boeing flight simulator in his basement for his next project.

For those feeling inspired by Riti’s handiness and drive, here’s a full scan of that August 1948 article.
***

For those long, lazy summer afternoons, here’s an ideal boat for loafing. You have your choice of power for it—pedals driving a paddle wheel or propeller, or an electric or outboard motor.
The pontoons—the most important part of the craft—may be covered with 0.020-inch or 0.032-inch aluminum or with plywood. I used ⅛-inch water-proof plywood on the one I built. Three 4-by-8-foot sheets are enough.
For frame, use eight 12-foot lengths of 1-by-1-inch white pine, and about 8 feet of 1-by-12-inch pine for bulkheads. The rear blocks are shaped from a piece of two-by-four. Figure 2 gives you the rear block and bulkhead dimensions and hole locations.

Lay out the four main bulkheads on the 1-inch board as indicated above Fig. 2. At this point, drill the ⅜-inch holes in the bulkheads as in Fig. 1. These holes are for drainage if the pontoons should leak. By resting the boat across a dock and raising the front, the water will drain through the 1-inch hole in the rear bulkhead and the ½-inch hole in the rear block. Taper the latter hole with a round file and use a cork as a plug. A screw in the cork will make it easier to remove.
I neglected to drill the drains in my boat. Later, I had to cut ports in the top of each pontoon section and siphon out the water.
Your next step is to drill screw holes through the 1-by-1-inch frames where they join the bulkheads and the bow piece. Countersink all screws. The screw heads must be well-sunk in the side and bottom frames at the bow and stern. At these points the frame pieces are planed down to a flat surface for the plywood covering.
Cut the bow piece as in Fig. 3 and trim the bottom frame to fit it. Trim the side frame pieces to fit flatly against the box frame. If you think the three frame members at the bow won’t go into place without cracking, steam or soak them in hot water until they become more pliable. Hold the side frames against the bow piece and mark the parts to be planed off to make them lie flat.
In assembling the pontoon frames, use the right screws—1 ¾-inch No. 10 flatheads at A and 2 ¼-inch No. 10 flatheads at B, Fig. 3.
The plywood is put on the frame of each pontoon in nine pieces—three on the top and three on each side. Cut the plywood so the bow and stern sections join the center section at the middle of the 1-inch-thick main bulkheads. This leaves a ½-inch edge of plywood on each section for screws.
Make paper or cardboard patterns of each section before cutting the plywood. That will insure [sic] getting all the needed pieces out of the three plywood sheets. Or, if you prefer, lay the frame on the plywood and mark it.
To fasten the plywood to the frames, you’ll need waterproof glue, about two gross of ⅝-inch No. 6 flathead brass wood screws, and some unbleached muslin.

On the center sections and the parts of other sections where the curve of the frame is not too severe, the screws may be spaced 5 to 6 inches apart. Where the curve is sharper, spot the screws 3 to 4 inches apart. Lay out the holes first and drill and countersink them.
Cut the muslin into 1-inch-wide strips. Glue the strips to the edges of the frame where the plywood will be applied. Spread another coat of glue over the muslin. Then place a section of the plywood on the frame, screwing it down firmly. Fig. 6 shows you the method of fastening the plywood and where to trim off overhanging edges.
Cover the sides of the frame first. A couple of coats of plain, lacquer, or enamel should be applied on the inside of the pontoons. The top is put on in the same way as the sides.
After the pontoons are covered and the glue has set, attach the rear blocks. Fill all the seams or rough spots with composition wood. Sand the entire job and cover with marine paint.
If you have difficulty bending the plywood on the few sections where the curve is severe, borrow your wife’s electric iron. Pass the heated iron over the plywood a few times. The heat will make it easier to form a sharp curve.
After the paint has dried, fasten a ⅝-inch or ¾-inch half-round strip of aluminum along the bottom of each pontoon. Form the strip all the way around the bow piece. Put the first screw into the top 1-by-1-inch frame meer. Put the last screw into the rear block. Use 1-inch No. 6 flathead wood screws, countersunk.

Cut the body frames and seat parts as shown in Fig. 4 from ¾-by-10-inch pine. The body frames taper from 3 inches to the width of the stock. Inner ones are 6 feet long, outer 3-foot-9. Fasten the parts together with flathead screws. The footrest, Fig. 8, also is cut from pine—it’s ¾-by-10 inches, by 5 feet. Attach it to the bottom edges of the body frame by screws.
No dimensions for the seat are given. They’ll depend on the size of the riders, who should be able to reach the pedals comfortably.
There are several methods of attaching the body of the boat to the pontoons. You may want to use the one given here or, perhaps, devise your own. In Fig. 5, A is a steel channel used to tie the frame to the pontoons. In the same figure, B is attached directly over the main pontoon bulkheads. The screws of B go into the top 1-by-1-inch frame and the bulkhead. The bolts of B run through holes in A, straddling the pipe crosspiece, which is clamped between A and B.
The stabilizing connectors, C in Figs. 5 and 7, are screwed into place directly over the joint in the plywood. The screws go into the main bulkheads. C is connected to the brace pipes by use of D. These fittings hold the pontoons rigid. The entire body of the boat rests on the two pipes shown in Fig. 8.
These gears may be bought, or if you want to simplify the machine work, it is possible to use a large breast drill as the gear transmission.
If you want to eliminate the gears and the 10- to 14-inch propeller, a suitable mount for the small outboard motor may be built on the rear of the seat. Or, to simplify the driving machinery, you could use pedals but substitute a chain drive and a paddle wheel for the shaft and propeller. An auto generator powered by a storage battery could also be used to drive the propeller.
For its size, the boat is light in weight. Using plywood as pontoon covering, my boat weighed about 230 pounds. The pontoons scaled about 40 pounds each and the frame about 150. An advantage of the metal parts I used to join pontoons and body is that the pontoons may easily be detached from the frame for winter storage.
