The day has come and Microsoft is now officially pushing out Windows 11 to the masses. Roll-out timelines are still uncertain for older machines, but newer PCs are first in line.
Among the changes, the operating system is debuting redesigned menus, which, if you sit in front of a Windows computer every day, you’ll want to set up to your standards.
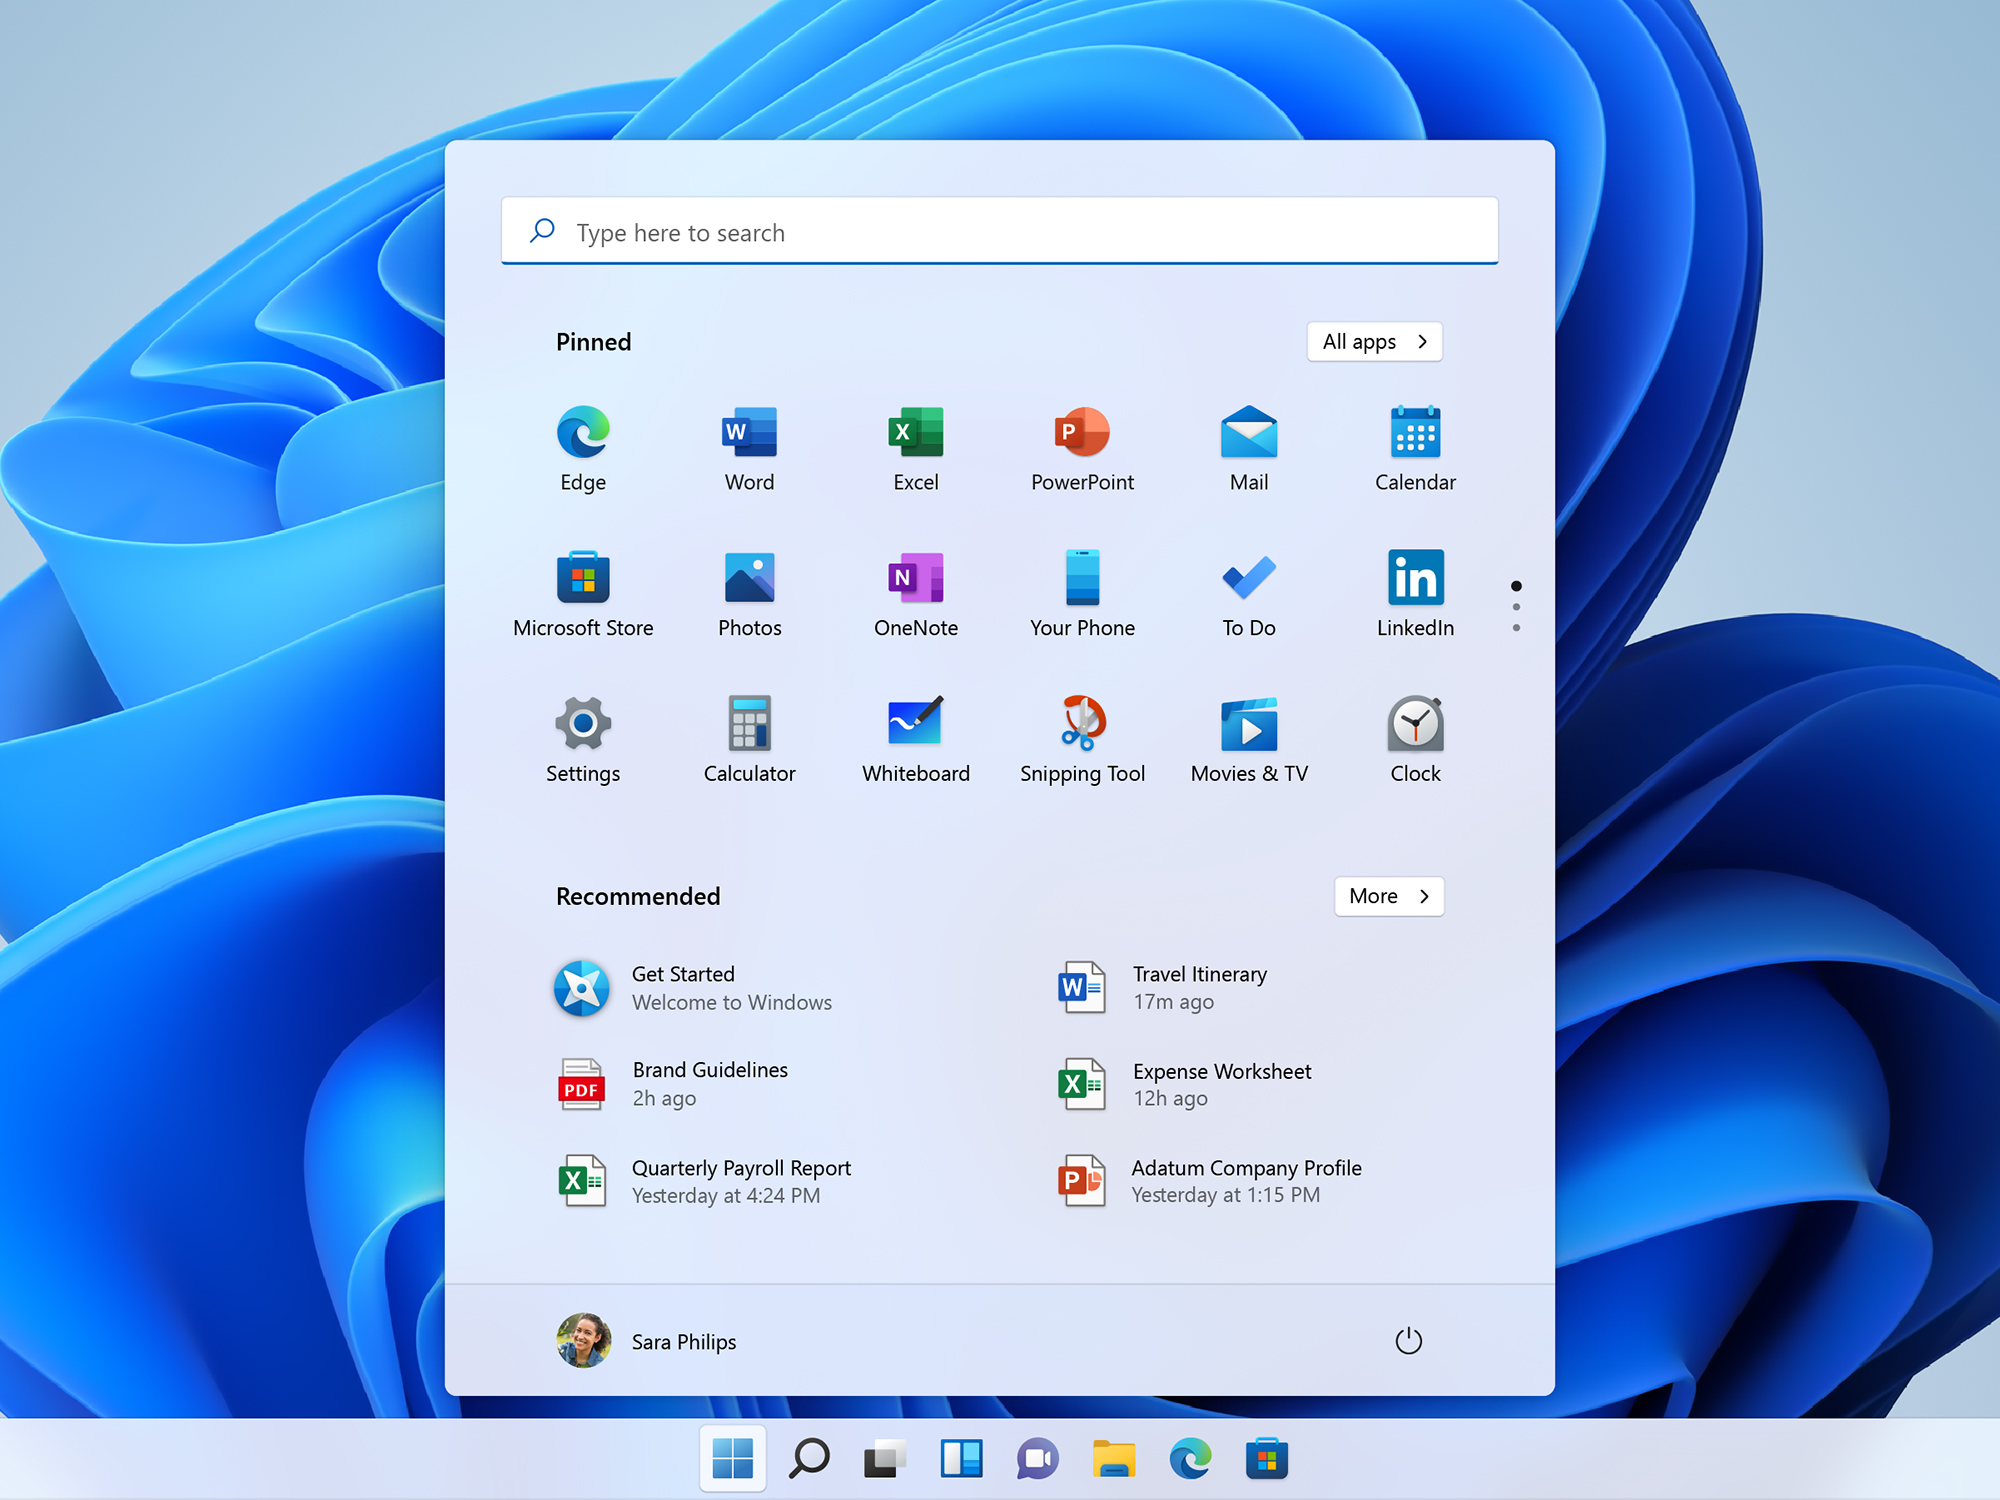
From repositioning the Start menu to checking external monitor settings, you can modify your newly updated system by clicking the Windows button on the taskbar and choosing Settings.
1. Put the Start menu back on the left
One of the most noticeable changes you’ll see in Windows 11 is that the Start menu button (and all your other pinned shortcuts) are centered on the taskbar. To put the Start menu button back on the left, open Settings and select Personalization, Taskbar, Taskbar behaviors, and Taskbar alignment. You can configure various other taskbar options from here, including whether it hides from view when you’re not using it.
2. Choose what the Start menu shows
Microsoft wants the Windows 11 Start menu to be much more of a central hub for your files and folders, not just a list of program shortcuts. You can decide whether to show recently opened items and particular folders in the Start menu by going to the Windows Settings panel and picking Personalization and Start. You’ll then see a list of toggle switches and menu items to specify what you want to see when the Start menu opens.
3. Make use of Snap Layouts
Windows 10 lets you drag programs to the side of the screen to ‘dock’ them on one half of the display, but Windows 11 gives you more layouts to choose from. Hover over the maximize/minimize buttons in the top-right corner of one of the open apps to see your options. To turn this feature on and off, and configure how it works, open Settings and then choose System, Multi-tasking, and Snap windows.
4. Enable dark mode
At this point, just about every piece of software out there offers a dark mode. Windows 11 is no different—you can switch to it from Settings by choosing Personalization, Colors, and then opening the drop-down menu next to Choose your mode. If you select Custom, you can use a different mode for applications and for Windows itself. Further down the screen you can set the accent color the operating system uses on interface elements, such as clickable links and the title bar on every window.
5. Connect your Android phone
Windows 11 builds on its predecessor’s Your Phone tool. This makes it even easier to connect an Android phone to your machine to transfer files between devices and send texts from your computer, for example. To set up the connection, open Windows Settings and pick Bluetooth & devices then Your Phone. The system will guide you through the process, which involves installing an app on your Android phone to establish the link to your PC.
6. Streamline the Windows update process
Microsoft has tried to make updates even more efficient and seamless in Windows 11, and if you open Settings and select Windows Update you can see (and manage) some of these new features. Choose Advanced options to enable faster restarts, configure bandwidth use, and set which times of the day you want your computer to install patches—you don’t want to be interrupted in the middle of a gaming session, for example.
7. Configure accessibility settings
The newest version of Microsoft’s operating system is more accessible for everyone, turning the Ease of access menu into the Accessibility menu on Windows 11. The options include color filters, text size, closed captions, and eye control. You can also select Speech to try out the new and improved Windows Voice Typing experience.
8. Check on the battery
Windows 11 comes with a redesigned and improved battery health screen. You can find it by going to Settings, System, and Power & battery. Compared to Windows 10, there’s a more detailed breakdown of how your battery level changes over time, and what’s causing battery drain. Scroll down and pick Battery usage to see which apps have sucked your computer’s energy the most since you last connected your laptop to a power outlet.
9. Turn on HDR
HDR (High Dynamic Range) manages the balance between the darkest and the lightest areas of whatever’s on screen, making sure you see all details. Windows 10 supported the feature, but Windows 11 adds even more, including gaming support. To set this up, from Settings choose System, Display, and HDR. Note that the options you see on the screen will depend on the HDR support your PC’s display offers.
10. Remember external monitors
On Windows 10, disconnecting an external monitor will shift all of your application windows back onto the primary screen. This forces you to move them again from scratch when you reconnect the monitor. However, Windows 11 can remember secondary display layouts: From Settings go to System, Display, and Multiple displays, and check the box labeled Remember window locations based on monitor connection.
