In our modern connected age, where pretty much everyone carries an excellent camera in their pocket wherever they go, people tend to collect a massive amount of data. A lot of that information ends up back on the web, but when you share images and video on Facebook, Twitter, Instagram, and the like, you depend on the nebulous “cloud” to keep your data safe and accessible. You could also store data on a local hard drive, but it’s pretty hard to access one of those remotely, or from other devices.
Another solution is a network attached storage (NAS) device, which stores data locally, like a hard drive, but acts as a server that anyone on your network, or even over the internet, can access.
Professional solutions for such devices can be pricey, but you can, in fact, make your own NAS setup with a Raspberry Pi computer and the external drive, or drives, that you may already be using to access your files. It won’t cost much, either, especially if you already have some of the components available.
Stats
- Time: 1-2 hours
- Cost: $150
- Difficulty: moderate
Materials
- Raspberry Pi
- MicroSD card (8GB or larger)
- Powered USB hub
- USB keyboard
- USB mouse
- HDMI monitor
- HDMI cable
- External USB hard drive or SSD
- USB cable
Install your operating system
1. Format your SD card. Exact instructions will depend on the computer you’re using to set everything up, but if it’s running Windows or macOS, download the SD Association’s formatting tool and use that. If you’ve never set up a Raspberry Pi before, we recommend checking out our guide on getting started with the little computer.
- Note: The process described here was tested on a Raspberry Pi 3B, 3B+, and a 4B, but other versions should work, too.
2. Download New Out Of Box Software (NOOBS). Opt for the Lite version, which will allow you to choose your preferred operating system and have it installed as it loads onto the Pi’s SD card.
3. Power your Pi. Plug the SD card, the monitor, the keyboard, and mouse into the Pi and turn on the power. I used the powered USB hub’s charging port to supply the Pi itself. This port is capable of providing 2.4 amperes of current, which is slightly below Raspberry Pi’s recommended current capacity.
- Note: The third-party hub I used appears to be sufficient for this setup, but you can use an official Pi power supply if you’re in doubt. Other power supplies with dedicated charging ports should also work, but make sure the current output (amps) is as close to 2.5 as possible.
4. Install Raspbian. When prompted, enter your Wi-Fi credentials and choose Raspbian as your operating system—not Raspbian Full [Recommended] or Raspbian Lite. The first will install software you don’t need, the second won’t install a graphical user interface, which you’ll need as you follow these instructions. Then, follow various setup prompts and updates.
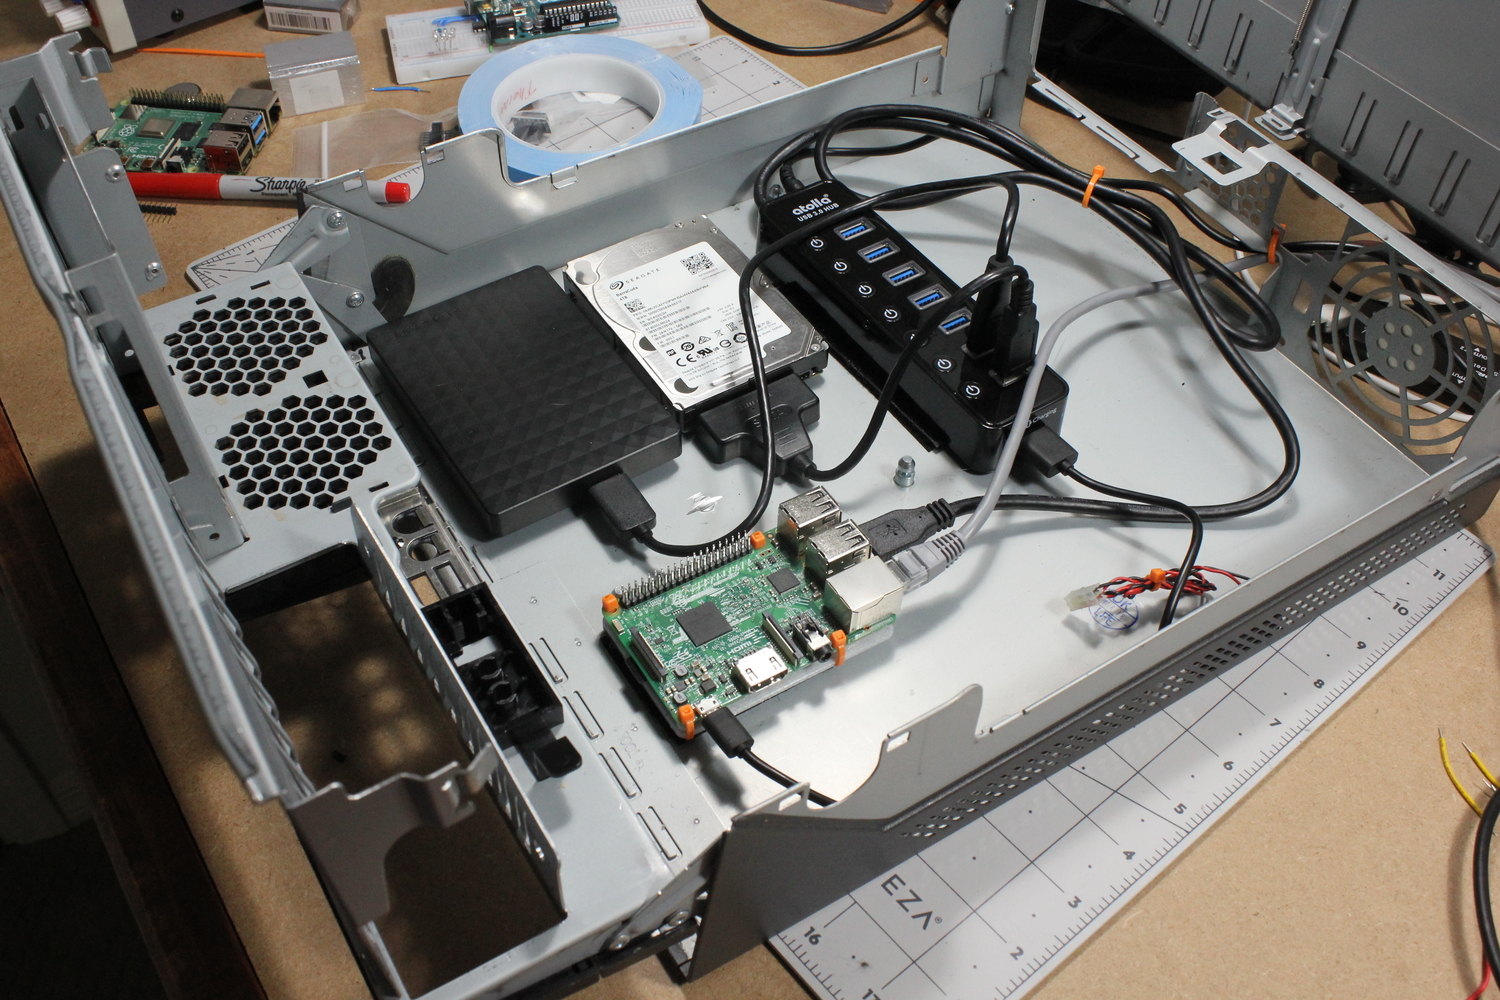
5. Plug in your hard drive. Whether you’re using one or multiple drives, plug them into the USB hub via the USB cables, and when the Pi acknowledges their presence, click OK to view them in the file manager. This will tell you the path you’ll need in Step 8. You can also create a new directory on the drive, so keep this window available.
Enter terminal commands

6. Enter the terminal. Do so by clicking on the dark icon toward the left on the upper taskbar (it has a <_ symbol on it).
7. Make sure your system is up to date. First, enter sudo apt-get update, then sudo apt-get upgrade, to make sure you’re running the most recent software. Then, enter sudo apt-get install samba samba-common-bin, followed by y, to start the process. A screen will appear asking if you want to Modify smb.conf to use WINS settings from DHCP; arrow over to Yes and hit enter.
- Note: These commands are case-sensitive.
8. Modify the configuration file. Next, enter sudo nano /etc/samba/smb.conf, which will open the nano terminal-based text editor. Scroll down to the bottom with the arrow key or page down and enter the following:
- [popshare] (Or whatever you’d like to call your shared storage space.)
- path = /media/pi/YourHardDrive/SharedDirectory (Substitute in the path from Step 5, leaving out the “/SharedDirectory” if you want to access the entire hard drive remotely.)
- writeable=yes
- create mask=0777
- directory mask=0777
- public=no (This means you and anyone else will need a user ID and password to access the drive remotely.)
9. Leave the text editor. Hit Ctrl + x to exit, then Y and Enter to save the file and go back to the normal terminal interface.
10. Create a user. In the normal terminal interface, enter sudo smbpasswd -a pi, to create a user called “pi.” You’ll be prompted for a password, which you could assign as “raspberry” to match the system’s default login, but you’ll likely want to change both to fit your purposes. Also, you may prefer a username other than “pi,” though it is easy to remember. Finally, enter sudo systemctl restart smbd. If you did everything correctly, you’ll be able to access your directory from other PCs on your network.
Access your files
11. Open File Explorer in on a separate Windows PC logged onto the same network. Then, navigate to This PC. Click on the Computer tab, then Map network drive. You shouldn’t have to change the drive letter, but plug in raspberrypipopshare under the Folder: input field. Enter your username and password from Step 10 when prompted. When that’s done, you’ll have a new “network location” under This PC where you will be able to access files like any other folder.
12. Repeat the process for other computers on your network. This will allow several family members, friends, or colleagues to share the same drive.
Hard wire
Once your drive has been set up, you may notice that the speed isn’t what you’re used to, especially if you normally use a hard drive connected directly to your computer. With everything unplugged, you’ll see speeds of 2-3MB per second, depending on your network traffic, as opposed to speeds around 100MB per second (or, theoretically, much more) when using USB 3.0 to transfer files directly. One easy way to improve this speed is to physically plug the Pi into your Wi-Fi router, letting an Ethernet cable handle that side of the traffic, rather than putting everything on the airwaves.
In my case, hardwiring the Pi led to a roughly 200 percent jump, with speeds in the range of 6-9MB per second. Note here that Windows measures speed in megabytes per second (MB/s), which is eight times faster than the megabits per second (Mb/s) that you see advertised for internet speeds. So, 9MB per second is actually 72Mb/s, which doesn’t sound quite so bad in internet speak. Theoretically, you could go even further and hard wire your PC or laptop to the Ethernet switch, but this would obviously hamper portability.
Note that the revision of the system in use now is a Raspberry Pi 3B. The Raspberry Pi 4B, with its USB 3.0 ports, would seem to be an obvious upgrade, but it appears that the speed bottleneck here is the fault of the Wi-Fi, not the Pi itself.
Going further
What’s outlined here will give you a functional storage space for all your stuff, and if you want to add new hard drives or shared directories, you can add the necessary text to your smb.conf file below what’s already there. Just follow the same procedure you would to set up a new drive. This could be useful if you wanted a family drive full of photos, video, and more, but another dedicated to your home office.
One important note here is that your data in this configuration is not backed up in any way. If you want some modicum of protection, you could set up a RAID array (redundant array of inexpensive disks). That way, if one disk fails, the other has a copy of your data. Another solution would be to copy modified files at a certain interval onto another drive that’s kept in a safe place to provide a physical backup of important files. You could even back your data up onto the cloud with a service like Google Drive or Dropbox, though if you’re doing that, you might consider whether you really want a NAS.
Another thing to consider is that Raspberry Pi’s don’t really enjoy being unexpectedly turned on and off, so buying a UPS (uninterruptible power supply) to keep the power flowing is a good idea. You could even share this power supply with your router to allow for wireless access to files even during a power outage. Also, enabling secure shell (SSH) remote access is a smart way to shut your NAS drive down and make other modifications. It’ll let you check on things without hooking up a monitor, keyboard, or mouse.
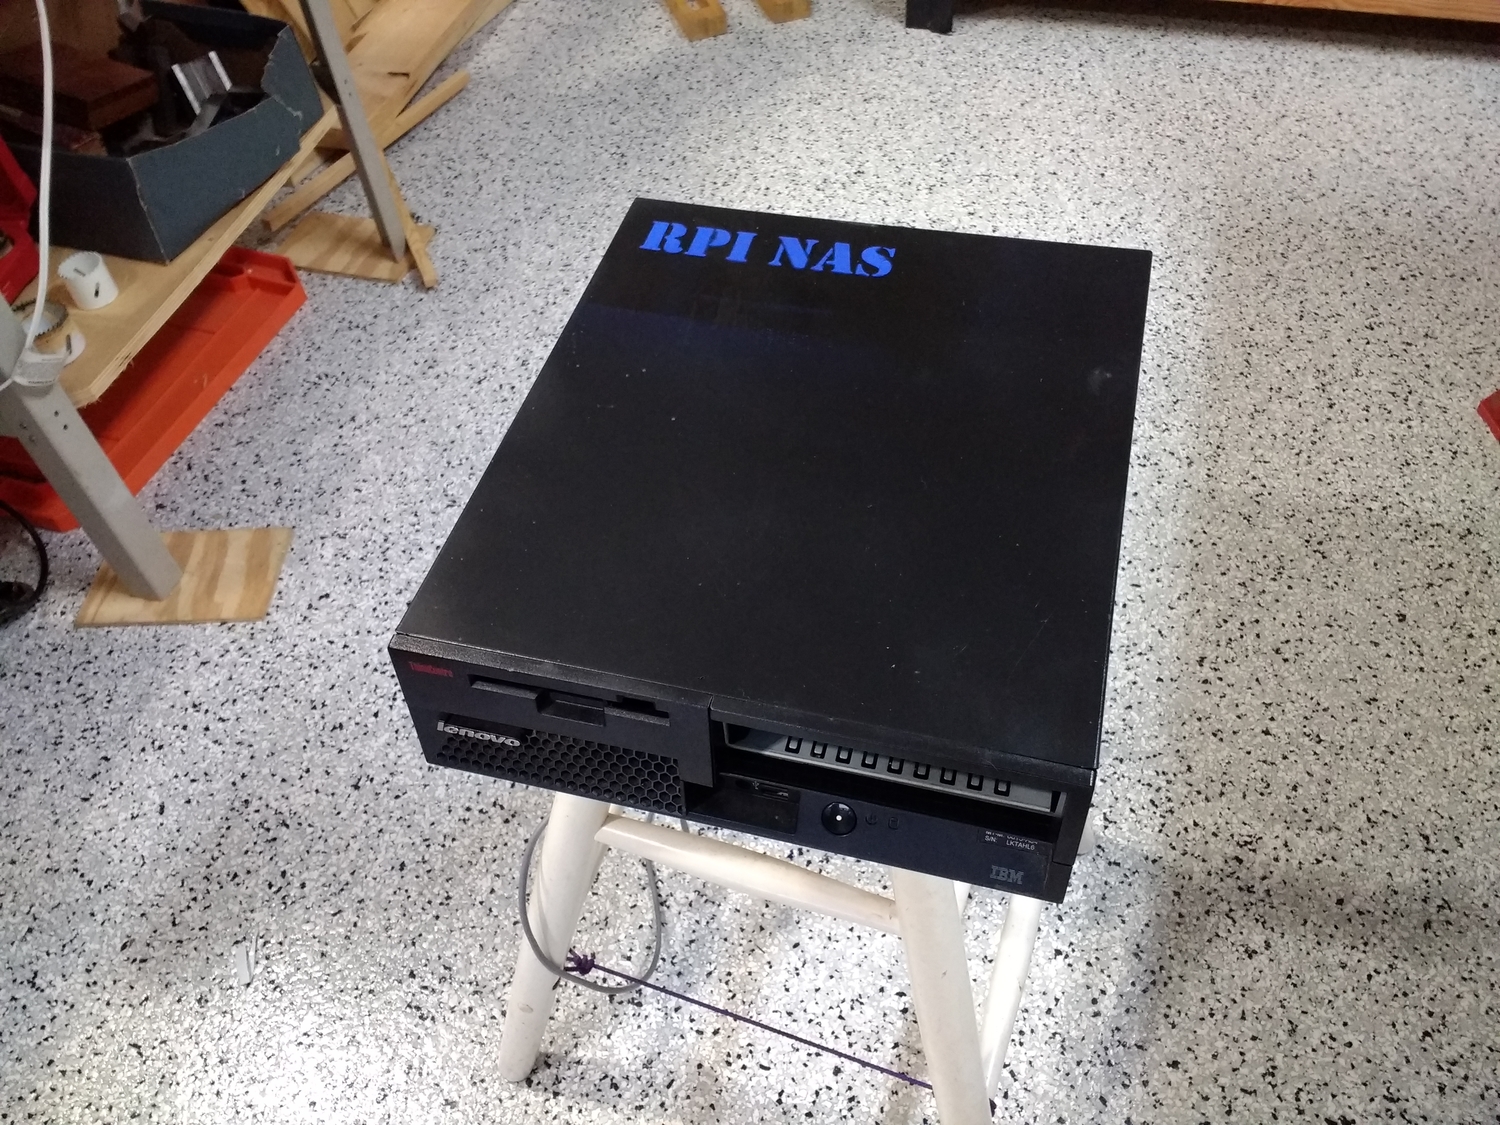
Of course, you’ll need some sort of enclosure to put everything in—I used a stripped-down desktop computer case. A heat sink or other cooling solution is a good idea, too. You can buy these online, but I actually modified and recycled one from the same computer that provided the enclosure.
In other words, if you’re a bit of an internet and PC “gearhead,” constructing the perfect Raspberry Pi NAS for speed, easy access, and redundancy is a job that never has to end. Setting one up can be useful for the near-instant access to a huge amount of network data, but don’t be surprised if it becomes a new hobby and ends up eating up a lot of your time as you try to get it “just right!”
