We may earn revenue from the products available on this page and participate in affiliate programs. Learn more ›
Biting the heads off chocolate bunnies is fun, but the real thrill of Easter is dyeing eggs.
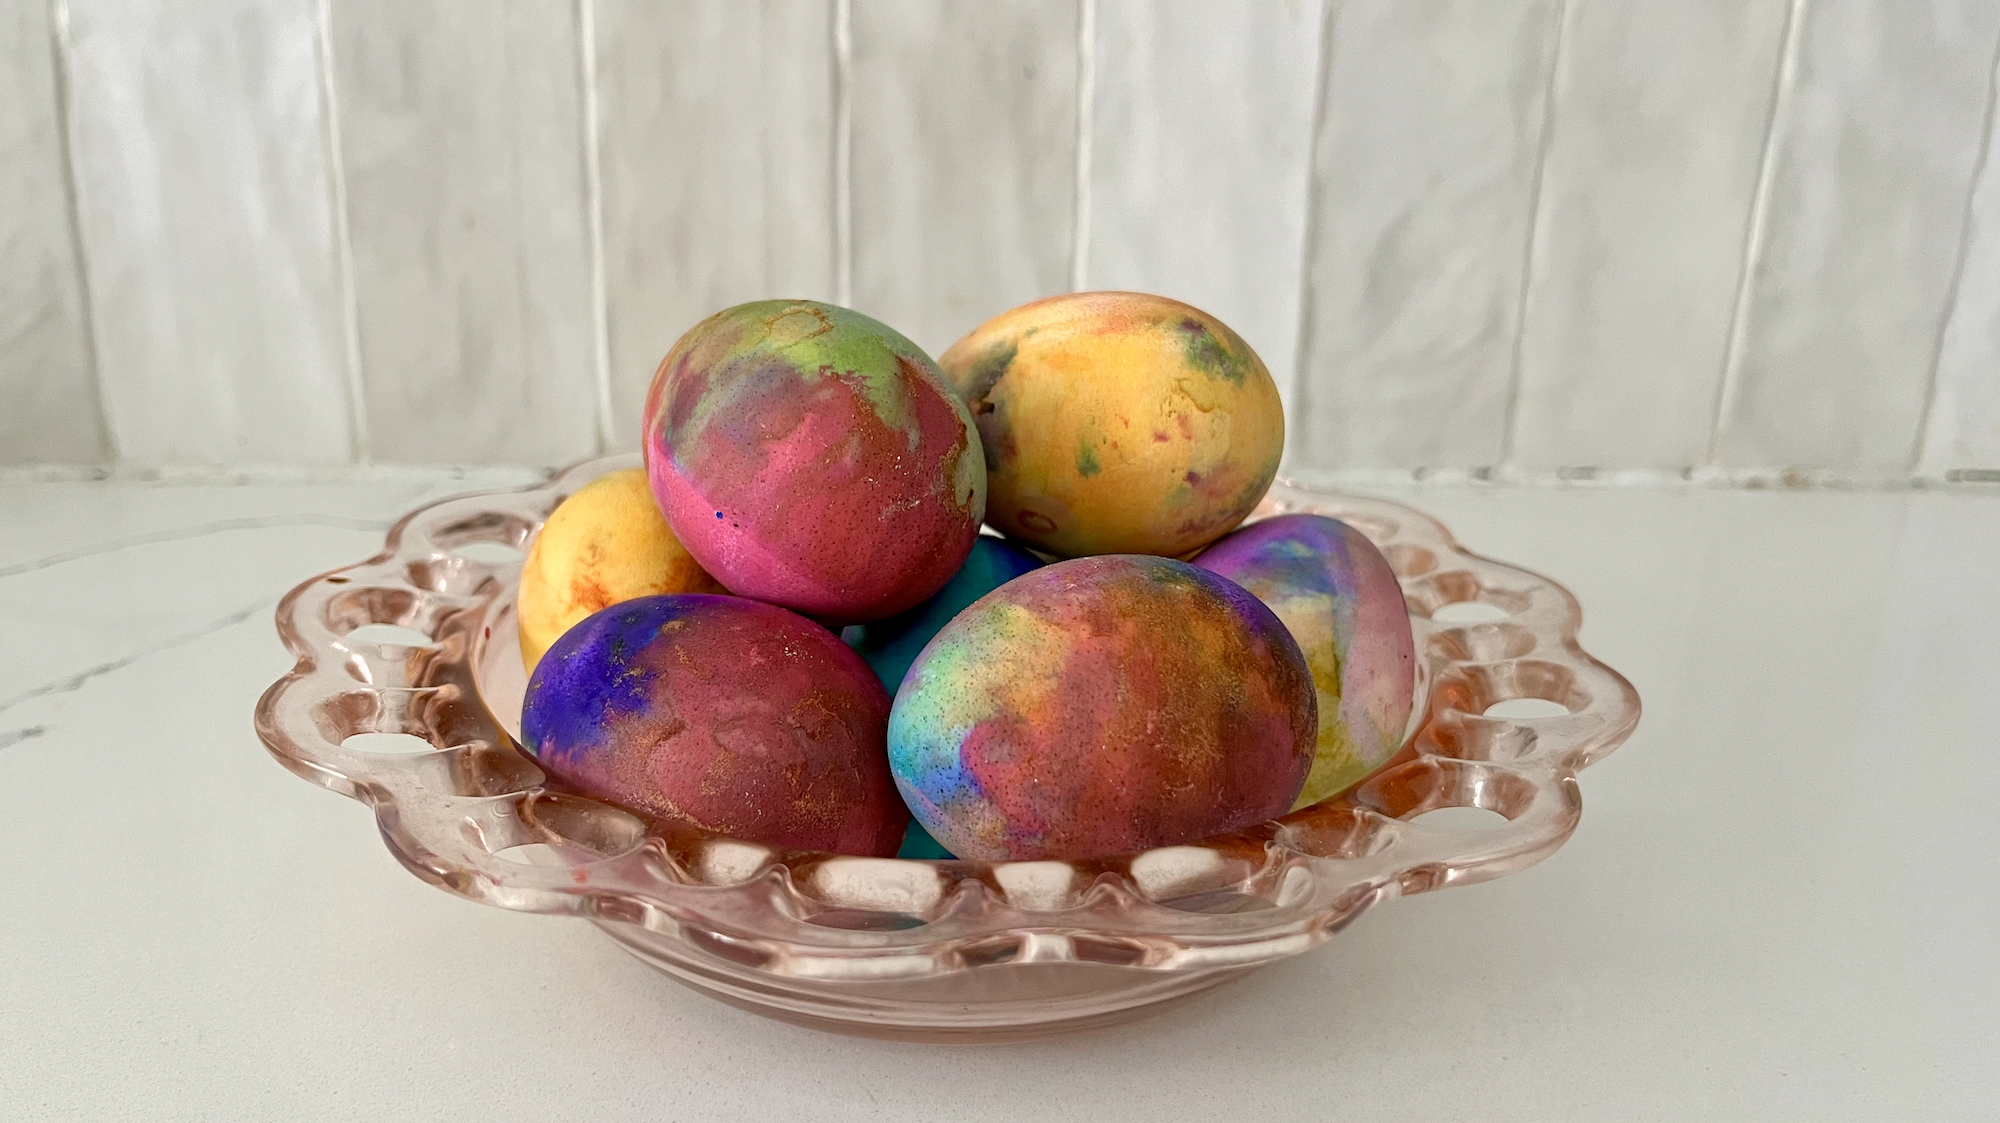
Maybe you grew up with the classic Paas tablet kits or your parents tried to dye Easter eggs the natural way with beets and turmeric. Both techniques will result in pigmented eggs but neither can match the science fair-style fun of volcano eggs. That’s right, these eggs rely on the same baking soda and vinegar chemical reaction that made your papier-mâché volcano bubble over in fourth grade. But instead of resulting in a sticky mess of newspaper strips, you’ll end up with a colorful array of dyed eggs that look like a tie-dyed nebula.
So go ahead and add more POP to your Easter eggs this year. (Popping bubbles, that is.)
What you’ll need to make volcano eggs
Ingredients
- White eggs
- Distilled white vinegar
- Baking soda
- Food coloring
- Water
Tools
- Muffin tin
- Paintbrushes
- Toothpicks (or something for stirring)
- Bowl
- Rubber or latex gloves (optional)
Activity time
- 30-60 minutes
Set up
- This project can get messy. We placed an old towel under a small laminate art table. You could also do the project outside, but I wouldn’t recommend dyeing the eggs on grandma’s beloved, antique wood table. My project assistant was a 6 year old who rated the fun a “10 out of 10.”

Directions
- Boil eggs in water with 1 tablespoon of white vinegar. Allow to cool.
- Fill each muffin tin cup with 1-2 tablespoons of baking soda, depending on how much “paint” you’d like to create.
- Add 5-15 drops of food coloring to the baking soda in each muffin tin cup.
Note: On first attempt, we used “natural food coloring” and the final product’s colors were quite dull. If you’re looking for something brighter (like our final product, seen above), use traditional food dye or the McCormick neon food coloring. - Add a splash of water to each cup and stir with toothpicks to create a paste-like consistency. Add more water or baking soda to get the proper consistency.

- Use a small paint brush to paint your eggs with the baking soda and food coloring paste.
Note: You can also use your hands to dip the eggs, but may want to wear gloves to avoid colorful finger tips. - After completing your painting masterpiece, place eggs in a bowl to let the color set for 5 minutes.
- While the color is setting, wash and dry muffin tin (or use additional tin). Then, scoop 1 tablespoon of baking soda in each cup.
- Place one painted egg on top of baking soda in each cup.
Note: For even brighter colors, add a few more drops of food coloring directly onto eggs in the cups.

- Now it’s volcano egg time! Add a hefty splash of vinegar to each cup. Allow the bubbles to fizz out before moving onto the next cup.
Note: If you don’t want the egg colors mixing, use less vinegar. If you, like us, enjoy chaos, use more vinegar and let all the colors run into each other.
- After “exploding” (as my child called it) all your eggs, place eggs back in carton or on wired rack to dry. Use tongs or a spoon to move eggs, if you’re trying to keep fingers dye-free.
Note: We didn’t use gloves and it took 3-5 hand washes to remove the dye from our fingers.
And that’s it! Sit back and admire your beautiful color-explosion volcano eggs while biting the head off a chocolate bunny.

