Before the dawn of synthetic dyes, all fabric was colored with natural pigments. Today, you can continue this ancient practice in your kitchen with a few simple tools and common ingredients that are safe for your cookware and available at any grocery store.
Stats
- Time: About 3 hours, plus 12 to 24 hours of steeping
- Cost: About $25 per color
- Difficulty: Moderate
Materials
- A 100 percent cotton T-shirt (or a similar volume of cloth made from natural fibers)
- 2 to 3 cups of white vinegar
- Dye ingredient of choice (see Step 1)
- Water
- (Optional) salt
Tools
- 2 large cooking pots
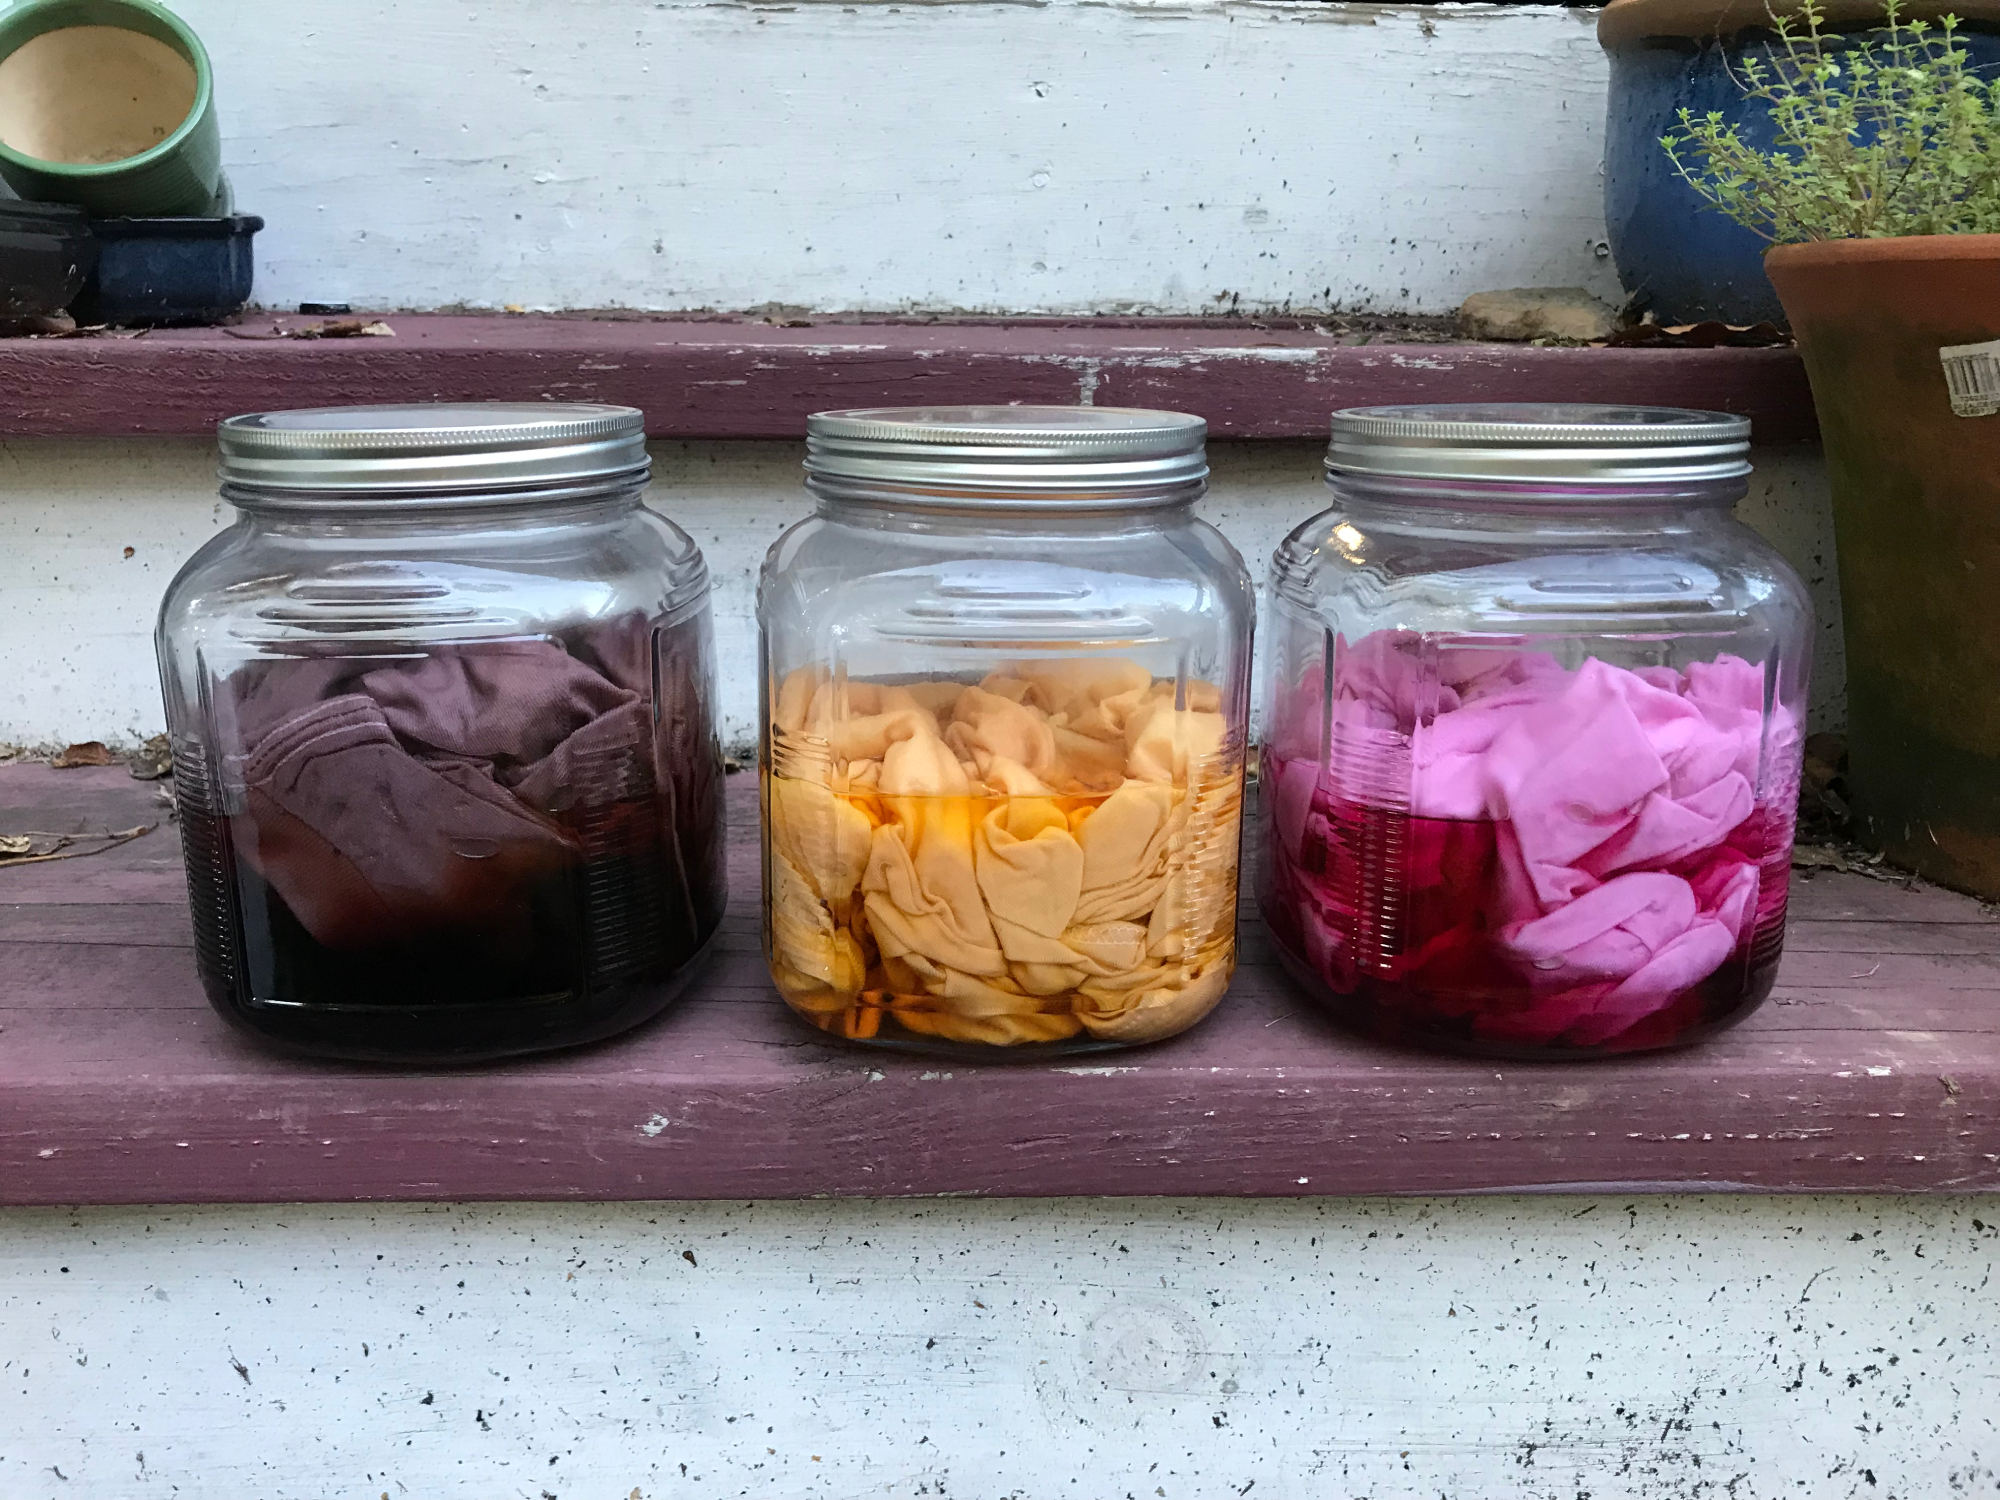
- Large jar with lid (half-gallon jars work well)
- Sieve (or slotted spoon)
- Tongs
- Plastic or wooden clothes hanger
- (Optional) iron and ironing board
Instructions
1. Prepare your dye bath in a large cooking pot. Choose the color you want to achieve from the list below, and always prepare more dye than you think you’ll need, as hours simmering on the stove will reduce its volume. Your finished dye (with food items removed) should fill a large cooking pot at least halfway.
- Yellow: Remove the skins from eight to 10 yellow onions. Place the skins in a cooking pot and cover them with water, then simmer on low heat for 30 to 45 minutes. Remove the skins with a sieve or slotted spoon.
- Pink: Remove the outer leaves and roughly chop a small red cabbage. Maximize its surface area by separating the tightly packed layers. Simmer 3 cups of cabbage, 6 cups of water, and 2 to 3 teaspoons of salt for one hour. Remove the cabbage pieces with a sieve or slotted spoon.
- Green: Roughly chop or rip up one 16-ounce container of spinach leaves. Simmer them in a pot of water for one hour. Remove the spinach pieces with a sieve or slotted spoon.
- Peach: Remove the skins and pits from six to 10 avocados. You can use the tasty flesh for another recipe. Simmer (but do not boil) the skins and pits in a pot of water for one hour. Remove the skins and pit pieces with a sieve or slotted spoon. You can also try salvaging unwanted skins and pits from a local restaurant by asking very nicely.
- Purple: Cover about 16 ounces of dried black beans with 1 inch of water. Let them soak for two to three hours or as long as overnight, stirring occasionally. Our tests found that beans soaked for two hours and beans soaked for 18 hours produced a similar final color. You may need to add a little extra water as the dried beans soak it up. Remove the soaked beans with a sieve or slotted spoon. You can now use them in another recipe if you like.
- Fuchsia: Add 6 tablespoons of dried hibiscus flowers—available in the tea aisle or international foods section of many grocery stores—to 6 to 8 cups of water and simmer for 30 minutes. Be sure to use real hibiscus tea (made from only the dried flowers) and not hibiscus-flavored herbal tea. Remove the flowers with a sieve or slotted spoon.
- Orange: Shred six to eight large carrots into a cooking pot and cover them with water. Add a handful of salt and simmer for one hour. Remove the carrot shreds with a sieve or slotted spoon.
2. Heat one part vinegar and four parts water in another large cooking pot. This is your mordant liquid, which removes finishing chemicals from your fabric and makes the dye adhere better to the cloth. Prepare enough to cover all the fabric you plan to dye with enough room for it to move around when stirred.
3. Simmer your fabric in the mordant for one hour. Begin this process when your dye bath is around one hour from being finished.
- Note: For black bean dye, you will need to make the mordant at least an hour after you start the dye bath. For onion skin or hibiscus dye, you should get the mordant simmering, then start the dye bath. For most of the other dyes listed above, start the dye around the same time as the mordant.
4. Remove the fabric from the mordant and place it in the dye bath. Press any excess vinegar-water out of your fabric with tongs or a colander before adding it to the dye.
- Warning: If you haven’t removed produce chunks or ingredient residue from the dye bath, do so now, before you put the fabric in. Your dye should be lightly simmering when you add the fabric.
5. Simmer your fabric in its dye bath for one hour.
6. Turn off the heat and let your dye bath cool. Keep the fabric soaking in it.
7. Transfer your dye and fabric to a large glass jar and soak overnight. When its contents are completely cool, you can put the lid on the jar. You can also leave your cooled dye and fabric in the cooking pot with a lid on, but there’s a small chance that the dye may stain your pot.
8. Remove the dyed fabric and rinse it with cool water. You can do this in a sink or use your garden hose outside—this natural dye won’t hurt your lawn. Some dye will wash out, but the fabric should still hold some color. If you like, you can keep the remaining dye in its jar for future projects.
9. Hang your dyed fabric to air dry using plastic or wooden materials. Learn from the author’s mistake: do not use uncoated metal hangers, clothespins, or drying racks to dry the fabric. Any metal that comes into direct contact with the wet fabric can stain it permanently.
10. (Optional) Iron the finished product. This isn’t necessary, but the heat can help set the color and give your garments a professional look.

