
It won’t be finished nor officially launched until later in the year, but macOS 14 Sonoma is now available as a public beta. This means that anyone who wants to try this early version of the software can do so.
For developers, making beta software available to download is a great way of having a wide group of people test their code so they can fix any remaining problems. For users, it’s a chance to access new and improved features earlier than they ordinarily would.
Bear in mind that you do this testing at your own risk, as public betas usually come with some bugs and issues. Some of your favorite programs may not work properly, and you may see problems such as battery life drain. That said, Apple betas are generally reliable and stable, but they still recommend installing the software on secondary devices that are not “business critical”.
If you do decide to give macOS 14 Sonoma a go, make sure all your important data is safely backed up before proceeding. Once that’s done, you can start enjoying the best features of Apple’s newest operating system.
How to install the macOS 14 Sonoma public beta
The macOS 14 Sonoma public beta will run on all relatively new Macs:
- 2017 iMac Pro or later
- 2018 MacBook Air or later
- 2018 MacBook Pro or later
- 2018 Mac Mini or later
- 2019 iMac or later
- 2022 Mac Studio or later.
If you think your machine qualifies and you want to join the program, open up the Apple Beta portal in Safari on your Mac, then click Sign up to register for the macOS beta using your Apple ID. If you’ve already registered to run beta software on an Apple device, click Sign in instead. You’ll have to agree to the terms and conditions that confirm you know what beta software involves.
[Related: 6 great features to try out in the iOS 17 public beta]
With that done, switch to the macOS section of the Apple Beta page, click Enroll your Mac, and Open Software Update. This will take you out of Safari and into System Settings: Click Beta Updates > macOS Sonoma Public Beta > Done.
Your Mac will then check for and download the latest public beta version of macOS, and will let you know when it’s ready to install. After a restart, you’ll be able to explore everything that this new version of the operating system brings with it.
1. Desktop widgets
Apple has been busy adding widget functionality to iPhones and iPads in recent years, and now it’s the turn of the Mac. For the first time, you can add widgets to the desktop as well as the Notification Center, making them more accessible and easier to refer to.
Right-click anywhere on the desktop and choose Edit Widgets to see what’s available—you can browse through the widget selection by app using the options on the left. To add a widget from the list, click on the green + (plus) icon or drag it over to the desktop. You can also add widgets from the Notification Center just by dragging them onto the desktop.
Once in place, you can rearrange and organize your widgets by dragging them. Finally, right-click on an applet to open its settings, where you’ll be able to tweak its details or remove it completely.
2. New screensavers

Apple has put together some gorgeous new slow-motion screensavers to mark the arrival of macOS 14 Sonoma—from whales and jellyfish swimming underwater, to the rolling landscapes of Hawaii and Yosemite National Park.
Open the Apple menu, then choose Screen Saver to see them. When you select a screensaver, the toggle switch at the top gives you the option to set an accompanying still image as your desktop wallpaper too.
3. Dock web apps
From Gmail to Slack to Instagram, a lot of the apps we use every day run in a browser. On macOS 14 Sonoma you’ll be able to pin these web apps to the dock, where you can launch them as you would a normal desktop application.
All you need to do is open up a web app in Safari, then select File > Add to Dock and specify a name for the shortcut. As well as showing up on the dock, the web app will also appear in Launchpad and you’ll be able to find it through Spotlight search.
4. Safari profiles
Apple’s browser Safari has now caught up with Google Chrome in offering profiles. This feature allows you to have one profile for business and another for leisure time, for example. Each profile works independently from others, so it has its own separate browsing history, extensions, and tab groups.
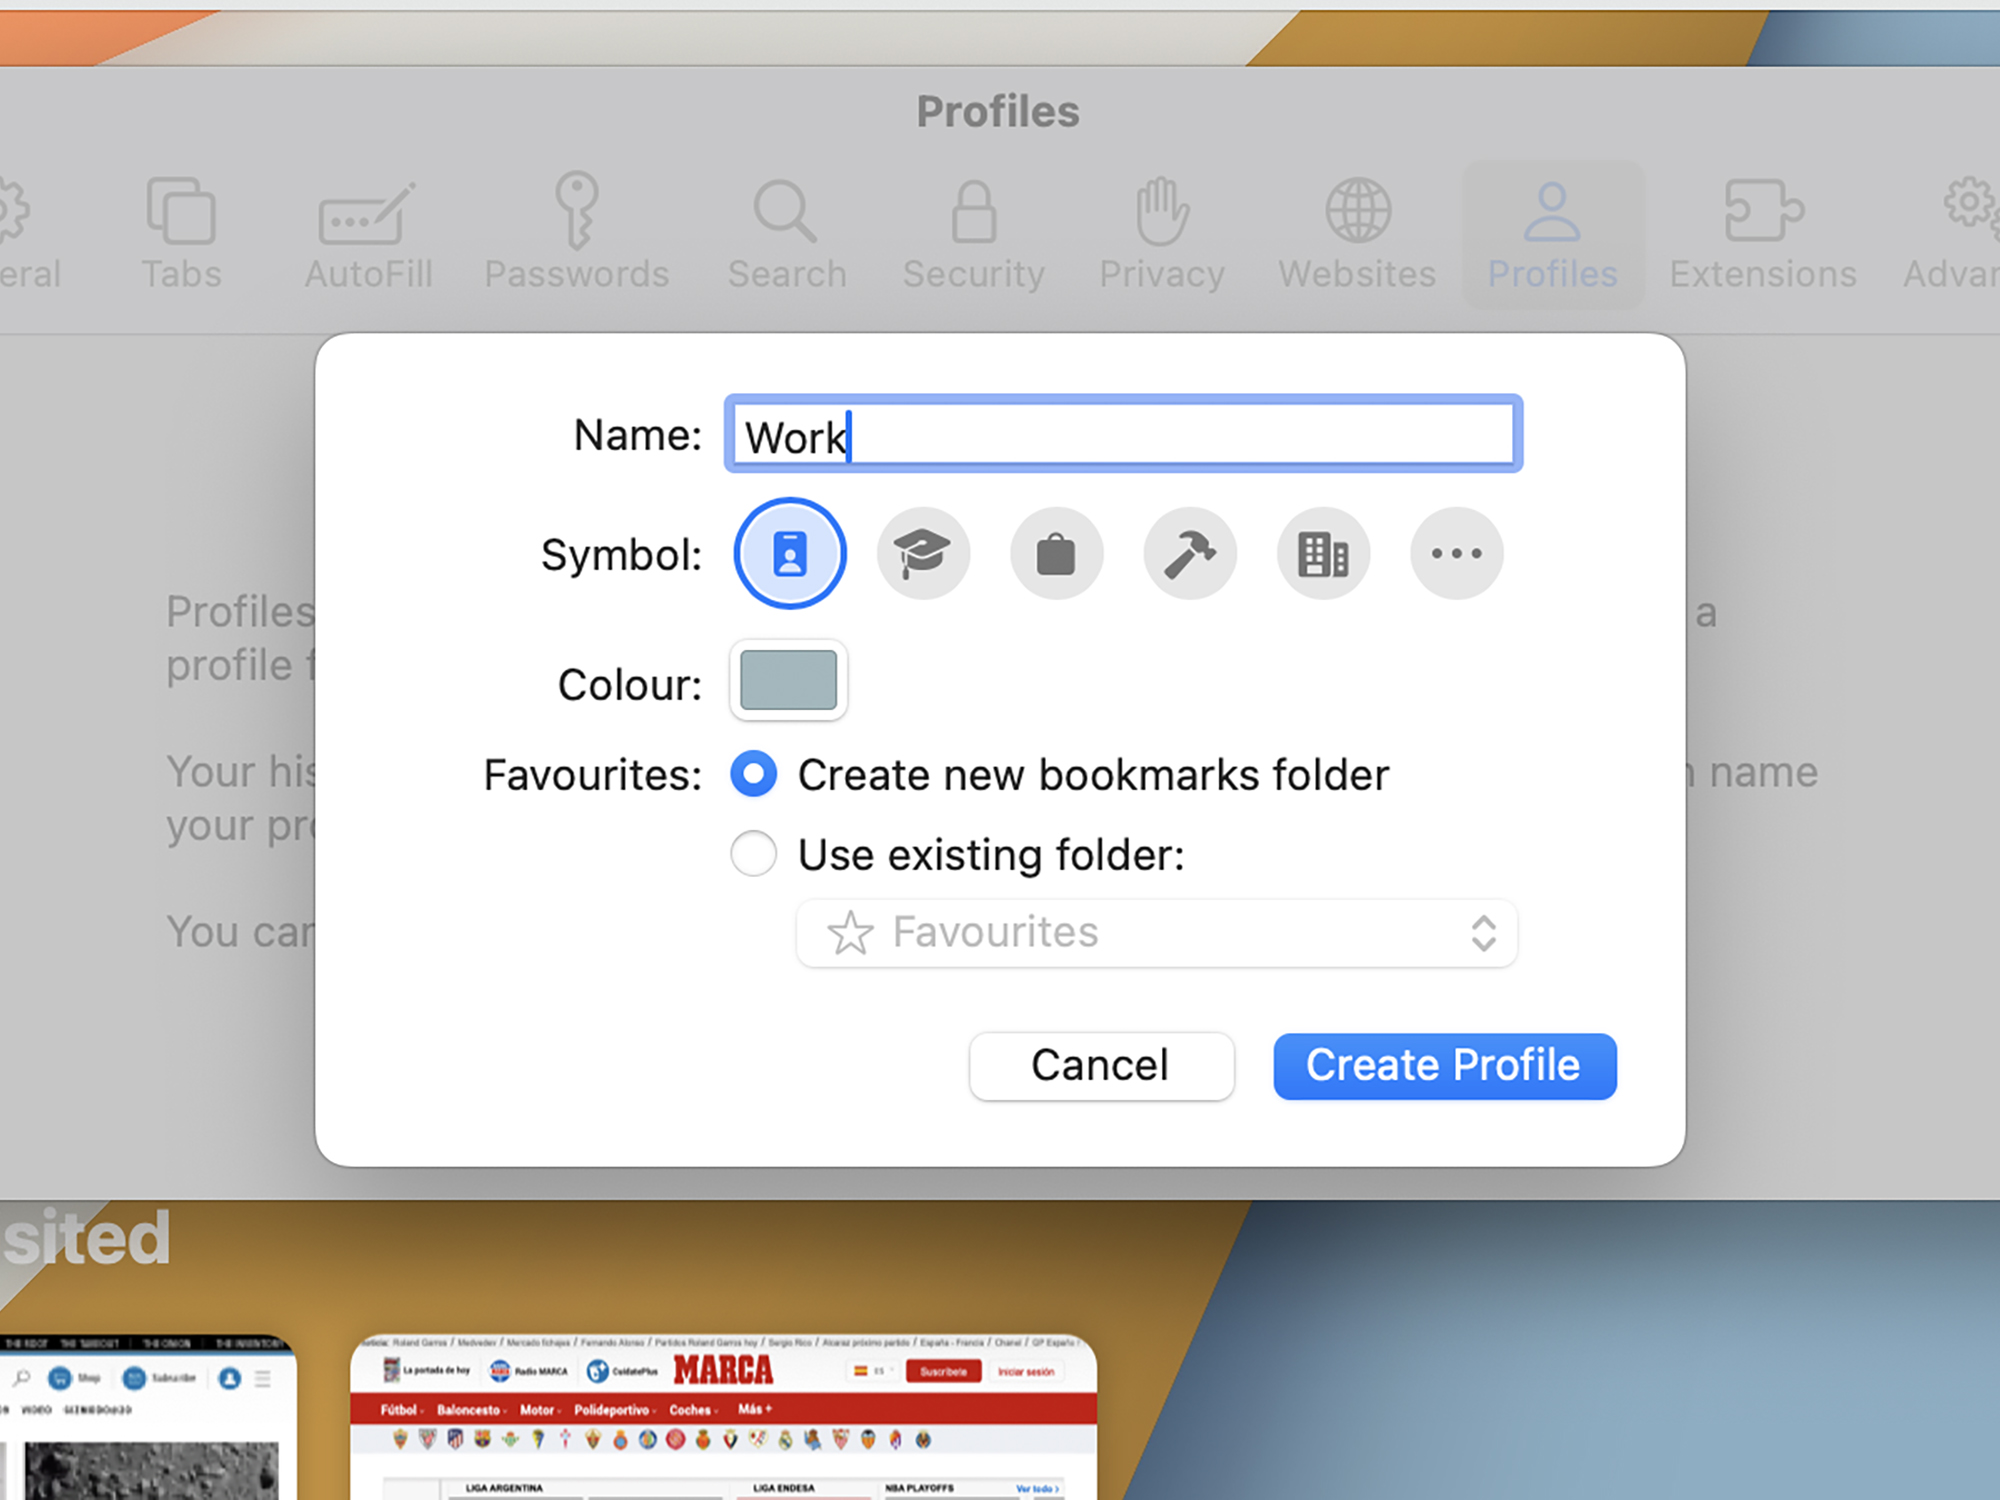
To create a new profile in Safari, click Safari > Settings > Profiles > New Profile. You’ll be able to choose a name, icon, and color for the new instance, as well as set up a new favorites folder or import an existing one.
When you’ve set up a second profile, a little drop-down menu appears in the top left corner of the Safari interface—open it up to switch between profiles. Head back to Safari > Settings > Profiles to further configure each instance and remove any that you no longer need.
5. Improved message search
There are a host of smaller upgrades for native apps on macOS, including better PDF support in Notes and some auto-categorization functionality in Reminders. One of the most notable among these updates is the introduction of search filters in Messages.
[Related: Duck yeah, Apple’s next autocorrect update makes it easier to swear]
Open the Messages app, click inside the search bar, and look for a contact to find conversations with that person. When you select the contact, now you’ll also see Link, Photo, and Location options, so you can narrow down your search.
6. Presenter Overlay
Apple’s macOS 14 Sonoma is adding a new video conferencing feature called Presenter Overlay. This tool allows you to stay visible to other participants while sharing something on your screen, like a slideshow. It should work with just about every video calling app eventually, but right now it only works with FaceTime and Zoom.
When you’re on a video call in FaceTime, click the Share Content button on the video feed (a small figure in front of a screen). A new dialog appears letting you choose whether to share the whole screen or a specific window. The Presenter Overlay options are on the same dialog: You can appear in a small bubble or as a larger overlay.
