When Klondike announced it was discontinuing the Choco Taco, fans of this 39-year-old ice cream truck staple inundated the Good Humor-Breyers brand with social media comments spanning the entire five stages of grief. And now there are rumors it could be making a comeback. Bah—ignore all that noise. Ascend beyond it.
One of the benefits of DIY is that you’re not beholden to the whims of a corporate bottom line. You can do whatever you want, and that includes making your own Mexican cuisine-inspired ice cream treat. Whether you actually enjoyed the Choco Taco or thought its waffle cone shell got a little too soggy too fast, you can absolutely slap together a tasty homemade version, and we can help you get started.
Stats
- Time: 1 to 2 hours
- Difficulty: easy
- Yield: about 12
Ingredients
Waffle cone
- ⅔ cup of flour
- ¼ teaspoon of salt
- ½ cup of brown sugar
- 2 eggs
- ¼ cup of unsalted butter
- ¼ cup of milk
- 1 teaspoon of vanilla extract
- (Optional) cooking oil (or cooking spray)
Chocolate sauce
- ½ cup of heavy cream
- ½ cup of chocolate chips (or baking chocolate)
- ½ cup of peanuts (or any other nut)
Ice cream
- 1 pint of whatever you want (or make your own)
Tools
- Measuring cups and spoons
- Small bowl
- Whisk
- Medium bowl
- Small, microwave-safe bowl (or small pot)
- Cutting board
- Chef’s knife
- Waffle cone maker, pizzelle maker, or krumkake maker (or just a frying pan and a spatula)
- Spoon
- Cooling rack
- Wooden spoon (or anything with a long, cylindrical handle)
- Two sturdy objects to elevate the spoon off the counter
- Small saucepan
- Heat-safe bowl
- Freezer-safe container with a lid
Instructions
1. Mix the flour and salt for the taco shell. What made the Choco Taco unique was its waffle cone taco shell, so that’s what you’ll be spending most of your time on. Without it, you’ve just got an ice cream sundae, and that’s not going to sit well in your bare hand. Grab a small bowl, dump in the flour and salt, and mix the two ingredients together.
- Note: You can use whatever waffle cone recipe you like (we used one from The Spruce), but don’t use waffle batter. Belgian waffles and their brethren include baking powder, which is a leavening agent. This white stuff will puff up any batter, and you don’t want that if you’re trying to make a crisp cone.
2. Combine the brown sugar and eggs in a separate, larger bowl. This is the bowl you’ll be making your batter in, so make sure it’s big enough.
3. Dump the salty flour into the sweet eggs, and mix it all up. When you’re done, all the ingredients you’ve worked with so far should be combined into a fairly thick, tan batter.
4. Melt the butter. Slice the butter into half-inch-thick slabs to maximize the surface area exposed to heat and plop them into a small, microwave-safe bowl. If you don’t have a microwave, you can use a small pot on your stove. Melting will take about 30 seconds in the microwave and maybe a couple minutes on the stove.
5. Add the milk, vanilla extract, and melted butter to the batter. You don’t have to do it in this exact order, but we did, to minimize the admittedly small likelihood that the hot butter would start cooking the eggs. Mix everything together until you have a smooth batter again.
6. Prepare your cooking surface. You don’t technically need a waffle cone maker, a pizzelle maker, or a krumkake maker to craft homemade Choco Tacos, but we think each of those tools will make the job easier. If you have one, get it set up according to its instructions.
That said, we scoffed at the rules of waffle cone making and cooked our waffle cone taco shells with nothing more than a frying pan, a spatula, and a dream. While they tasted like waffle cones, they lacked the crisp crunch of a cone and were a little like stiff pancakes. But that didn’t matter much in the end—to us, at least.
7. Set up a “waffle clothesline.” Hot off the press (or stove), your waffle cones will be malleable, but they won’t stay that way for long. You also won’t want to waste time holding them in the shape of a taco shell until they’re completely cool. We found the best solution was to build a sort of waffle clothesline out of a wooden spoon placed between two sturdy containers, but you can use anything that achieves the same effect.

8. Cook a waffle cone. If you’re using a press of some kind, spoon in a nice circle of batter in any size you want, close the lid, and cook it for one to two minutes, or however long your machine’s instructions suggest. Easy.
[Related: We made pancakes with substituted ingredients so you don’t have to]
If you’re using a frying pan, cooking will be a little more complicated. Grease the pan with cooking oil or spray, and wait for it to get hot over medium heat. Then spoon a heaping tablespoon of batter into the pan, letting it form a circle about 2 inches across. Let it cook for about five seconds, then start spreading the batter out as thin as you can, expanding the circle as far as it will go without breaking.
When your dollop of batter has turned pale and you can see bubbles across its surface (about 30 seconds), flip it over and immediately press down on it with your spatula. This will simulate the pressure you’d get in a mechanical press, but won’t duplicate it. Move your spatula every five seconds or so to ensure an even thickness. After another 30 seconds, take the waffle cone off the pan and put it on a cooling rack, paper towel, or plate.
- Warning: If you’re working on a stovetop, you may find your hand gets hot from being close to the pan so frequently. Take breaks or wear an oven mitt to mitigate any potential pain.
9. Mold your cone into a taco shell and hang it up to cool. When your cone is cool enough to handle, bend it into the desired shape and press it over the handle of your wooden spoon or whatever you’re using as a “clothesline.”
- Warning: If you wait too long to bend the cone, it will crack, so it may take you a few tries to find the right timing.
10. Repeat steps 8 and 9 until you’ve used all your batter. You may find your clothesline is too small to hold all your taco shells, but each one should hold its shape fairly well after a minute or two of cooling. You can then move them from the hang-dry line to a traditional cooling rack, but you may need to place them upside down so they retain their shape. You should have around a dozen when you’re done.

11. Chop your nuts. Traditionally, the Choco Taco contains peanuts, but we used cashews. Put your chosen nuts on a cutting board and use a knife to chop them into fairly evenly sized pieces.
[Related: 4 simple ways to upgrade your boring DIY cutting boards]
12. Make the chocolate sauce. We made a simple chocolate ganache, which is just equal parts heavy cream and chocolate. You can use any chocolate you like, even chocolate chips. You could even attempt to temper some chocolate, but only if you’re feeling really fancy.
Pour the cream into a saucepan over medium heat and let it heat up. Meanwhile, dump the chocolate into a heat-proof bowl. When the cream starts to bubble around the edges (about a minute or two), pour it into the chocolate and mix it all together until you’ve got a smooth chocolate sauce.
13. Add the nuts to the chocolate sauce. Just dump them in and mix everything together.
14. (Optional) Make ice cream. If you’re a member of the “go big or go home” crowd, maybe you want to make your own ice cream for these. We tried, using our well-tested recipe for hand-churned ice cream in a bag, but it didn’t make enough, so we bought a pint at the grocery store. Sometimes you have to know your limits. The original Choco Taco was stuffed with fudge ripple ice cream, but you can use anything you like.
15. Fill the tacos with ice cream. When your shells are cool enough to hold their shape (we waited about an hour), start assembling your homemade dessert. First, scoop the ice cream into a shell, and place it into whatever container you plan to freeze your DIY Choco Tacos in. Keep going until all the shells are full of ice cream and they’re lined up nicely in the container. This will keep them from falling over when you add the chocolate.
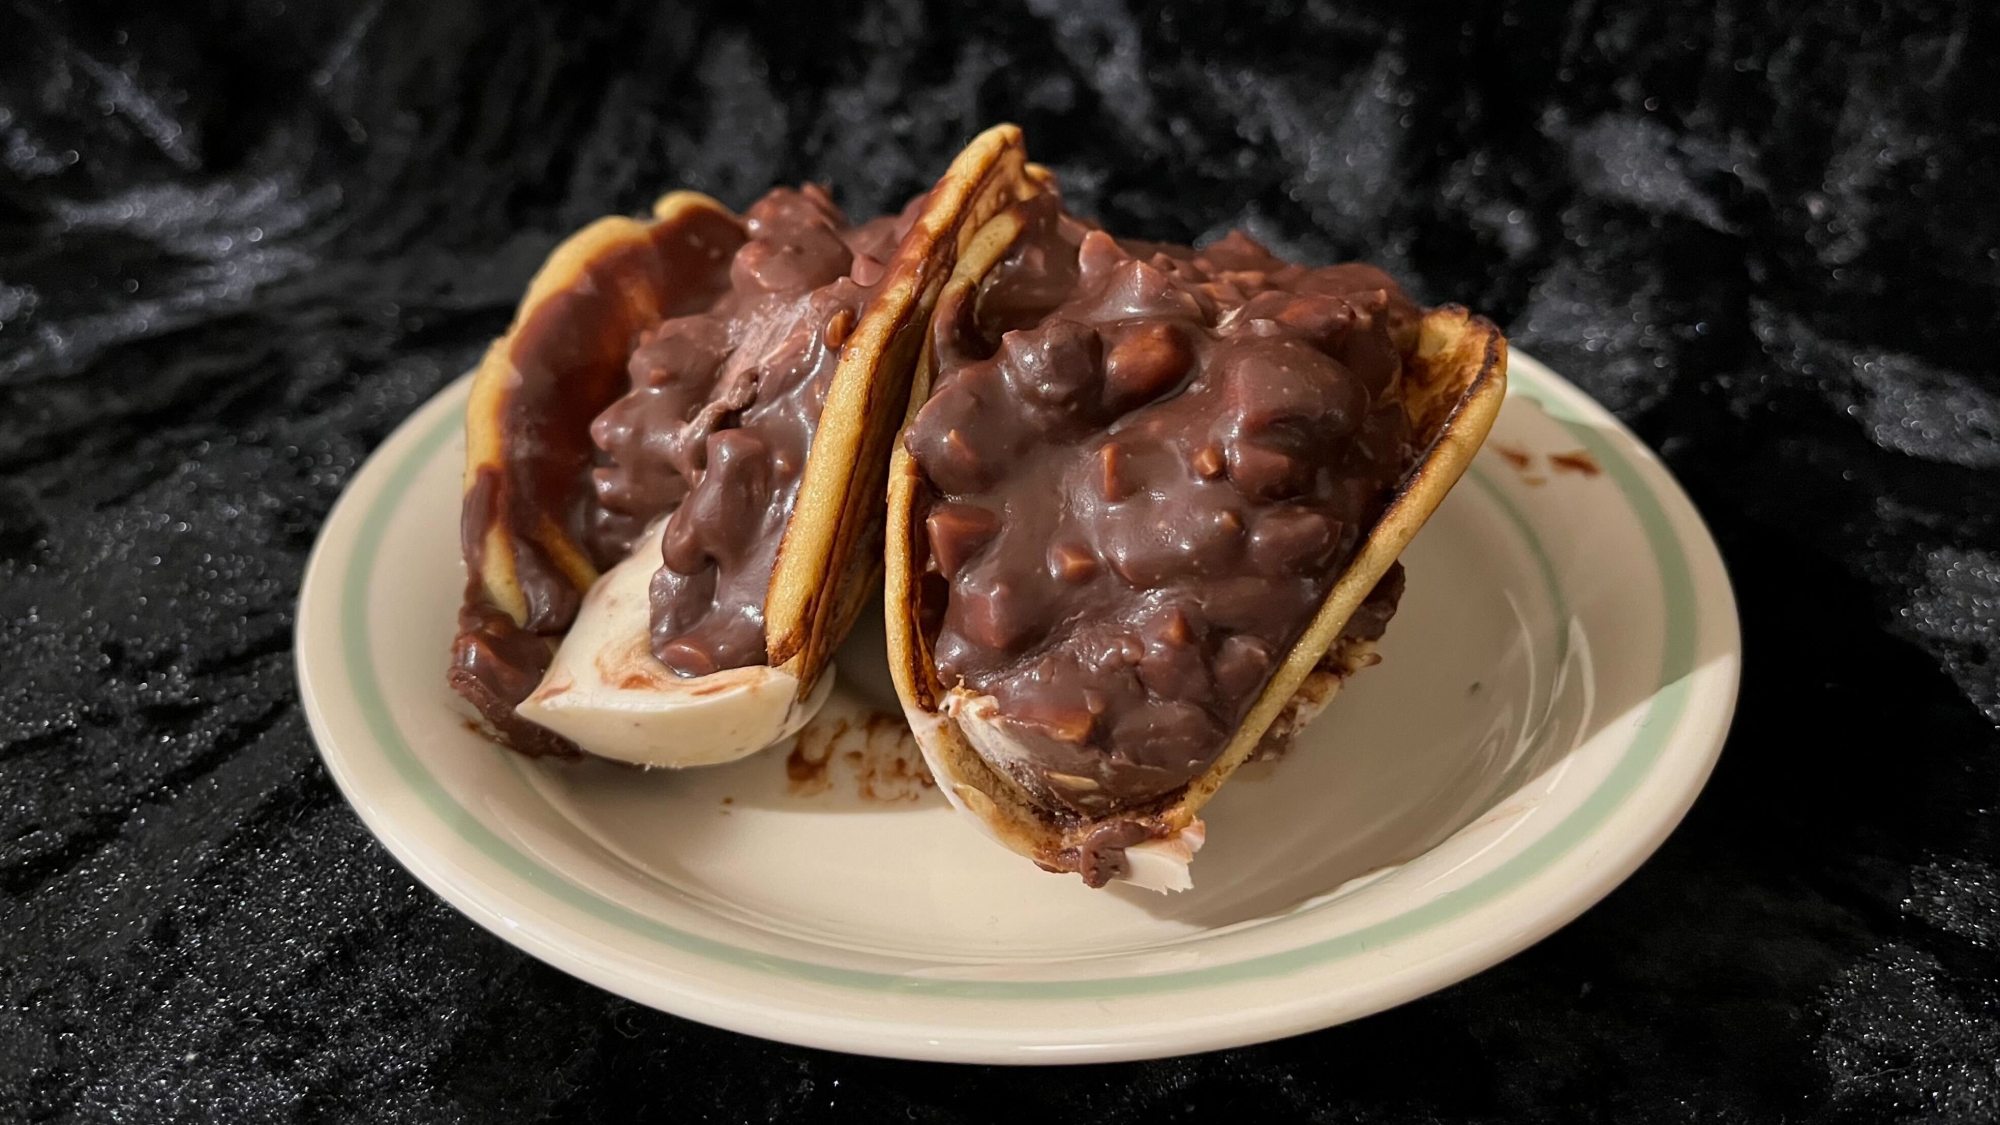
16. Add the chocolate. Spoon the chocolate sauce onto each taco, using as much as you want.
17. Freeze. Let the desserts sit in the freezer for at least an hour or two (we waited three) before eating them. While you can eat them immediately, freezing them will ensure the chocolate hardens and everything melds together like a Choco Taco you’d get out of a package.
- Note: You may need to use a spoon or fork to separate the individual tacos for serving.
Although these frozen treats may not fill the nostalgic hole in your soul left by the departure of your beloved Choco Taco, they will taste good, and that counts for something.
