Welcome to PopSci’s at-home science projects series. On weekdays at noon, we’ll be posting new projects that use ingredients you can buy at the grocery store. Show us how it went by tagging your project on social media using #popsciprojects.
This is where we usually tell you why a project is fun, educational, or useful as justification for why you should make it yourself. But come on, we’re making ice cream. It’s a timeless dessert that appeals to almost everybody, and you can make a bowl of it with just some dairy, sugar, and flavoring.
Yes, we’re making this ice cream in a bag, but we promise it works a lot better than the last time we tried to make food in a plastic bag. It’s also a bit of an arm workout, which just means you will have earned this treat.
Before you start, dig up your thickest winter gloves, or find some other type of insulating hand covering—the bag gets colllllllllld. Get pumped. Let’s do this thing.
Stats
- Time: 15-20 minutes
- Difficulty: moderate
What you’ll need (for one serving):
- ½ cup of half-and-half (or ¼ cup milk and ¼ cup heavy cream)
- 1 tablespoon of granulated sugar
- ¼ teaspoon of vanilla extract (and/or other flavorings)
- 2 quart-sized plastic zip-top bags
- 1 gallon-sized plastic zip-top bag
- ½ cup of large-grained salt
- About 6 cups (3-4 trays) of ice
- Winter gloves
- Timer
- (Optional) Bowl and spoon
Instructions
1. Combine the ice cream ingredients. Pour the half-and-half, sugar, and vanilla extract into one of the quart-sized bags. You can add some other flavorings if you want—we added a few drops of lavender extract, too.
2. Seal the bag. Squeeze out most of the air (you’ll still need some air to get into the ice cream for it to have the right consistency), and seal the bag. Then, put it inside the other quart-sized bag to minimize the risk of it breaking or opening during the mixing process.
3. Put the smaller bags in the larger one.
4. Add ice. Pour all your ice into the gallon-sized bag, covering the smaller bag.
5. Add salt. This is probably the only time you should ever use half a cup of salt to make one serving of anything. You won’t be eating it, thankfully. Pour it all over the ice and seal the large bag.
6. Shake the bag. Time for an arm workout: Shake the bag for around 10 minutes. As you go, the ice cream will begin to solidify. Don’t watch the clock—time moves like molasses when you’re rapidly moving your arms. Set a timer and maybe turn on some tunes and rock out. Dance around. Pass the bag around to give everyone a turn. Do literally anything to keep your mind off the fact that you’re shaking a bag of ice and cream.
- Tip: Our preferred method of shaking was to place the bottom of the bag in one hand and grip the sealed top with the other. Then, we shook it back and forth.
7. Check your ice cream. If it’s not quite done, keep shaking. If it’s the proper consistency, great!
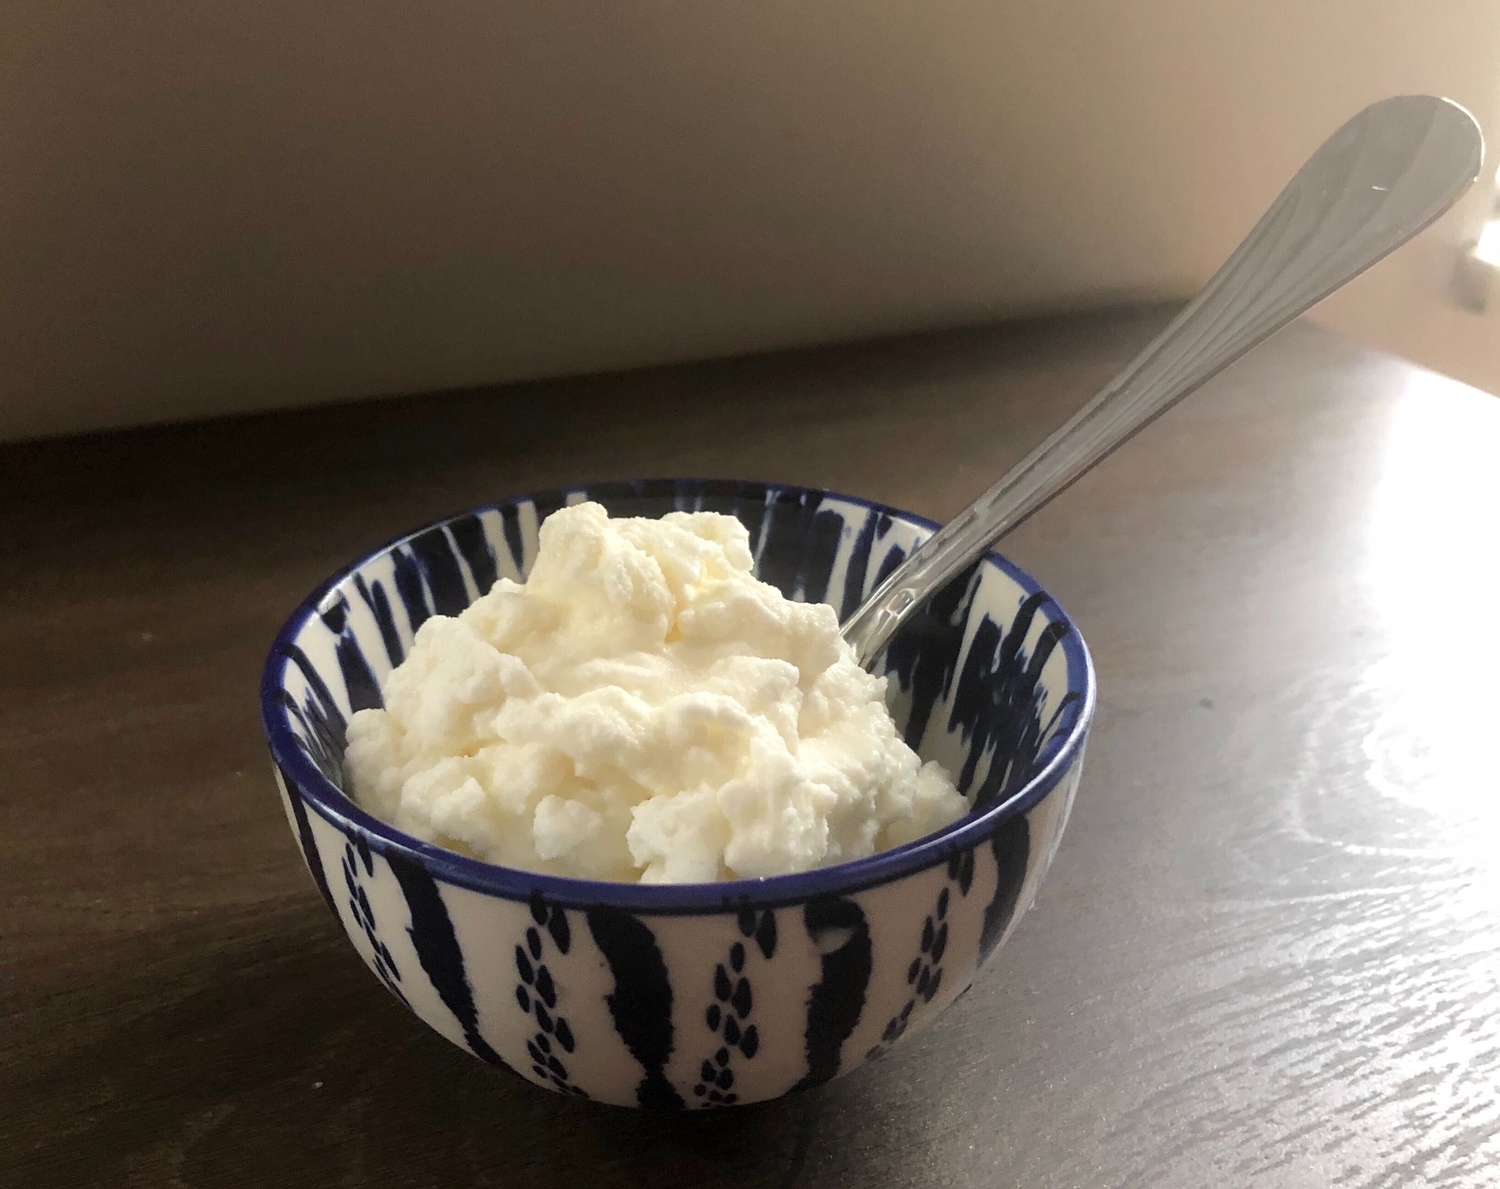
8. Eat. Get that ice cream in a bowl, dress it with your favorite toppings, and enjoy. Or just gobble it straight out of the bag with a spoon. You do you.
- Tip: If you’re trying to get the ice cream out of the bag, the easiest ways to do so are to rip or cut the bag down the side so you have more room for your hand, or to cut off one of the bottom corners and squeeze it out.
How it works

Water freezes at 32 degrees Fahrenheit (0 Celsius), but that’s not the case for ice cream. Because the frozen treat contains other compounds (like sugar), its freezing point is lower—somewhere around 16 degrees (-9 Celsius), according to Karen M. Schaich, a professor in Rutgers University’s food science department.
That’s where the simply absurd amount of salt in this recipe comes in. When there’s just ice in the bag, there’s a thin film of water on each cube, as they’ve begun to melt from contact with the air, says Richard Jones, a physics professor at the University of Connecticut. When you add salt, it dissolves and turns that film into salt water, which has a lower freezing point than fresh water. That means the sloshing slush in the big bag is going to be much colder than a bag of plain ice water.
Now, the salted ice and the ingredients in the smaller bag want to reach thermal equilibrium (the point where heat no longer moves between them). During this process, heat leaves the innermost bag and goes to the melting ice, making the ice cream components colder.
All that helps the freezing process, but shaking matters too. You can’t just let everything sit in the salt-ice bath, walk away, and return to a fresh batch of ice cream. Instead, you’ll return to some really cold, sweet half-and-half. For one, jostling everything around thoroughly coats the ice cubes with salt, which aids in the melting process and march toward thermal equilibrium, Jones says. The faster the ice melts, the more heat it sucks from the ingredients and the quicker everything turns into a tasty dessert.
Constant motion affects the ice cream components, too: If you’re not shaking everything, you’re neither mixing the ingredients nor getting air into your ice cream. Both are essential, says Pat Polowsky, a food scientist.
For the best bag-mixed ice cream experience, eat it immediately. If you save it and freeze it, the ingredients will eventually separate and you won’t have ice cream anymore. Schaich says this is a consistent problem with all emulsions, including ice cream. But while commercial ice cream-makers use emulsifiers like lecithin to better link the water and fat, this recipe doesn’t. Separation happens even faster sans an ice cream machine, which can mix more thoroughly than any human appendage can. So if you wait too long, things are going to get weird—and ice cream that makes you uncomfortable has no place in your life.
