Whether you’re enjoying the last burst of bounty from a successful home garden or simply hoping to avoid excess trips to the grocery store as COVID-19 cases rise, canning fruits and vegetables is a great way to shore up your food reserves for the months ahead. But this method of processing and preserving food can be intimidating, and for good reason—improper canning can leave your produce tainted with potentially deadly bacteria.
Still, while canning food requires lots of care—and means closely following recipes and directions—it’s not actually difficult. If you’re willing to invest the time and patience in doing it properly, you’re capable of canning food that won’t kill you.
The crucial differences between fridge pickling and canning
It is so simple to pickle things and put them in jars, and you don’t have to be fussy about recipes for so-called “fridge pickles”: If you put fresh vegetables in a reasonably clean jar with roughly equal parts water and vinegar, they should stay edible for at least a month, if not longer. A fridge pickle is no more intimidating or dangerous than any other food in your fridge—if it smells fine, looks fine, and was prepared recently enough that you don’t have to scratch your head trying to remember how it got there, you can tuck right in. If you’re looking for a low-stress way to slightly stretch out the life of some produce (or you just really want some pickles), a fridge pickle recipe might be your best bet.
But fridge pickling isn’t canning, and you can’t store the results of these recipes in your pantry for months at a time.
Properly canned food will generally be more acidic than anything pickled in the fridge, which helps keep bacteria from growing during storage. You’ll also have to process your jars: Sterilize them before you fill them and use boiling water to seal them shut when you’re done. Those two steps are crucial, because they lower the chance of dangerous microbes getting into your precious preserves. Following a proper canning recipe also means you can jar and store foods without the added acidity of vinegar or citric acid (at least in some cases—see below for warnings).
Why you must find and follow a canning recipe
Many home cooks consider recipes more of a jumping-off point than a strict set of rules, but you should absolutely not improvise when it comes to canning. To explain why, let’s briefly talk about the deadly serious—but easy to avoid—risks that come with canning.
The bacterium Clostridium botulinum is present in loads of places, but it’s particularly prevalent on the surfaces of fruits and veggies. The bacterium produces a neurotoxin that’s among the most toxic known substances in the world, but it doesn’t pose a problem under most conditions—C. botulinum is an anaerobic microbe, which means it requires low-oxygen environments. The C. botulinum you might encounter on the surface of a fresh piece of fruit will be closed up inside protective spores, which aren’t generally able to make people sick. (The big exception to this is that infants can get very sick when spores manage to grow and multiply in their digestive tracts—which is why babies shouldn’t eat honey, where such spores are common).
According to the Centers for Disease Control and Prevention, home-canned veggies are the most common cause of botulism outbreaks in the United States. Here’s why: Canning keeps food preserved because sanitizing and sealing jars means most bacteria already in the food die (from the heat of the boiling water bath) and new bacteria can’t find their way in (because the lid is vacuum-sealed by the boiling water bath). But if the jars aren’t properly processed, that same air-tight environment can create a perfect place for C. botulinum spores to awaken, start multiplying, and produce botulism toxins. You can’t smell, taste, or see C. botulinum, so even food that seems fine can be deadly. That’s why properly sealing your jars is so crucial—any sign that the jar’s seal came loose is an indication that your food is contaminated.
Keeping foods above a certain acidity (AKA at a low pH) can prevent the growth of C. botulinum, which is why following tried-and-true recipes and instructions is crucial. Some produce is acidic enough to safely can with hot water. Some produce requires added acid in the form of lemon juice or vinegar to make this process safe. Other foods require a pressure canner. The bottom line: You can indeed can just about anything, but the required steps, equipment, and ingredients differ from food to food, and playing fast and loose with those instructions can quite literally cost you your life. Luckily, there are lots of tested and scientifically sound recipes available online. If you’re new to the world of canning, you can go straight to the source—the US Department of Agriculture’s exhaustive list of canning instructions.
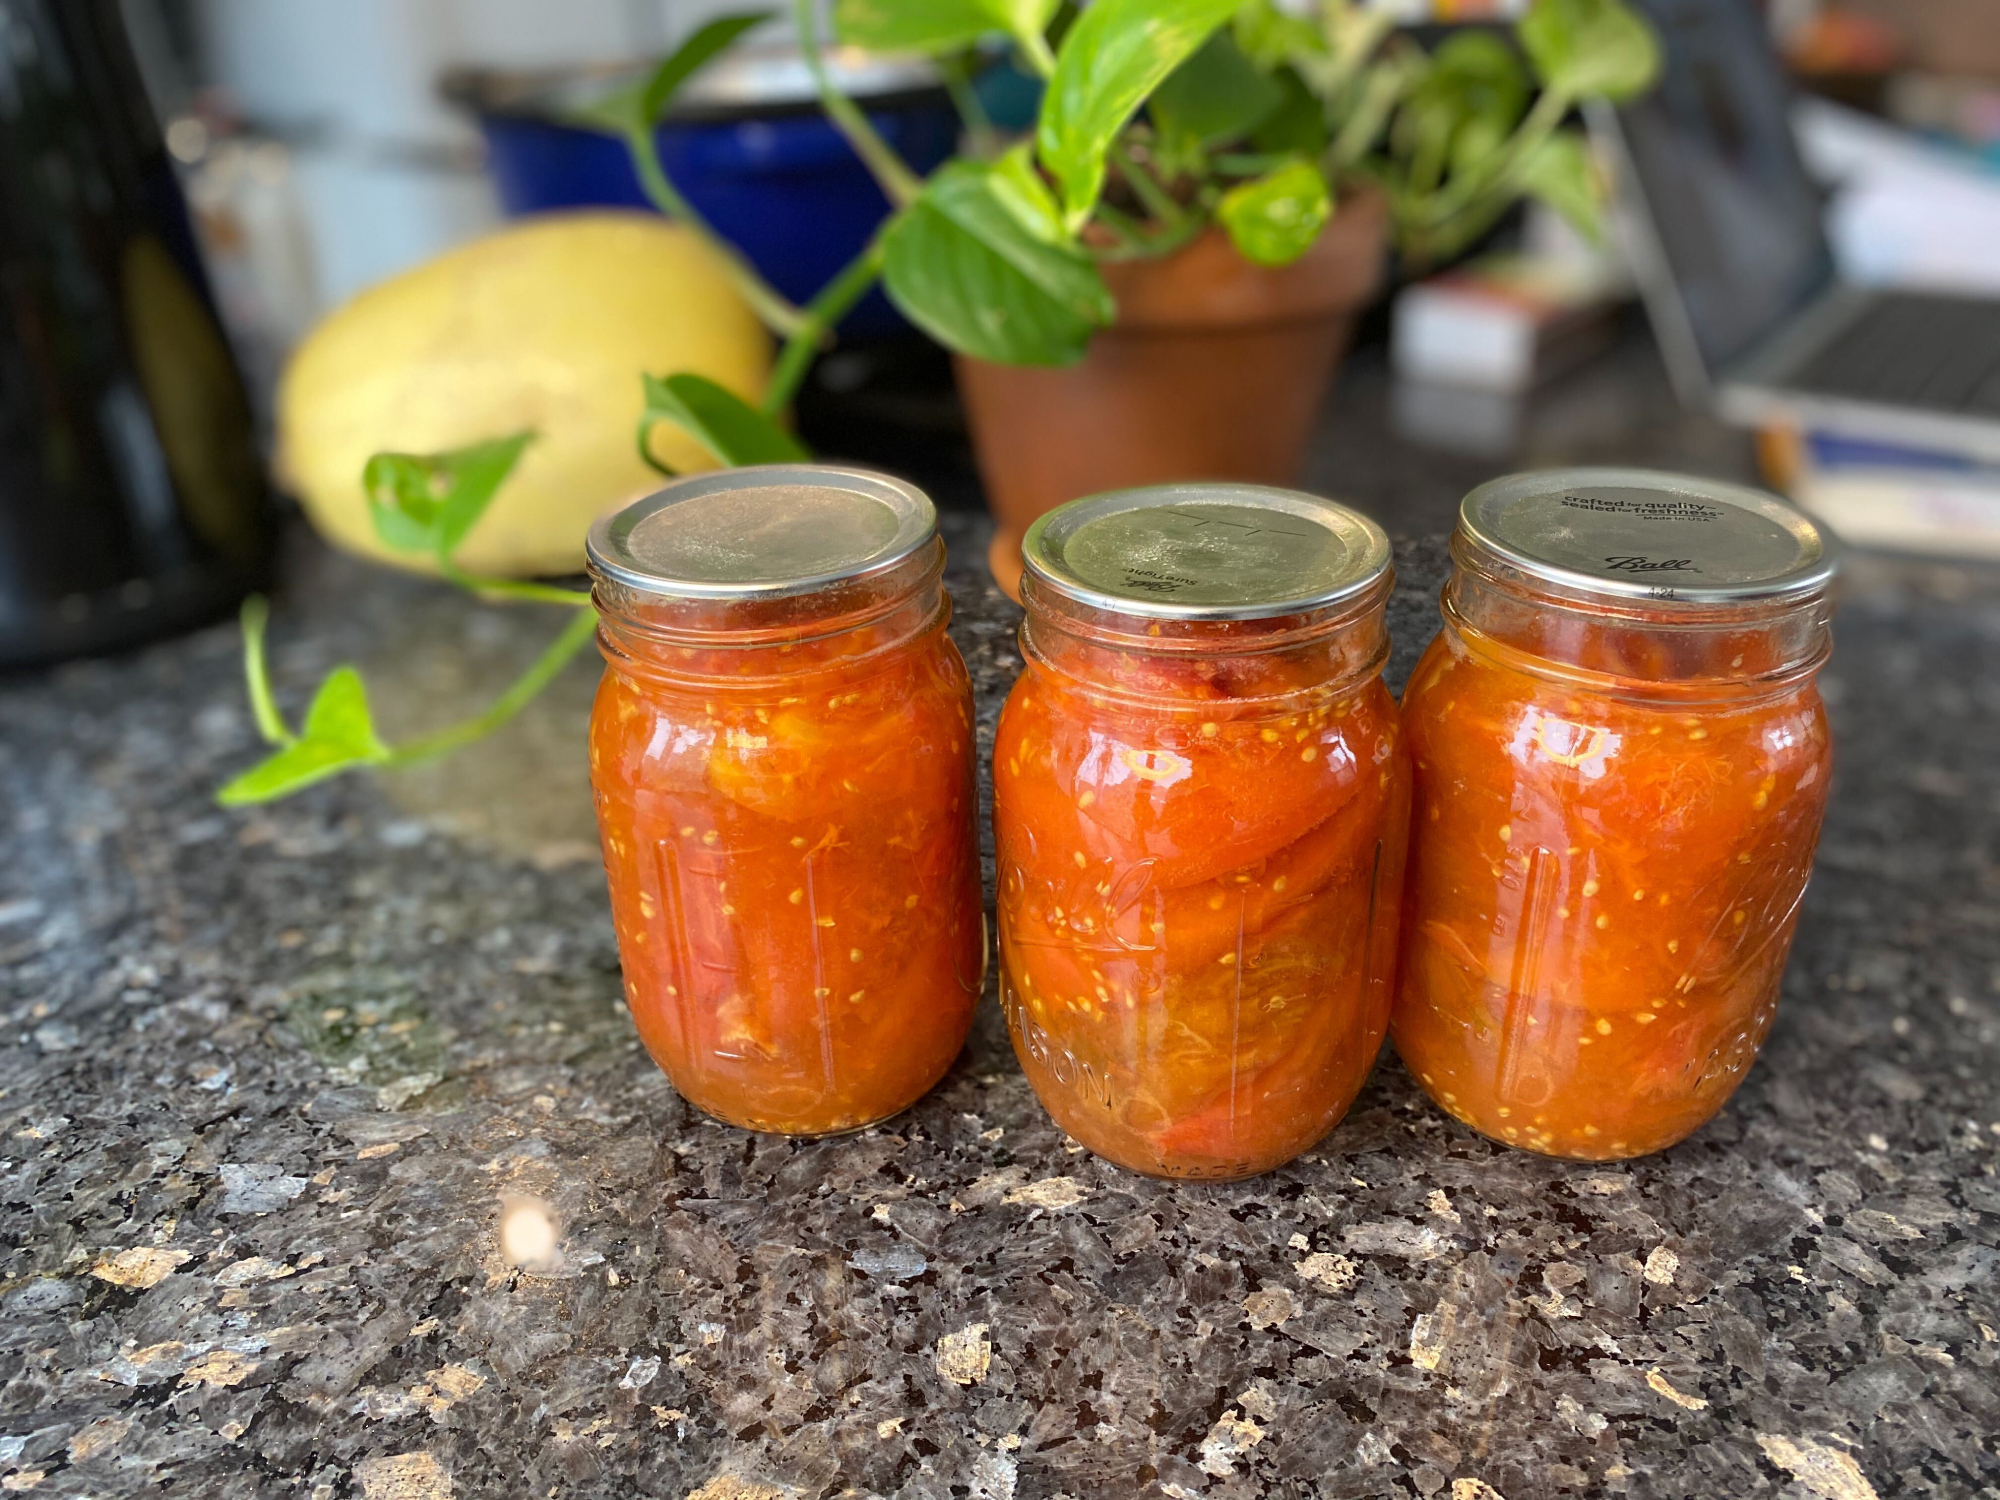
Because each recipe is different, we’ll start you off with an example of hot water processing that’s versatile and not too tricky: halved tomatoes. The process will teach you the basics you’ll need to follow other low-pH canning recipes, and will set you up with a base for salsas, chilis, soups, and tomato sauces that will last for a year or more in your pantry.
Stats
- Time: 1.5 hours active, 12-24 hours wait time
- Material cost: ~$100 for all the supplies and gear, but everything is reusable (except for the lids)
- Difficulty: moderate
Tools
- 9 (16-ounce) mason jars with lids and bands
- Canning funnel*
- Canning rack*
- Jar lifter*
- A tall stock pot with a lid
- Kettle
- 2 large bowls
- Slotted spoon
- Knife
- Cutting board
- Measuring spoons
*You can get many of these items by purchasing a beginner canning bundle, but ones bought separately will generally be higher quality, and starter kits often have additional items you won’t really need.
Materials
- 13 pounds of tomatoes
- Citric acid (or bottled lemon juice)
- Water
- Dish soap
- Clean dish towels
- Sharpie (or label maker)
Instructions
1. Sanitize your jars. Wash them with warm water and soap, then place the canning rack in your stock pot and put the jars (without lids) on the rack. Do not crowd or stack the jars. Fill the pot with warm water so the jars are covered by an inch or two, and bring it to a boil. Leave boiling for 15 minutes while you prepare your tomatoes, then turn off the heat and keep the jars sitting in the water. Your jar lids and bands should not be boiled, but you should place them into the cooling stock pot (or another pot of simmering water) for five minutes to sterilize them. Wipe the jars, lids, and bands dry with a clean towel.
2. Wash your tomatoes.
3. Prepare bowls of water for the tomatoes. Bring several cups of water to boil in your kettle. Pour the boiling water into one of your large bowls. Fill the other with cold water.
4. Dip each tomato into the hot bowl. Let them sit for 30-60 seconds, or until their skins begin to split. Use a slotted spoon to avoid burning yourself.
5. Dunk each tomato in cold water. Let it sit for around 30 seconds and then remove its skin, which should slip right off.
6. Cut your tomatoes. Once out of the cold water, set the fruit on your cutting board and use your knife to slice them in half. Remove the cores, which you can throw away or save for making stock. It’s okay if you want to slice your tomatoes larger or smaller.

7. Carefully remove each jar from the boiling water bath. Use the jar lifter to grasp firmly around the neck of the jar (the narrowest part, just below the lid). Carefully dump the boiling water into your sink or back into the stock pot. Place each jar open-side down on a clean towel to avoid contamination while you work.
8. Boil another kettle full of water. You’ll use this in Step 11.
9. Boil the water in the pot. Remove your lids and bands from the large stock pot if you haven’t already done so, and bring the water within back up to a rolling boil.
10. Flip the jars right-side up. Add ¼ teaspoon of citric acid or one tablespoon of bottled lemon juice to each jar. Then, using your funnel to avoid spillage, fill each jar with halved tomatoes. Leave at least half an inch of space at the top of each jar.
11. Pour boiling water from the kettle into each jar. Leave at least half an inch of space at the top, but fully cover the tomatoes. You may need to poke around with a narrow spatula or knife to get rid of air pockets. Wipe the rim of each jar with a clean towel to get rid of any errant tomato juice.

12. Seal the jars. Carefully place a flat lid on top of each jar, making sure to line up their edges. Screw a band onto each, but not too tight.
- Tip: Turn the band only until you feel the slightest bit of resistance, then add just one more quarter-turn.
13. Put the jars back into the boiling water. Use your jar lifter to carefully lift each jar into the pot. Make sure each can is sitting upright on the canning rack, and keep at least a half an inch of space between each jar. You can repeat this step multiple times if your pot isn’t large enough to process all the jars at once. The water should sit at least 1 inch above the tops of your jars; add more boiling water from a kettle if necessary.
14. Process the jars. Place a lid on your stock pot and allow the jars to boil for at least 40 minutes. If you live at a high altitude, you may need to let them sit even longer. Check this chart to be sure. Periodically make sure the water is still boiling, and add more boiling water from your kettle if necessary to keep the jars completely submerged.
- Warning: You must use the kettle to add already-boiling water to the pot because cooler water will lower the temperature of the water in the pot. If the pot stops boiling at any point, start the 40 minutes over once you’ve returned to a rolling boil.
15. Remove the jars from the pot. Turn off the heat and take the lid off your stock pot. Wait 5 to 10 minutes for the water and jars to cool slightly, then use the jar lifter to remove them one by one from the pot. Make sure not to tilt any of the jars as you move them; keep them vertical. Place them somewhere they can rest undisturbed at room temperature for 12 to 24 hours. Don’t worry if the tomatoes seem to shrink down into the jar a bit as they cool.
- Warning: It is extremely important that you not touch the bands of the lids during this time, as this can affect the quality of the seal.

16. Remove the lid bands. After 12 to 24 hours, gently remove the bands and test each jar’s seal. There are several ways to do this, but the easiest is to press a finger down on the center of the lid. If the lid springs up when you release your finger, it isn’t sealed. You should be able to lift each jar up by its lid (without the metal band on it) without opening it. Any unsealed jars must be processed again. Check the lid for any nicks or defects in its rubber seal before you do so—if you find any, you’ll have to swap in a new lid.
17. Label your jars. Write the date on the lid or another easily visible area so you can keep track of how long they’re safe to eat.
18. Store the jars. Keep them somewhere away from direct sunlight and where temperatures won’t go above 95 degrees Fahrenheit or below freezing.
What to know when it’s time to open them up
When you’re ready to eat your canned tomatoes, make sure your jar has stayed totally sealed. You should check for any bulges or dents in the jar’s lid, and make sure there are no signs that food has bubbled out and dribbled down the outside of the jar. You should have to break a tight vacuum seal to open the jar—using a butter knife to pry up the edge is one method—and you shouldn’t eat the food inside if the lid comes off without a fair bit of resistance. If you have any doubts about the seal on your jars, do not eat the tomatoes. Follow these instructions to safely dispose of any contaminated food.
You can reuse (sterilized) jars and bands, but you cannot use lids more than once for processing. You can keep using those lids for storing dry goods, or things in your fridge, but the seal won’t work a second time.
