Kombucha first came to the U.S. as a hippie-health fad in the ‘70s, made its comeback into hipster cafes a couple of years ago, and now you can find it in pretty much any major convenience store. But you’re not here to figure out where to buy a bottle—you’re here to learn how to make it. And you’re in luck: It’s easy, cheap, and you’ll get to witness the bacterial magic of fermentation happen right before your eyes.
Kombucha 101: the truth and the hype
Even though its popularity in the western world only dates back several decades, kombucha has a more ancient origin. Reports say it dates back to 220 B.C. China (not at all surprising considering Asian cuisine has mastered fermentation), where it was used as medicine. It then made its way through trade routes to Russia and Eastern Europe, and finally over to America.
Hippies in the U.S. latched onto kombucha after a 1961 Swiss study claimed the drink had antioxidant and anti-inflammatory benefits, and helped reduce cholesterol, blood pressure, and cancer spread. Since then, there has been an on-and-off debate as to whether kombucha is a cure-all elixir. Although there is no scientific research that confirms any of these benefits in human subjects, that has done nothing to stop the hype—between 2017 and 2018, sales of the drink in the U.S. grew more than 49 percent.
Let’s make some kombucha
Even if drinking the metabolic waste of bacteria is not your thing (you know that’s what beer is, too, right?), what’s really cool about kombucha is that once it’s done, you can flavor it any way you want. Plus, knowing there’s a tiny bacterial universe changing your tea into something new is utterly fascinating.
To make kombucha, you’ll have to go through two stages of fermentation—each lasting between 3 and 10 days—but if you want to grow your own symbiotic culture of bacteria and yeast (SCOBY), you’ll have to do that first, which may take up to four weeks.
If you just want to brew kombucha, you can buy a fully grown SCOBY or a starter kit—we won’t judge.
Making your SCOBY
Because we at PopSci DIY love to make things more complicated for ourselves so you don’t have to, I chose the longest route possible to homemade kombucha, and decided to nurture my own SCOBY from scratch. Ladies and gentlemen, meet Toby, the SCOBY.

Stats
- Time: 1 to 4 weeks
- Cost: $20-$25
- Difficulty: easy.
What you’ll need
- 7 cups of water
- ½ cup of white sugar
- 4 bags of regular black tea
- 1 cup of unpasteurized, unflavored, store-bought kombucha
- 1 (1 gallon+) jug with an opening you can fit your hand into (if it has a spigot, even better)
- 1 coffee filter or a piece of cheesecloth
- 1 rubber band
1. Clean everything thoroughly. Since you’re making an environment for bacteria to live and thrive in, you’ll need to make sure all your tools are clean and don’t hold any microbes that might threaten your SCOBY. Thoroughly wash your hands, your jug, and whatever you’re brewing your tea in, and make sure there’s no trace of any soap lather in any of them before you start.
- Tip: Using a jug with a spigot will allow you to get your kombucha without manipulating the SCOBY, which means less chance for it to get contaminated with harmful bacteria.
2. Brew your tea. Pour the water into a pot and bring it to a boil. Remove it from the heat, place your tea bags in, and let it brew. Note that you can only use black tea at this stage—the SCOBY feeds off nitrogen and compounds such as caffeine and theanine, which black tea has in higher concentrations. Although your SCOBY can grow in green tea or other herbal infusions, it won’t be as healthy and robust, and eventually it will die. Think about how babies are fed highly nutritious food when they’re little—it’s the same principle.

3. Add sugar. Pour the sugar into the tea and stir until it dissolves. Again, whatever you use for this must be exceptionally clean. Let the tea cool to room temperature.
- Note: It is extremely important that the tea is cold before you mix it with the kombucha. Hot water will kill the bacteria and no SCOBY will grow, no matter how long you wait. And that would be a tragedy.
4. Pour the tea and kombucha into the jug.
5. Replace the jug’s lid with the cheesecloth or coffee filter. Your SCOBY needs a safe but ventilated environment to grow. Once you’ve swapped out the lid, secure the cheesecloth or coffee filter with a rubber band. If you’re using cheesecloth, make sure it’s clean and won’t drop any lint inside the jug. Also, make sure the fabric is dense enough to prevent dust or other particles from contaminating your SCOBY.

6. Place the jug in a warm, dark place, and wait. Bacteria thrive with high temperatures and little light, so give your SCOBY the coziest environment possible. I placed my jug in a cupboard right over the range hood—since it’s high and hard to access, I don’t open it very often, and the warmth of the stove gave Toby, the SCOBY, a toasty home.
7. Check on your SCOBY every week. Once it grows to be ¼-inch thick, you can move to the next step.
First fermentation

When your SCOBY is big and strong, you’ll be ready to make your first batch of kombucha.
Stats
- Time: 6 to 10 days
- Cost: $5
- Difficulty: Still easy
What you’ll need
- 14 cups of water
- 1 cup of white sugar
- 8 bags of tea (at least two of them black)
- 2 cups of unflavored kombucha
- 1 SCOBY (purchased or made)
- One large jug holding at least 1 gallon
- 1 coffee filter or a piece of cheesecloth
- 1 rubber band
- 1 clean plate
1. Brew the tea. Again, with squeaky-clean hands and in a thoroughly clean pot, boil water, remove it from the heat, and drop the tea bags in. You can choose to use eight bags of black tea, or two bags of black tea and six bags of whatever your tea-loving heart desires. I used six bags of pure green tea (my favorite), but you can run wild here. Add sugar, stir until dissolved, and let it cool down to room temperature.
2. Remove the SCOBY. Give your hands another wash, rinse thoroughly, and gently remove the SCOBY from the jug. Place on an equally clean plate.
3. Set aside your starter tea. If you made your SCOBY, you can use the tea it was floating on as a starter tea—just set aside two cups of it. Put the rest in an airtight sealed bottle for the second fermentation (more on that later). You can rinse the jug with clean water if you want to, but it’s not necessary. If you skipped the SCOBY-making process, you can use unflavored, store-bought kombucha just as well.

4. Mix the sweetened tea with the unflavored kombucha. Once both liquids are in the jug, add the SCOBY. When the tea is at room temperature, pour it into the jug. Add two cups of kombucha, and gently place the SCOBY inside. Don’t worry if it doesn’t float to the top or if it sinks sideways. The SCOBY is just doing its thing and will eventually make its way back to the surface.
5. Cover the top, secure it, and store. If you made your own SCOBY you’ll be familiar with this step. Cover the jug opening with a coffee filter or cheesecloth, as long as the fabric is dense enough so dust and other particles won’t fall into the jug and contaminate the SCOBY. Secure the filter with a rubber band and store the jug in a warm, dark place.
6. Check on your kombucha. Sometime between the third and sixth days of fermentation, use a clean straw as a pipette to take a sample of your kombucha and taste it. (Don’t just sip straight from the jug, put the straw in, cover one end, and take it out—liquid will have stayed inside the straw.) Make sure it’s not overly acidic—this will mean you let the kombucha ferment for too long and it’s no longer safe to drink. Toss it and start over. If it’s to your liking, you can go ahead with the second fermentation. Keep in mind that bacteria feed off sugar, so the more time you let the kombucha sit, the less sweet it’ll be.
7. Take a look at your SCOBY. If it’s grown thicker than an inch, you can peel off a couple of layers to keep it in shape. Don’t throw them away, though—they can easily turn into another SCOBY. Consider spreading your thick SCOBY’s love by giving them to someone who wants to start brewing their own kombucha, or store them away in a “SCOBY hotel,” which is just a jug filled with SCOBY and some starter tea. There are also other things you can make with extra SCOBY, including candy and crafts.
Second fermentation

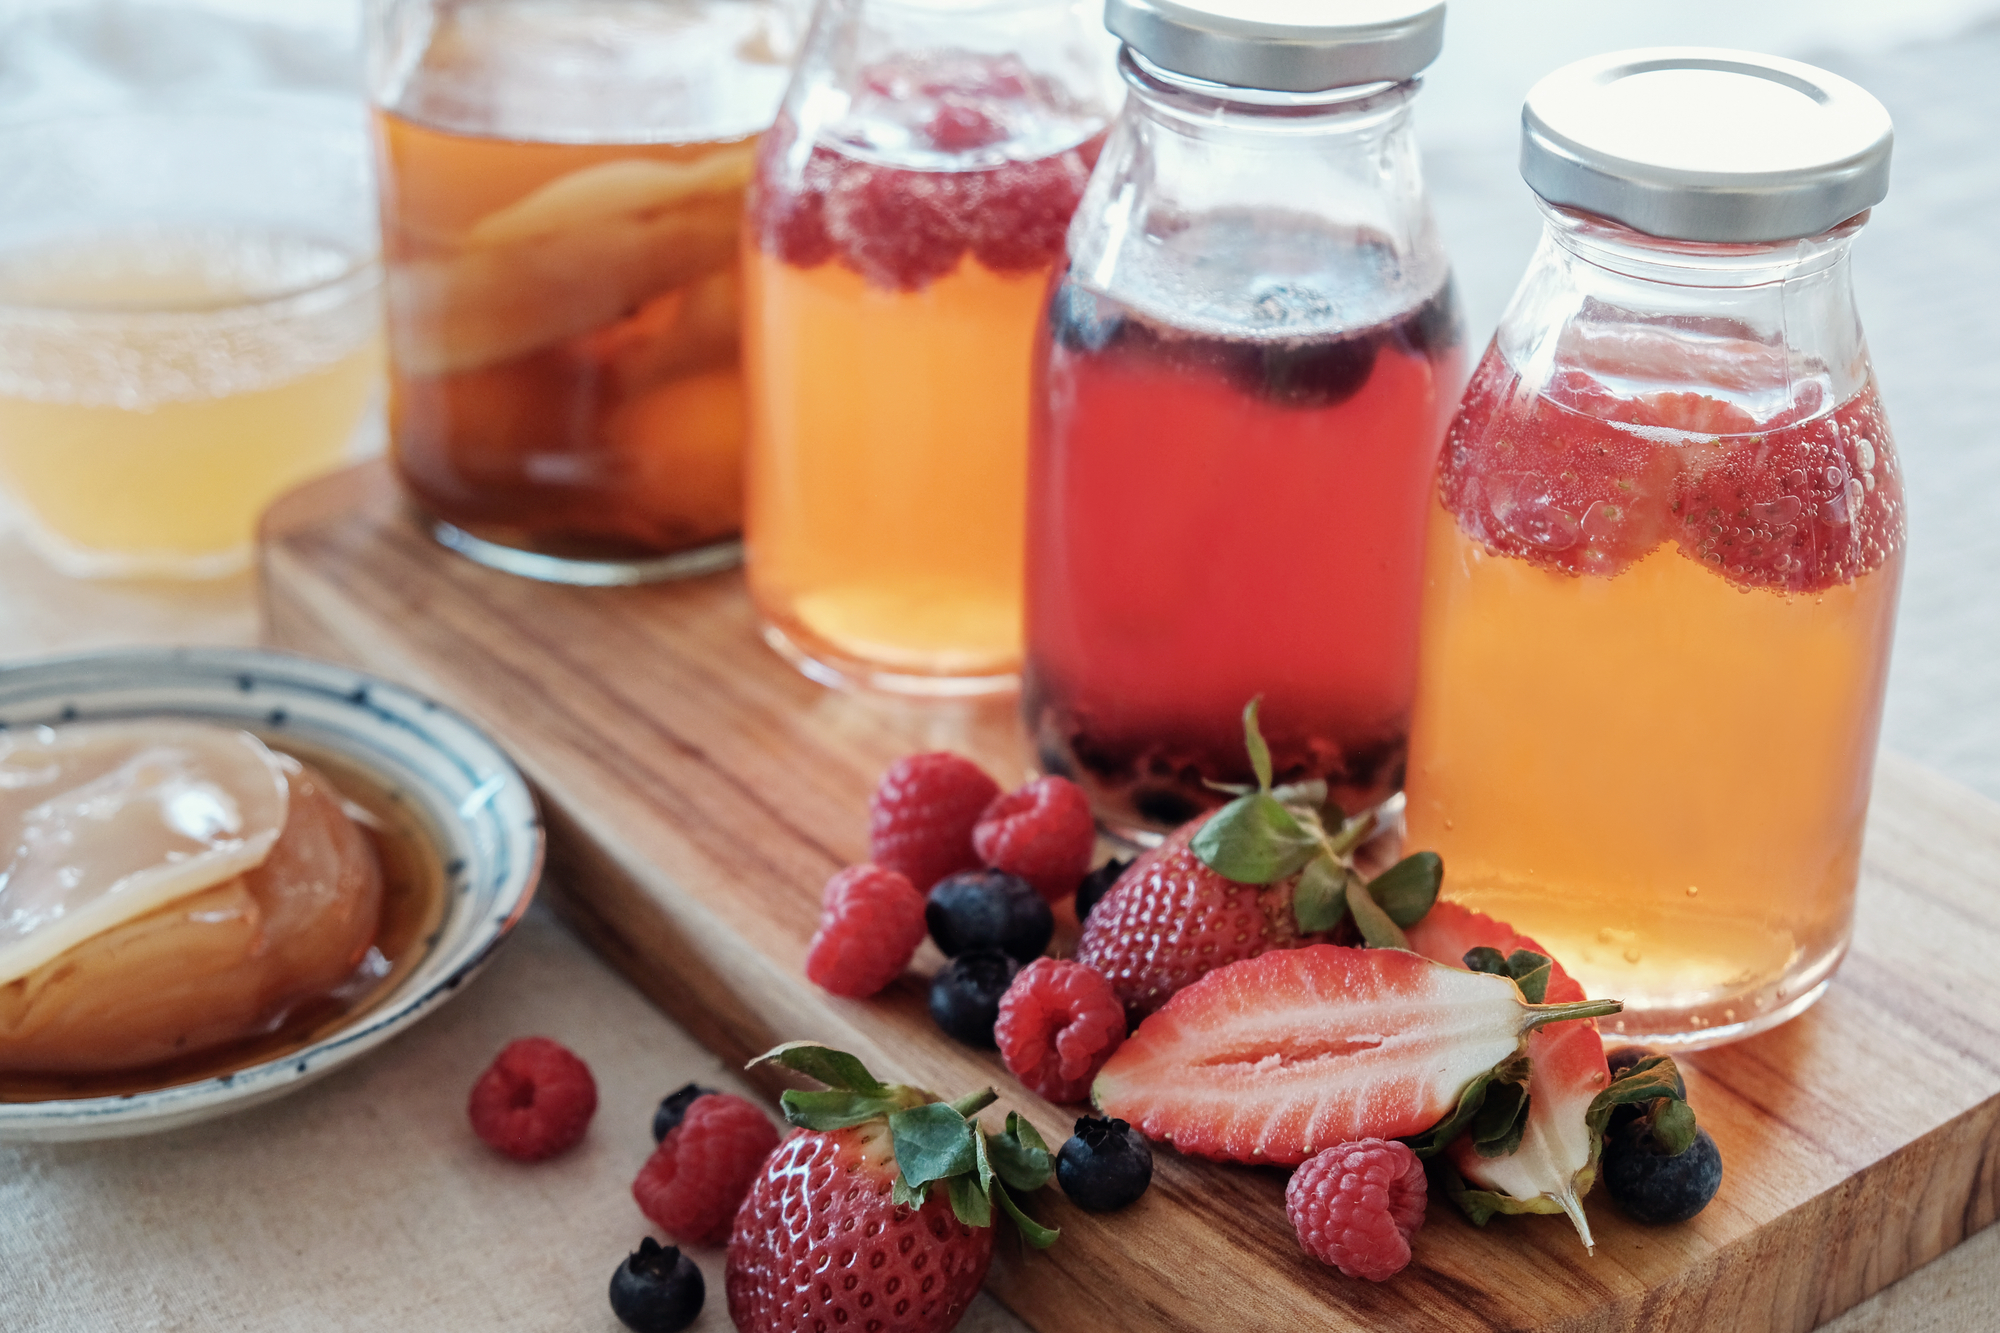
This is where you get to experiment and make your kombucha taste exactly as you like it. Also, this is where carbonation happens and you’ll get to burp some bottles (you read that right).
Stats
- Time: 3 to 10 days
- Cost: $10 – $20
- Difficulty: This just keeps being easy
What you’ll need
- Kombucha from the first fermentation or starter tea
- Flip-top glass brewing bottles (as many as you need)
- Any sweetners you want to experiment with. A couple of suggestions: Honey, mashed fruit (oranges, berries, apples, peaches, etc.), fruit juice, mashed peppermint candy, and crystalized or fresh ginger.
1. Pour the kombucha into your brewing bottles. If you want to keep brewing, set aside two cups of kombucha for your next batch (see Step 3 from the first fermentation). With the remaining tea, fill your brewing bottles up to ¾ of their capacity. This is important because carbonation will begin to happen as a result of the fermentation process, and the pressure inside the bottle will accumulate daily. The less space you leave for the gas, the more often you’ll have to open—or burp—the bottles to release some of the pressure. Do so once a day.
- Tip: When you burp your bottles, cover them with a kitchen towel and do it as slowly as you can. If you waited too long to release pressure (or didn’t leave enough space inside the bottle), this will prevent you from painting your ceiling “kombucha tan.”
2. Flavor your kombucha. This is the creative part of brewing kombucha—at this stage, you can experiment and see what interesting flavors you can come up with. You can use honey, sugar, fruit juice, ginger, and even an assortment of mashed fruits to give your beverage a signature touch. If you’re going for fresh fruit or ginger, let the kombucha ferment for another two days before drinking it. If you use any kind of sweetner or fruit juice, you can consume it instantly. Since I’m a simple kind of girl—or maybe just didn’t feel like going to the grocery store to buy fruit—I merely added a couple tablespoons of honey and a few pieces of ginger to each bottle. It gave me exactly the amount of sweetness and kick I was looking for.
3. Slow down fermentation by putting your bottles in the fridge. Fermentation is a train that cannot be stopped, but you can certainly slow it down by controlling temperature. Putting your bottles in the fridge will prolong your kombucha’s life and prevent it from getting too acidic too soon.
4. Start all over again. By the end of this process, if you want to keep brewing, use the two cups of unflavored starter tea you set aside at the beginning of this process (see Step 1 of the second fermentation), and repeat the instructions for the first fermentation. Remember to peel layers off your SCOBY to keep it healthy and strong, and share the kombucha love with those around you.
