
Google continues to add new features to Gmail, the latest being customized layouts to transform your messages from plain and standard to something much more eye-catching and personalized with just a few clicks. As well as picking a predetermined layout, you’ll also be able to add logos and take control over colors, fonts, and images in your emails, so you can match your company or personal branding.
Right now the option is only available on the web for Google Workspace users—that is people paying directly for the service, or members of an organization that does. But if you’re not currently a Workspace user, then there are third-party plug-ins you can add to Gmail that will provide you with a range of email templates you can modify to suit your own needs.
How to set up email templates on Gmail
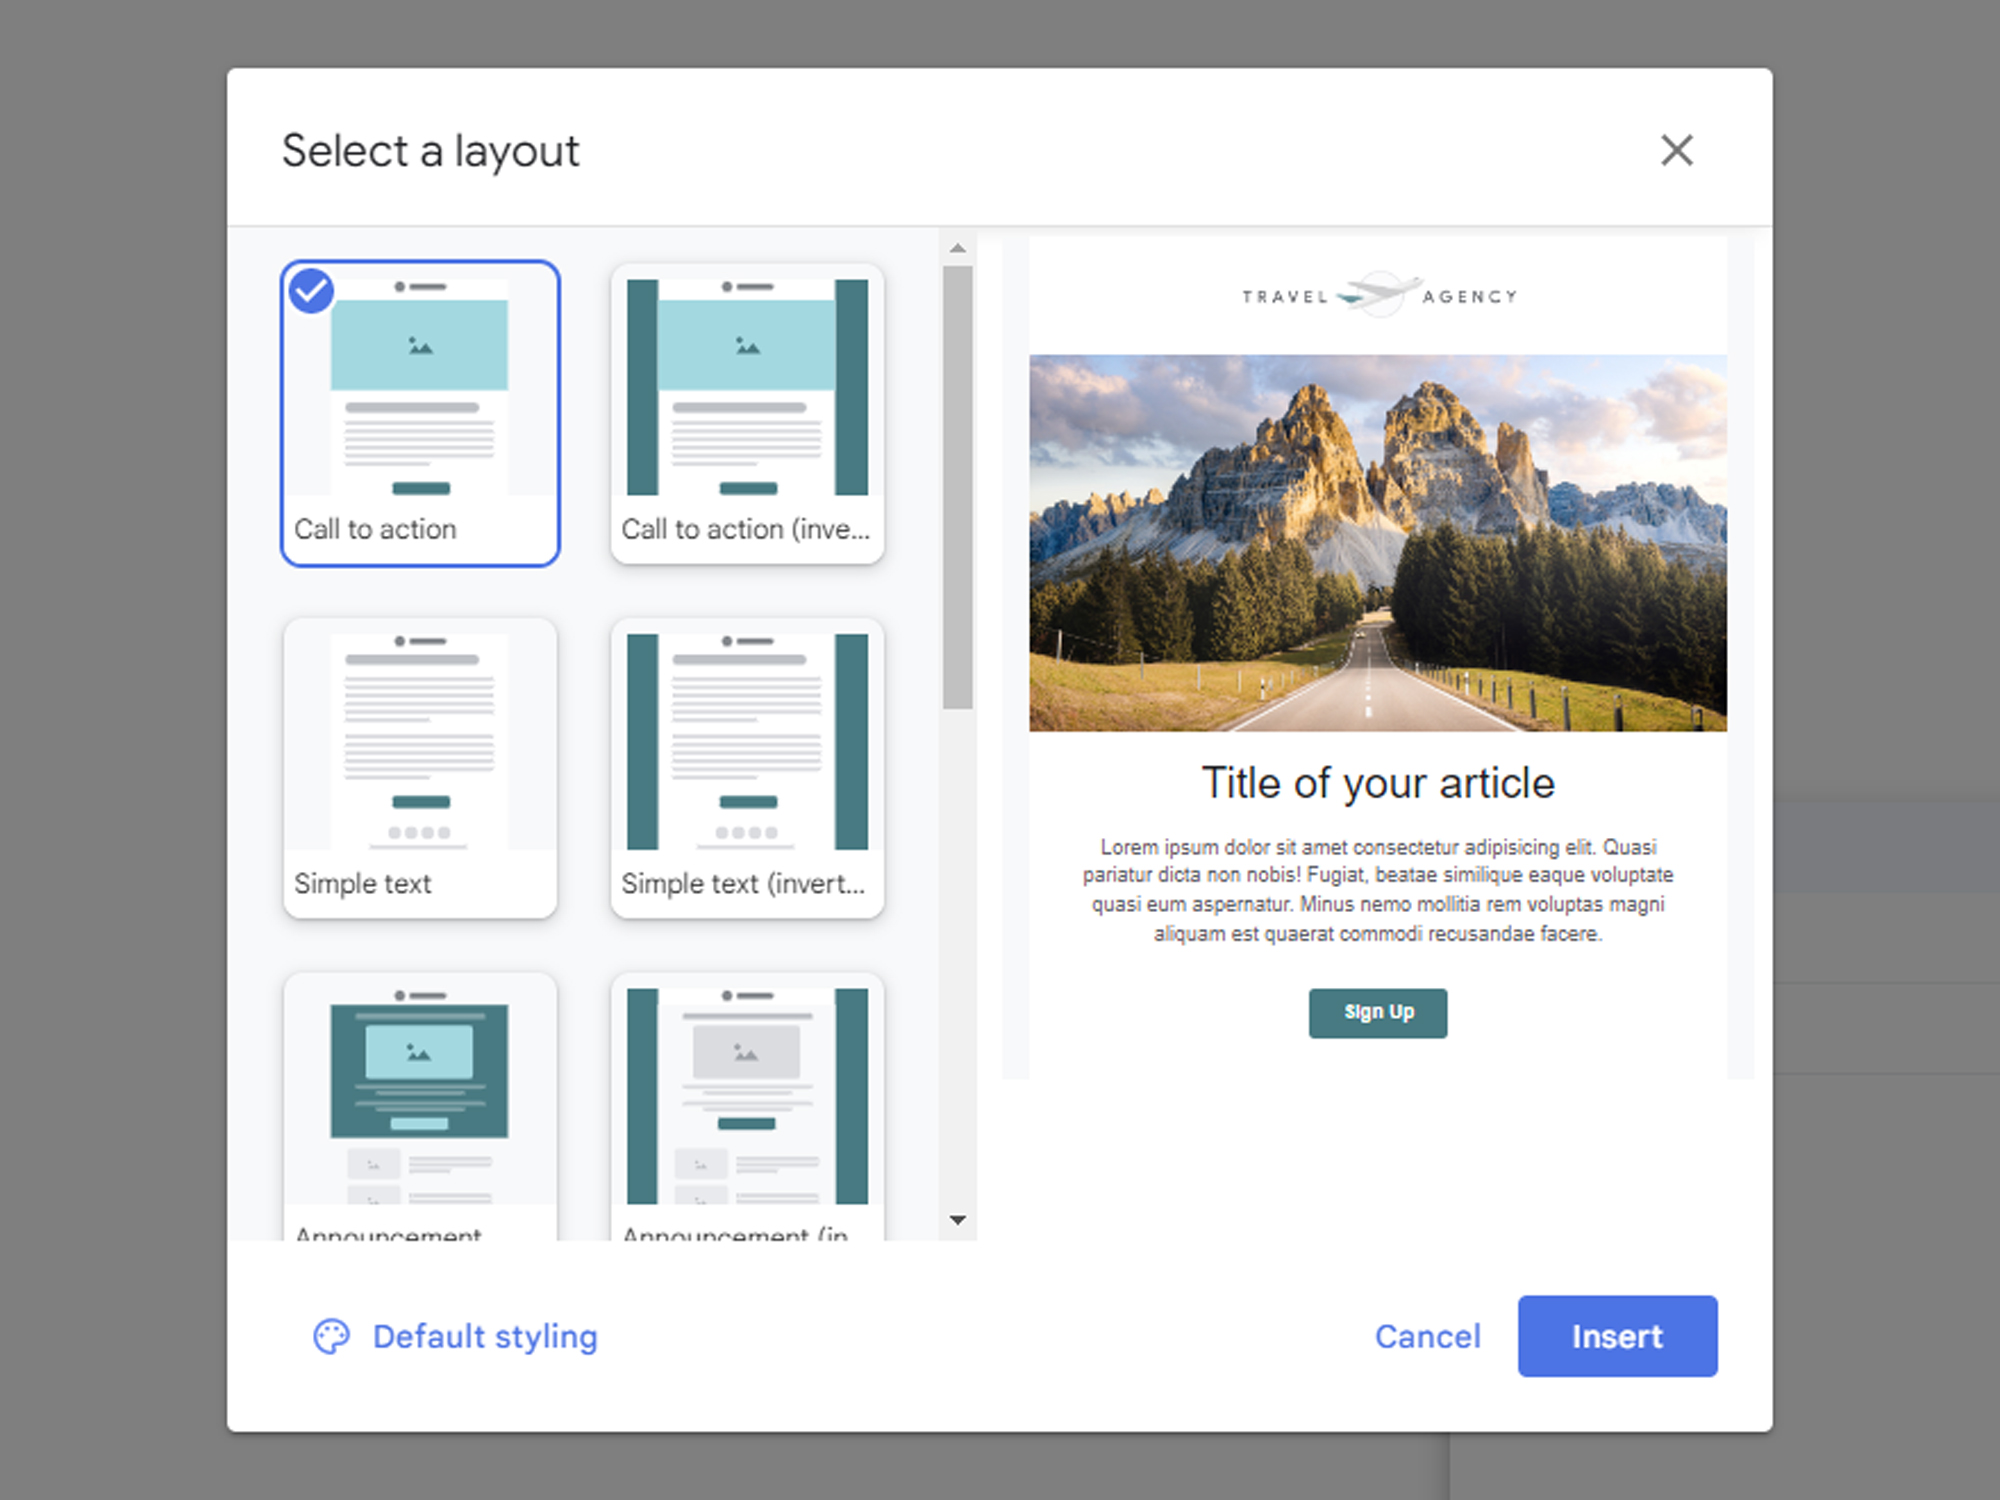
Head to Gmail in your web browser, then click Compose to start writing a new message. You’ll find the layouts button toward the end of the row of icons next to the Send button—it looks like a subdivided rectangle. Click it to open up a layout gallery where you’ll be able to choose from templates combining images, text, and other elements. Select any of the thumbnails to see a preview on the right.
Once you’ve found a layout you like, click Default styling to customize the template. Here you can drop in your logo, select your email’s primary font, and adjust the color palette—Pick the main one and Gmail will select a few others to match. Via Footer details, you can enter a name and address to go at the bottom of the email, and via Links, you can add some social media URLs.
[Related: Google integrated its other apps into Gmail. Here’s how to best use them.]
Click Save changes to confirm the tweaks that you’ve made to the template, then select Insert to drop the layout into the email you’re composing. Once you’re there, you can edit the text and the images just as you would in any other email—click on a picture and pick Change image, for example, to swap it out for something else. Whenever you select a part of the template you can also choose Remove section to get rid of it.
All the other functions of the email compose window will work as normal—you can add the recipients and the subject header at the top just as you always have, for example. Use the full-screen button (two arrows, top right) if you need more space to work on your layout, and click on Send when the email is ready to go. If you want to ditch the changes you’ve made and start fresh with a new template, click on the customized layouts button again and start over.
Add email layouts with CloudHQ
One of the alternative options for customized email layouts for Gmail is an extension by CloudHQ. Compatible with Google Chrome and Microsoft Edge, the service offers more than 1,000 designs to choose from, and it’s free to use for individuals. If you want the ability to share templates within a team, and access to customer support via email and phone, it’ll cost you $10 a month.
Get started by finding the Gmail Email Templates extension in your browser’s store, installing it, and registering an account with CloudHQ. In Gmail on the web, click Compose to reveal a new insert template icon just to the right of the Send button (it looks like a blue document).
The next dialog box shows you all the templates you have to choose from—and there are a lot of them. You might want to make use of the drop-down menu at the top to pick a specific category of layouts (such as Invites and Legal), and if you can’t find what you’re looking for, you can use a search box. Click on any template to drop it into your new message and start customizing it.
You’ll find the built-in template editor straightforward to use. Click on blocks of text to enter your own, and use the formatting options that pop up to change the font and text size, and add bold or italic letters. If your chosen layout includes buttons, you can simply click on them to edit their appearance and set where on the web they redirect the reader to. Select any images in the template, and you’ll be able to swap them out for your own via the Upload Image button. When you’re done, click Close Editor and send the message.
Customize your emails with Stripo
Stripo is an advanced email creation tool that you can adapt to work with a variety of email clients, including Gmail. You don’t need any graphic design or coding experience, because you can simply drag and drop different elements into place to personalize your messages. Premium accounts start at $15 a month, but you can create up to four email layouts a month for free.
You can start building your layouts from scratch, but if you’re not feeling creative, you can also choose from one of the more than 1,200 templates that Stripo provides. You’ll find them under different categories, and you can sort them by industry, season, or what features they have (like countdown timers, for example). There’s also a search tool if you’re in need of something specific, but keep in mind that only some are available for free.
[Related: 9 advanced Gmail searches that will dig up stuff you never knew you missed]
When you find a template you like, you can edit it in your browser. You’ll get a host of formatting and customization options to play around with so that you can include things like social buttons and animated GIFs. There is an impressive number of features and tools you can use, including undo and redo buttons to retrace your steps and roll back a few edits.
Once you’ve got an email layout that you’re happy with, you’ll need to save it to your Stripo account and export it so that it’s ready to use in Gmail. With a template open, click Export at the top, then Gmail, and enter your Google credentials. The layout will appear as a draft in your Gmail account, and you’ll be able to use the platform’s built-in tools to make any other basic edits (like formatting, for example) before sending it.


