
We all deal with a daily deluge of email, which means we jump at anything that can improve the efficiency of our inboxes. In that spirit, consider creating at least one email alias, and you should find that your organization and, in some cases, privacy, improve immediately.
Aliases are useful features found in popular services such as Gmail, Microsoft Outlook, and Apple Mail that serve as alternative addresses for when you don’t want to give out your main one. They still direct messages to your original inbox, so you essentially get a new address without having to go through the hassle of setting up a new account with its own login credentials.
What is an email alias?

In general, email aliases act as “fronts” to your main email address, although the exact details vary from service to service. Anything sent to these variations will arrive at the same inbox as messages meant for your main address, while keeping your original moniker hidden from view. That said, the real application here is not anonymity, but easy filtering.
For example, if you sign up for a lot of email newsletters, consider doing so with an alias. That way, you can quickly filter the incoming messages sent to that alias—these are probably low-priority, so you can have your provider automatically apply specific labels, mark them as read, or delete them immediately. Alternatively, a filter might prioritize messages sent to the alias you give out to friends and family, or those sent to the alias you use for work emails. This approach gives you a lot of flexibility for managing your inbox.
Bear in mind that recipients can usually look at one of your aliases and use it to figure out your main email address. So in situations where anonymity is critical, you might need to start fresh with a new address. Still, if hiding your identity doesn’t matter as much, aliases are much easier to configure than whole new accounts.
How to create a Gmail alias

You don’t need to jump through any hoops to set up a Gmail alias. Just add some periods and plus symbols to the addresses you give out. When you tack on a plus sign followed by a word, the Google service will ignore the added text, and it overlooks periods altogether. For example, let’s say your email is “johnsmith@gmail.com.” Messages addressed to “john.smith@gmail.com,” “j.o.h.nsmith@gmail.com,” “johnsmith+hello@gmail.com,” and “johnsmith+message@gmail.com” will all show up in your usual Gmail account.
Although the end result is the same, this gives you a quick and effective way of filtering messages. Going back to the John Smith example, you might always do your online shopping through the “john.smith@gmail.com” alias. When these messages arrive, Gmail might automatically label them “shopping” or “receipts.” You could sign up for email newsletters with the moniker “johnsmith+news@gmail.com,” and a filter might mark them read and send them straight into the Updates tab.
[Related: 4 tips to bring your Gmail inbox to zero]
To set up a filter, head to your Gmail settings: Open the web portal, click the cog icon in the top right corner, and pick See all settings. Choose Filters and Blocked Addresses, Create a new filter, enter your chosen alias in the To field, and hit Create filter. Use the next dialog to decide what should happen to messages sent to this address—you can add labels, flag them with stars, mark emails as important, mark them as read, or instantly archive messages, among other options. Finally, click Create filter.
Giving out aliases is easy, but if you want to send Gmail messages from these addresses, you’ll have to tweak the settings once more. Open Settings, go to Accounts, find Send mail as, and click Add another email address. Then type out the email address, tick the Treat as an alias box, and click Next Step. From now on, whenever you compose an email, you’ll be able to select your alias in the From field.
How to create an email alias in Outlook
Outlook aliases are similar to the ones you can build in Gmail. You can also create completely new “@outlook.com” addresses within your primary account, which gives you more options if you want to use aliases to maintain anonymity.
With Microsoft’s free webmail service, you can still make up variations on your full address using plus symbols, but periods won’t work the way they do in Gmail. For example, you can use aliases such as “johnsmith+news@outlook.com” and “johnsmith+work@outlook.com,” but you can’t rely on “john.smith.” Again, you don’t have to specifically create these aliases—just hand them out, and they’ll work automatically.
To set up a filter for your tweaked email addresses, click the cog icon in the top right, hit View all Outlook settings, make sure you’re in the Mail tab, select Rules, and choose Add new rule. Name your rule whatever you want, go to the dropdown menu under Add a condition, and pick To from the list of options. Another text box will appear to the right—enter your email alias there. Finally, use the Add an action dropdown menu to decide on an action to take. For instance, you might tell Outlook to immediately delete alias-addressed messages, move or copy them to certain folders, mark them as read, label them as spam, categorize them, forward them to another email address, and so on. Click Add another action to process the incoming message in multiple ways, or Add an exception to exclude certain messages from the filter. When you’re happy with the actions an alias-addressed email will receive, click Save.
[Related: How to secure your Microsoft account]
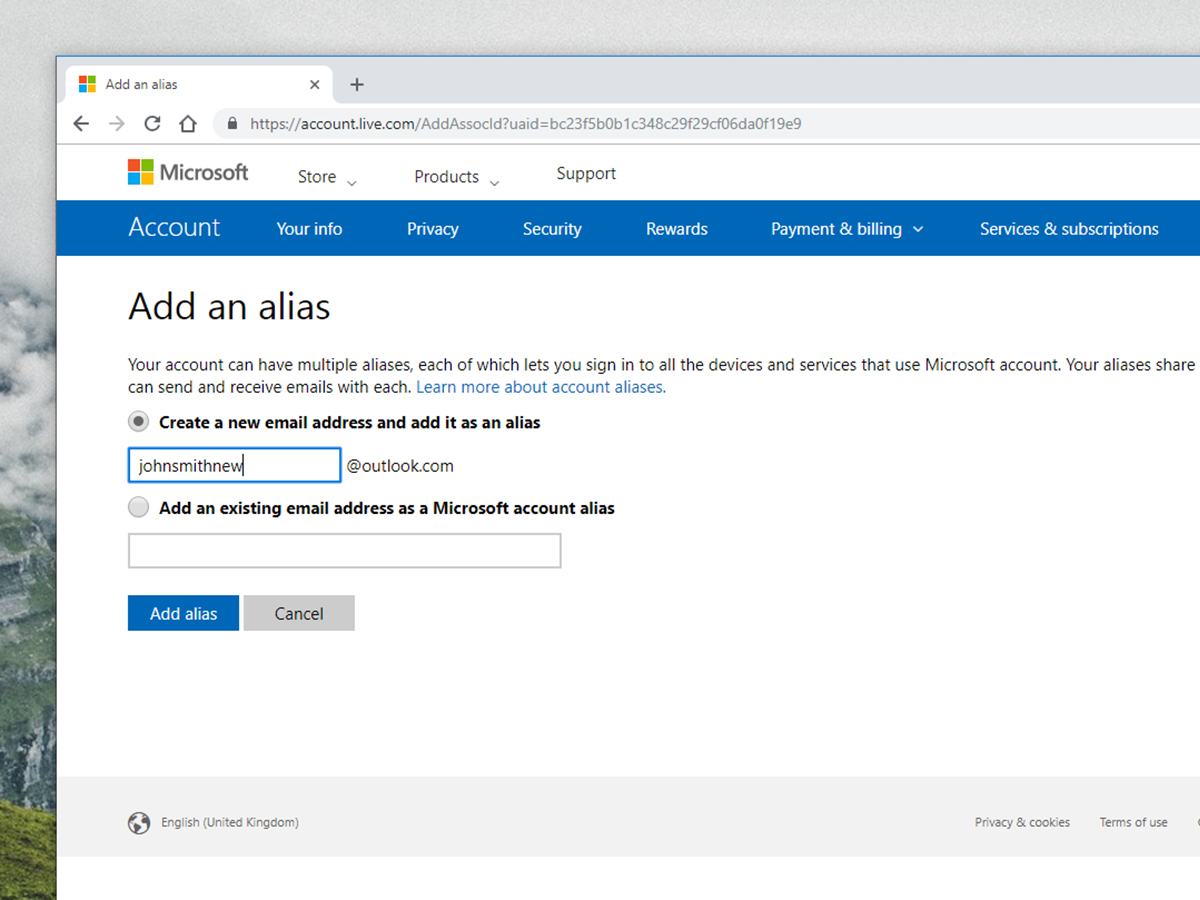
Unlike with Gmail, you won’t be able to send messages from these variations on your original email address. However, Outlook does let you add a completely new @outlook.com address inside your primary account. If your requested address is available, you’ll get to manage both “johnsmith@outlook.com” and “johnsmithalias@outlook.com” from the same account—messages addressed to both will arrive at the same inbox, and you can send messages from both as well. So if you want to use aliases to achieve anonymity, Microsoft’s email service has an edge over Gmail in this department.
To add this kind of alias, you’ll need to visit a specific web page within your Microsoft account (account.live.com/AddAssocId/). Look under the Create a new email address and add it as an alias heading and enter your new address there. You can choose pretty much any alias you want, as long as you pick addresses that nobody else has claimed first. Once you’ve established an email alias or two (or more), they will work in the desktop version of Outlook, as well as the Mail application that comes with Windows. To create new ones though, you’ll need to follow these steps in your web browser, not the desktop app.
You can filter incoming messages sent to these aliases the same way you filter those sent to DIY aliases made with plus signs. To actually send emails from your added addresses, just click From when you’re composing a message and select whichever moniker you prefer.
How to create an iCloud email alias for Apple Mail
The Apple Mail alias system works very much like the Outlook one. Without changing any settings, you can toss pluses into your address, and messages sent to “johnsmith+work@icloud.com” will still end up in the “johnsmith@icloud.com” inbox. However, you can’t send emails from these aliases. To get that ability, you can create up to three completely new @icloud.com email addresses that funnel messages into your original inbox.
Let’s start with those plus-sign aliases. To filter messages sent to those addresses, head to iCloud Mail’s web portal, click the cog icon, and choose Preferences. Select Rules, then Add rule. Enter your alias in the top field, change the label to is address to via the dropdown menu, and decide what you want to do with the message: You can send it to a folder, forward it, mark it as read, and more.
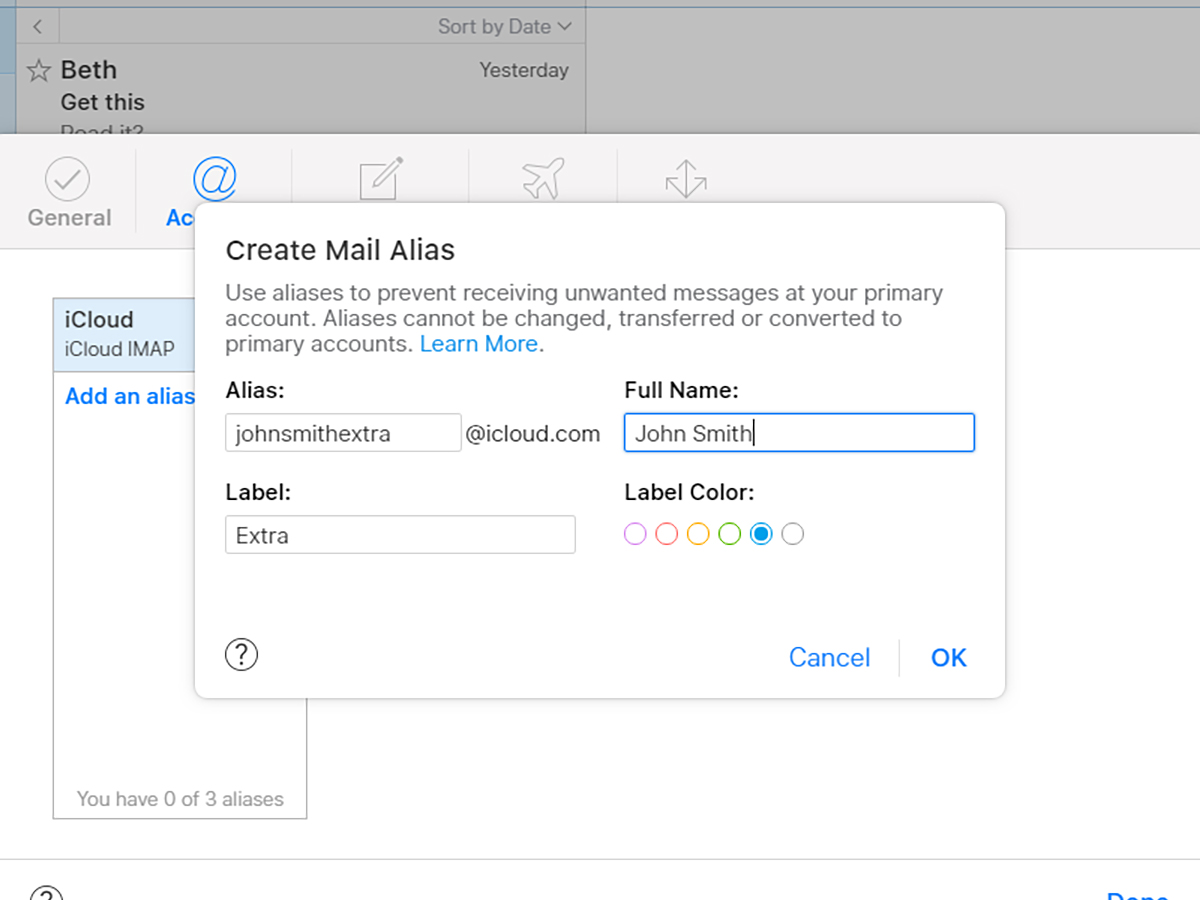
Those DIY aliases are easy to set up, but you can’t send messages from them. For that, you can create a brand-new alias—a different email address managed from your original account—and send messages from it. First, click the cog icon, followed by Preferences. From the Accounts tab, choose Add an alias, and enter your chosen address. If it’s available, it’s yours. Finally, you can tell Mail to apply a label to any messages that arrive at this address.
That’s not the only filter, of course—the same rules you applied to plus-sign aliases will also work for standalone ones. And you can send messages from them: When you compose a new email, your available aliases will appear as options in the From box. This holds true whether you’re writing a message from the web or from the macOS desktop app. To further add and manage aliases from your Mac, open the Mail app and choose Mail, then Settings.
This story has been updated. It was originally published on November 11, 2018.
