The story often starts the same way: you find a funny picture on the internet and want to add it to your work presentation or turn it into a meme to share with your friends. You download the image and realize there’s not much you can do with it because your platform of choice does not support WebP format.
You don’t have to give up your title of the funniest person at the office—there can be a happy ending. Use these three simple steps to quickly turn WebP photos into classic, easy-going JPEGs.
WebP as in webpages
“I didn’t download a webpage,” you might have scoffed when you thought you downloaded a JPEG or a PNG file and found a WebP instead. Don’t let this file format confuse you, though—WebP files are images, but their name derives from the fact that they’re optimized for the web.
[Related: How to convert any file to any format]
Created by Google, the WebP image format claims to be 26 percent lighter than a PNG, and up to 34 percent lighter than a JPEG, allowing it to retain high quality without slowing websites to a crawl. WebP images are relatively new, and even though most web browsers support them, there are big platforms and applications, like MailChimp or even Google Slides, that don’t.
How to turn WebPs into JPEGs
Technically, you can Google “convert WebP to JPEG” and get a handful of web-based platforms that will change the format of your image files. That’s a totally feasible way to approach this problem, but many converters require you to download the picture, upload it to the website, and then download it again, which is inefficient to say the least.
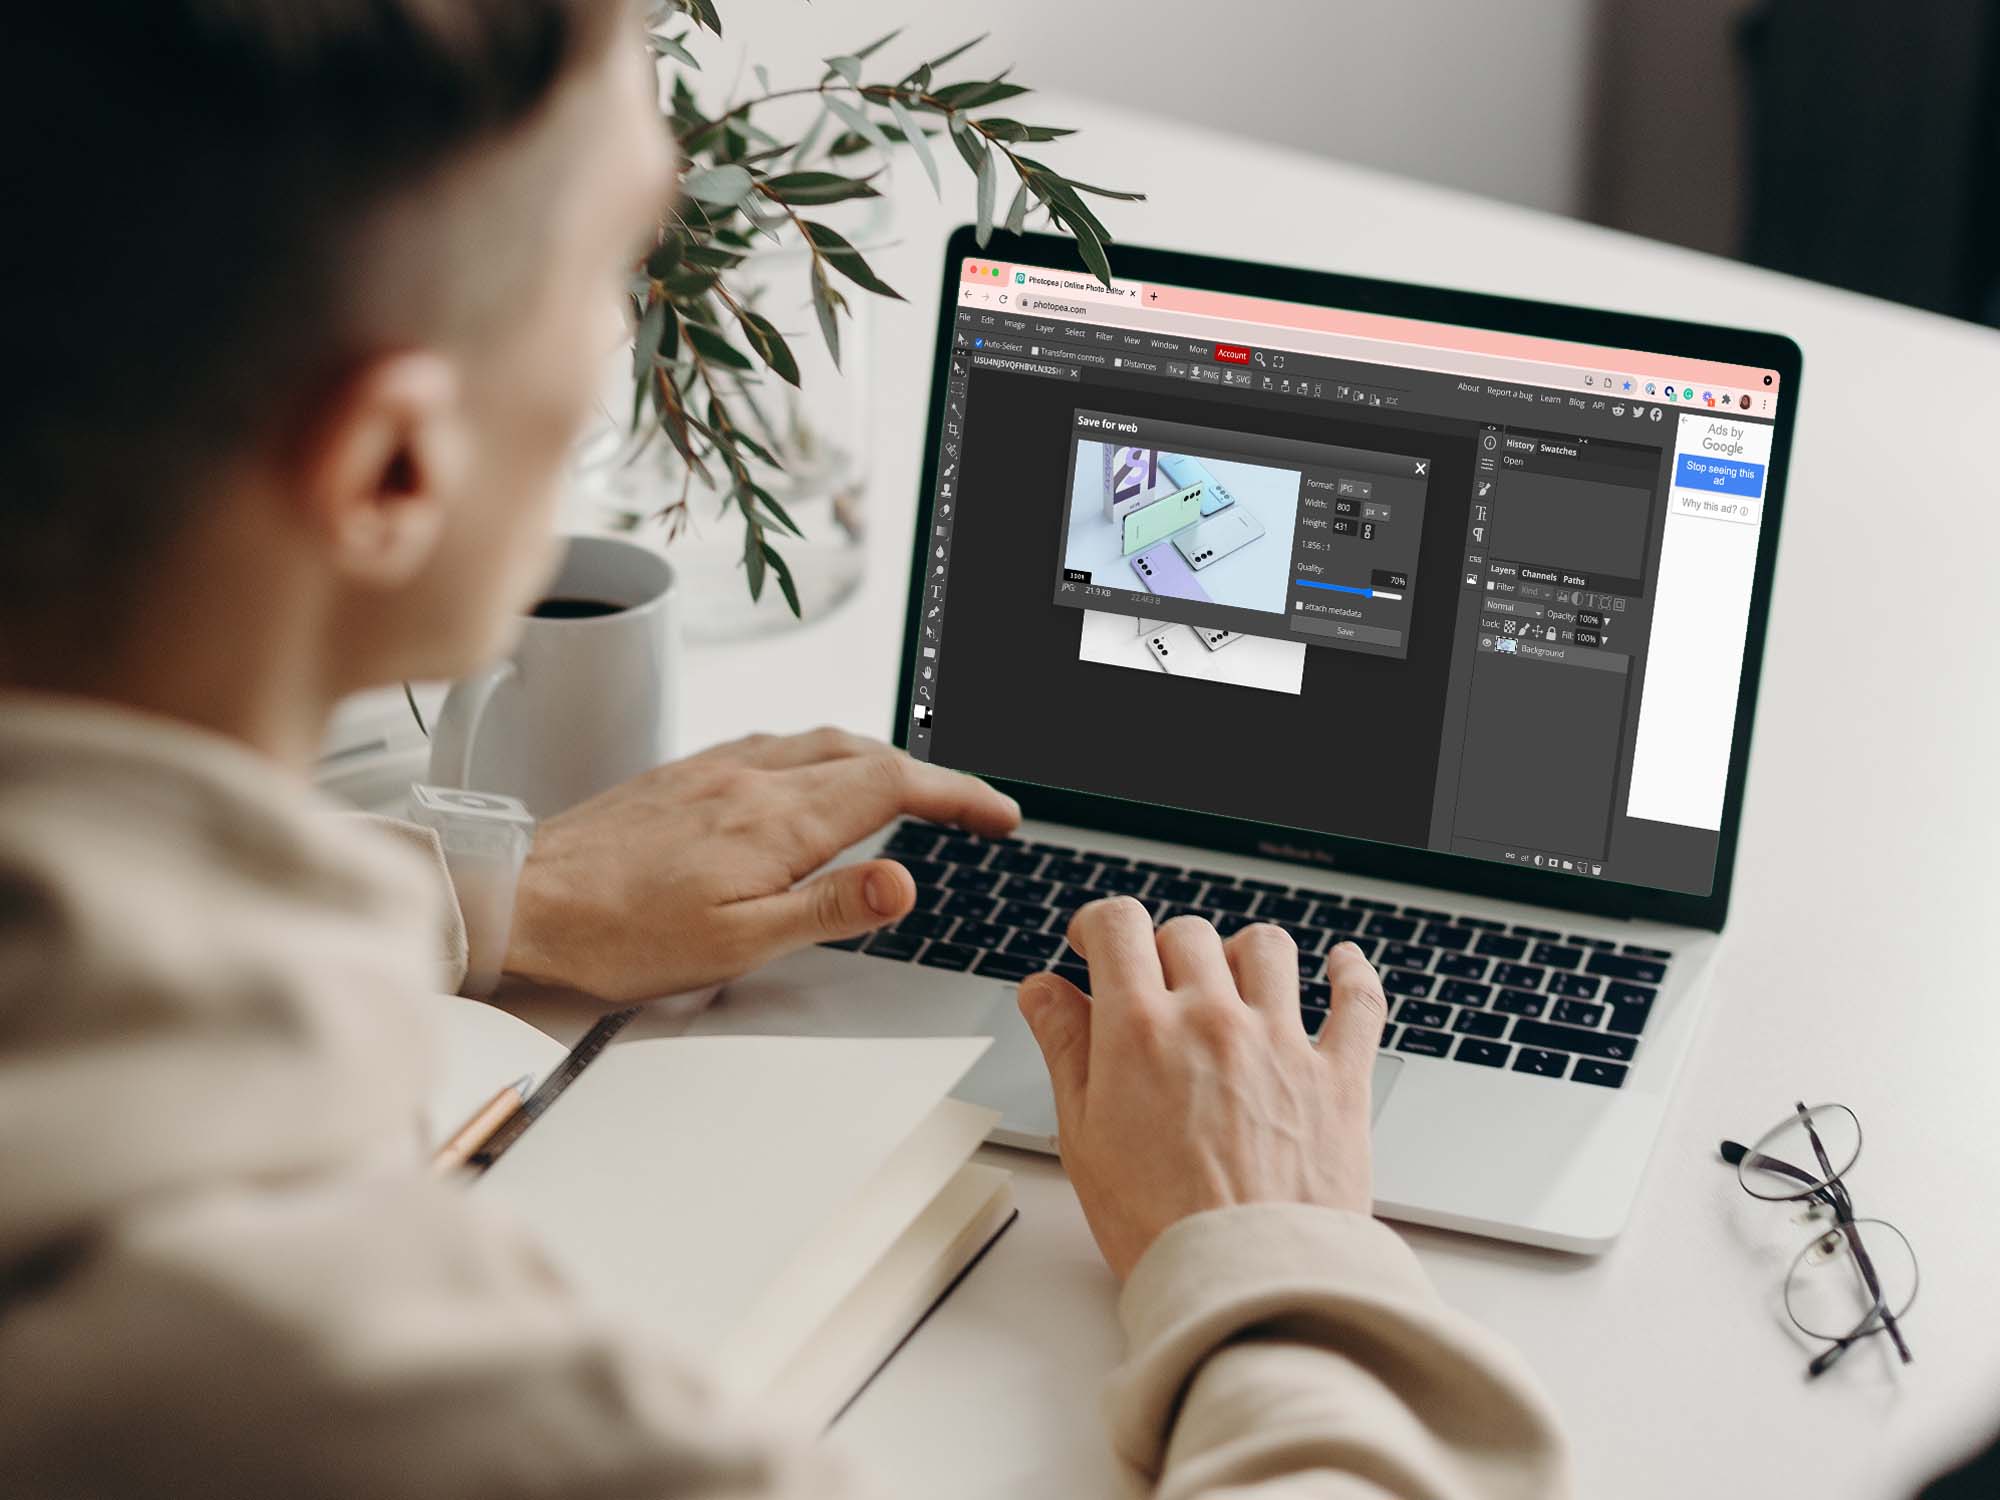
Instead, you can convert a file and download it just once by using its URL and a platform like the free web-based photo editor Photopea.
First, make sure you’re dealing with a WebP file. On Chrome, right-click the image and choose Open Image in New Tab… (Firefox, Safari, Microsoft Edge, and other browsers offer similar options when you right-click on photos). When the new tab pops up, turn your attention to the address bar and look at the last part of the URL, which tells you the format of the image you’re looking at. If it says “.webp”, you have a file you can convert. Copy that full URL to your clipboard.
[Related: Easily convert a PDF to an image on your phone]
In another tab, open Photopea and click on File > Open more. Next, choose Open from URL, paste the address of the photo you want, and click OK. By default, the file will open as a new project, which you can edit, crop, and resize right there in the platform. When you’re done, click on File again, go to Export as, and choose your fighter: JPEG, PNG, PDF, or any of the other listed formats. You’ll see a new window pop up, which will show you options related to the format you chose, such as the quality and size you want your image to have. Finish by clicking Save.
With time, more and more platforms will support the WebP image format and tricks like this will not be necessary. Until then, don’t let annoying files stop you from cracking up your friends and colleagues.
