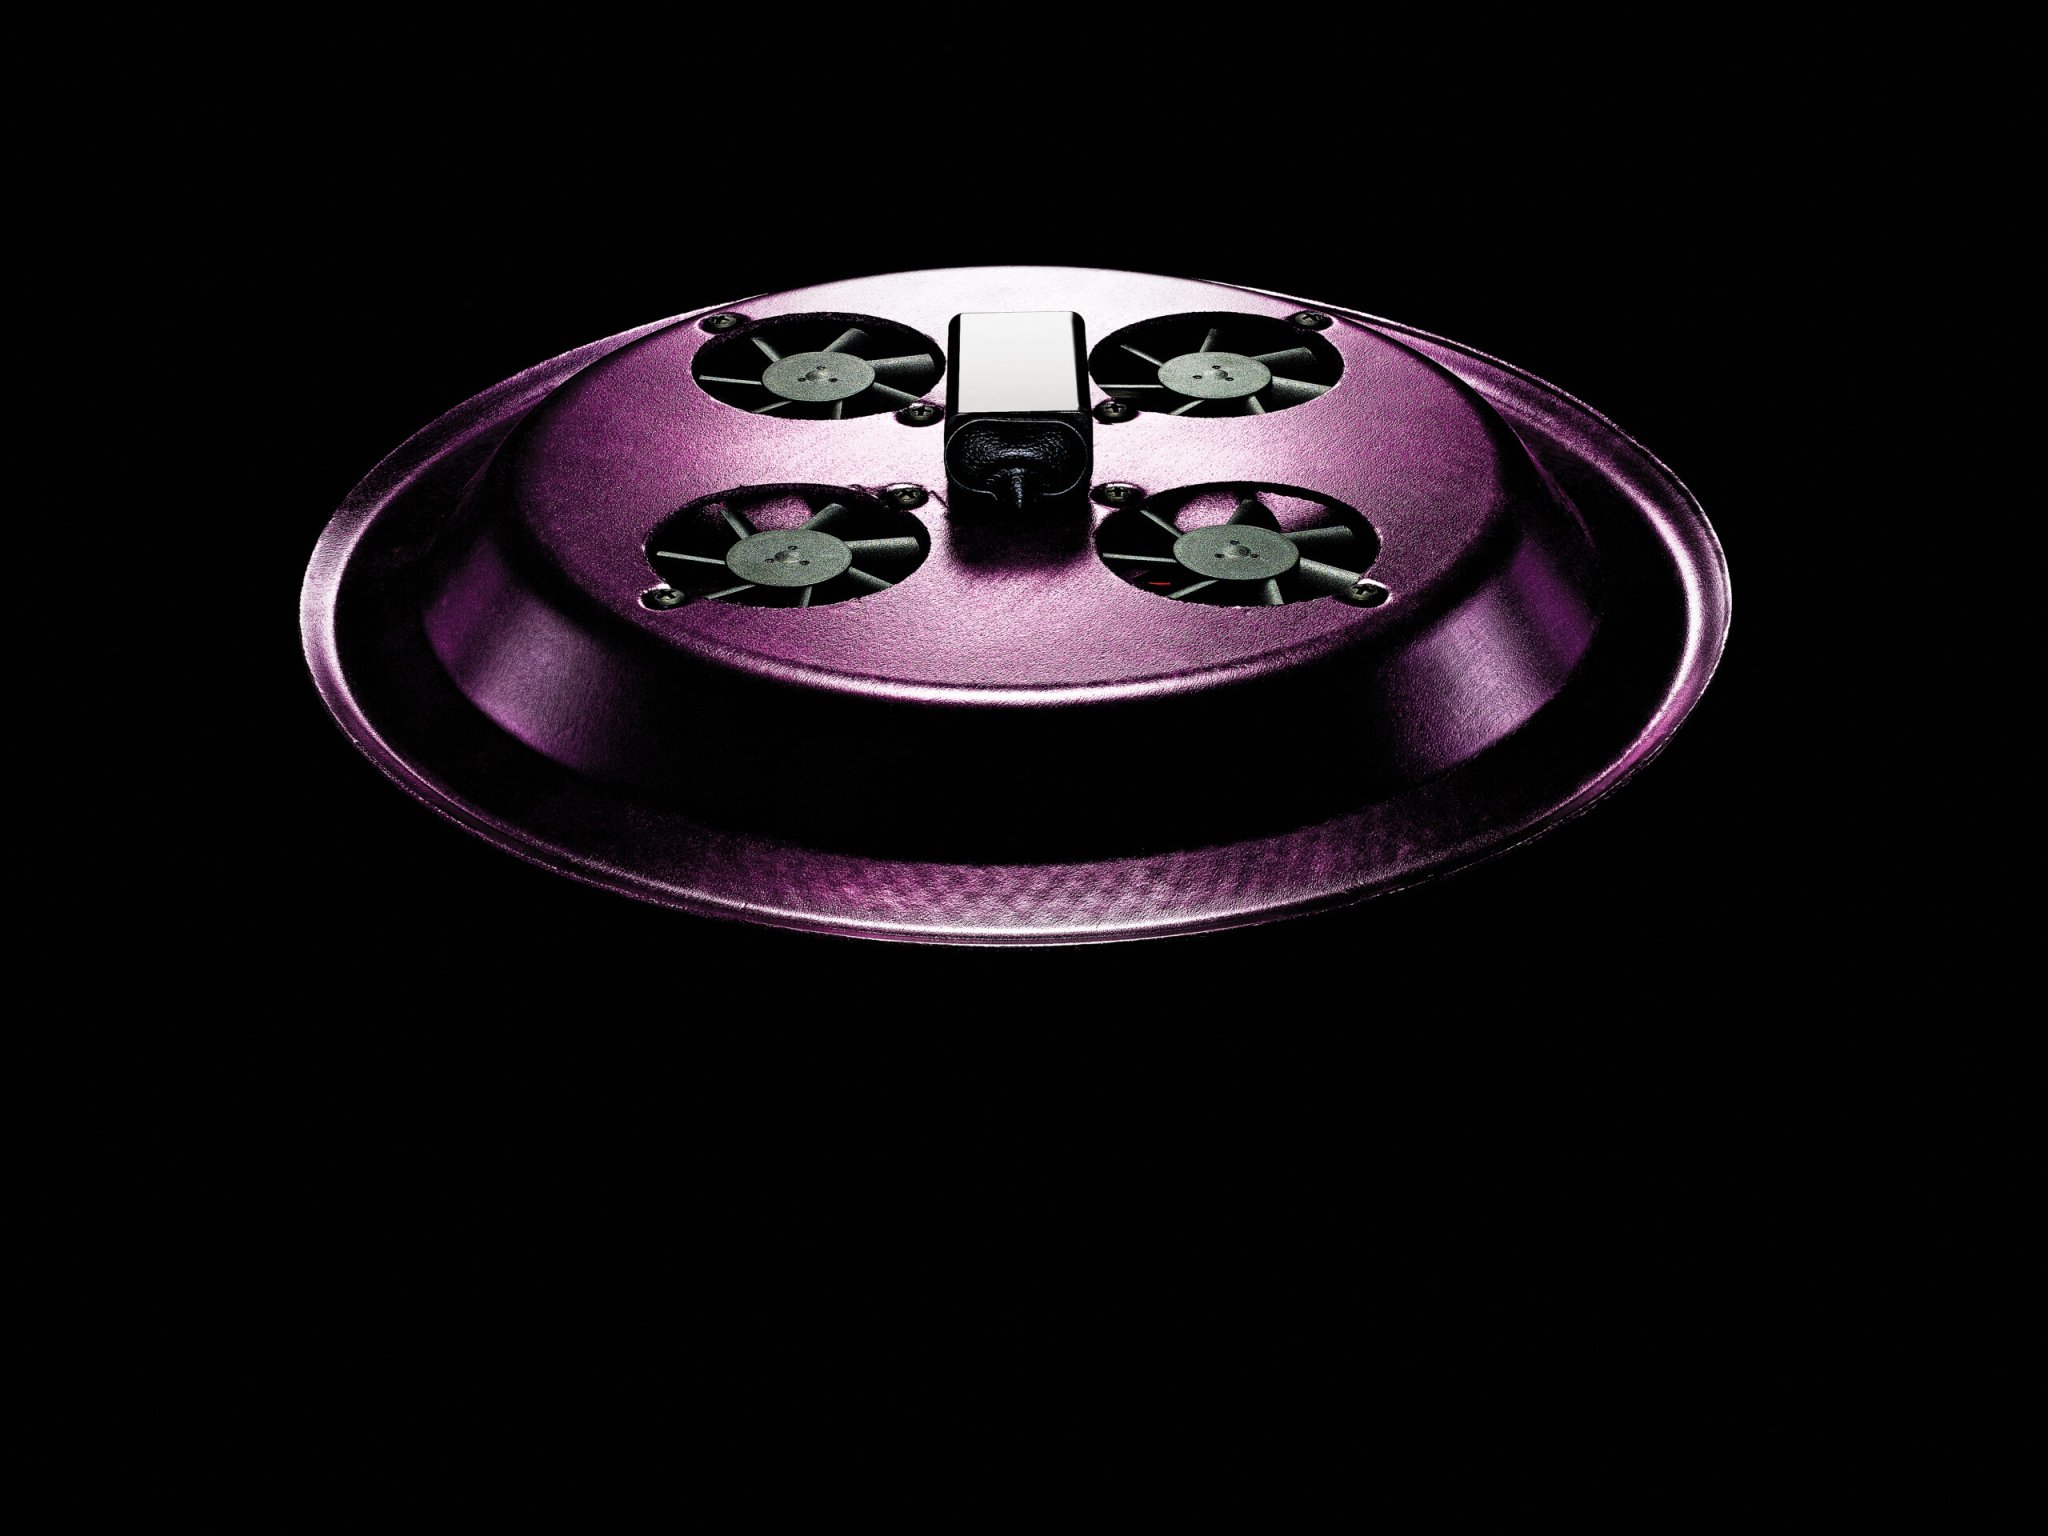
If you believe the old Hollywood prophecies, Marty McFly will be hopping out of Doc Brown’s DeLorean on October 21st. And when he gets to the future, he’ll need a hoverboard. You can do your part to prevent a time paradox–just slap together this low-budget hovercraft from a pair of Styrofoam plates and four surplus case fans. The stacked plates force the breeze from the fans into a wall of downward-directed air around the edge of the craft. This wall, called the momentum curtain, raises the pressure of air trapped underneath the craft, increasing lift and allowing it to hover. The “hoverplate” won’t carry your weight, but it will glide effortlessly over any smooth surface like a giant, self-powered air hockey puck. Great Scott!
Materials
- 2 11-inch-wide, 1-inch-deep foam plates
- 4 small (50 mm x 10 mm) 5-volt case fans
- 9-volt NiMH battery
- 9-volt battery clip
- 2 wire nuts, 22-18 AWG
- 8 5/8-inch 6-32 nylon screws and hex nuts
Tools
- Utility knife
- Drill
- Wire strippers
- Hacksaw

Instructions
Stack the plates face-up and arrange the fans in a circle on top, with labels up. Point the wired corners toward the center, with the opposite corners close to the rim. Mark the top plate with the locations of each fan’s opening and its inner- and outer-corner mounting holes.
Remove the fans and drill eight 1/8-inch mounting holes through both plates. Separate the plates and cut out the four circular fan openings in one of them. This will be the top plate.
Attach the battery to the battery clip, and set it in the center of the top plate. Note the location of the battery clip wires and cut a small triangular slot for them to pass through.
Saw two corners off each fan case, leaving the wired corner and the one opposite attached. Arrange the fans inside the top plate as in step 1, and pass nylon screws, from below, through the eight mounting holes in both the top plate and the fans.
Trim the fan wires to reach about an inch past the center of the plate, and then strip half an inch of insulation from each.
Thread the battery clip wires through the triangular slot from below and pull the battery and clip up close to the plate. Then trim the wires until they just reach the plate center. Strip half an inch of insulation from each wire and unclip the battery.
Twist all five red leads (four from the fans and one from the battery clip) together with one wire nut, and all five black leads together with the other.
Cut the rim off the bottom plate, about halfway down the side, and discard it. Install the bottom plate inside the top plate, so it fits over the fans and protruding screws, and secure it with eight hex nuts.
Flip your hovercraft over, clip in a freshly charged battery, and set it on a smooth floor.

Warning:
The fans don’t generate much power, but they can still cause minor cuts and bruises. Keep your fingers clear!
This article was originally published in the March 2015 issue of Popular Science, under the title “A Hovercraft Built From Styrofoam Plates.”