‘Tis the season for spooky decor. And if there’s one ornament that screams that Halloween season is here, it’s a jack-o’-lantern. Unfortunately, many animals find pumpkins delicious, and if by the end of the season, yours has not turned into a rodent’s dinner, it will at least be rotten and destroyed.
To avoid the stench of a decomposing piece of fruit on my porch, this year I made jack-o’-lanterns out of wood. This is a relatively straightforward build that still provides plenty of opportunities to flex your creativity.
And regardless of the age and dexterity of the people living with you at home, you can make this project a family affair—I built three in my first batch, and had each of my kids and my wife design the faces. My children are only seven and I don’t trust them with a jigsaw yet, but they still helped assemble the boxes and tops. We also got to tromp through the woods together searching for the perfect stick to make the stems from.
There’s also no reason these boxes have to be limited to Halloween. Carve whatever symbols speak to your favorite seasons or holidays, and you’ll have decorations to keep your home festive all year round.
Stats
Time: 2 to 4 hours
Cost: $15 to $30
Difficulty: Intermediate
Materials
- 1 (8-feet long) 1-inch by 8-inch board
- Flickering tea lights
- Wood glue
- 1-¼-inch brad nails
- CA glue
- Orange spray paint
- Black spray paint
- (Optional) 1 (2- to 3-inch long) stick
- (Optional) ¾-inch dowel
- (Optional) eye bolt
Tools
Instructions
1. Cut your boards to size. Normally, woodworking projects start with fully milling the wood, but sometimes, precision milling isn’t necessary. In this case, as long as the boards are reasonably flat, you can use them for this project, making this the perfect opportunity to reuse some of those scraps you may have lying around your working area.
All I did to trim my boards was joint the long edges down to size on my table saw. Then I squared up and trimmed the ends to length using my crosscut sled. This process was more than adequate for creating a nice, tight box. You’ll be able to hide any gaps later with a coat of paint.
These are the size boards I cut, but you can adjust these measurements to match your design and whatever wood you have on hand.
- 3 (5-inch by 12-inch) for the front and two sides
- 1 (5-inch by 9-inch) for the back
- 1 (7-inch by 6-inch) for the base
- 1 (8-inch by 7-inch) for the top-base
- 1 (6-inch by 5-inch for the top-top
Pro tip: If you’re buying your wood, take your time at the store to sort through the lumber and find the flattest boards. Instead of just looking at it straight on, look down the full length of the board on all four sides, but particularly along each long edge. This is the best way to see the waves and warps. Spending 10 minutes searching for the best boards can save you a lot of headaches later on.
[Related: 3 Halloween costumes you can make with reused masks]
2. (Optional) Carve the face. If you’re working with a scroll saw, you should draw, carve, and finish the face of your jack-o’-lantern on the front panel before you proceed. You can find more directions on how to do so in steps 6 and 7.
If you’ll be using a jigsaw for this, you can skip this and continue to step 3.
3. Glue the pieces together to form a box. Assemble the four sides of the box by smearing wood glue on one long edge of the front board, and pressing one of the two side boards against it. Make sure the edge is flush with the face. Drive brad nails through the sideboard into the edge of the front board to hold the two together while the glue dries. Then repeat the process with the other side.

If you don’t have a brad nailer, you can use clamps for this step. The nailer is just faster, particularly if you’re making more than one box at a time.
Continue by installing the back of the box in the same way. This board is shorter than the others to create an opening where you can slip the tea light into the box when it’s fully assembled, so you’ll need to position this board at the top of the box, not the bottom. If you haven’t carved your design yet, the top and bottom probably don’t matter at this point in the process. If you have, make sure the bottom of your design aligns with the tea light opening.
4. Assemble the tops. The top is very basic. Glue the 6- by 5-inch board flat on top of the 8- by 7-inch board, roughly centered. This creates a square top hat effect. Clamp or brad nail the two boards together while the glue dries.
Continue by drilling a small pilot hole in the center of the assembled piece. This is where you will screw the stem of the hat or the eye bolt to hang it.
5. Sand, sand, and then sand some more. Once the glue has dried, it’s time to sand. I use 120-grit sandpaper on my orbital sander. The priority is to flush the edges with the faces to hide some of the seams. This also helps make cutting the face with a jigsaw easier, as the saw won’t get hung up on the lips.
I didn’t try to remove any pits, scratches, or imperfections in the wood, for two reasons. First, you’ll be painting your box bright orange which will hide a lot of those imperfections. Second, I’m aiming for a weathered look, which means holes, marks, and scratches fit the aesthetic beautifully. If you’re aiming for a more polished, pristine look, then by all means—keep sanding.
6. Carve the face. I used a jigsaw to carve out the face, and the box shape created a stable platform for me to cut on that was deep enough for the saw blade to move up and down in.
If I’d done it before assembling the box, I would have had to find (or build) a place to cut while clamping the board down to my bench, which seemed like a lot of unnecessary effort.

The process with a jigsaw is pretty easy and took about 10 minutes. First, draw your design on the front of the box. Make sure that the face is oriented so the opening in the back panel is at the bottom.
Next, drill a series of holes in the design large enough for the saw blade to fit into. A 3/8-inch drill bit worked for my blades. The placement of these holes can make the difference between an easy path for your saw and a hard one. Put one hole in each corner of the design elements (eyes, nose, mouth, at the tips of teeth), so that you can cut from hole to hole along the line, and then back the other way as needed. This will allow you to make longer, smoother cuts, and reduces or eliminates the need to cut yourself space to turn around in, which leaves ugly, jagged edges behind.
7. File and sand the inside of the cutouts. No matter how careful you are, jigsaws almost always leave behind some jagged edges. Sand these down as smooth as you want to match the aesthetic you’re going for.
Because many of the face features are relatively small or oddly shaped holes, I found sandpaper hard to use. Instead, I used a variety of files to get into all of the nooks and crannies. A round-back file was particularly useful.
When I’d gotten most of the features smooth with the files, I went back over it one more time with a piece of 120-grit sandpaper wrapped around a small scrap of wood. This couldn’t get everywhere but did a decent job. I also used this to round over the sharp edges of the holes.
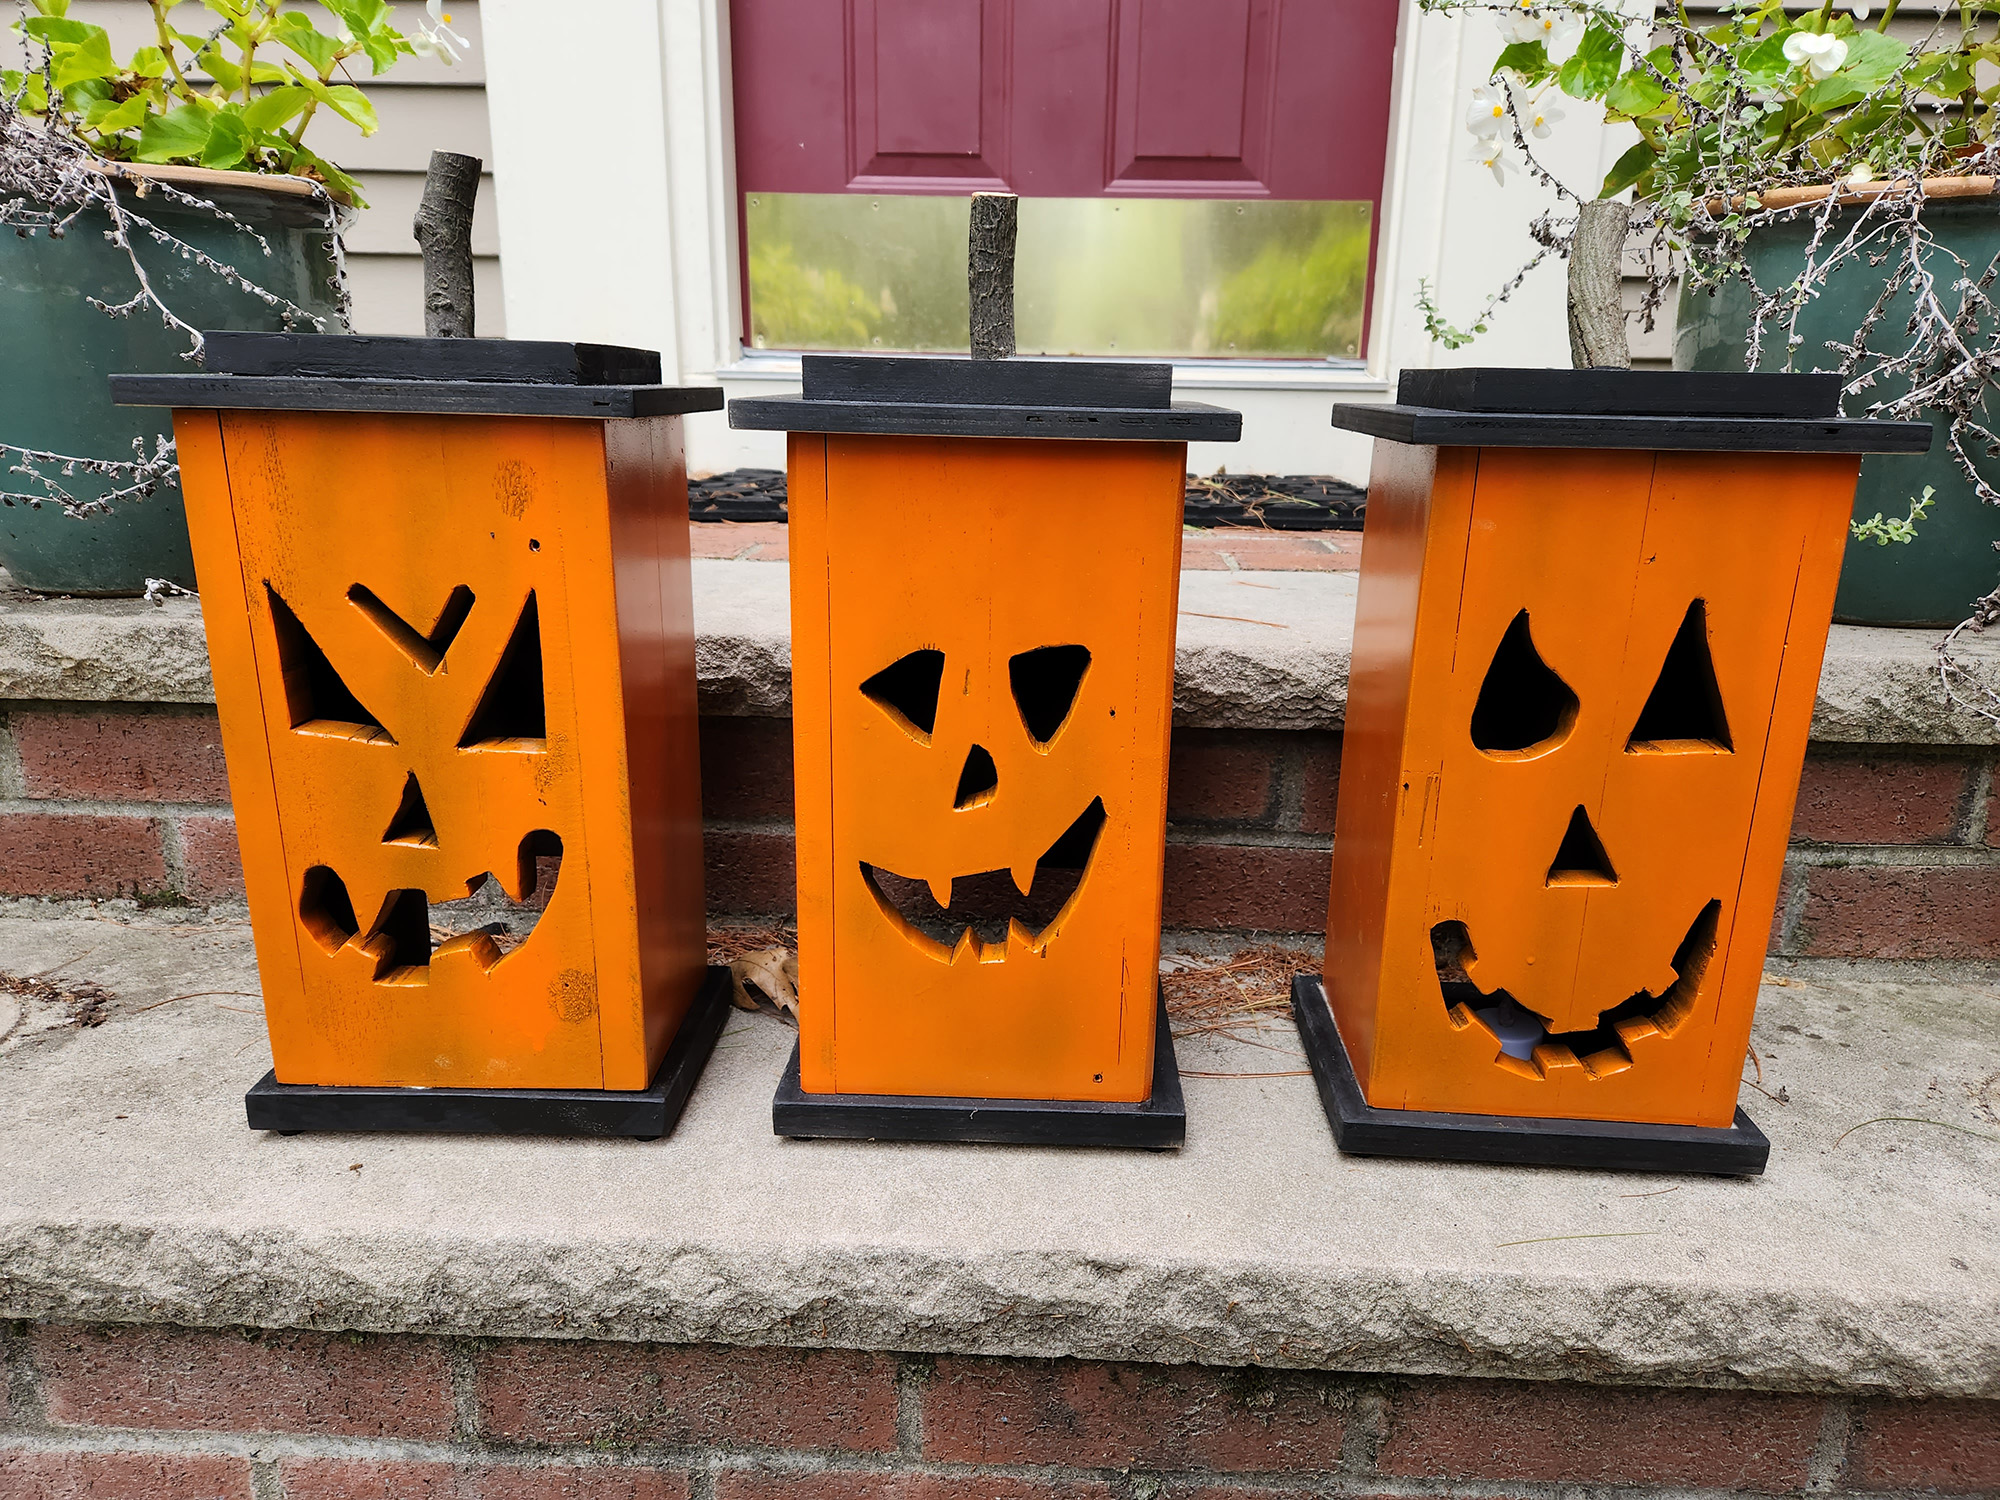
8. Paint it like a pumpkin. You can paint your jack-o’-lanterns using whatever colors, techniques, or patterns you like. But If you want to replicate the weathered, rustic look of the pumpkins in the photos, you’ll have to go through a two-step process.

Start by painting everything black—top, box, and base. I used regular black spray paint for this, but use whatever you have on hand or that you’re comfortable with. Then, paint over that black foundation with several light coats of glossy orange. I wanted the top and base to remain black, so I applied the new coats of paint to the box only. By doing light coats, the black underlayer shows through. I kept adding new coats until the vast majority of the box was orange, but there were still some specks of black, as though the paint had started to fade and discolor over time. It took about three coats of orange to achieve the look that I was going for.
9. Pumpkins, assemble! Now it’s time to put everything together. The first step is to screw the stems to the top. My lanterns are designed to sit on stairs, so I used a 2-inch long piece of branch that my kids chose from a tree in my backyard as the stem. If you’re planning to hang the lantern, you can also use a dowel, or install an eye bolt.
[Related: Five science tricks to scare up a better Halloween costume]
Then it’s just a matter of using wood glue to attach the top and bottom to the box. However, this was slightly tricky to clamp, so I used gravity and cyanoacrylates (CA) glue instead—a strong, fast-acting glue that bonds well to a wide variety of surfaces. A few dabs of CA glue at each corner kept the top from sliding. To add some clamping pressure, I just placed some heavy objects on the tops of the lanterns—screw boxes, my drill, a container of wall repair spackle, and some other random items. A few hours later, the combination made for a perfectly adequate glue-up.
10. Light it up. The last step is to slip a flickering tea light inside the box through the opening in the back, flip it on, and then turn the lights off. The result should be a spooky, glowing Halloween decoration you can use inside or out.

