We may earn revenue from the products available on this page and participate in affiliate programs. Learn more ›
If you spent spring and summer honing your propagating skills, you now probably have a bunch of new green babies.
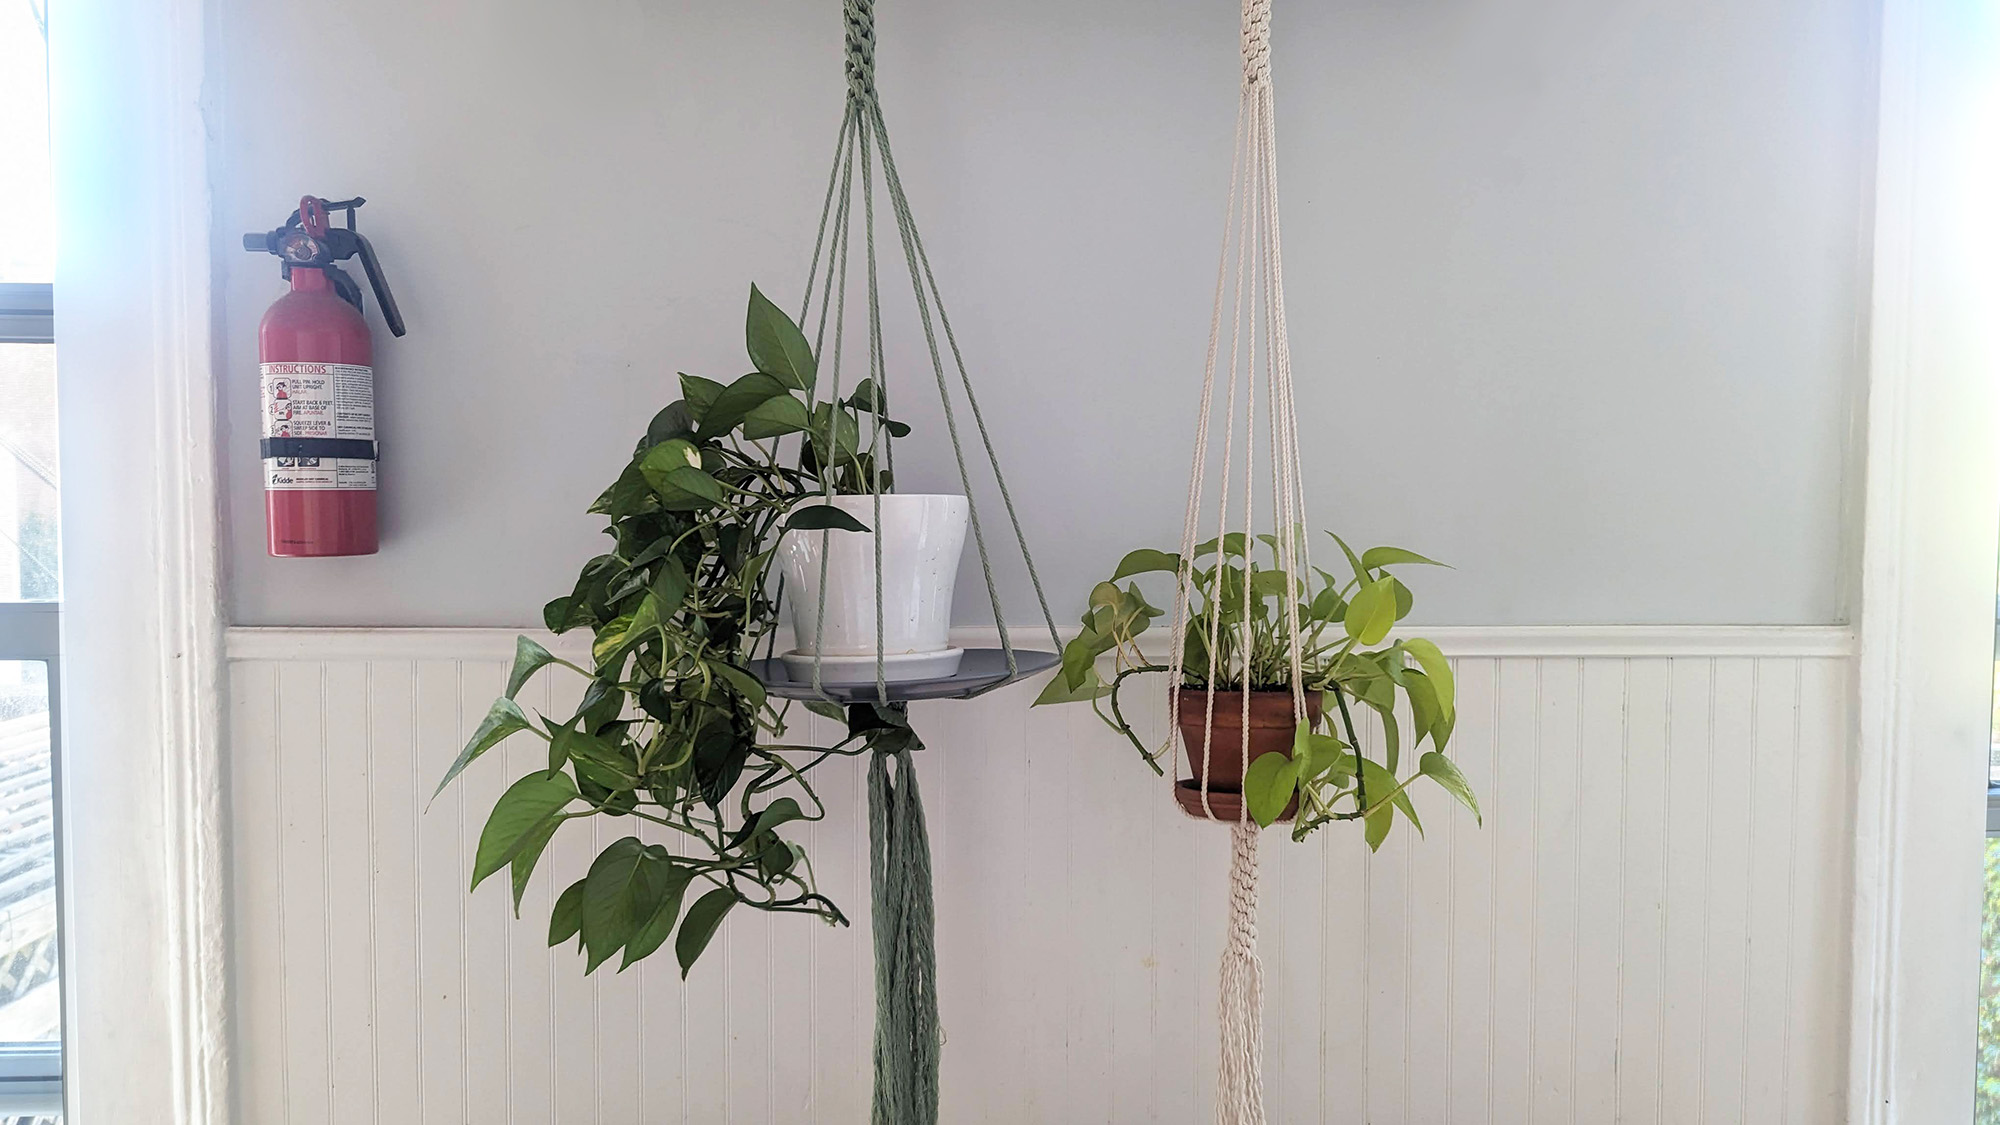
If windowsill real estate is running low and the rest of your flat surfaces are already burgeoning with plants, you might benefit from simple plant hangers you can easily make at home. All you need is some cotton cord and knowing how to make an easy box knot. After that, it’s all about picking the right spot for optimum light exposure, setting up a sturdy hook, and starting your very own vertical indoor jungle.
Stats
- Time: 15 minutes
- Cost: $1.30 per hanger
- Difficulty: easy
Materials
- 4 (4-yard-long) pieces of 4-millimeter cotton cord
- 1 (2-inch-wide) wire ring
Tools
- Scissors
- Measuring tape
- Masking tape (or washi tape)
- (Optional) hair brush (or slicker brush)
How to make a DIY hanging planter
Measure, cut, and set your pieces
1. Measure and cut four pieces of cotton cord. You’ll be folding each piece in half, so cutting 4-yard pieces will result in a hanger that’s approximately 1 yard long (the excess is tied up in the knots). However, the overall length of the hanger—how low it will hang with a pot in it—will depend on the width of the pot or (if you’re using one) bottom plate you plan on hanging. The wider they are, the shorter the overall effect will be.
Feel free to play around with these proportions—if you’ll be hanging a pot with a large circumference and want more of a dramatic effect, cut longer pieces of cord. The given proportions will help you know how much longer they’ll have to be. If you’re using a cord thicker than 4 millimeters, add some extra yardage to account for the thickness of the knots.
And if you want to add some oomph to your plant hanger, you can cut more pieces of cord—as long as it’s an even number of pieces, you’ll be good to go.
- Note: We don’t advise cutting more than six pieces if you’re using 4-millimeter cord, as you’ll need to leave enough space between the cords for the leaves of your plant to spill over the pot. If you want to use more pieces of cord, we recommend using one that’s not as thick.
[Related: These DIY hanging plant shelves will make your home feel like a forest canopy]
2. Separate your cords into two groups and lay them on a flat surface in a cross shape. Make sure the two groups intersect right in the middle. To do this, fold them in half and draw an inconspicuous dot using a marker—you won’t be able to see it when you finish.
3. Pass two consecutive arms of your cross through the metal ring. It doesn’t matter which ones you choose, as long as they’re side by side.

4. Make a spiral lanyard. Also known as spiral stitch sinnet, this braid is made of multiple consecutive box knots, which you may also know as friendship knots. Don’t worry—making a spiral lanyard is way easier than it looks.
If this is the first time you’ve tied a box knot, starting out with your yards-long cords and the metal ring might be a bit of a challenge, so we suggest taking two short pieces of cord (no longer than 20 inches) and taking some time to practice.
How to tie a box knot
1. With your cords making a cross shape, identify each arm starting with the one at the top. We used the four cardinal points (clockwise from the top: north, east, south, and west), but if orientation has never been your thing, you can go with letters or numbers.

2. Take the east cord, fold it to the left, and lay it on top of the south cord. You’ll want to leave enough space so you can thread a cord through the resulting loop later.

3. Take the south cord, fold it away from you, and lay it on top of the west cord.

4. Take the west cord, fold it to the right, and lay it on top of the north cord.

5. Take the north cord, fold it toward you, and lay it on top of the west cord. As you can see, the movement is always the same: you take one cord and lay it on top of the one to the left of it.
- Pro tip: You can also tie a box knot by folding your cords to the right—the effect will be the same. You can even alternate the box knots (one made by folding cords to the left, the next one to the right) to make a Crown Sinnet.
6. Now that there are no cords left to fold, take the north cord and thread it through the loop you left at the beginning. The resulting shape will be a box made of four squares.

7. Finish by pulling the cords and tightening the knot.

If this approach is too hard for you, there are several YouTube videos that will teach you different ways to make a box knot. It doesn’t matter how you do it—as long as it’s a box knot, the result will be the same. Keep in mind that unlike the practice photos above, when you’re working with your planter, each arm will have two cords.
Continue by making enough space for your pot
5. Continue tying knots until your spiral lanyard is around 6 inches long. The objective of this part of your hanger is to secure the ring in place. Making the spiral lanyard between 2 ½ and 3 inches long will also do the trick, so you can go as long as you want.

- Pro tip: As the lanyard gets longer, it’ll be more and more uncomfortable to keep tying knots on a flat surface. Holding the lanyard between your knees will make knotting so much easier.
6. Measure 24 inches of loose cord starting at the end of the spiral lanyard. The structure of your hanger will consist of the lanyard attached to the metal ring, a section of loose cord, and a second lanyard where the planter will sit. The size of the planter you can hang and how low it hangs will depend on how long the section of loose cords is—the longer it is, the wider the planter can be and the lower it can hang. We made our loose cord section 24 inches long, which is ideal for planters or plates with diameters between 4 ½ and 8 ½ inches.

- Pro tip: If you’re planning to hang a bigger planter, make sure the hook or nail you’ll be attaching your plant hanger to is securely fastened to the ceiling or wall, and can withstand the weight of your planter. Then, you can determine how long you need your loose cord section to be by hanging the planter or having someone hold it for you while you calculate the length you want through trial and error. If you need to, use a simple overhand knot to secure the cords where you want your planter to sit.
7. Use masking or washi tape to bind the cords together at the 24-inch mark. You’ll want the bottom side of the tape to coincide with the beginning of the loose cord section.
8. Tie another lanyard. Hold the planter between your knees and start tying box knots. Again, this lanyard can be as short as 2 ½ inches or as long as you want—it just has to be long enough to prevent the weight of the planter from undoing the box knots.

9. Cut the remaining cord so they’re all the same length. When your lanyard is as long as you want it, tidy up your work by removing the tape and cutting all the remaining cord to the same length. Your planter is now ready to use.

[Related: 7 key plant care tips every plant parent should know]
If you want to go the extra mile, you can undo the braiding of each cord by twisting them in the opposite direction. And if you want to get a full “horse tail” effect, depending on the thickness of the fibers, you can use a slicker or a hair brush (natural or mixed bristles work best) in small sections to reduce the cord to single threads.
