After years of focusing on images, social media is expanding beyond photos and video. The new belles of the ball are apps like Clubhouse and features such as Twitter’s Spaces, where audio is king.
But if you want to bring that voice-only style to posts on more traditional platforms like TikTok and Instagram, you’ll need to pair it with a video. This usually requires skill and access to video editing tools, but if you have an Android, Google just made things a little easier for you.
The operating system’s native Recorder app now features a tool that will turn audio into perfect social media-ready video—soundwave and subtitles included. Here’s how to use it.
How to make audio-only videos on Android
First, make sure you have the Recorder app. If you own a Pixel device, it’s installed by default, but if your phone’s manufacturer included its own recording tool, you can download Google’s platform for free from the Google Play Store.
Recorder is a simple recording app—open it and press the big red button at the bottom of the screen to, well, record. But what makes this app different is that because it’s a Google app, it makes use of the company’s machine learning. This technology automatically creates a transcript of any recording you make, in real time, which you can download as a TXT file or use as subtitles for a social media post. It’s not perfect, but it’s pretty accurate in ideal conditions that include little background noise, paced speech, and not a ton of slang.
[Related: How to build a mobile recording rig—It’s simpler than you think]
To make your post, start by creating your audio. Unfortunately, the app’s only input is your phone’s microphone, so you’ll be limited to either speaking directly into it or aiming the mic at the speakers of another device. It’s worth mentioning that it’s not nice to record and post audio (and video) of people without their consent on social media. In some states and circumstances, it may even be illegal. So before you start rolling, make sure to let other people know you’re about to record.
When you’re ready, hit the big red button and tap it again when you’re done—you can punch it a third time to resume recording or tap Save (to the right) to finalize your work and go back to the app’s home screen.
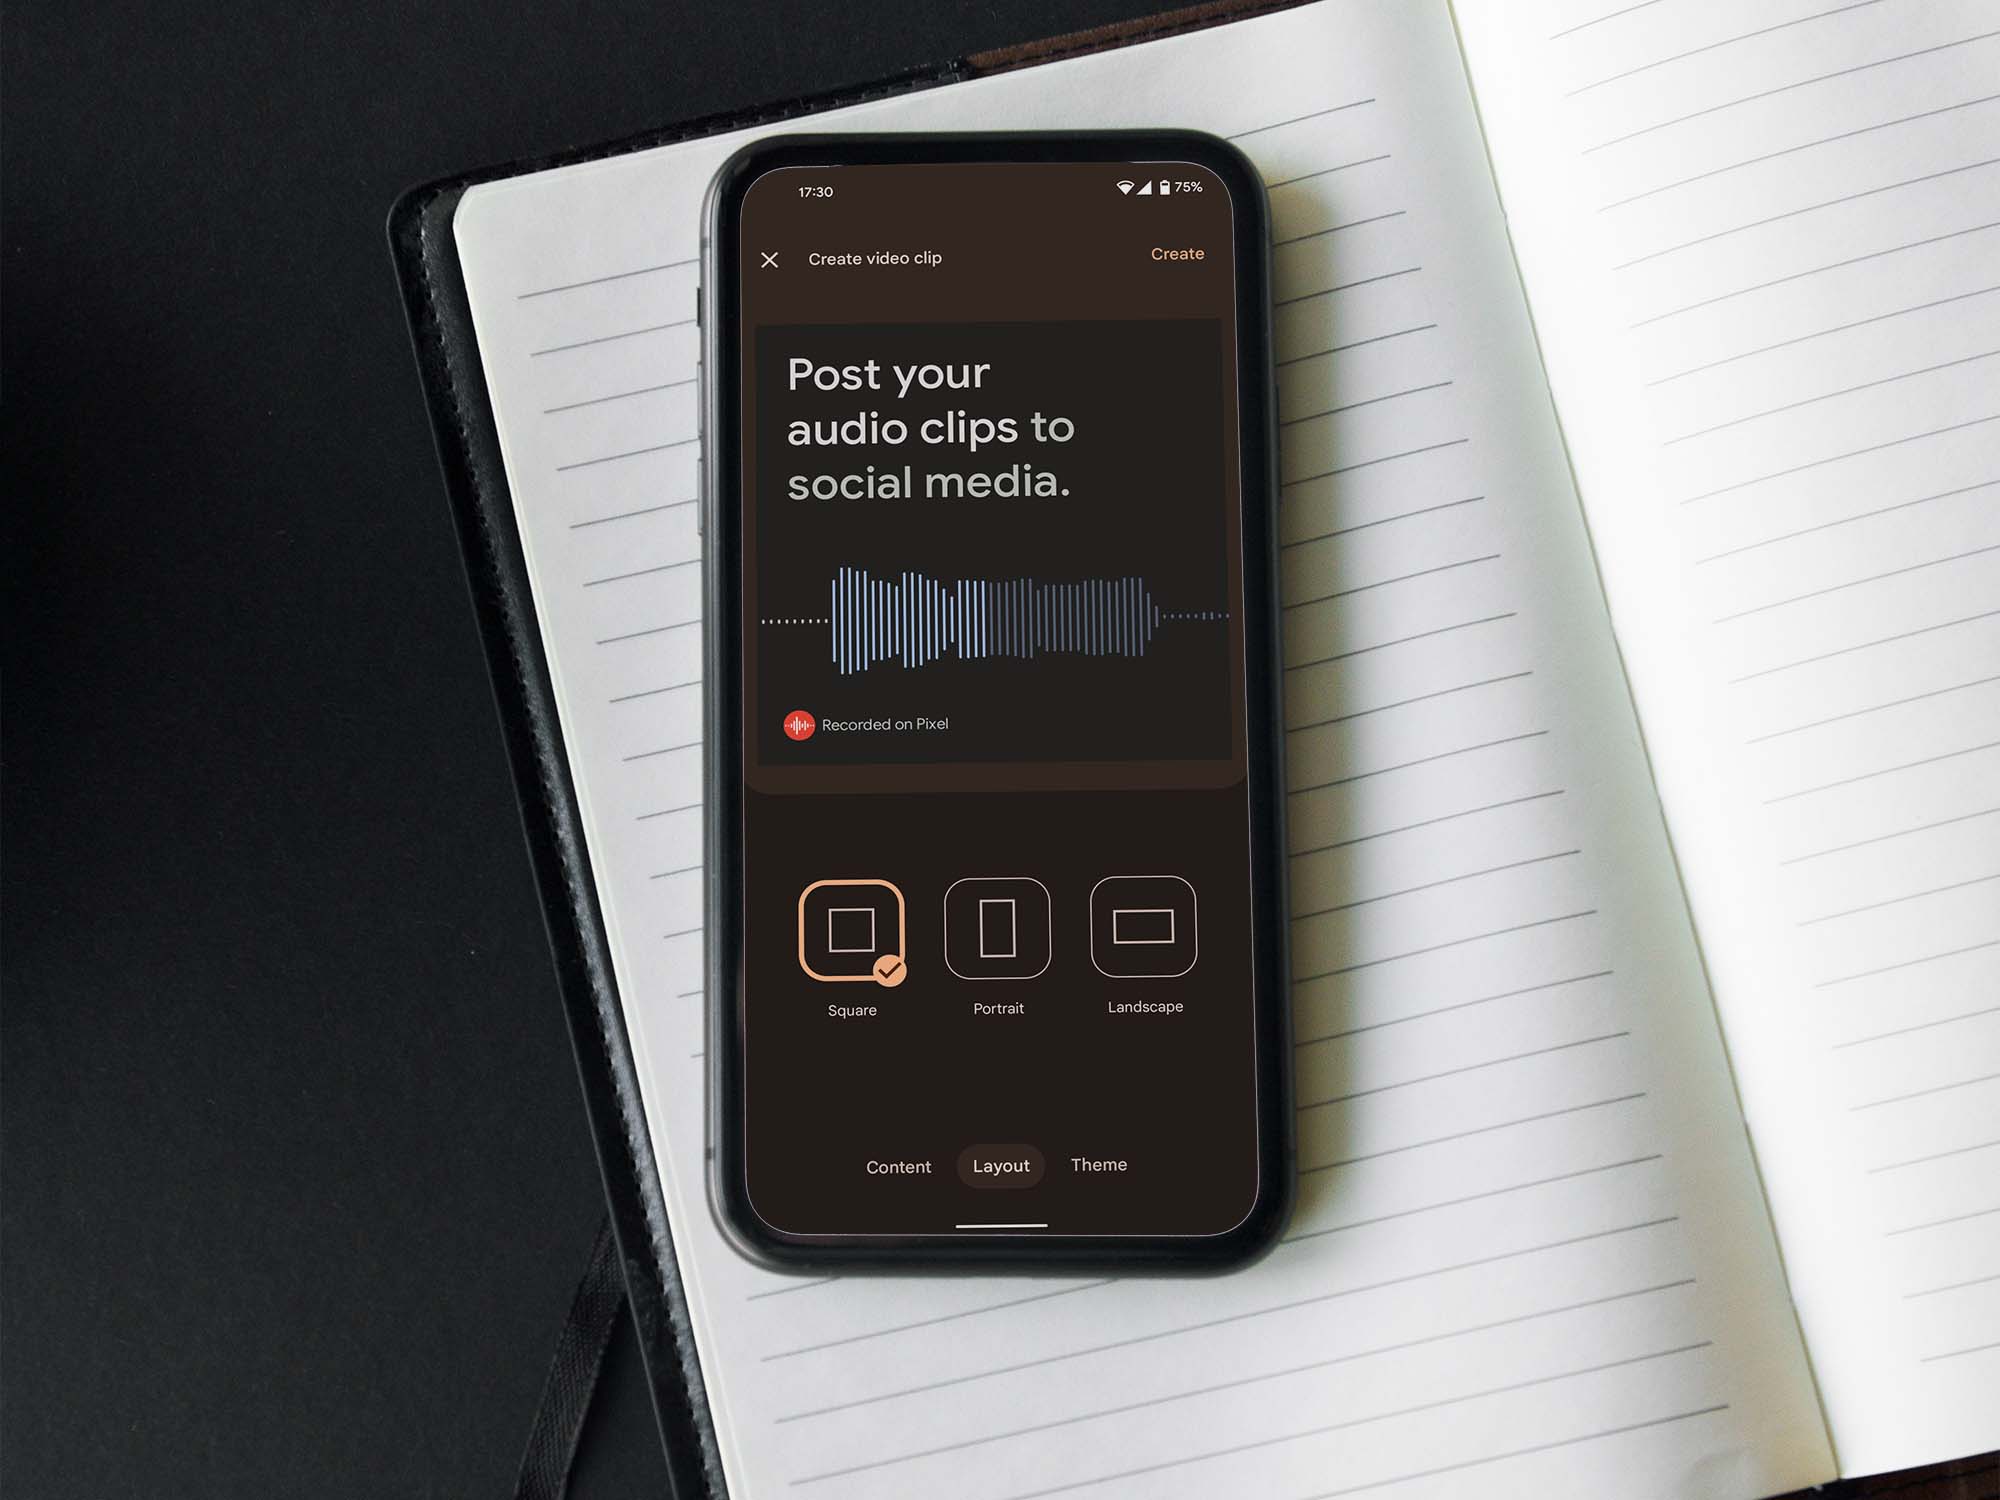
There, you’ll see a chronological list of your recordings, with the most recent ones at the top. Tap the one you want to open and listen to it using the playback buttons at the bottom of your screen. If your recording is longer than five minutes, the app will ask you to crop it to that length before you convert it to video. You can do that and other basic editing tasks by tapping the scissors icon at the top of your screen. When you’re done, tap the menu button (three dots) in the top right corner of your screen and choose Share, then Video clip.
On the next screen, you’ll see a preview of your clip along with a few customization options. First, choose a layout: Square (ideal for your Instagram feed); Portrait (perfect for your TikTok account), and Landscape (the go-to choice for fans of the 16:9 ratio). On the menu at the bottom of your screen, tap Content to choose between a simple waveform video or a clip that also displays the transcript. Notice that if the app’s AI doesn’t detect any voices in your recording, you’ll only be able to choose a waveform format. This is not likely to happen if your mic picked up people talking—the technology is pretty good at telling sounds apart and even differentiates between instrumental and singing bits within a song.
Finally, at the bottom of your screen, tap Theme to change the colors of the elements in your video. You only get two options: a black background with a blue waveform and white letters (dark theme), and a white background with a blue waveform and black letters (light theme). It’s definitely not the most varied of customization menus, but at least it’ll let you get your video slightly closer to your grid aesthetic.
[Related: How to turn on ‘dark mode’ for all your gadgets and apps]
To finish, tap Create at the top right corner of your screen. Then, you’ll be able to see the final product and choose between Save to Device and Share to other apps. Using this last option will allow you to post directly to Instagram (feed and Stories), TikTok, Slack, Tumblr, and other compatible social media platforms you may have installed on your phone.
Remember to use this feature wisely—it may be the start of a prolific and mysterious career in ASMR content creation or the piece of evidence that will put you on the losing side of a lawsuit. Either way, you surely won’t have to spend hours choosing the right filter to amass those precious likes.
