
There’s nothing quite like putting down roots and tending a garden. But what happens if you don’t have a backyard? Or you’re suddenly uprooted? Or you decide to go on a road trip and can’t get anyone to watch your plants?
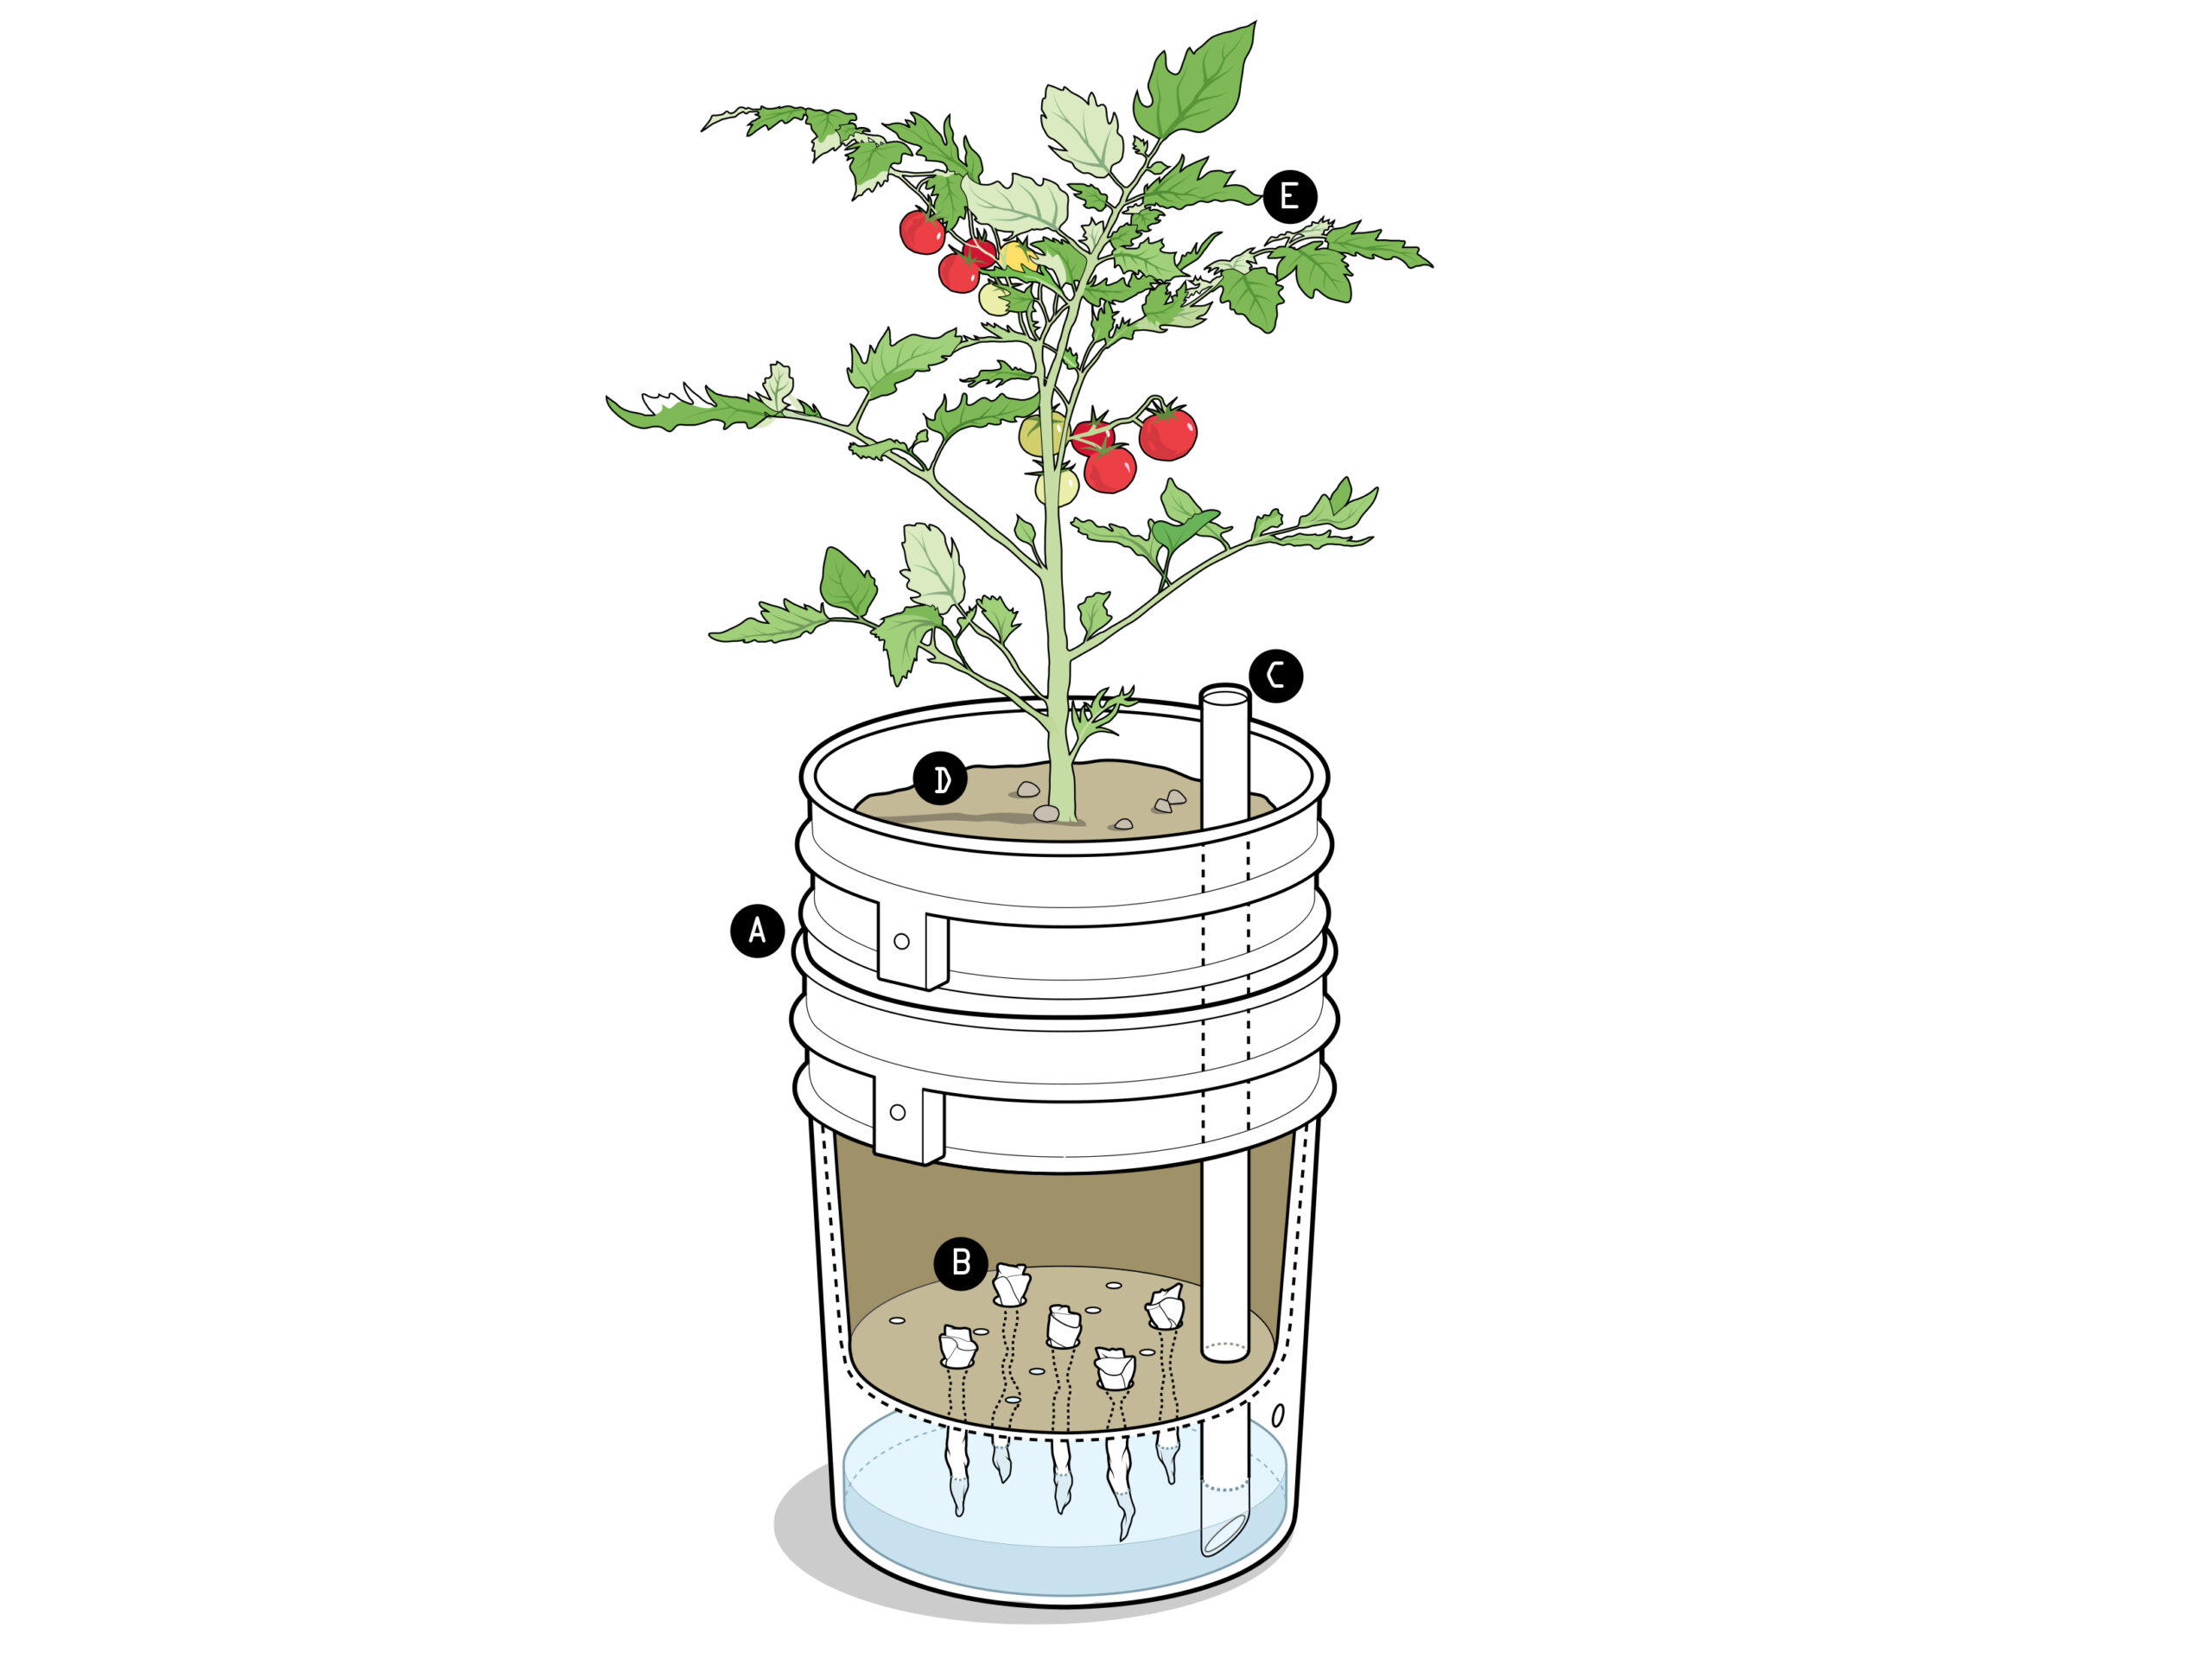
Just whip up a portable container garden. Sure, it’s not the same thing as a plot of land, but it’s easy to build and you can move it on demand. In this design, created by researchers at the University of Maryland Extension, a water reservoir helps keep the plants healthy and hydrated—even if you forget to water them while you’re traveling.
Stats
Time: 2 hours
Cost: $50
Difficulty: Easy
Tools & Materials
- Two five-gallon food-grade buckets (A)
- Drill with ½-inch hole saw and 1/16-inch bit
- Sandpaper
- Cloth or nylon strips (B)
- PVC pipe, ¾-to 1-inch wide, 18 inches long (C)
- Saw
- 16 quarts of soil (D)
- Seedlings or plants (E)
Instructions
- Trace the mouth of the pipe on the bottom of one bucket, less than an inch from the edge. Drill and sand out that circle.
- Drill five additional 1/2-inch holes: one in the center and four evenly spaced around the edge. For drainage, add eight smaller holes spread around the bottom.
- Tie a knot at one end of each cloth strip. Feed the strips through the 1/2-inch holes so the knots sit on the inside and the cloth hangs down.
- Put the holey bucket into the second one, mark a spot on the outer bucket where the holey base hits, and separate them. Drill a small overflow hole at the mark and restack the buckets.
- Cut one end of the pipe at a 45-degree angle. Push that end through the pipe-size hole in the inner bucket.
- Fill the inner bucket with damp soil and plants, and keep them hydrated by pouring water down the pipe. Stop adding water when the overflow hole starts to leak.
This article was originally published in the January/February 2017 issue of Popular Science, under the title “Road-ready garden.”
