There are lots of reasons why you might want to learn how to take a screenshot on your computer or phone: proving you finally completed that video game, recording a website layout for safekeeping, or even making a custom wallpaper image from your favorite movie for your desktop.
Whatever the reason, here’s how to get it done on all the major platforms, whether it’s Windows, macOS, Android, or iOS.
How to take a screenshot on Windows
Figuring out how to take a screenshot on Windows is simple: Just make a simple tap on the PrtSc (print screen) button and a shot of your computer’s desktop will automatically save to the clipboard. You can then paste the screen grab into an image editor and save it in whatever file format you want. Windows doesn’t make any sound or show you any animation when you take a screenshot, so don’t be surprised if it seems like nothing is happening. Just go to your favorite image editor, hit Paste (or Ctrl+V) and you should see your screenshot.
Depending on your keyboard or the make of your laptop, the PrtSc button may only be accessible while pressing another key like Fn, Shift, or Ctrl. If hitting PrtSc by itself gets you nowhere, try combining it with one of those keys until you get the desired results.
If your keyboard has one, you can also use the Windows key to take a screenshot: Press Win+PrtScn and the image will be automatically saved into a Screenshots folder within your account’s Pictures location. Meanwhile, Alt+PrtScn will grab only the currently active window and copy it to the clipboard. You may also need an additional key like Fn or Shift for these shortcuts.
[Related: 10 cool features to use Windows 11]
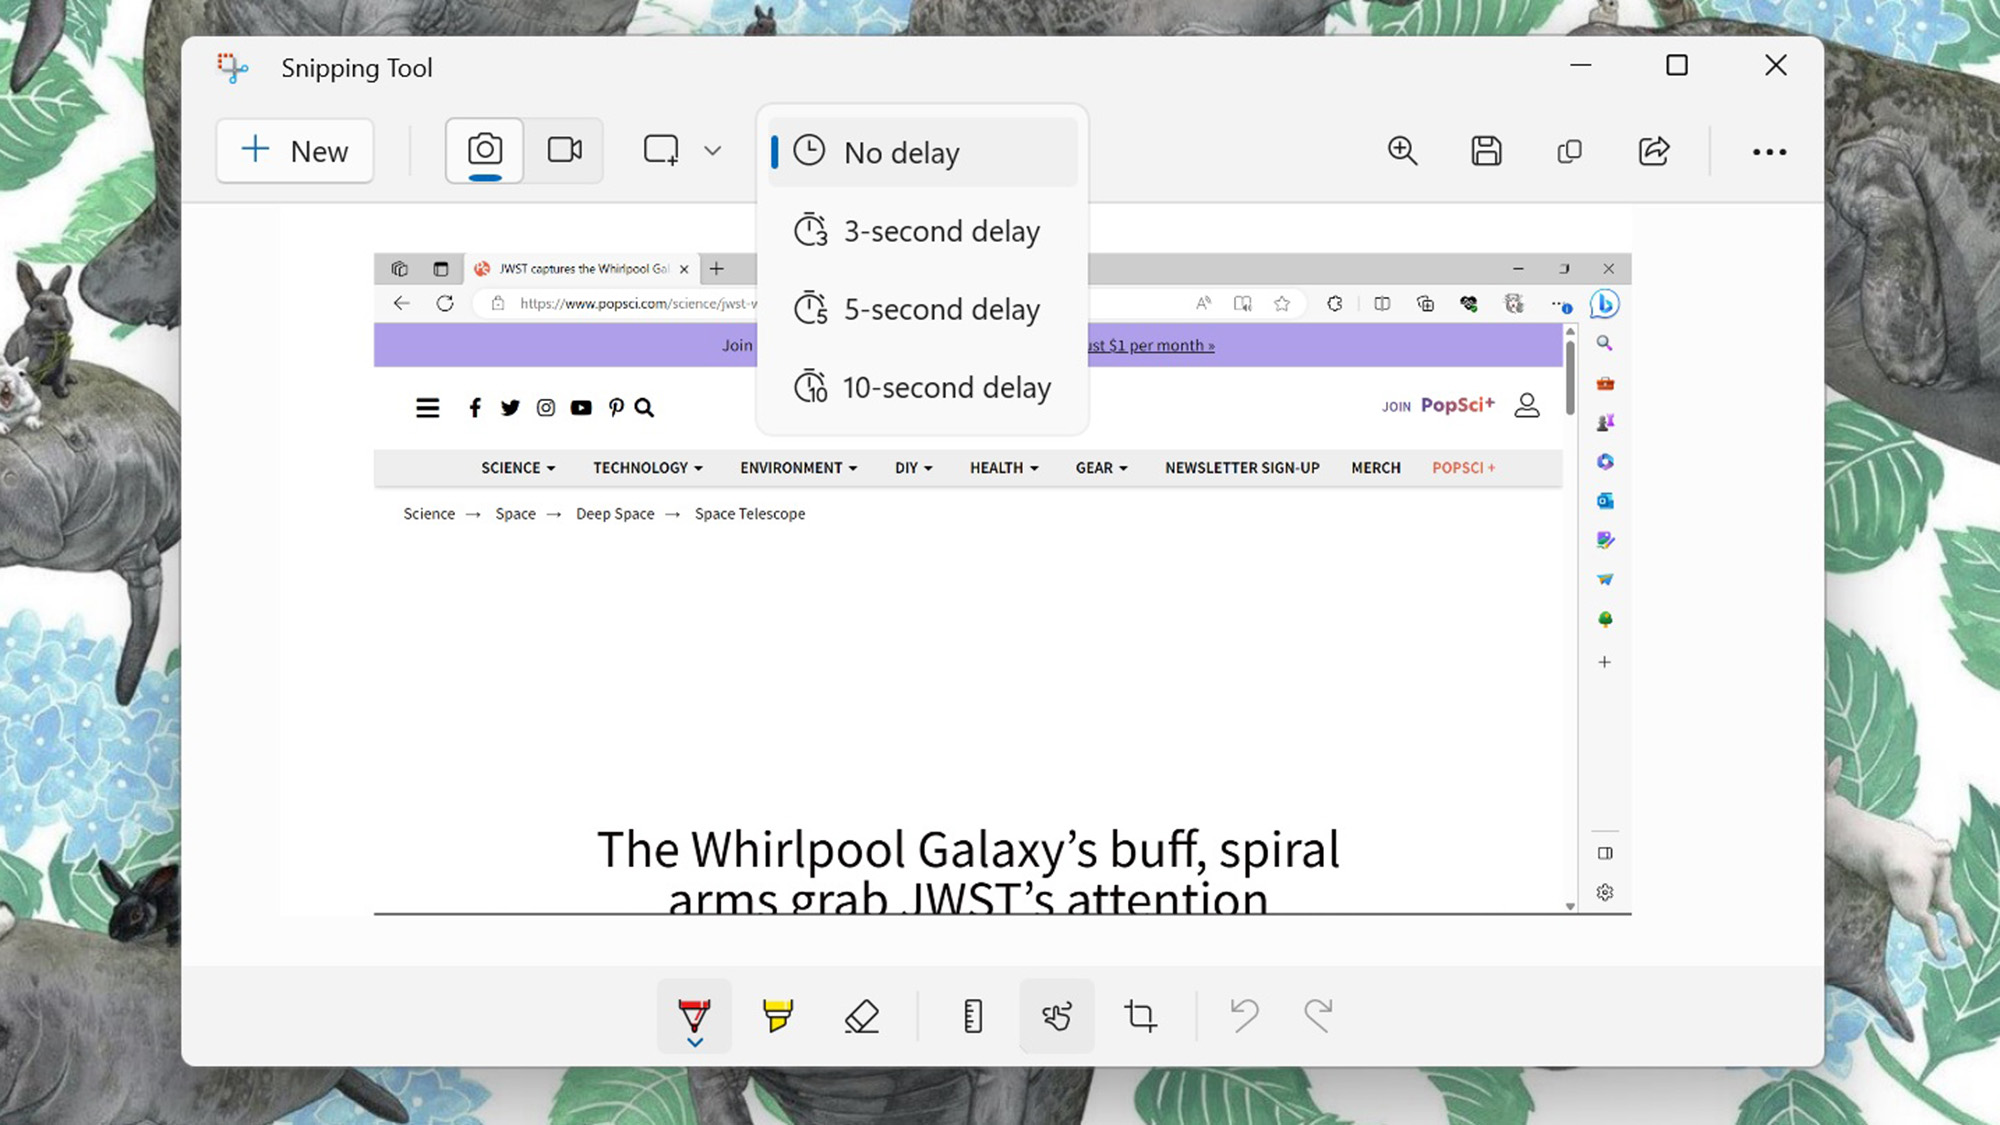
You can get help from various utilities, too. On Windows 11, locate the new and improved Snipping Tool (remember, it’s called Snip & Sketch on Windows 10): You can find it using the search tool on the taskbar or by hitting Win+Shift+S to summon a simplified version of it. Use the crosshair tool to select an area on your screen—the moment you let go of the left mouse button, Windows will add the screenshot to your clipboard.
Use the buttons at the top of your screen for more options—the Freeform Snip button (second to the right), allows you to make selections in any shape you want; the Window Snip button adds a screenshot of the current open window to your clipboard; and finally, the Fullscreen Snip takes a picture of your entire screen and saves it to the clipboard. You can also use the dialogue box that pops up in the bottom right corner of your screen to open the image on the Snipping Tool app and edit it.
Take note: You won’t get some of the Snipping Tool’s features when you summon it with the keyboard shortcut. But if you search for the full version of the app, you’ll be able to take screenshots with three and 10-second delays, as well as annotate pictures, crop them, and even measure them. Alternatively, you can use the Xbox Game Bar app that comes with Windows 11 to capture grabs from games.
If you need even more options and features, consider tools such as Dropbox (free, and it has its own screenshot feature) and Snagit ($63).
How to take a screenshot on macOS

Apple keyboards don’t have a PrtScn key—or, of course, a Windows key—so the shortcuts are completely different. Ctrl+Shift+Cmd+3 copies the current screen contents to the clipboard, but you can also drop the Ctrl part and just do Shift+Cmd+3 to save a PNG file directly to the desktop.
If you just want to capture part of the screen and send it to the clipboard for subsequent pasting, use Ctrl+Shift+Cmd+4. Then drag the mouse to outline an area of the screen or press the spacebar to capture a particular window. As before, if you leave out the Ctrl button, your Mac will save the image to your desktop rather than copy it to the clipboard: that’s as simple as hitting Shift+Cmd+4
[Related: 38 advanced Mac keyboard shortcuts for productivity]
Changing the number key to a 5 will give you more options. Press Shift+Cmd+5 to summon MacOS’s built-in Screenshot tool—a small menu bar that appears at the bottom of your screen. The first button to the left will take a screenshot of your entire screen, including the app dock; choose the second button, and your Mac will take a screenshot of the window you select with your mouse. The third button will show you a selection of the screen you can reposition and resize by using your mouse and the circles on each of the selection’s corners. Hit enter to take the image, which the system will save as a PNG file to your desktop. Hit Esc if you decide to abandon your screenshotting adventure once you’ve launched this tool.
This tool also offers two more buttons to record the entire screen of your Mac or a particular open app. You can also hit the Options button to choose a new location to save your screenshots, access a timer, and see other options, such as remembering the tool you used the last time.
As on Windows, there are numerous utilities that will help you in your screen-grabbing endeavors. You have a couple of free options, like Lightshot Screenshot and Dropbox. If you’re willing to part with $10, SnapNDrag can give you a few more options in terms of annotations and customizations.
How to take a screenshot on Android
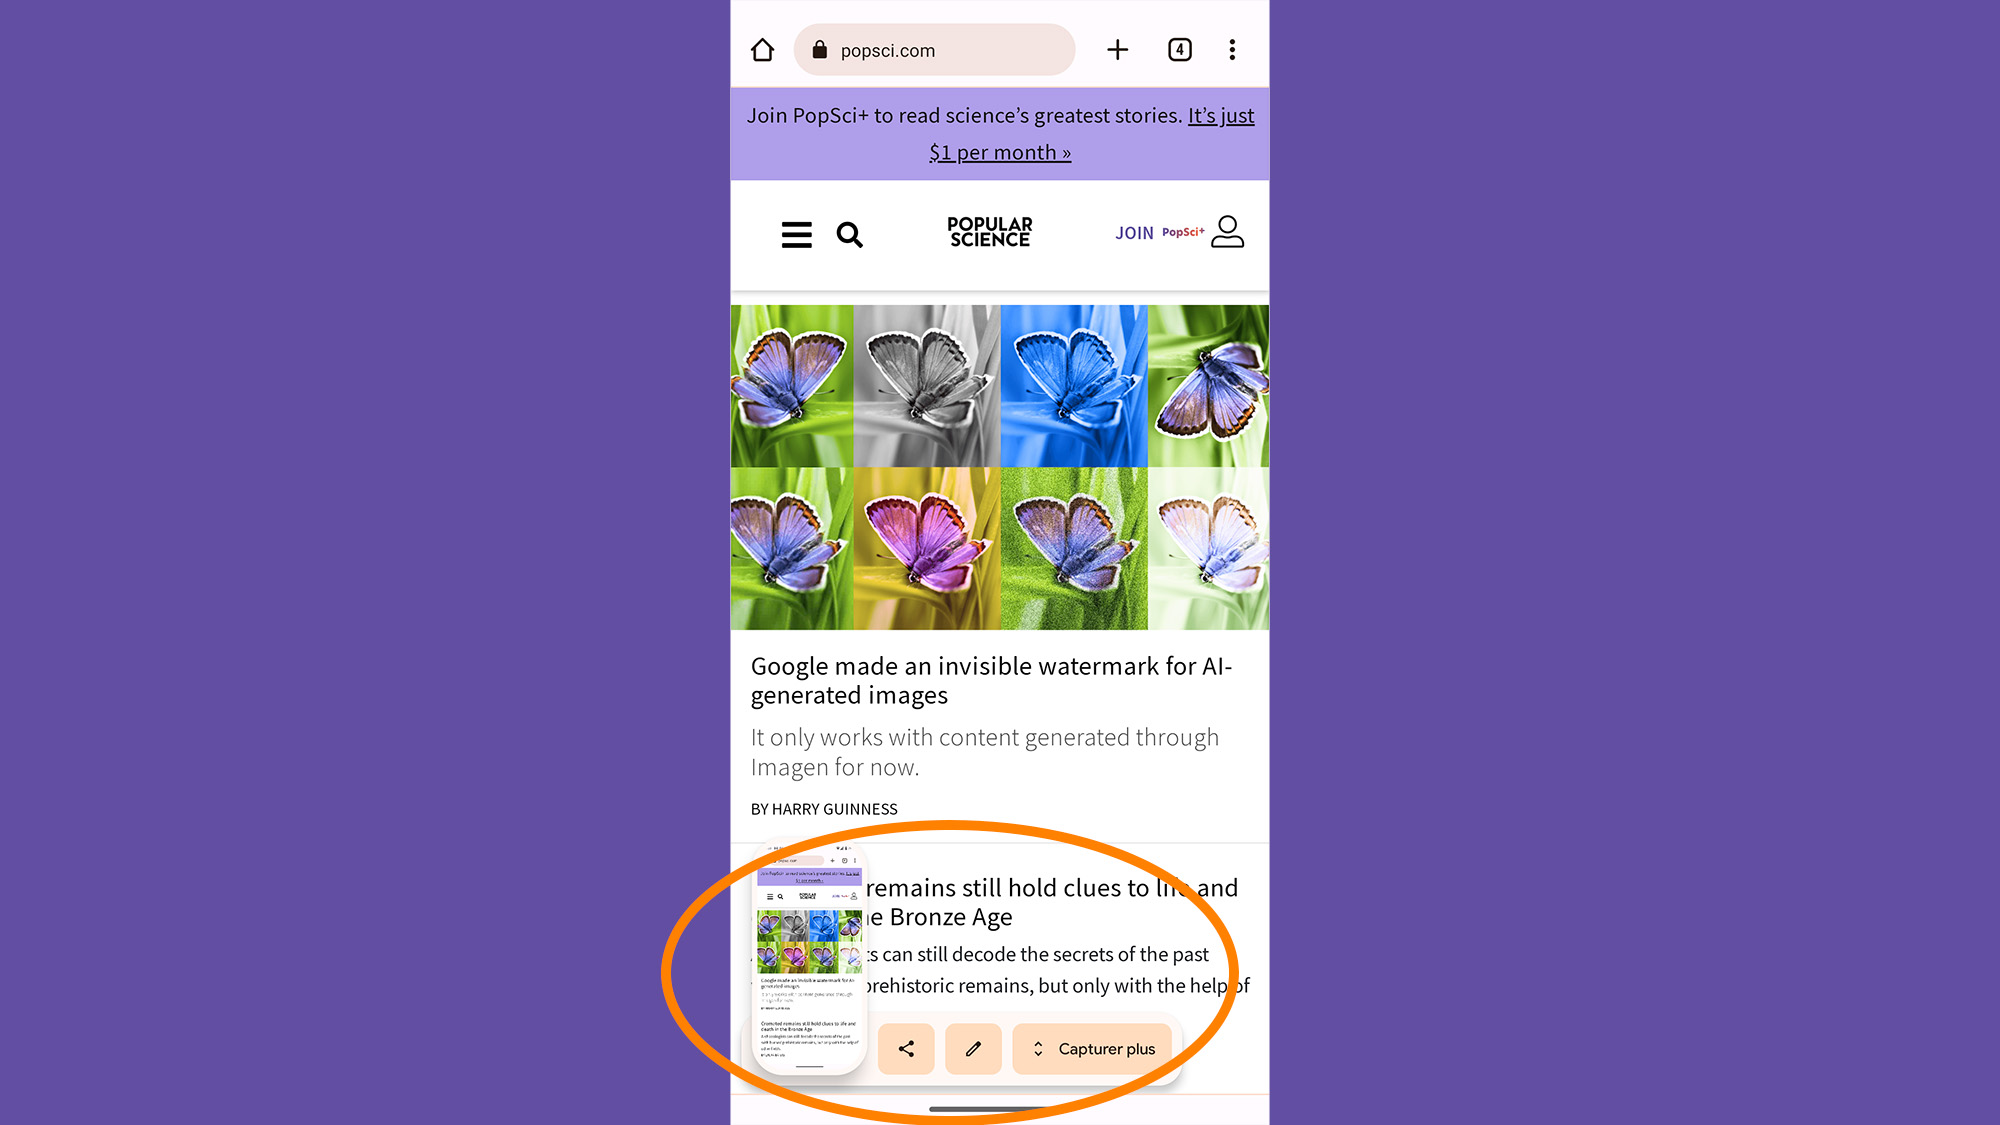
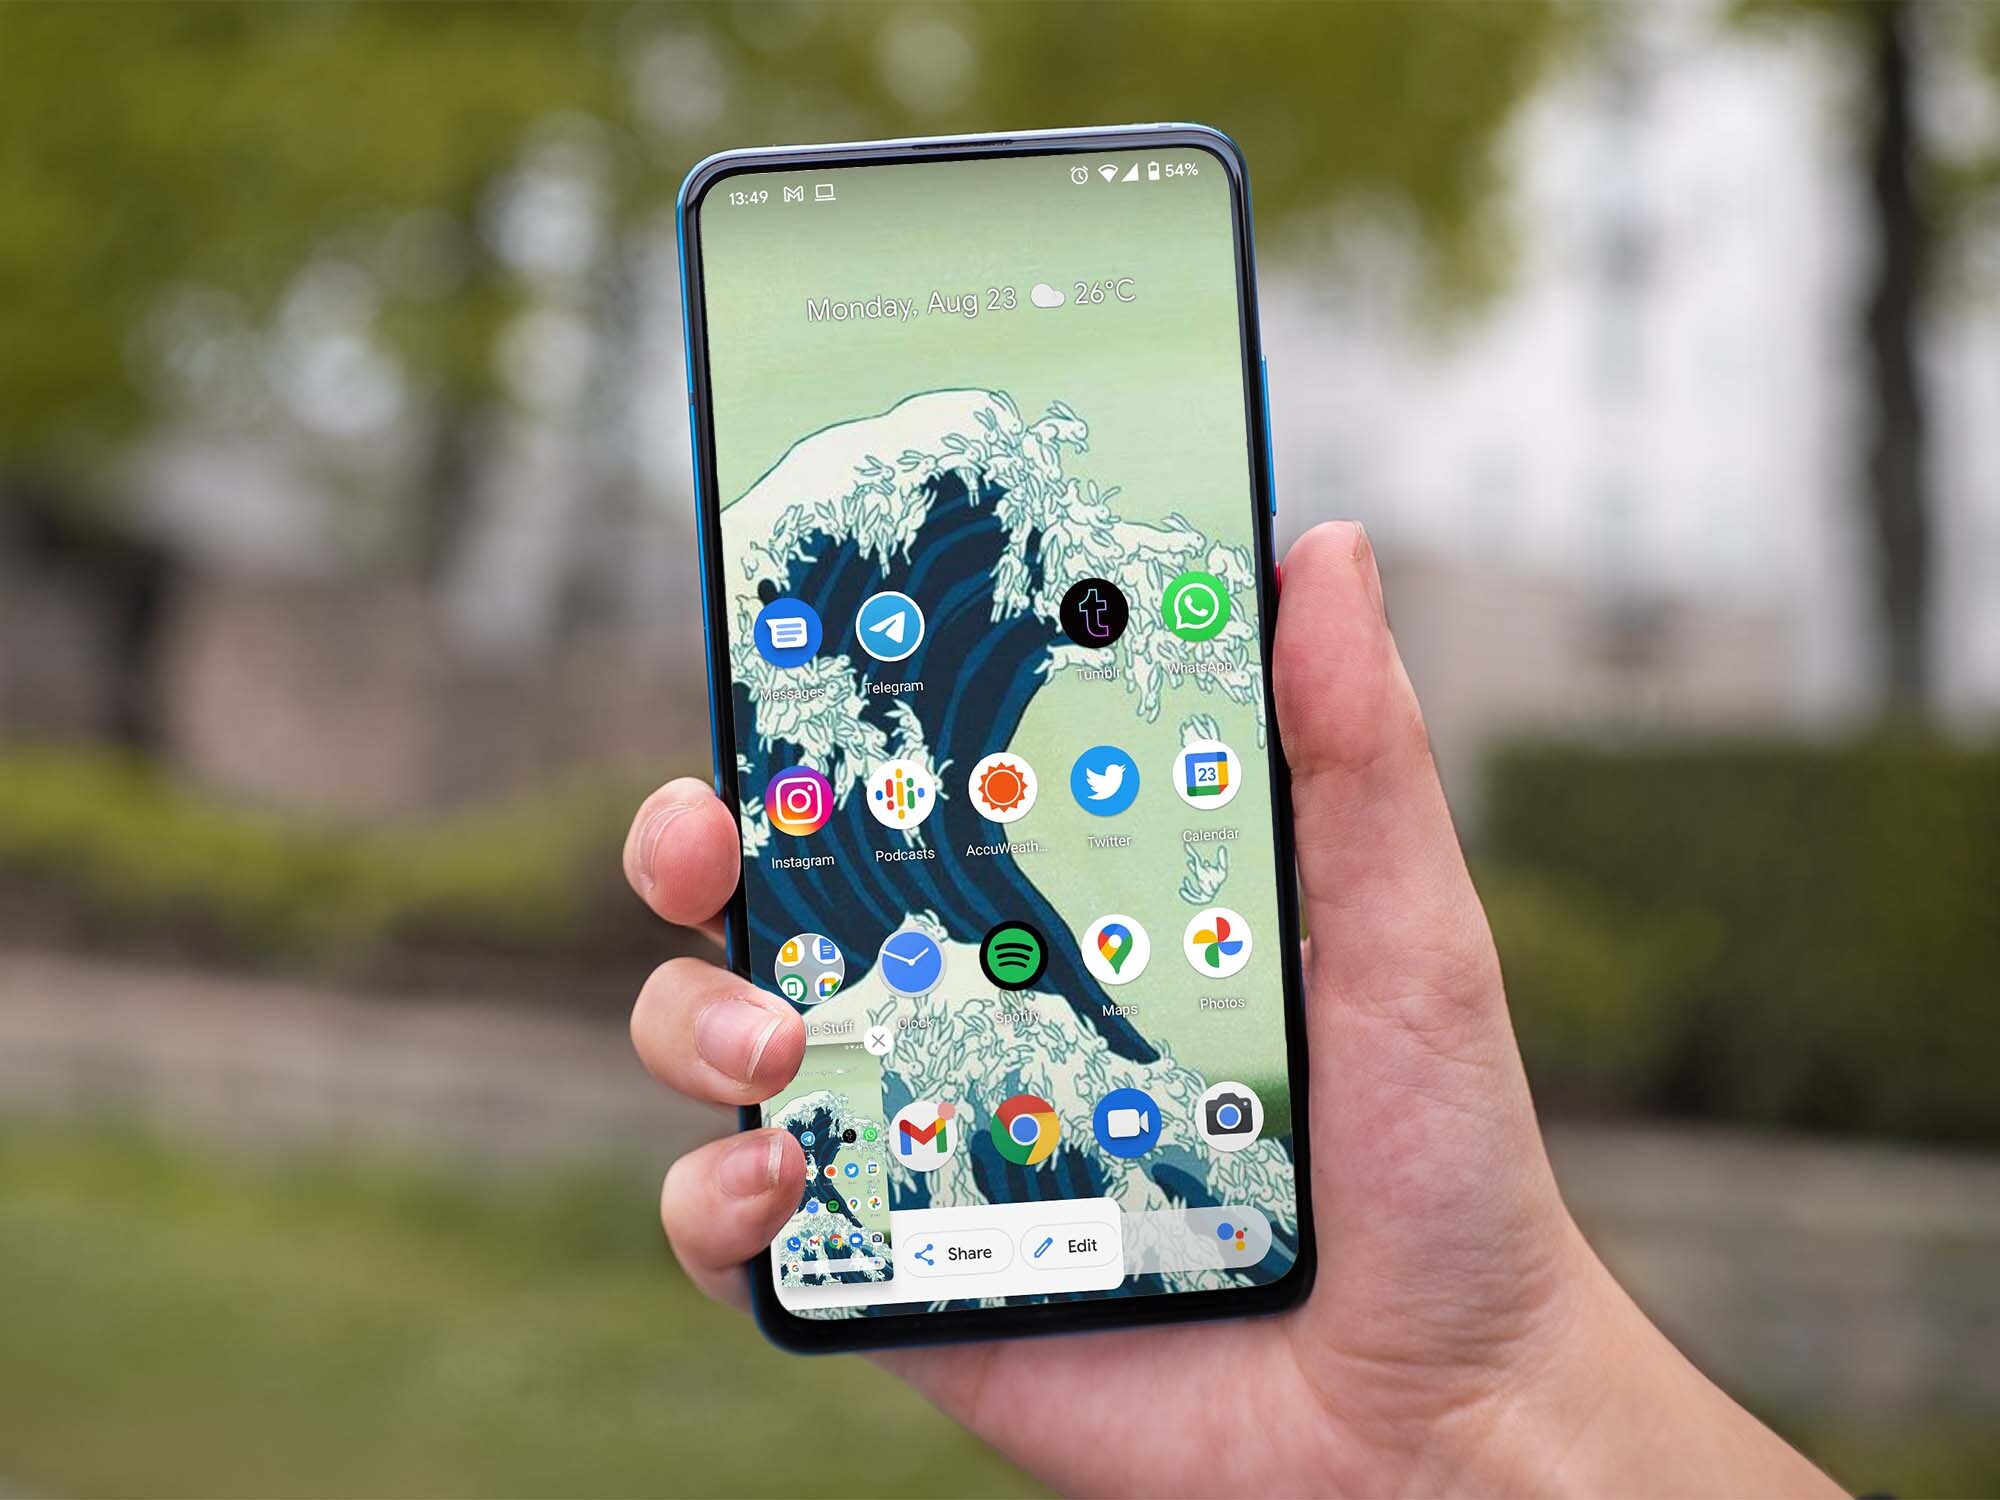
On the majority of Android devices, you can press the volume down button and the power button together to take a screenshot. The screen should flash, and you’ll see a notification that a grab has been captured. Tap this notification if you want to share or edit the image.
Pixel phone owners can also take screenshots by tapping the back of their phone twice. To set that nifty feature up, go to Settings, scroll down to System, and choose Gestures. The first item on the list will let you use the double tap as a trigger for multiple actions: toggle on the switch next to Use double tap and choose Take screenshot from the list.
If you need to find the screenshot afterward, it’ll be in your device’s Photos app. If you have Google Photos, tap on Library in the bottom right corner of your screen, then choose the Screenshots folder under Photos on device. You can also go straight to the Files app, tap on Images, and then choose Screenshots at the top of your screen.
That said, Android devices come with all kinds of manufacturer-made software skins running on them, so the shortcut might be slightly different depending on the make and model of your phone. Still, most manufacturers have adopted the same key combo—on both Samsung Galaxy and HTC phones, for example, just press the power and volume down buttons simultaneously to take a grab. If you want to go hands-free, just engage the Google Assistant and ask it to take a screenshot for you.
How to take a screenshot on an iPhone or iPad
Capturing the screen on iOS and iPadOS devices is just as easy as it is on Android devices.
On iPhones with Face ID, simultaneously press and release the side button and volume up button. On older models, combine the Home button and the side button (or the Sleep/Wake button). It’s much the same with iPads: Simultaneously press and release either the top button and the volume up button, or the Home button and top button. The screen will flash and the picture will be saved to a dedicated Screenshots album on your iPhone or iPad. Then you can review or share it by opening up Photos.
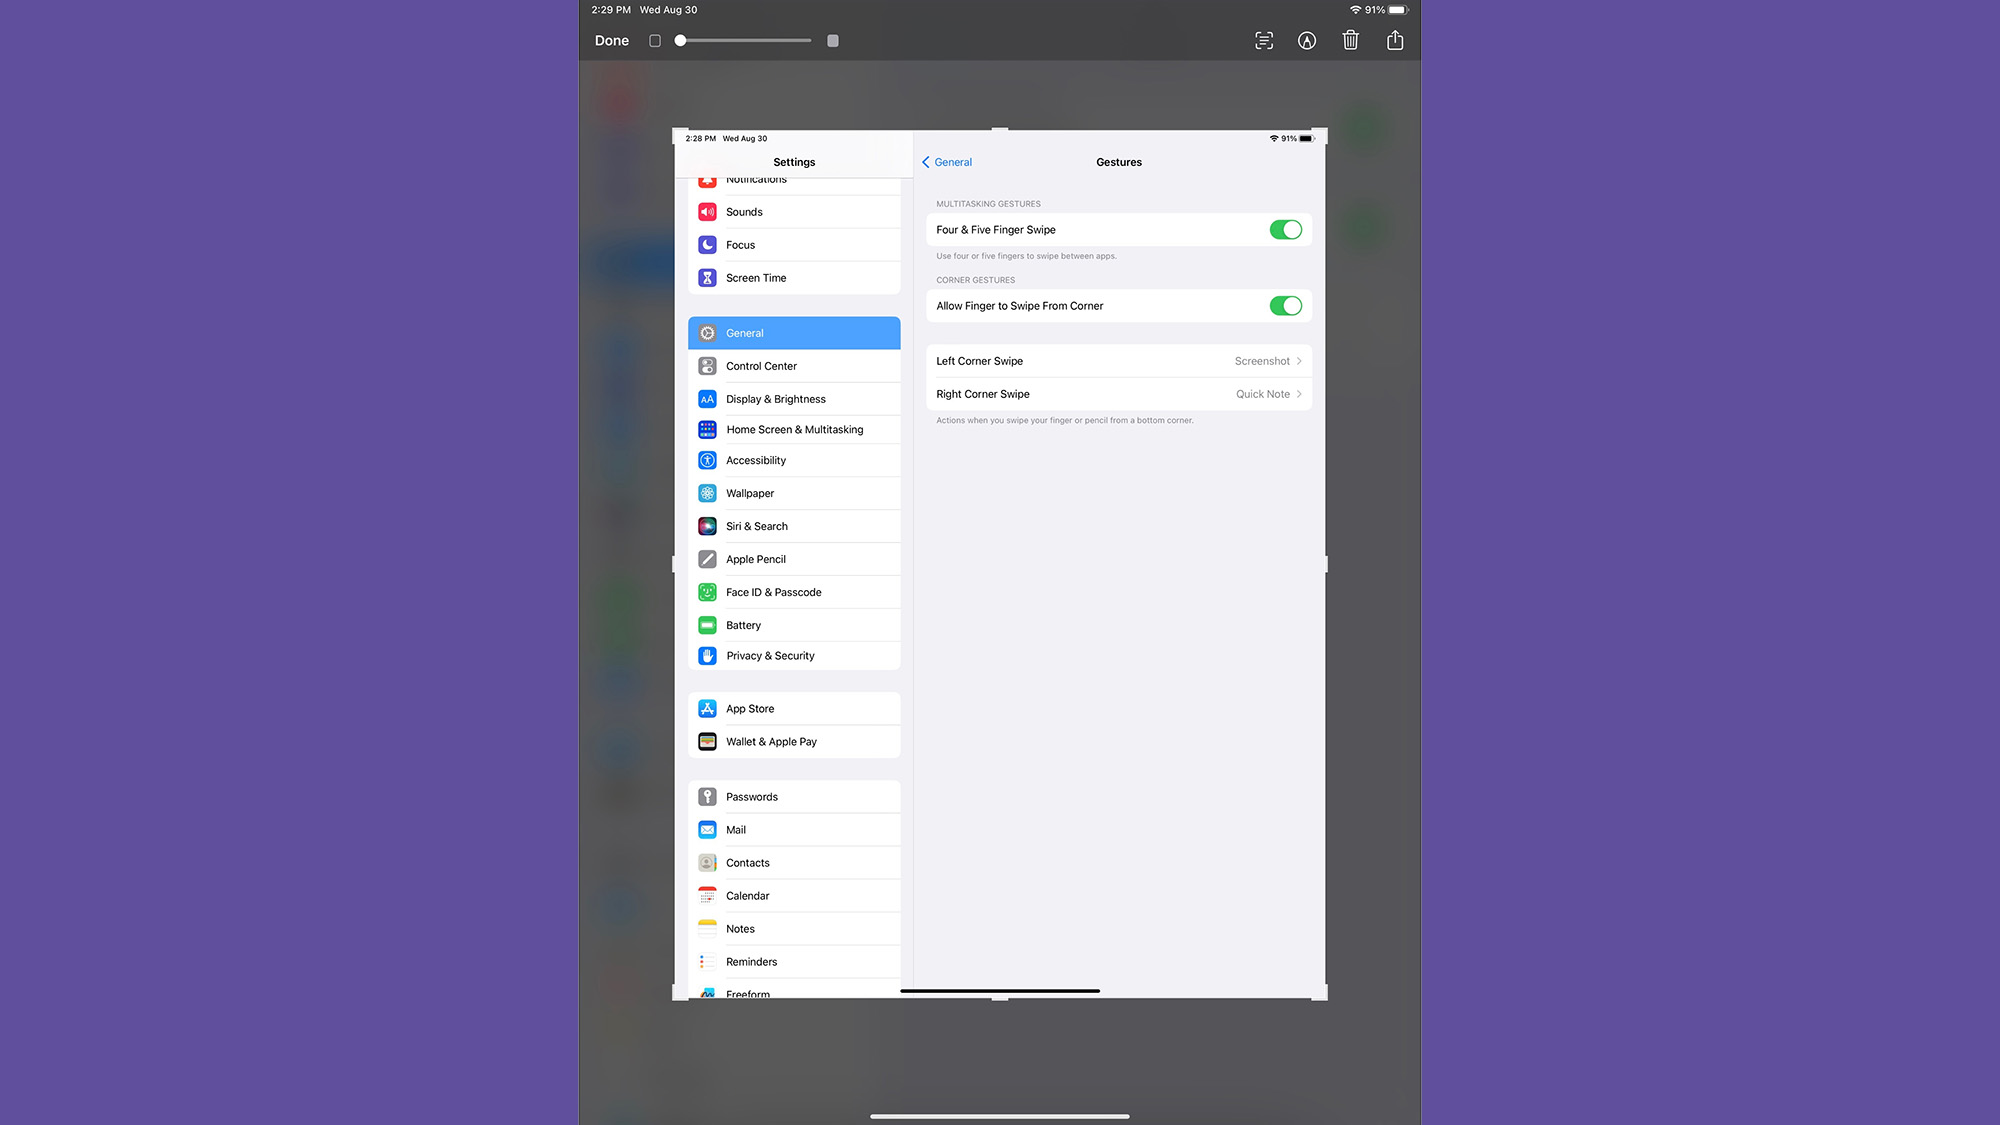
On iPads, you can also set up a specific gesture to take screenshots even more easily. Go to Settings and on the menu on the left choose General. Under Corner gestures, toggle on the switch next to Allow finger to swipe from corner, and choose Screenshot from either the Left corner swipe or the Right corner swipe options depending on what you want. To take the screenshot, just swipe from your chosen corner, and you’re done.
[Related: The best screenshot and screen recording apps for your phone]
But wait, there’s more! It’s also possible to get your phone or tablet’s display up on a computer and capture it from there. On macOS, connect your device via USB, then run QuickTime, and choose File and New Movie Recording. If you select iPhone (or iPad) from the drop-down menu by the red record button, the device’s display will appear. To capture the window, use the Ctrl+Shift+Cmd+4, spacebar, and click combination we mentioned in the macOS section above.
On Windows, you can use an AirPlay client such as LonelyScreen or Mirroring360, then broadcast the iPhone or iPad screen to your laptop or desktop using the AirPlay feature built into Apple’s operating system. To do so, swipe down from the top right corner (or up from the bottom of the screen on some devices) to open the Control Center, then tap on Screen Mirroring to get connected.
Got all that? Feel free to use your new skills and take a screenshot of any part of this article you’d like to save for reference.
This story has been updated. It was originally published in 2017.
