Whether it’s to save messages for posterity, troubleshoot problems, capture memorable gaming moments, or run tutorials, the ability to take screenshots is so essential that it’s built into Windows, macOS, Android, and iOS.
ChromeOS, Google’s operating system for their Chromebook laptops, is no different and has easy-to-use tools to grab screenshots and screen recordings. The OS also provides some basic integrated editing tools for your captured content if you need them.
Start by launching the screenshot toolbar
Taking screenshots on a Chromebook will require you to summon the screenshot toolbar. There are several ways to do this, so pick the one that works best for you.
Newer Chromebooks come with a dedicated screenshot key—it looks like a circle inside a rectangle and you’ll find it up on the top row of the keyboard. As you might have suspected, pressing this button brings up the screenshot toolbar at the bottom of the screen.
[Related: The best cheap Chromebooks in 2023]
If your Chromebook doesn’t offer this option, you can try the overview key: This is also on the top row of the keyboard, and looks like a rectangle with two vertical lines next to it. This key brings up an overview of all your open windows, but if you hold down Ctrl+Shift and then press it, the screenshot toolbar will appear.
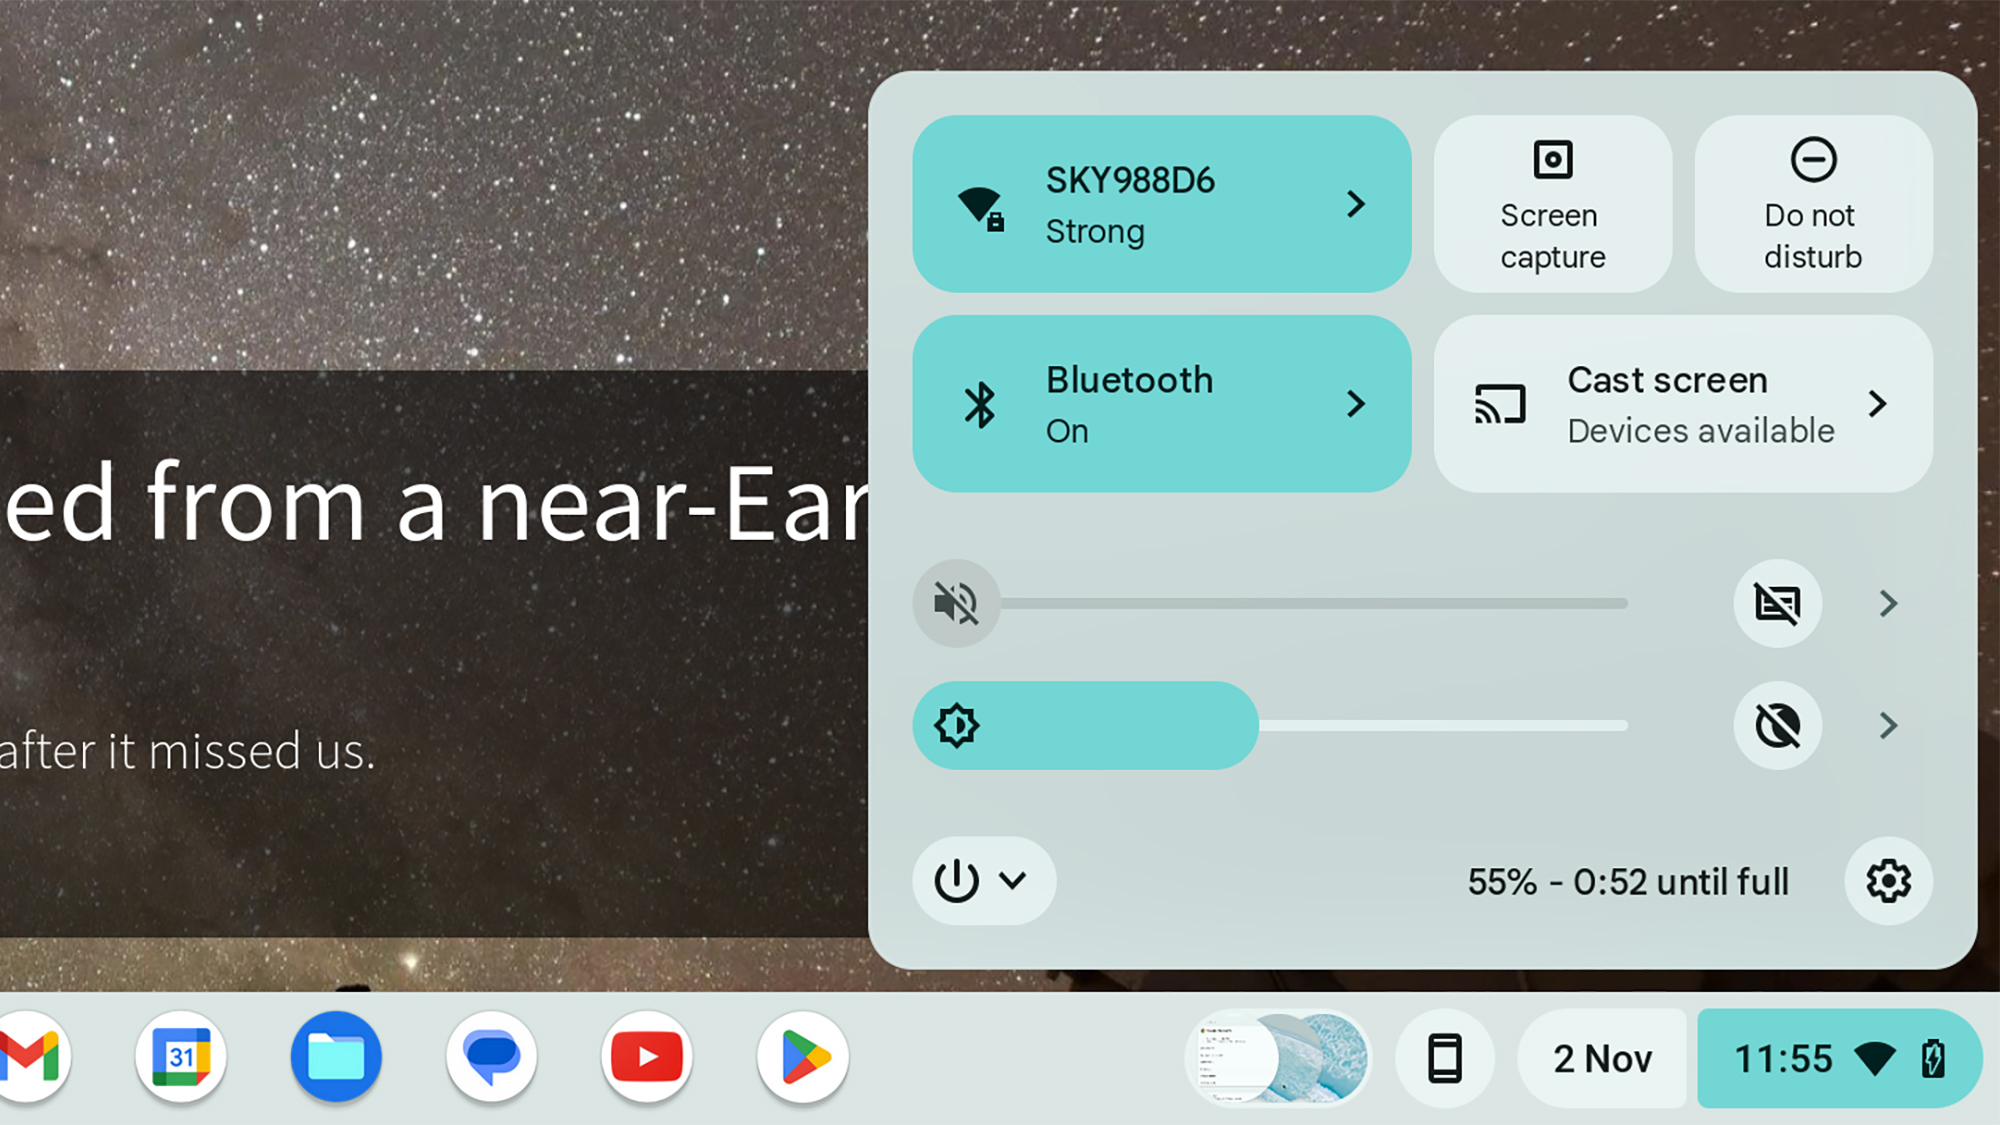
Finally, you can get to the screenshot toolbar by bringing up the Quick Settings panel. Click the clock in the lower right corner of the screen and on the emerging menu, click the Screen capture button.
Customize how you take screenshots on ChromeOS
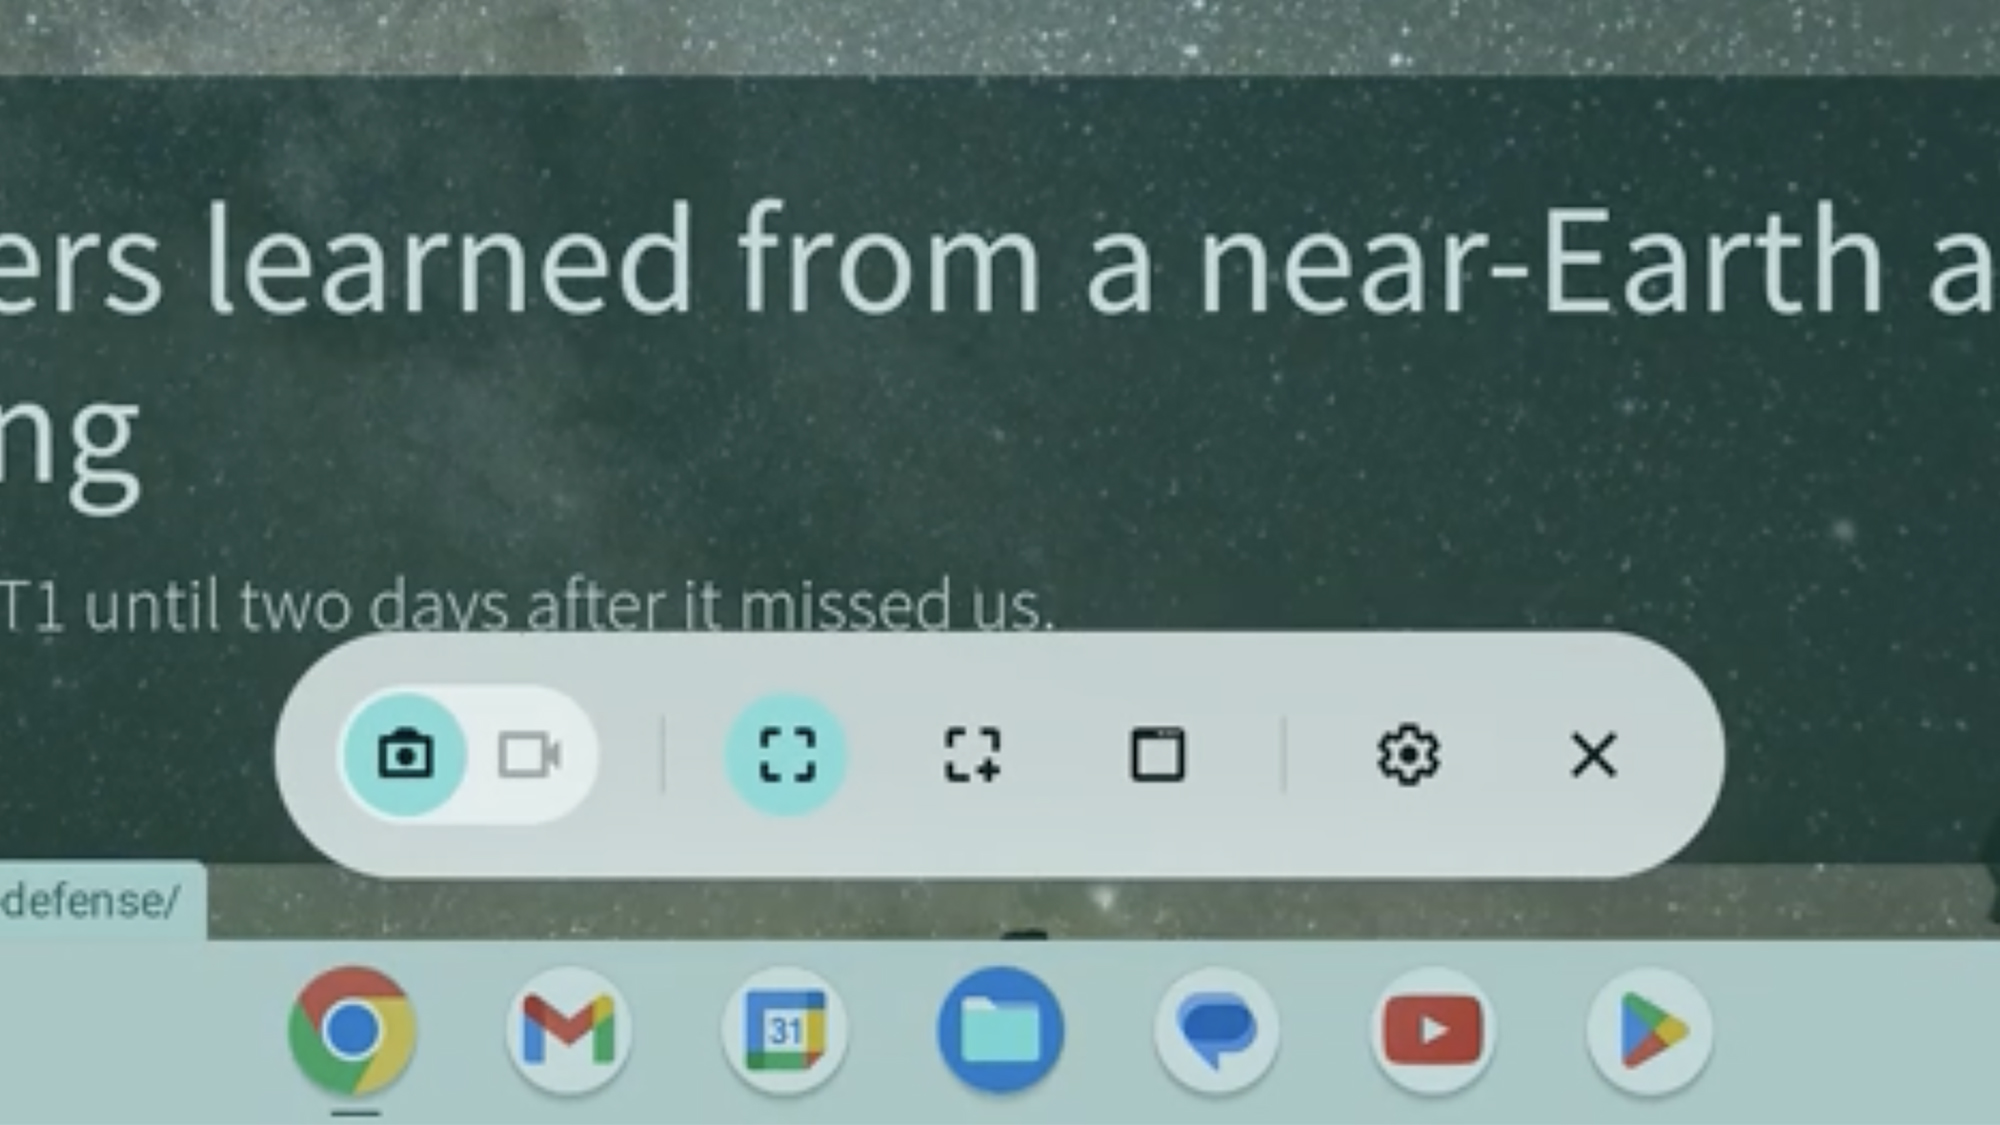
No matter how you brought up the screenshot toolbar, once it’s open, your options are then the same. On the far left of it you can click either the camera icon or the video camera icon to switch between the ability to take screenshots and screen recordings.
The next three icons to the right let you grab different portions of the screen. Choose the first one to capture the whole screen, the second one to select part of it, or the third one to grab an image of a specific open window. Further to the right is a cog icon that opens the screenshot settings—most of them relate to videos, but you can also choose where in your Chromebook you save your screengrabs.
If you’re making a recording, you’ll be able to include audio from the Chromebook microphone, the feed from your webcam, along with clicks and presses from your mouse and keyboard. These are all useful options if you’re recording a tutorial or a gaming session, for example.
With everything set up the way you want, it’s time to take a screenshot or start a screen recording: For full screen captures, click anywhere on screen; to grab a specific part of the screen, use the crosshair tool to select a portion of it, or if you want to capture a single app window, just click it. Your Chromebook will snap screenshots instantly, but for videos, you’ll see a countdown before recording starts. You can stop them whenever you want by clicking the red button on the shelf at the bottom of the screen.
Editing your screenshots on Chromebook
When you finish capturing a screenshot or screen recording, a small pop up appears in the lower right corner of the screen—click it to see the image or video stored on your Chromebook.
[Related: Revive your old computer by turning it into a Chromebook]
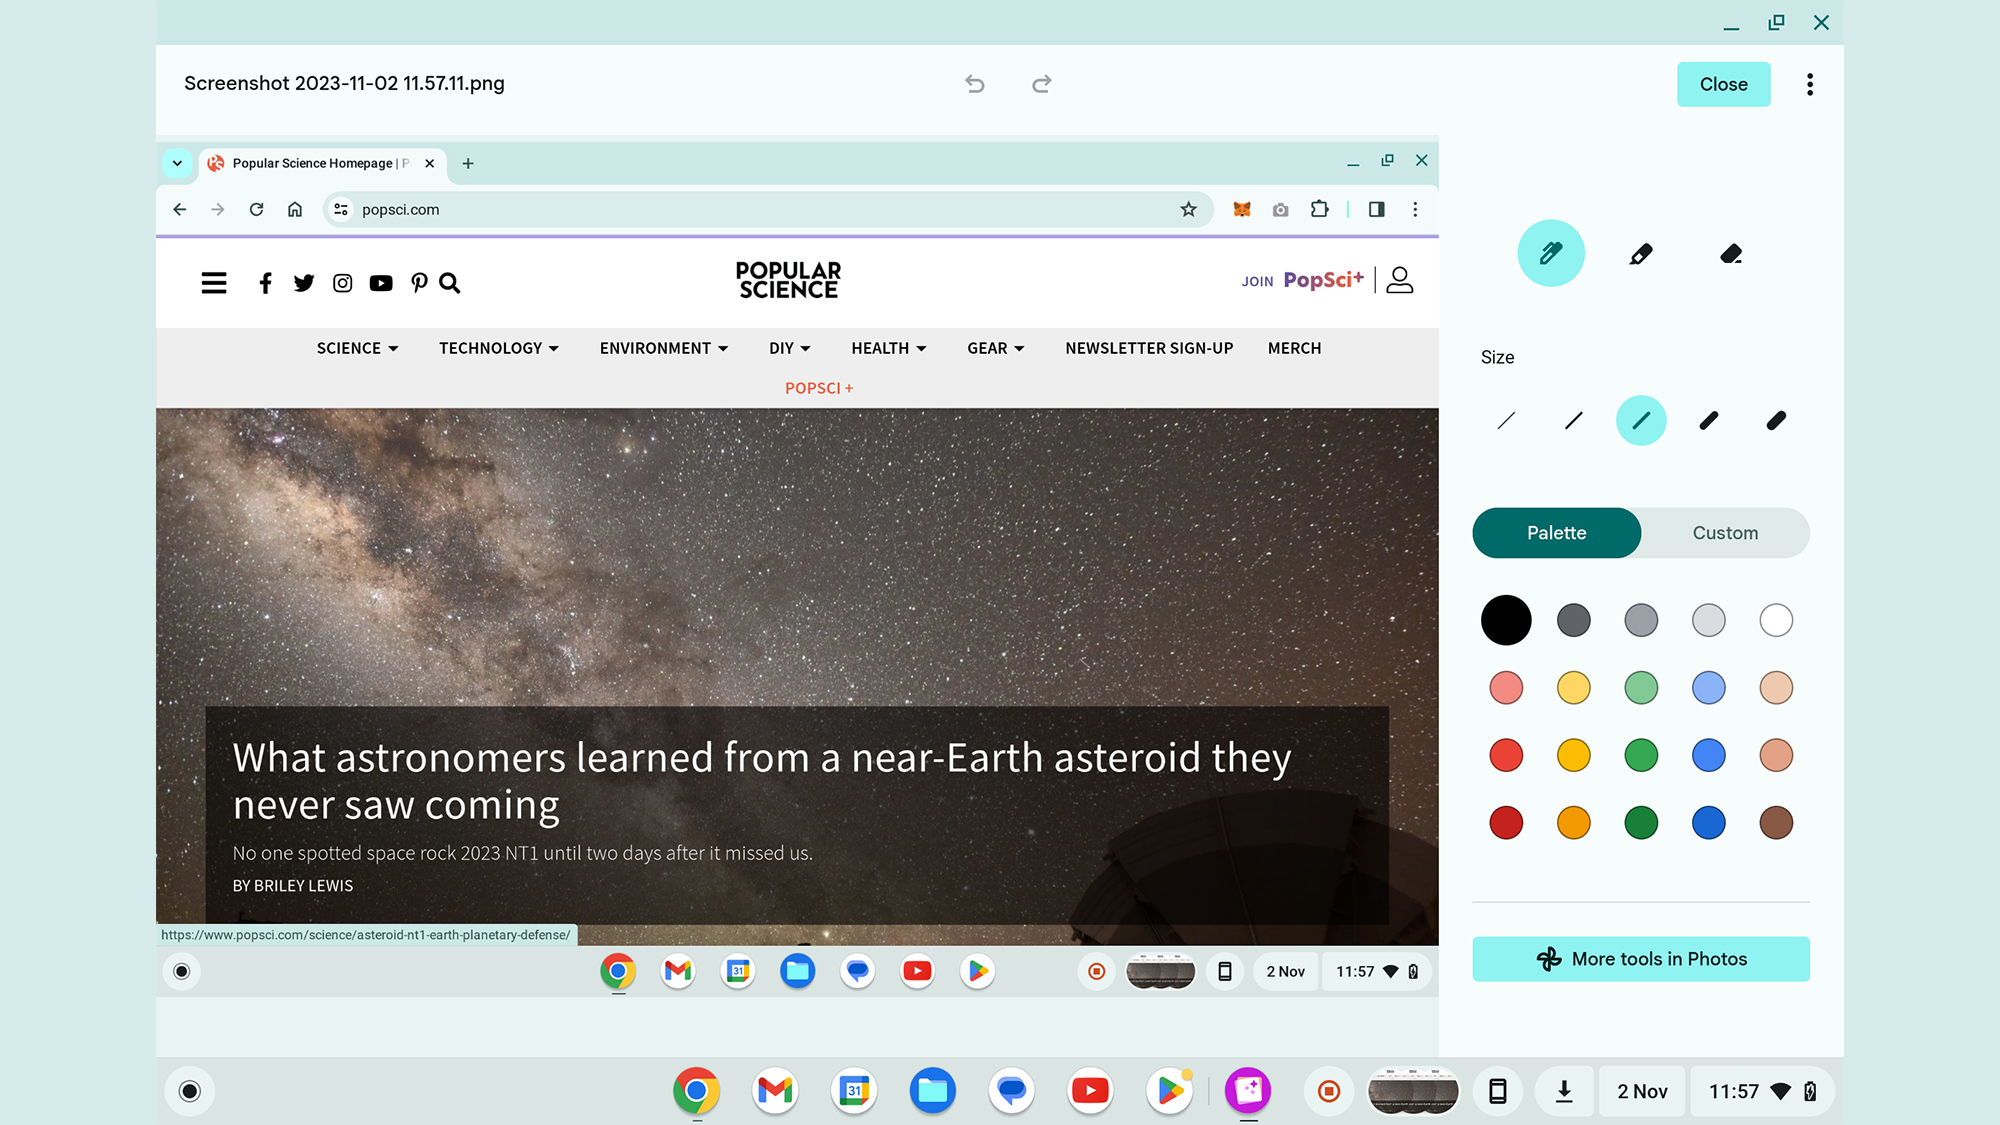
The pop up for screenshots also has an Edit button on it, though you don’t get this with screen recordings. When you click it, the image will open in the basic screenshot editor included with ChromeOS: Hover over the icons at the top to crop and rotate the picture, resize it, add annotations, or change the exposure, contrast, and saturation.
It’s the annotation tool labeled Draw that’s perhaps most useful for screenshots. A new pane pops out on the right, showing different pen types and colors. Once you’ve made your choices here, you can start scribbling on the image. Click Done when you’re happy with the changes, or Cancel if you don’t want to save them. There’s also a link to launch the image in Google Photos on the web, where you’ll find more editing options.
