
The hottest trend in artificial intelligence right now is generative AI, which can produce an entire essay or realistic images from just a text prompt. Now you can also use this technology to build a website.
Easy-to-use website builders that don’t require any coding are now commonplace, but these AI-powered platforms make leaving your mark on the web even easier. They allow you to skip the dragging and dropping and turn a brief outline of what you want your site to look like into something fully functional.
For the purposes of this guide, we’re using Framer, one of the best AI-powered site builders we’ve found so far. The platform also provides hosting services, and it’s free to use for sites with up to 1GB of bandwidth and 1,000 visitors per month, but you can pay for a subscription (starting at $5 a month) to remove these limitations.
Look out for other similar AI web tools. It’s possible new and better ones will pop up in the future, along with established website creation services adding AI tools of their own.
Creating an AI-generated website with a prompt
Head to Framer to get yourself a free account. Once you get to the proper Framer interface, you’ll see a Start with AI button right in the middle of the screen—click it to start building your site.
The more details you provide in the prompt box that will pop up, the better results you’ll get. If you wait a few moments before entering your prompt, you’ll see some examples appear on the screen that will be useful to inform your own: Include the name and purpose of the site, the kind of style you want (like “playful” or “professional”), and the different elements that the site should include (such as a portfolio or a sign-up form).
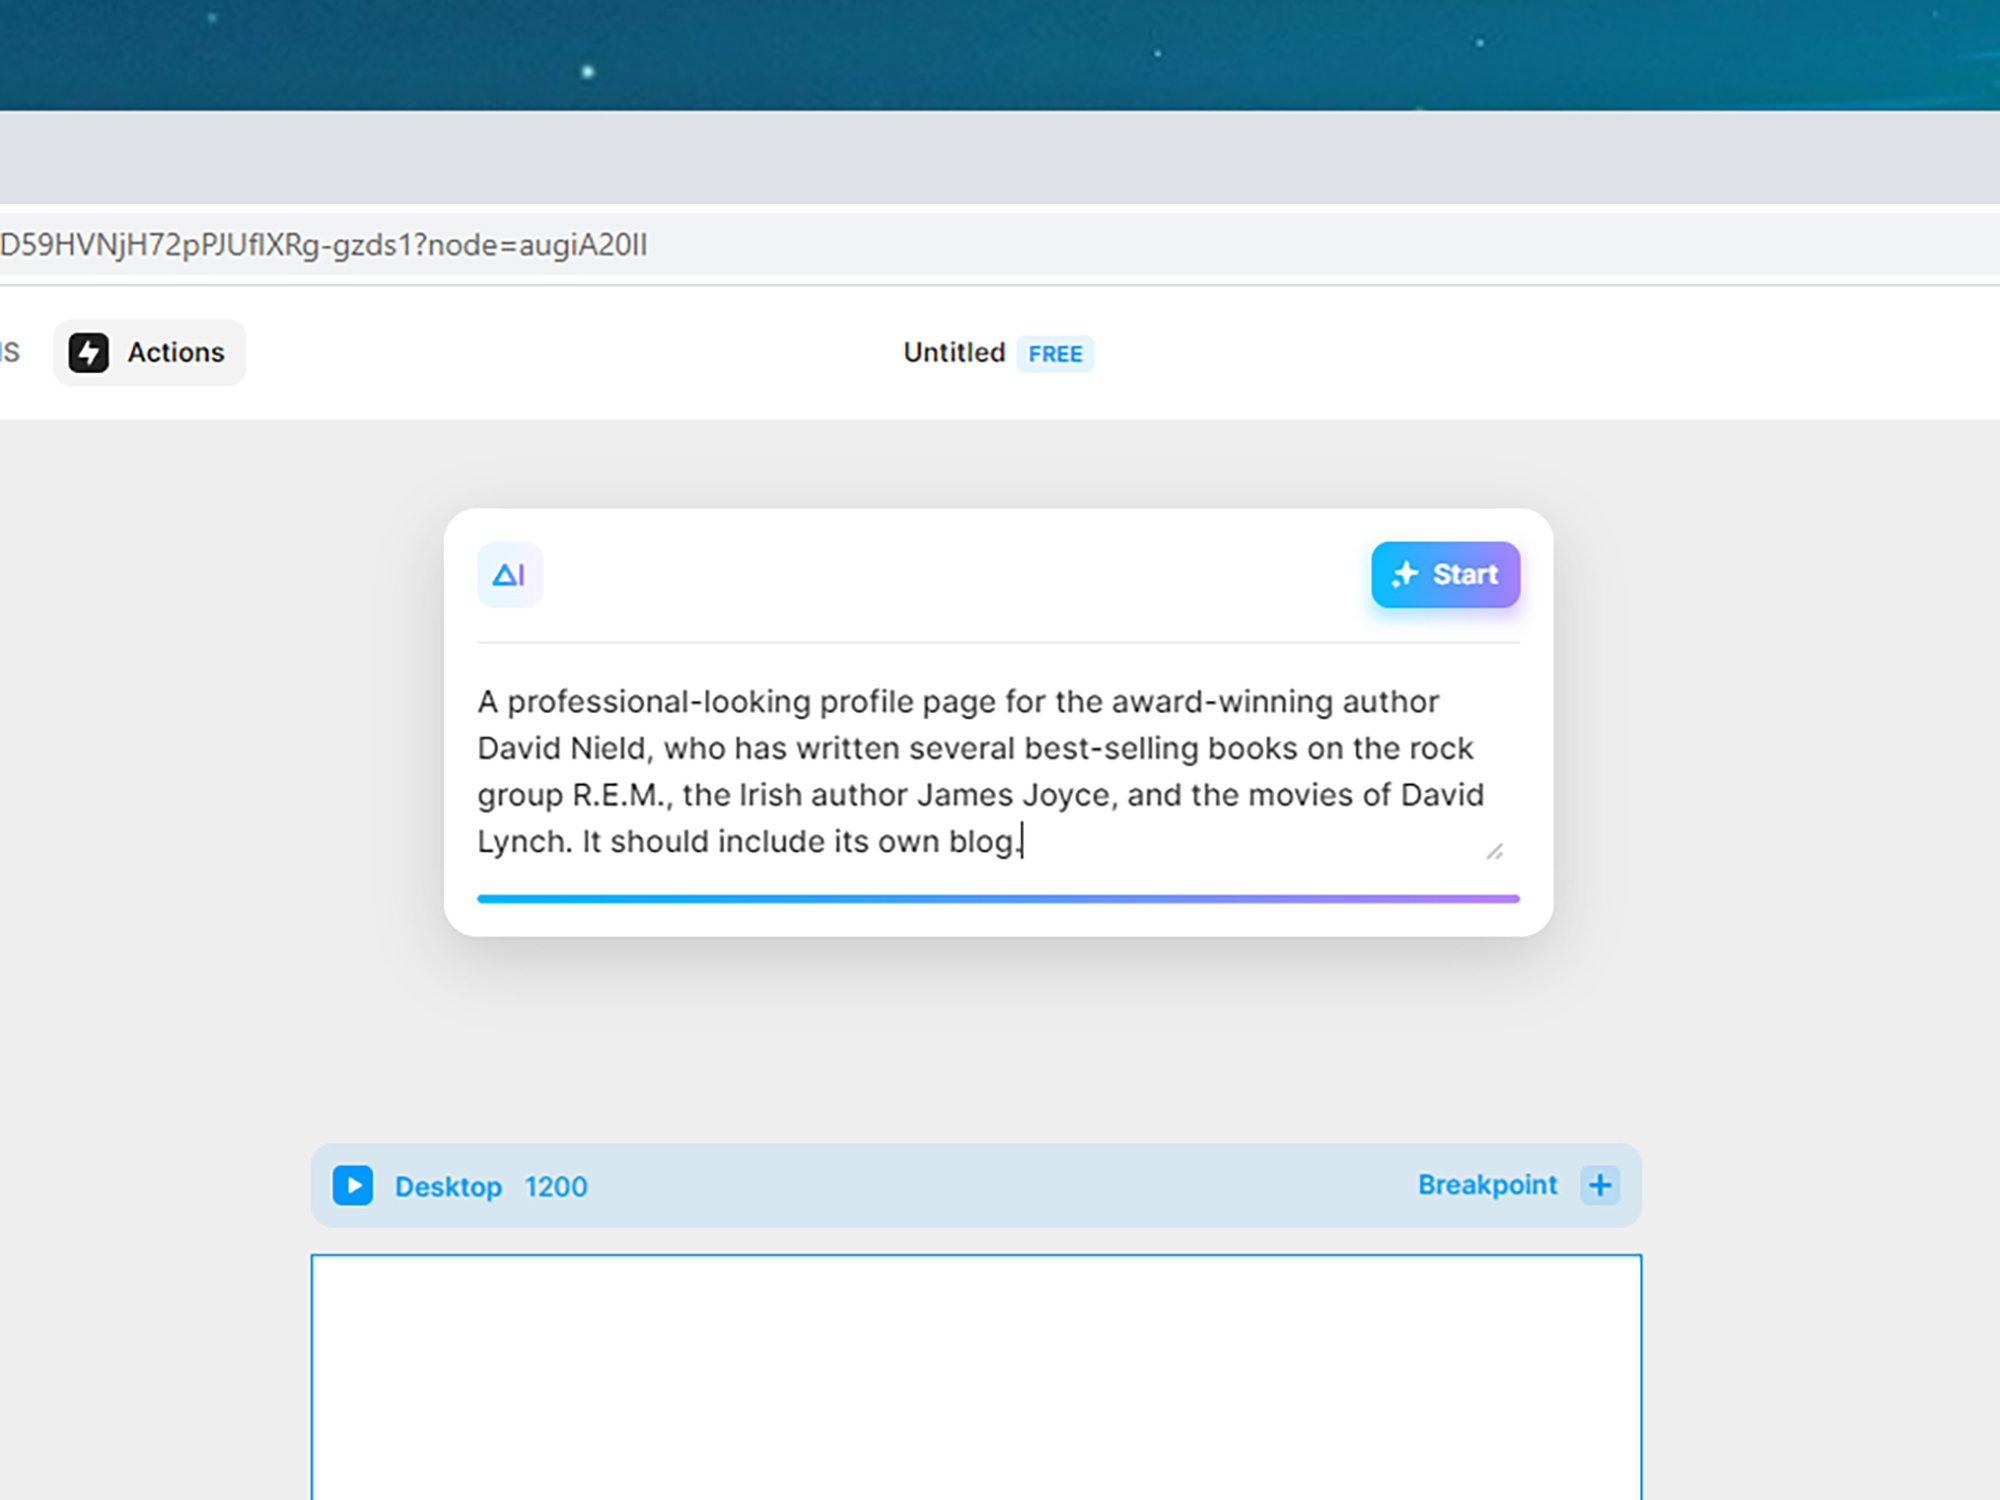
As you type out your prompt, you’ll see a progress bar along the bottom of the input box that will make sure you’ve entered enough details to generate a page. Try to have it completely full before you stop typing, and if you want to provide even more information, you can keep on typing. When you’re done, click Start.
The platform will build your website before your eyes, adding graphics and text inspired by your prompt. All the sites Framer produces are responsive, which means they automatically adapt to screens of different sizes. If you want to see how your website looks on tablets or smartphones, you can see these different layouts if you scroll across. If you’re not happy with the resulting design, click Regenerate on the right or edit your prompt if you think you need to.
Down the right-hand side of the screen, you’ve got a choice of color palettes and fonts that you can pick from to refine the AI-generated design. You can cycle through the colors to see how each of them will look by clicking the palette buttons. You can also click on an individual section of the site, and then the AI button to the right (the icon showing two stars) to go through the color options for that specific section.
Click the cog icon (top right) to edit various settings, including the site name and description. Here you can also set the thumbnail image that will show when you share your site on social media. If you know HTML and want to add all of these details directly into the code, you can access it here too. In the top-right corner of the interface, you’ll see a play button—click it to preview how your site looks in a web browser.
Tweaking the design and adding content
As impressive as Framer’s AI engine is, it’s unlikely that it’ll get everything perfectly to your taste. To make changes, just click an image or text box to bring up layout and effects settings, for example. With a double-click, you can change the actual image or enter your own text.
Right-click on anything that’s on your website and even more options appear. You’ll be able to delete, move, and duplicate blocks, as well as change their alignment and edit which other blocks they’re linked to so you can move them as a group. You can undo any mistakes with Ctrl+Z (Windows) or Cmd+Z (macOS).
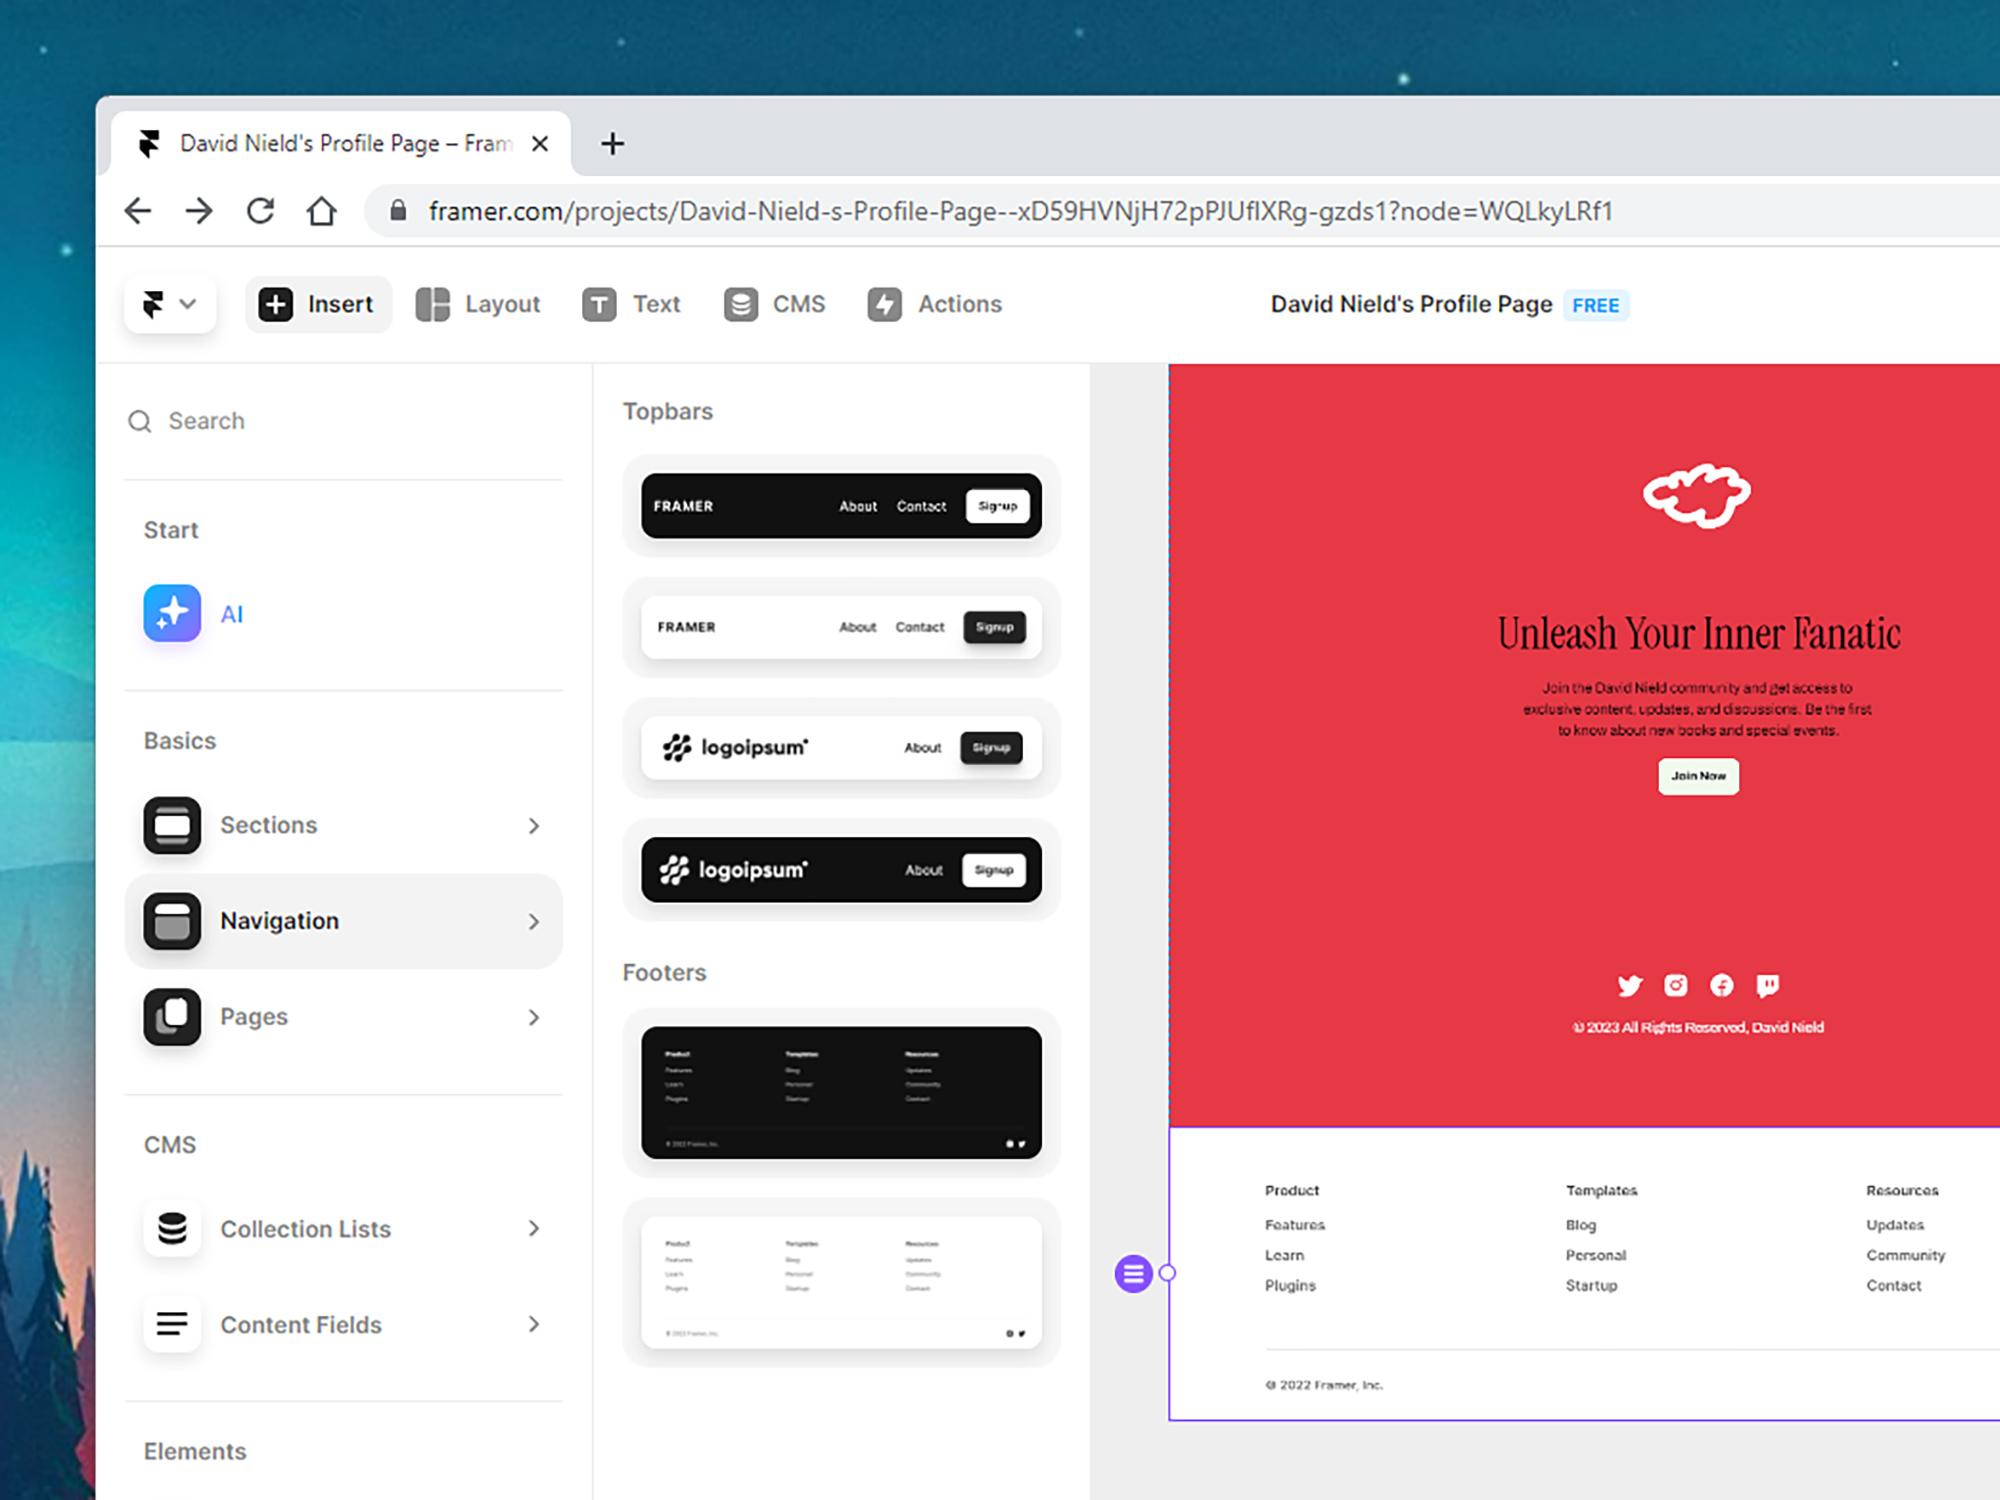
Click Insert (top left) if you want to add entirely new sections to your website: anything from portfolio pages, to headers and footers, to web forms. Framer will guide you through the creation process in each case. The colors and style will match the rest of your site, and you can click and drag to reposition any new elements if you need to.
There’s a CMS (Content Management System) built into Framer: Click CMS at the top and then Add Blog to attach one to your website, using the style and colors you’ve already established. You’ll see both an index page for the posts (visible on your homepage) and the individual post pages themselves, with some sample content added in. To see all the posts, add new ones, and delete existing ones, click CMS at the top.
Double-click on any blog post to make changes. You can change the style of text, add links, images, and videos, and split posts up with subheadings. Framer will save all of your changes automatically, so you don’t need to worry about losing any work. Help is always at hand, too: From the front screen of the platform, click the Framer icon (top left) and choose Help from the menu to see users’ frequently asked questions.
Up in the top-right corner, you’ll see the Publish button, which will put your site live on the internet. You can also use this button later to apply any future changes you make to your website once it’s already out there. If you’re using Framer for free, you’ll get a custom URL on the framer.ai domain, and your site will have a small Framer watermark overlaid on the bottom right corner.
