
This story has been updated. It was originally published on August 8, 2017.
When you decide to share a large file or folder online—perhaps you want to send a cute home movie to a doting relative, or need to back up a photo archive to a secondary location—you can’t just attach it to an email. Under the virtual weight of all those 1s and 0s, your regular email client could collapse.
Instead, once your files reach a critical size, you must turn to apps and programs to shuttle them around the web. Use these services to shift any heavy data load, whether you’re transferring it from one computer to another or sharing it with another person.
Share large files with Dropbox

File-syncing and cloud storage service Dropbox also lets you easily share hefty files. The amount you can shift depends on whether you pay for Dropbox space or not. The free version can manage up to 2GB; for anything larger (up to 2TB), you must pay $10 a month for yourself or $17 for up to six people to share. It also depends whether you’re uploading files to Dropbox using a web browser (50GB maximum file size), the desktop clients for Windows or macOS (no file size limits), or the mobile apps for iOS and Android (again, no file size limits).
Once you’ve uploaded a file to your Dropbox, you can share it with another person by clicking the Share button beside it in the web interface (if you don’t see this button, try selecting the file or moving your mouse cursor over it). If you’re using a desktop client, right-click on it to share; if you’re using a phone app, tap the three dots under the file to open a menu that lets you share it. To set the data’s destination on the web or desktop, enter a name from your contact list or manually type an email address; on mobile tap one of the options under Share and choose your path. The recipient will get a link they can use to download the file, and they don’t need to have a Dropbox account to access it. For proprietary files, you can add password protection, or set the shared link to expire at a certain time via the Settings option on the sharing dialog box.
Dropbox is particularly easy to use if you want to share a big file between two or more of your own devices. Just install the Dropbox client on both of the machines and add the file to your Dropbox: It will automatically sync to all locations.
Share huge files with Google

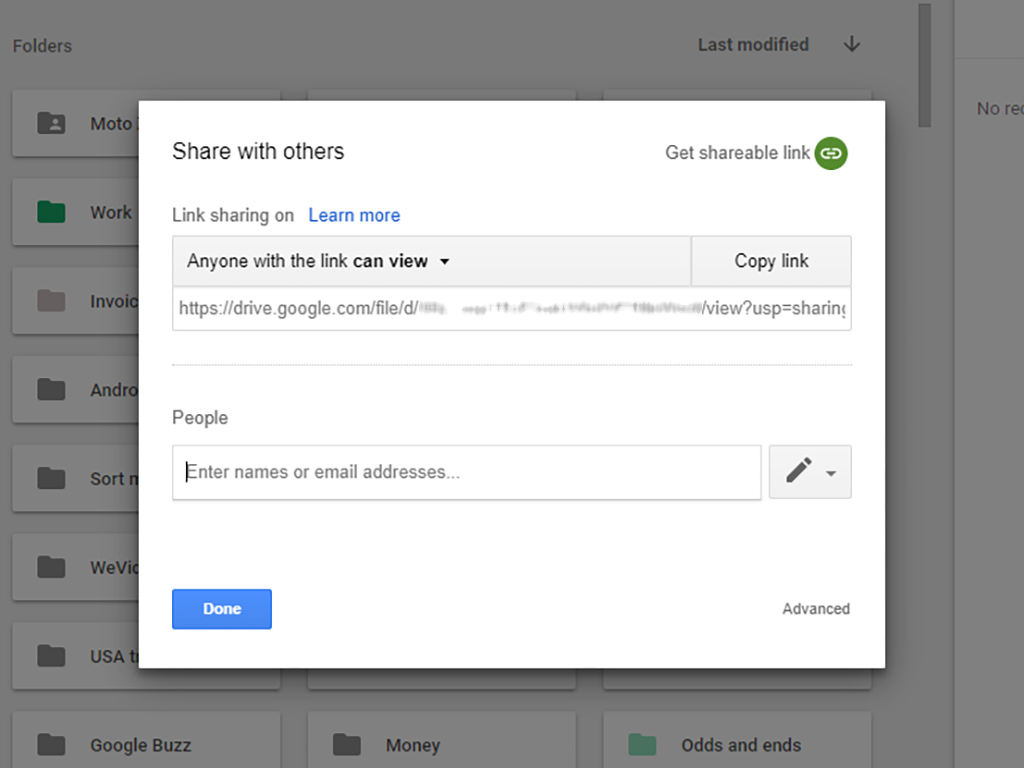
Google’s free file storage system, Google Drive, works a lot like Dropbox, though you get 15GB of free space across Drive, Gmail, and Google’s other apps. If that’s not enough for your needs, you can upgrade to Google One and get 100GB for $2 a month ($20 per year), 200GB for $3 a month ($30 per year), or 2TB for $10 a month ($100 per year). Even if you choose the most expensive option, the largest file you can move maxes out at 5TB, no matter how you upload it. Again, you can go through your web browser, a desktop application, or a mobile app for Android or iOS.
To move something through the web interface, select a file, click the Share button (a humanoid silhouette with a plus symbol) to send it to another person, and simply enter the person’s name (if they’re in your contacts) or email address. The recipient will get a link to download the file, with no need to install or sign up for Google Drive (although they’ll need their own Google account if you want them to edit or collaborate on a shared document). On a desktop client, find a file in your Google Drive folder, right-click, Ctrl+click, or Cmd+click on it, then choose the Share with Google Drive option. Windows users should note that the desktop client menu doesn’t include a Share with Google Drive option: Instead, you have to choose the Google Drive option, which will open up another menu where you can select Share. In the mobile apps for iOS and Android, tap the three dots to the side of any file to share it.
As with Dropbox, you can install the desktop application for Google Drive on two computers to easily share a file between the two machines: Simply sign into your Google account in both places and make sure the folder containing the file syncs.
Share big files with WeTransfer

WeTransfer also falls into the basic-free-and-fast camp, at least if you want to send files smaller than 2GB. For $10 a month, you can upgrade to WeTransfer Pro, which sends up to 200GB of data at once, password-protects the shared files, and allows you to set custom expiration dates on the download links.
This service works much like the now-defunct Mozilla Send, which we previously included in this story. First, navigate to the WeTransfer website in your browser, agree to the terms and conditions, select the files you want to share, and WeTransfer will turn them into a shareable link. To choose between sending an email with that link, or just copying and pasting it somewhere else, click the button with the three dots. The link’s recipients can click it to trigger the download, no sign-up or sign-in required.
Share large files with OneDrive

Some file-sharing options come built right into your desktop operating system. First up is OneDrive, which you’ll find on Windows machines. Unfortunately Microsoft only gives you 5GB of OneDrive space for free. If you’re going to be using more than that, you’ll need to start paying for a monthly subscription. Prices start at $2 a month for 100GB. For the paid service, files can be up to 250GB in size.
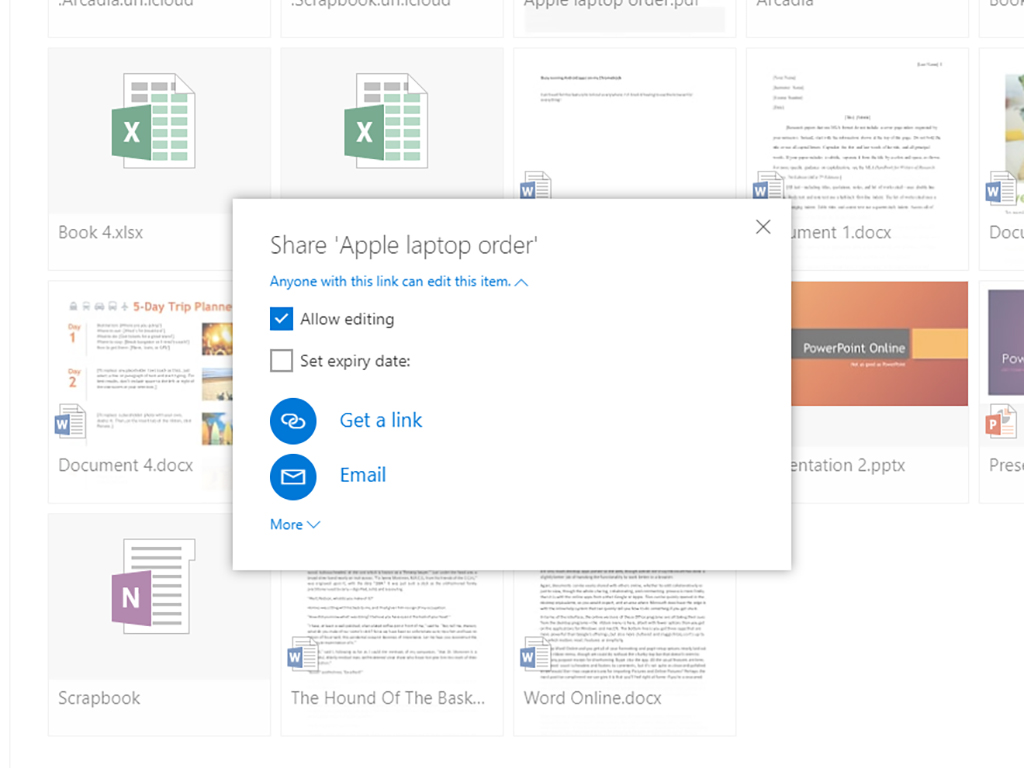
Launch File Explorer and head down to your OneDrive folder. When you right-click on a file, you’ll see a Share a OneDrive link option. This generates a shareable link and copies it to the clipboard. You can then paste it somewhere else, like an email. Once the recipient opens the link in a browser, they can view and download the file whether or not they have a OneDrive account. If you’re away from your main computer you can do your sharing through OneDrive on the web: Select the relevant file using the tick boxes, and then click Share. The web interface actually gives you a few extra settings, like the option to set an expiration date for the link.
Share big files with iCloud

Finally, there’s iCloud, baked right into macOS. To take advantage of its sharing abilities, first make sure to upload your desktop and documents folders to iCloud: Open System Preferences, then your Apple ID, followed by iCloud. Then, make sure iCloud Drive is turned on and click Options next to iCloud Drive. Finally, choose Desktop & Documents Folders. This will ensure you can share any file in those folders and their subfolders. The maximum file size iCloud Drive supports is a massive 50GB, but you only get 5GB of storage for free—upgrade plans for iCloud+ start at $1 a month for 50GB.
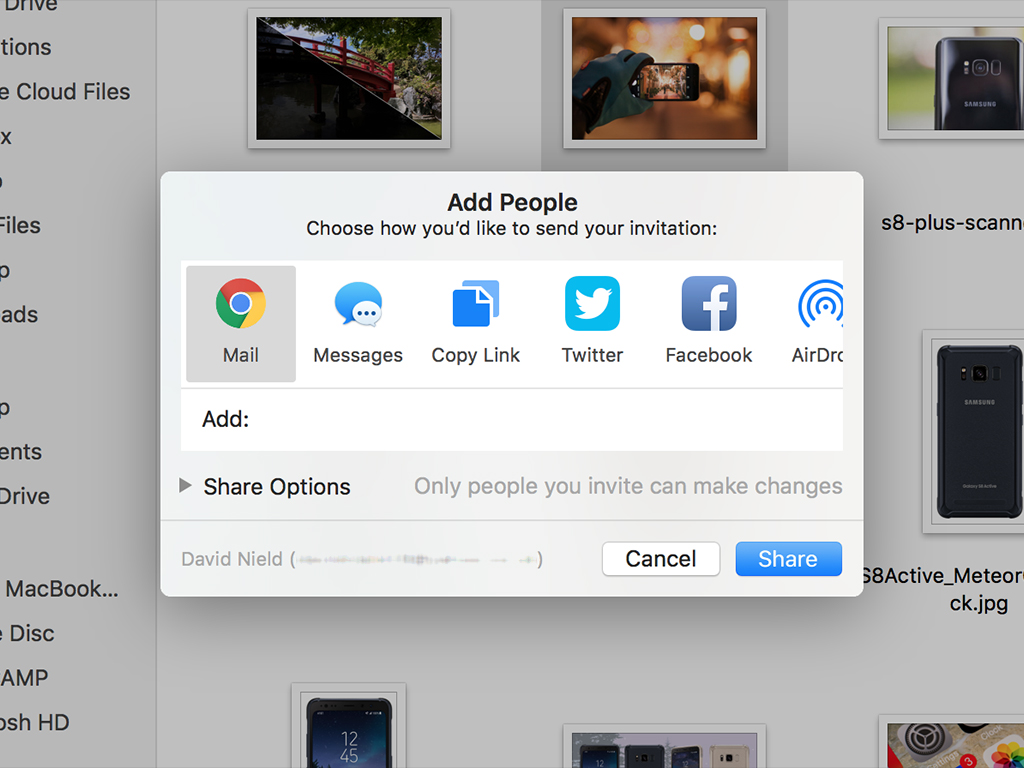
To share items, go to iCloud Drive in Finder, choose Share, and then pick Share File or Share Folder. Decide which app you want to use, who can access the shared file, and what permissions they’ll have. You can send out a link via email or copy it to the clipboard—but the link’s recipients will need an iCloud account to access it. In this respect, Apple lags behind its rivals. Though iCloud has less ease-of-use and file sharing flexibility, the service regularly receives new features and improvements. Plus, it does have the benefit of being built right into macOS, so you don’t need to install another application or open up a web browser to use it.
