We all deserve more secure internet connections, and if you splurged on one of Google’s latest phones, you already have one available. The Pixel 7 and the Pixel 7 Pro come with a built-in VPN, giving users a private and secure network for no extra charge.
The feature has been available for some time to Google One users on the Premium tier ($100 a year), so if you’re renting cloud storage from the big G, you can also use this feature, no matter what device you have.
Setting it up the first time is not as intuitive as you’d hope, but once you’ve enabled it, it’ll be way easier to turn on and off whenever you need an extra layer of security.
How to set up the Google One VPN
Whether you’re wielding a shiny new Pixel 7 or 7 Pro, or you’re a Google One subscriber, you’ll need to set up your VPN for the first time through the Google One app. The newest Google devices come with the tool pre-installed, but if you don’t have it, you can easily download it from your phone’s app store—yes, including Apple’s.
[Related: You should switch to a browser that has its own VPN]
On a new Pixel, once Google One is installed, the device will prompt you to sign in using the main account on your phone. On the next screen, the app will show you a pop-up message saying you have access to a VPN and inviting you to set it up. Tap Manage to do just that.
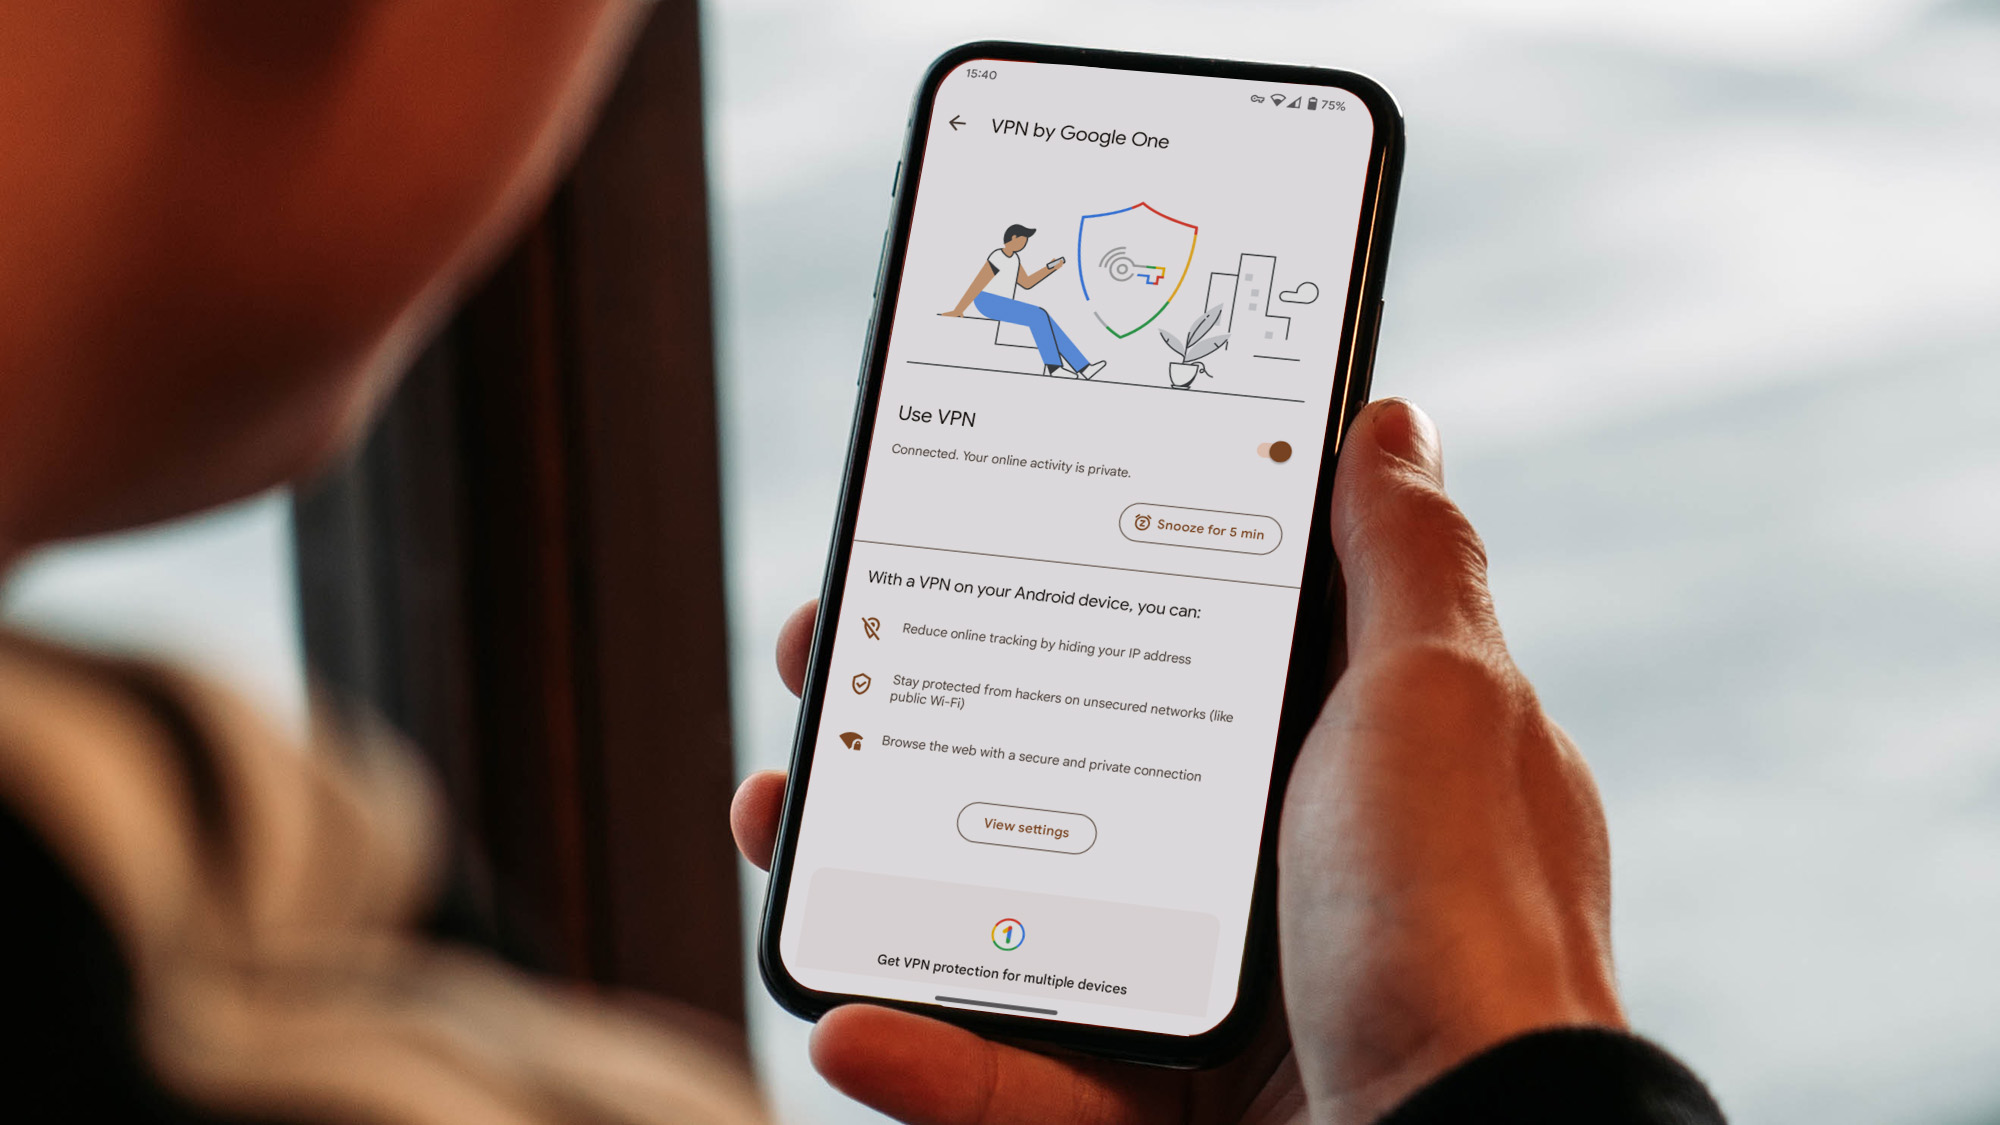
If you’re not on a Pixel 7, log into the app using the account linked to your Google One subscription. On the Home tab, scroll down and tap Manage on the VPN tile.
On the next screen, tap the toggle switch next to Use VPN to turn it on. Accept the connection request that follows, and your connection will automatically become private. You’ll know the VPN is active because you’ll see a tiny key icon to the left of the clock in the upper right corner of your screen.
Get easy access to your Google VPN
Once you go through the setup process, you won’t have to do it again. Your phone will recognize the VPN connection, and you’ll be able to easily turn it on and off if you add it to the Quick Settings menu. To do that, drag down with two fingers from the top of the screen to open the menu and tap the pencil icon to edit it. Scroll down to find the VPN tile—it has a key icon on the left—and then long-press and drag it somewhere in the first eight rows.
Remember that the Quick Settings menu only has 16 slots. When you open the notifications drawer (pull down from the top of your screen with one finger) you’ll only see the first four; if you fully open the menu, you’ll only see the first eight; and you’ll have to slide that group to the left to see the remaining eight. If you will be using your VPN on and off throughout the day, we recommend you drop its corresponding tile into one of the first four slots, to save yourself some slide gestures and ensure you always have easy access to it.
How to configure your Google VPN
One of the biggest drawbacks of Google’s service compared to other popular alternatives like ExpressVPN or NordVPN is that you won’t be able to choose where you’re browsing from. This means that even though your connection will be secure, your IP address will always correspond to the geographical location you’re physically in.
[Related: How to use a VPN]
This virtual globe-hopping feature has helped users access content that’s not readily available in their region, like titles in Netflix’s French catalog that you can’t get in the US. To prevent this workaround, some apps just block VPNs altogether—you can open them, but they won’t load until you turn your VPN off. If you have one of these restrictive apps on your phone, it won’t make any exceptions for Google’s VPN, but you’ll be able to give these apps the ability to bypass the private connection so you can keep using them while the VPN is on.
To do this, open the Google One app and tap on the VPN tile. Under Using apps when the VPN is on, tap Update settings, then hit the plus sign next to each app you want to ignore the VPN. Once you’re done, Google One will prompt you to restart your connection and you’ll be good to go.
VPNs can be extremely helpful whenever you have to access sensitive information while using a public network. So, if you need to check your bank balance and the only way to connect to the internet is through a store’s WiFi, you’ll definitely want to protect yourself from potential attacks by using a VPN. Setting it up now will let you have it handy whenever you need it.
