For many people, soaking in a warm bath is a relaxing way to wind down after a tough day. Unfortunately, combining bath time with activities like reading, watching videos, or sipping a nice glass of wine isn’t always feasible. Water doesn’t mix well with paper, electronics, or wine, after all.
That’s where bath trays come in. These wooden shelves span the top of your tub to hold drinks, candles, and books, and can be as simple as a piece of plywood. But with a bit of planning, measurement, and careful cutting, you can customize a tray to hold exactly what you need for your perfect bath. This is also a great DIY gift for the bath-taker in your life, particularly with Mother’s Day and Father’s Day coming up.
Stats
- Time: 6 to 8 hours
- Material cost: $25 to $75
- Difficulty: Moderate
Tools
- Miter saw (or circular saw)
- Router
- Pattern router bit, aka a trim router bit
- Roundover router bit
- Orbital sander
- Sanding discs (80-, 120-, 150-, and 220-grit)
- Clamps
- Drill
- 1-inch Forstner bit
- (Optional) jigsaw
- (Optional) corner radius template
- (Optional) sanding sponges
- (Optional) 2-inch and 4-inch hole saws
- (Optional) tack cloth
- (Optional) compressed air
Materials
- 1 (6-foot) 10-by-1-inch board (or any other type of wood that’s at least a ¾-inch thick—for stability)
- ¾-inch plywood
- Wood glue
- Spray-on polyurethane
Instructions
1. Cut the wood to length. Measure the width of your tub and use a saw to cut your chosen wood down to length. My tray hangs over the edge of the tub about 3 inches to accommodate a handle, so it is 39 inches long to fit on a 36-inch tub. If you aren’t interested in a handle, cut your board as long as the tub is wide.
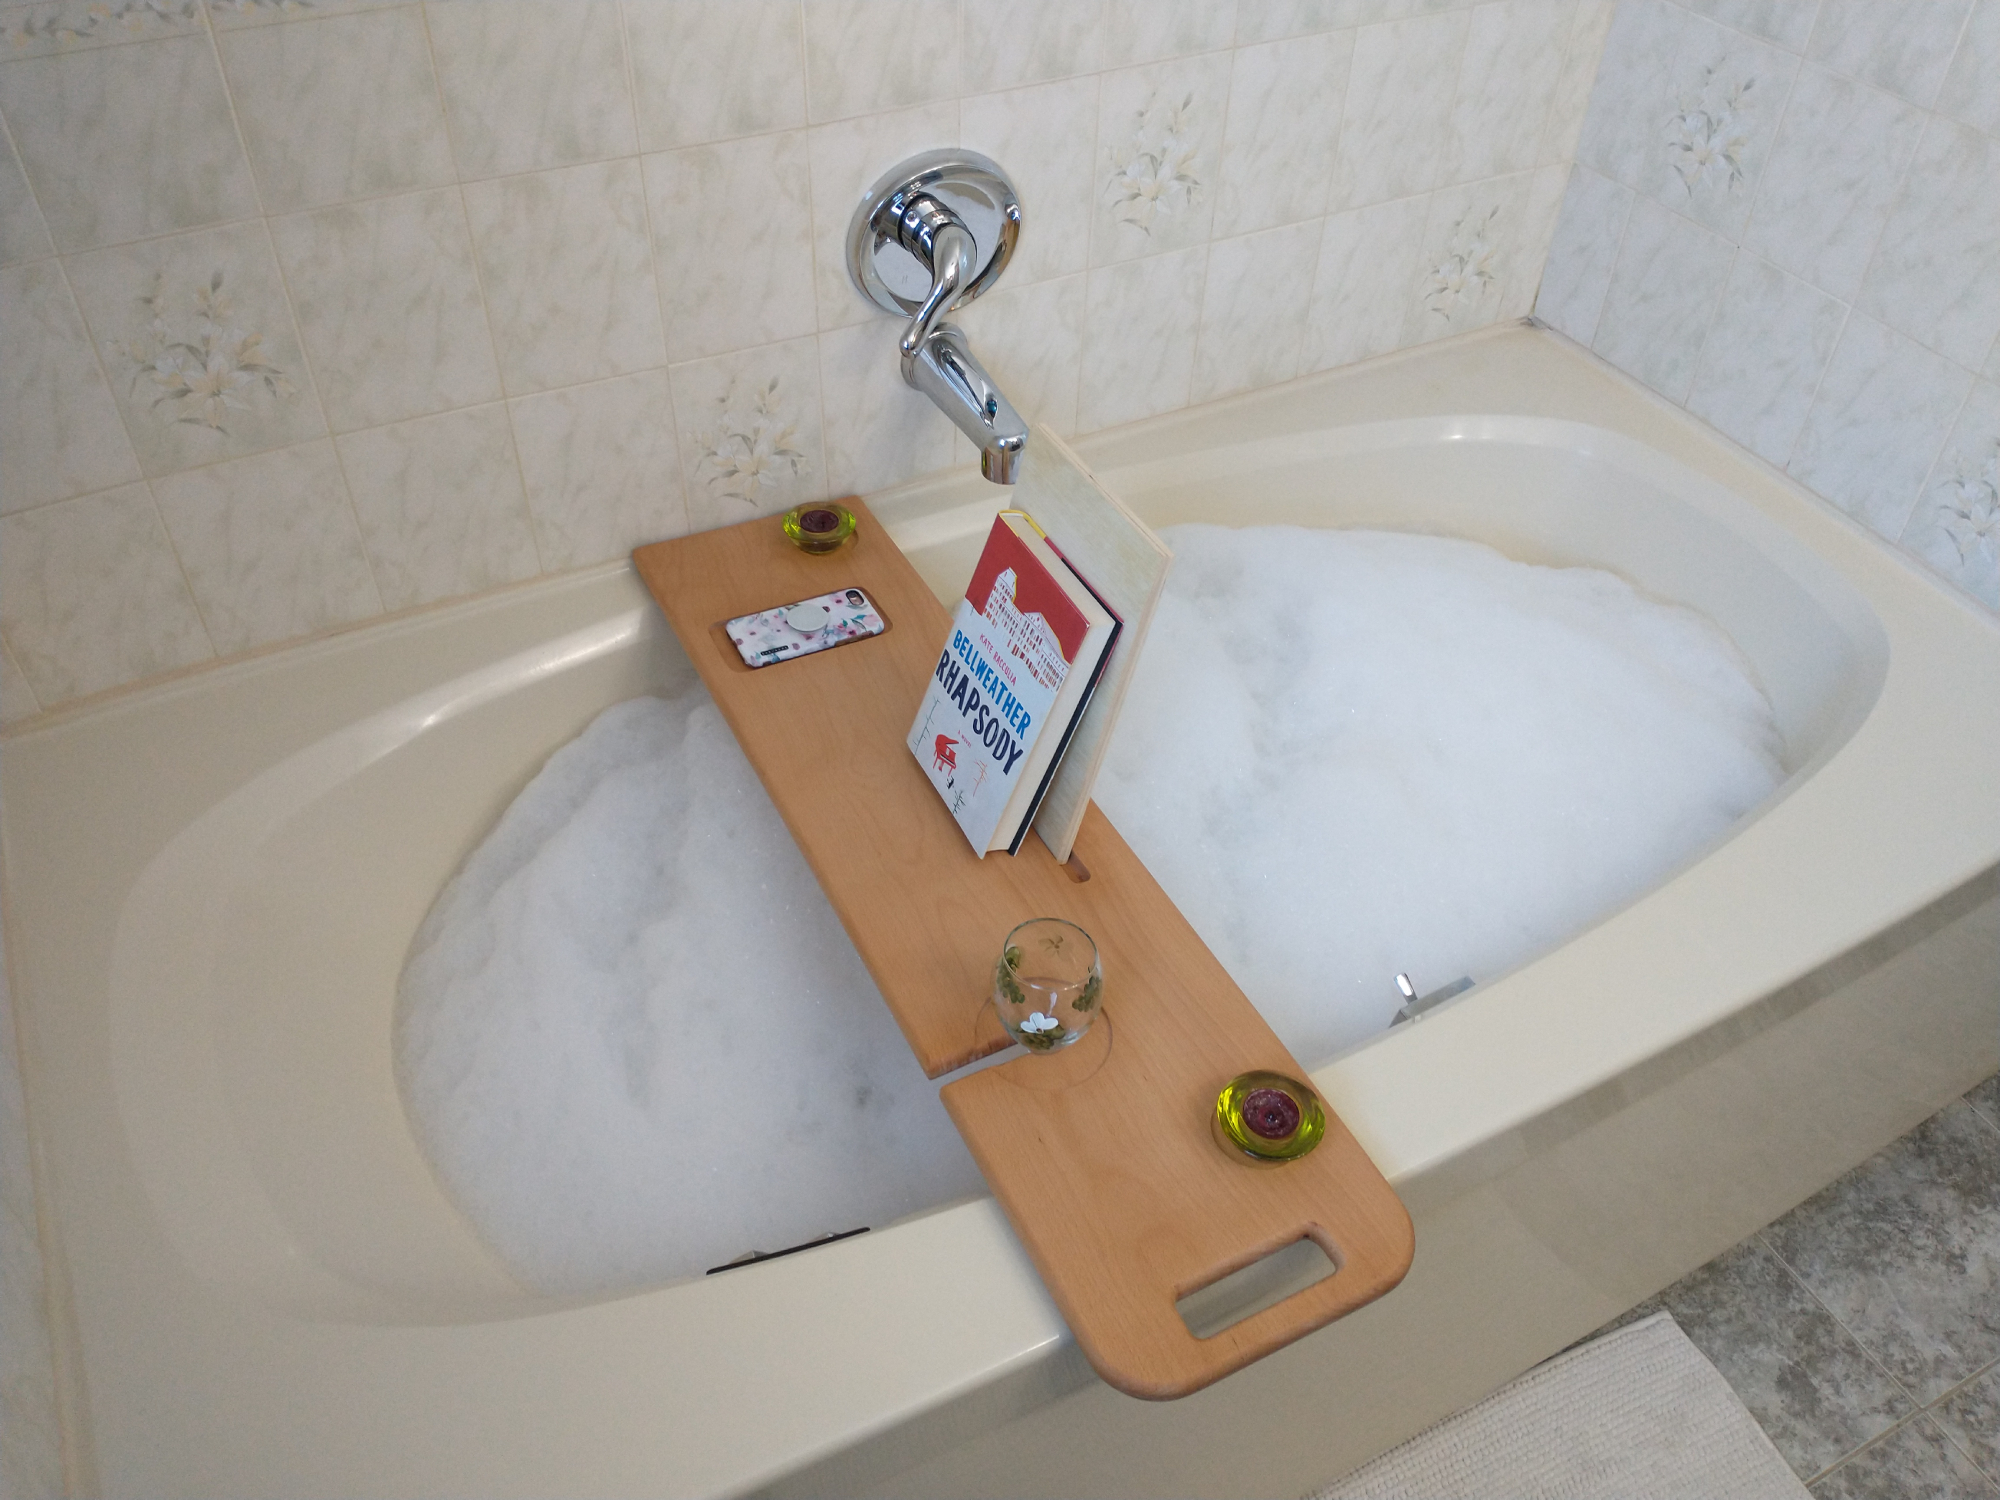
2. Draw your layout on the board. Careful design now will save headaches later. Hand-sketch the approximate positions of all your desired elements in pencil right on the board. The tray described here has space for a tablet or book, two candles, a teacup or wine glass, and a phone, but you can customize yours however you please. Once you have a layout you like, precisely measure and draw everything on the board.

Keep the structure of the tub itself in mind too. For example, if the bottom of a wine glass will hang below the tray, the slot for the stem must be far enough away from the tub’s inner wall that the glass won’t hit it. Also, make sure to center any tablet or book holder to the tub, not to the full tray if the tray will hang over the edge. Otherwise, the tablet won’t be centered when you’re sitting in the bath.
Don’t be afraid to erase, move, and start your layout over at this point. It’s far easier to reposition things around now than after you’ve started cutting.
3. Make a plywood template. Most of the cuts in this project will be done with a router and a pattern bit. These bits have a bearing on the top that lets them ride along the edge of a template to flush-cut the wood below. To make cuts easier, faster and more accurate, make cutouts in the template for each of your design elements. I created cutouts for the 2-inch candle holes and the 4-inch teacup holes, and should have made some for the handle and phone holder—it would have made cutting them much easier and faster.
[Related: Build your own drawer organizer]
Circular cutouts, like those for cups, are simple. Using a hole saw, cut a 2-inch hole and a 4-inch hole in a scrap piece of ¾-inch plywood. My scrap was about 12 by 12 inches, which was plenty of room for both holes. I suggest keeping the holes at least 3 inches from each edge of the board, to make the next step easier.
If you want your template to include the non-circular elements, like the handle or phone holder, cut them out with a jigsaw. I made my handle 4 inches long and 1 inch wide, but I didn’t measure the phone holder—I just traced my phone.
4. Cut all of your insets and the handle. Working one at a time, lay each plywood template over its cut location and clamp it securely to your work piece. Set the depth of your pattern bit so it extends about 3/16-inch past the plywood to create your desired insets. Turn the router on, then lower it into the center of the hole, letting it slowly dig into the wood. Once the router base is resting on the plywood, carve out the inset in concentric circles until you reach the outside edge of the template. The ball bearing on top of the pattern bit will ride along the inside of the template, preventing you from cutting into the template and ensuring you carve out a perfect circle in the wood beneath.
Repeat with all of the insets and holes you have templates for, including the handle. When cutting the handle, take multiple passes with the router, increasing your bit depth about a ¼-inch at a time. Making multiple shallow cuts allows for better control than doing one deep pass.
- Tip: You can freehand the cuts if you don’t have the time, materials, or tools to make a template. I freehanded the phone holder and part of the handle, and it came out fine as long as you don’t look too close.
5. Cut a hole and channel for the wine glass. Use a 1-inch Forstner bit or hole saw to cut the hole for the wine glass stem in the center of the tea cup inset. After all, how often will you be drinking tea and wine at the same time?
Having a hole isn’t enough, however, because the wine glass base won’t fit through. Cut an approximately ½-inch-wide channel from the front of the bath tray to the hole. I used the same pattern-cutting bit from step 4, riding along a piece of plywood as a guide. This method works, but you can also use a jigsaw.
6. Cut a groove for the tablet to stand in. Customize this cut to your tablet. Mine has a thick, heavy-duty case, so the groove needed to be about ⅝ of an inch wide and ¾ of an inch deep. This lets the tablet easily slip into the groove and then lean back at a slight angle. I cut the groove long enough to hold the tablet in both portrait and landscape orientation.
If you have a thinner tablet, cut a narrower groove. Test different sizes on a piece of scrap before committing to the finished piece in order to find the ideal tilt angle for you.
When you’re ready, use a straight edge as a guide and cut out your channel. As with the handle, take multiple shallow passes until you reach the depth you want.
7. Curve the corners on the handle side. Because my tray hangs 3 inches over the edge of the tub, I turned the sharp corners into curves with my router using a corner radius template. This is just a piece of medium-density fiberboard (MDF) with the corners pre-cut to curves with different radiuses: 1, 2, 3, and 4 inches. Clamp this template to a corner, making sure the edges are square with the edges of your work piece and the sharp corner juts out from under the curve you want. Then follow the arc of the template with your pattern bit. Perfect, uniform curves, every time.
- Tip: If you don’t have a corner radius template, find something with the radius you want and trace it onto your work piece. A roll of packing tape works really well for this. Then cut the corner with a jigsaw and clean up the round edge with your orbital sander or router.

8. Round over all the edges. Swap out the pattern bit in your router for a roundover bit. Like with the tablet groove, test cuts will help you here, preferably on the same kind of wood as the tray. As you test, make two adjustments: the depth of the bit to get the type of roundover you’re looking for, and the speed of both the bit and your movement to minimize burning. The longer the bit sits in one spot, the more likely it is to burn. Burn marks can always be sanded off, but minimizing char will save time later.
9. Sand, sand, and then sand some more. Sanding is the key to great-looking woodworking. The very first step is to eliminate the inevitable router burns with 80-grit sandpaper. Unfortunately, because most burns will be on the rounded edges and corners, an orbital sander won’t work well. It’s hand sanding and elbow grease for you.
One product that helps is sponge sanding blocks. These are thick sponges with various contours carved into them. Wrap the sandpaper around the sponge and sand like normal. The sponge flexes and forms to the shape of your edges, giving you better contact and reducing the time and energy required to sand. If you don’t have these, we recommend wrapping the sandpaper around a small block of smooth wood or sanding while wearing thick gloves—splinters will get ya when you least expect ‘em.
Once the burn marks are gone, use your orbital sander and 80-grit paper to remove any major scratches or divots from the flat, accessible areas of the wood. When the wood is clean and smooth, work through the remaining grits: 120, then 150, 180, and finally 220. Use the orbital sander as much as you can to save time, but hand-sand the details so you don’t ruin the edges.
10. Glue stopper blocks to the base. To keep the tray from moving and dumping your tablet and wine into the tub, install stopper blocks on the bottom. Cut a pair of strips from the leftover project wood, each about 8 inches long and an inch or so wide. Glue these to the bottom of the board just inside where the inner inner edge of the tub walls touch the tray. Don’t fit these stoppers too tight to the walls, or it will be hard to put the tray onto the tub and slide it back and forth as needed.
11. Clean the wood and apply finish. When the sanding is done, clean the board thoroughly. I use a three-step process. First, vacuum every inch of the project, several times. Then use a tack cloth to wipe it down. Finally, right before applying the finish, use an air compressor or a can of compressed air to blow off any remaining dust.
Use whatever cleaning method you have available—just get all the dust off.
When the board is clean, apply your finish of choice. I used a spray-on, extra thick polyurethane. Spraying makes getting into the nooks and crannies easier and cleaner.
- Pro tip: After your final coat has dried, rub the surface with a piece of brown paper bag. This will knock down any nubs in the polyurethane without scratching it, giving a super smooth finish.
12. Build a book stand. This is pretty straightforward. Find, buy, or cut a piece of wood that’s approximately the same size as your tablet. Then stand it up in the tablet groove, and you’ve got an easy book holder. I used a 10-by-12-inch piece of scrap ½-inch plywood that I had from a previous project. It wasn’t quite thick enough to sit how I wanted, so I glued an ⅛-inch thick scrap of wood to the back of the board to create a better resting angle.
- Note: You can screw or glue the book holder into place. However, I left mine removable for easier storage.
13. (Optional) Add a book stopper. I chose not to add one of these to my tray because I didn’t like the way it looked. But if you want something to keep the base of your book in place, glue another strip of wood, maybe 8 inches long and ¾ of an inch tall, down about 2 inches in front of the channel. This creates a lip that the bottom of the book will rest against. Test out a few different positions and board sizes before you glue it down to make sure it will work for you.
Now bask in the glory of your handiwork as you bathe.
