The computer age has transformed everything from the way we capture precious moments to the way we watch movies. We’ve switched from film photos to digital images, VHS tapes to streaming videos, vinyl to music files…you get the picture. However, before we owned pocket-size gadgets that could store or stream vast libraries of videos, audio, and images, we kept our favorite content and recorded memories in analog form—often saved to tapes that can break down as they age.
To enjoy all of this media again, and preserve it for the future, you need to digitize it. This guide will focus on digitizing storage formats that rely on outdated players—so you can stop reading now if you saved your content to CDs or DVDs, which still slot into computers and external disc drives.
While we’d encourage you to convert your content yourself, if you’d rather spend money on a professional job, specialty companies will digitize your old recordings for you—they’re just a Google search away. If you can’t dig up any good options in your local area, many firms are willing to work with mailed-in content. For the DIYers, we’ll guide you through your options and explain how they work.
VHS tapes
We’re guessing you keep many of your old home movies and favorite childhood films on VHS tapes. To digitize this format, you need a device to play the videos, an adapter to output them, and a computer to capture them.
If you don’t have a VHS player sitting around, borrow one from a friend or source a second-hand machine from a site like eBay. On the back of the player, locate the S-Video or composite video output. These ports may have labels, or you can check those links to find pictures of what they look like.
A number of inexpensive adapters can plug into these outlets and connect them to your computer’s USB port. The Elgato Video Capture ($74 on Amazon) and the V.TOP USB 2.0 Video Audio Capture Card ($30 on Amazon) will both get the job done.
Many such adapters come with their own capture software for recording the USB input to your computer’s hard drive. If they don’t, you can also use free tools like Avidemux for Windows, or QuickTime for macOS. If you’d prefer a computer-free process, you can buy an alternative all-in-one device, such as the ClearClick Video To Digital Converter ($120 on Amazon), which digitizes tapes directly to a memory card.
If you’re a stickler for quality, you can really go to town with dedicated video capture cards that fit inside your desktop computer (like the $124 Hauppauge Colossus 2), or external capture boxes (like the $100 AVerMedia AVerCapture HD). But these pricey tools are really designed for higher-quality video sources such as games consoles—they’re overkill for old VHS tapes. That said, they will make your digitized video look the very best it can.
For analog video formats that are older than VHS, follow the same principles: Find a machine capable of playing the movies, preferably with an S-Video or composite output, and then some way of converting the output into USB format for your computer. And if you simply can’t find the necessary hardware, you can usually find a professional service to do the job for you.
Cassette tapes
Converting audio tapes works along the same lines as converting video ones. You need to dust off whichever one of your devices that can still play your old cassettes, then convert it into a format, typically USB, that your computer can access.
On a cassette player, look for red and white RCA connectors or a port labelled line-out. If your old player doesn’t have the proper features, consider buying a second-hand deck that does. In a pinch, even a standard headphone jack can output audio, but this should be a last resort.
If your computer has a 3.5mm line-in port (NOT a microphone input—this is a different format), you’ll only need one cable. Depending on the cassette deck outputs, that may be a $4 stereo audio patch cable or a $5 RCA to stereo cable.
To go the USB route, you’ll need a device that will convert your cassette player’s output to a USB input. Something like the V.TOP Digital Audio Capture Card ($17 on Amazon) will do this, or you can buy an all-in-one player and converter, like the Reshow Cassette Player ($22 on Amazon) or the ION Tape Express Plus ($40 on Amazon). However, a classic tape deck and dedicated cables will probably result in better-quality digital files.
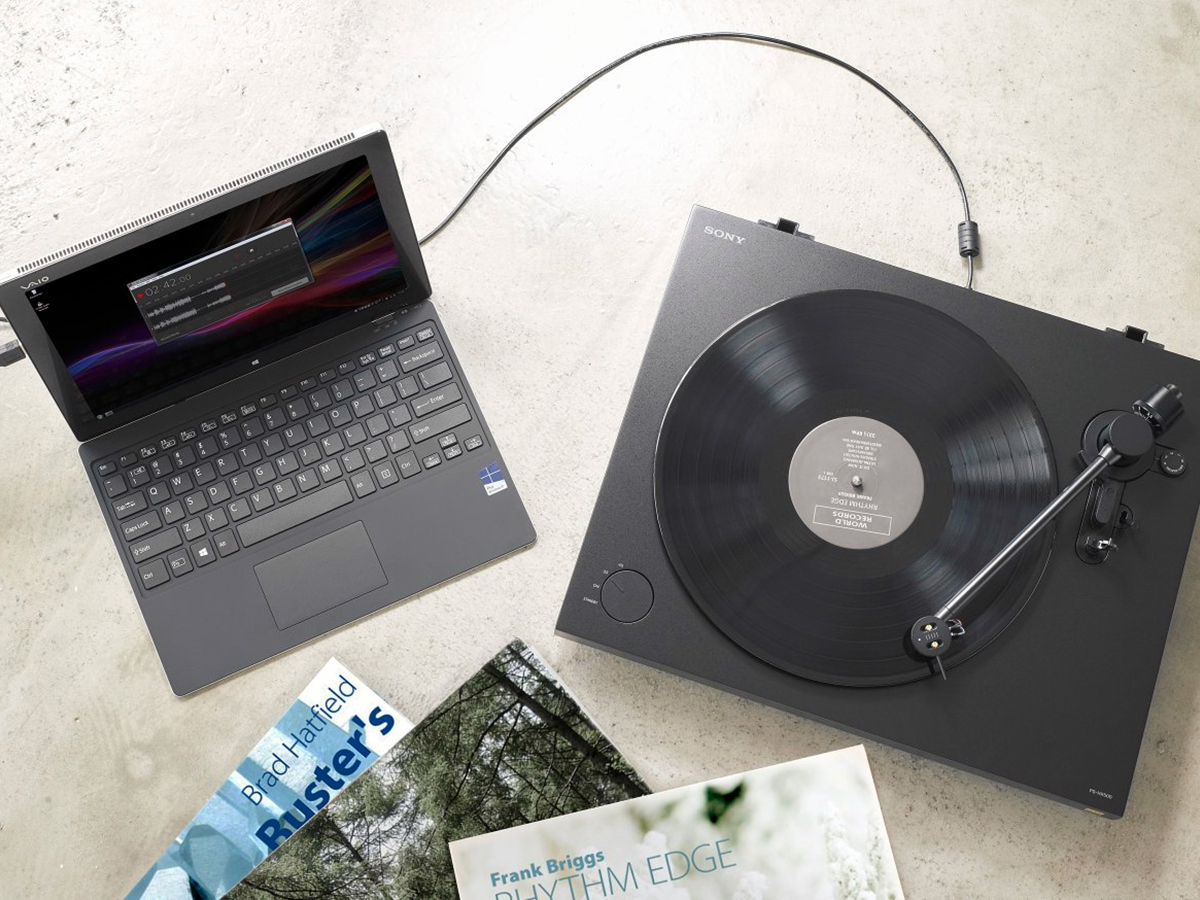
Vinyl records
For vinyl records, the process is similar: Find the right cables for converting your record player’s outputs, whatever they may be, to a computer-compatible input such as a 3.5mm line-in or a USB port.
Given vinyl’s continuing popularity, a lot of players now boast built-in digital conversion tools. With devices like the Sony PSLX300USB ($128 on Amazon) or the Audio-Technica AT-LP60-USB ($126 on Amazon), you only need a USB cable and a computer to do the recording.
Your conversion device(s) of choice may also come with capture software to transform your tapes or records into MP3 format. Some even offer tools for cutting between tracks and removing excess hiss. If not, Audacity is the best free audio conversion software. Compatible with both Windows and macOS, it has a ton of options for saving and processing your captured audio. This Audacity tutorial provides more information on the settings and options you should use to convert older media.
Photo prints
This is perhaps the easiest conversion, because you don’t need any special hardware or skills for the task: Your smartphone camera can easily digitize any printed image. Just make sure to shoot in a well-lit location and carefully line the physical picture up with the camera.
Instead of clicking away with your standard camera app, check out a program specifically for digitizing old snaps. We like PhotoScan, an app connected to Google Photos. It crops, straightens, and rotates photos for you, as well as removing glare and imperfections and correcting brightness and color. If you don’t like PhotoScan, Pic Scanner Gold (for iOS) and CamScanner (for Android and iOS) provide similar services. Of course, if you enjoy editing images, you can apply some corrections and fixes yourself.
One of the reasons to opt for PhotoScan is because it lets you easily store your newly-digital pictures in Google Photos. This app will hold an unlimited number of photos for free (although it only accepts a maximum size of 16 megapixels), automatically sort and tag your images, and make them available across any platform. Apple and Microsoft also offer excellent photo management services.
To digitize your print photos at the highest-possible resolution, you may choose to swap your phone for a dedicated scanner. This process will take longer, but ultimately produce higher-quality pictures. Your hardware options run all the way from the bulky multi-function devices like the Brother DCP-L2540DW ($125 on Amazon) to portable and compact machines like the Fujitsu ScanScap iX100 ($190 on Amazon). For more tips on scanner shopping, check out our guide to going paperless.
