
Smartphone cameras have a problem: The photos they take are too good for lots of things. The 12-megapixel camera on my iPhone XS Max takes images that are between about two and five megabytes in size, depending on how complicated and colorful the shot is. That’s awesome when you want high-quality photos, but it makes sending more than one or two files a painful experience—especially if you have to use something like email.
Most of the photos you see on a daily basis have been compressed and reduced from their original quality. Facebook and Instagram mash the quality right down so pages load quickly. Facebook Messenger and WhatsApp do the same with picture messages to make them send swiftly. It’s great for convenience, but it’s also a reason to print your photos from original files and not ones downloaded from social media. Even on popsci.com, almost all the photos are compressed so they don’t slow your internet browsing to a crawl.
And while aggressive automatic compression has its downsides, just leaving them in full resolution does, too. Apple’s iMessage sends photos in full quality, but that means they can take a while to go through. And send too many and you could burn through your or your texting buddy’s data cap.
Generally, if you care about how your images are going to look (and it’s okay not to a lot of the time), the best way to make sure they’re not horribly degraded or ludicrously large files is to handle the compression yourself—or at least be aware of what’s going on. This is even more important if you want to upload photos to your own website, email quality shots to your older relatives, make sure the plumber can see the serial number in the pictures you’re sending, and so on. All it takes is three steps and a bit of knowledge of what’s going on behind the scenes.
First, resize
Before diving into compression, let’s talk about the easiest way to reduce the size of a file without drastically reducing the image quality.
If someone doesn’t need a 4000–pixel wide shot, don’t send them one; you certainly don’t need something that size for your blog. Instead, resize your photos down to a more reasonable 1200 pixels wide. By doing that, you can take a 4.5MB file down to a 900KB file—a reduction of more than 75 percent. You still don’t want to send hundreds of 900KB files, but it’s a lot better.
For quickly resizing images on your phone, Image Size (both iOS and Android) is a great option. Otherwise, both Apple Photos and Windows Photos allow you to do it on their respective operating systems. And of course, there’s my fave: Photoshop: Just go to Image > Image Size and dial in the size you want.
Then, compress
Now, compression—there are two kinds: lossless and lossy. With lossless compression, you won’t strip away any detectable details. Instead, the system uses algorithms, clever tricks, and knowledge of how much humans actually see to reduce the amount of information (and thus the file size) without cutting the quality. I prefer to think of it as optimizing rather than truly compressing files.
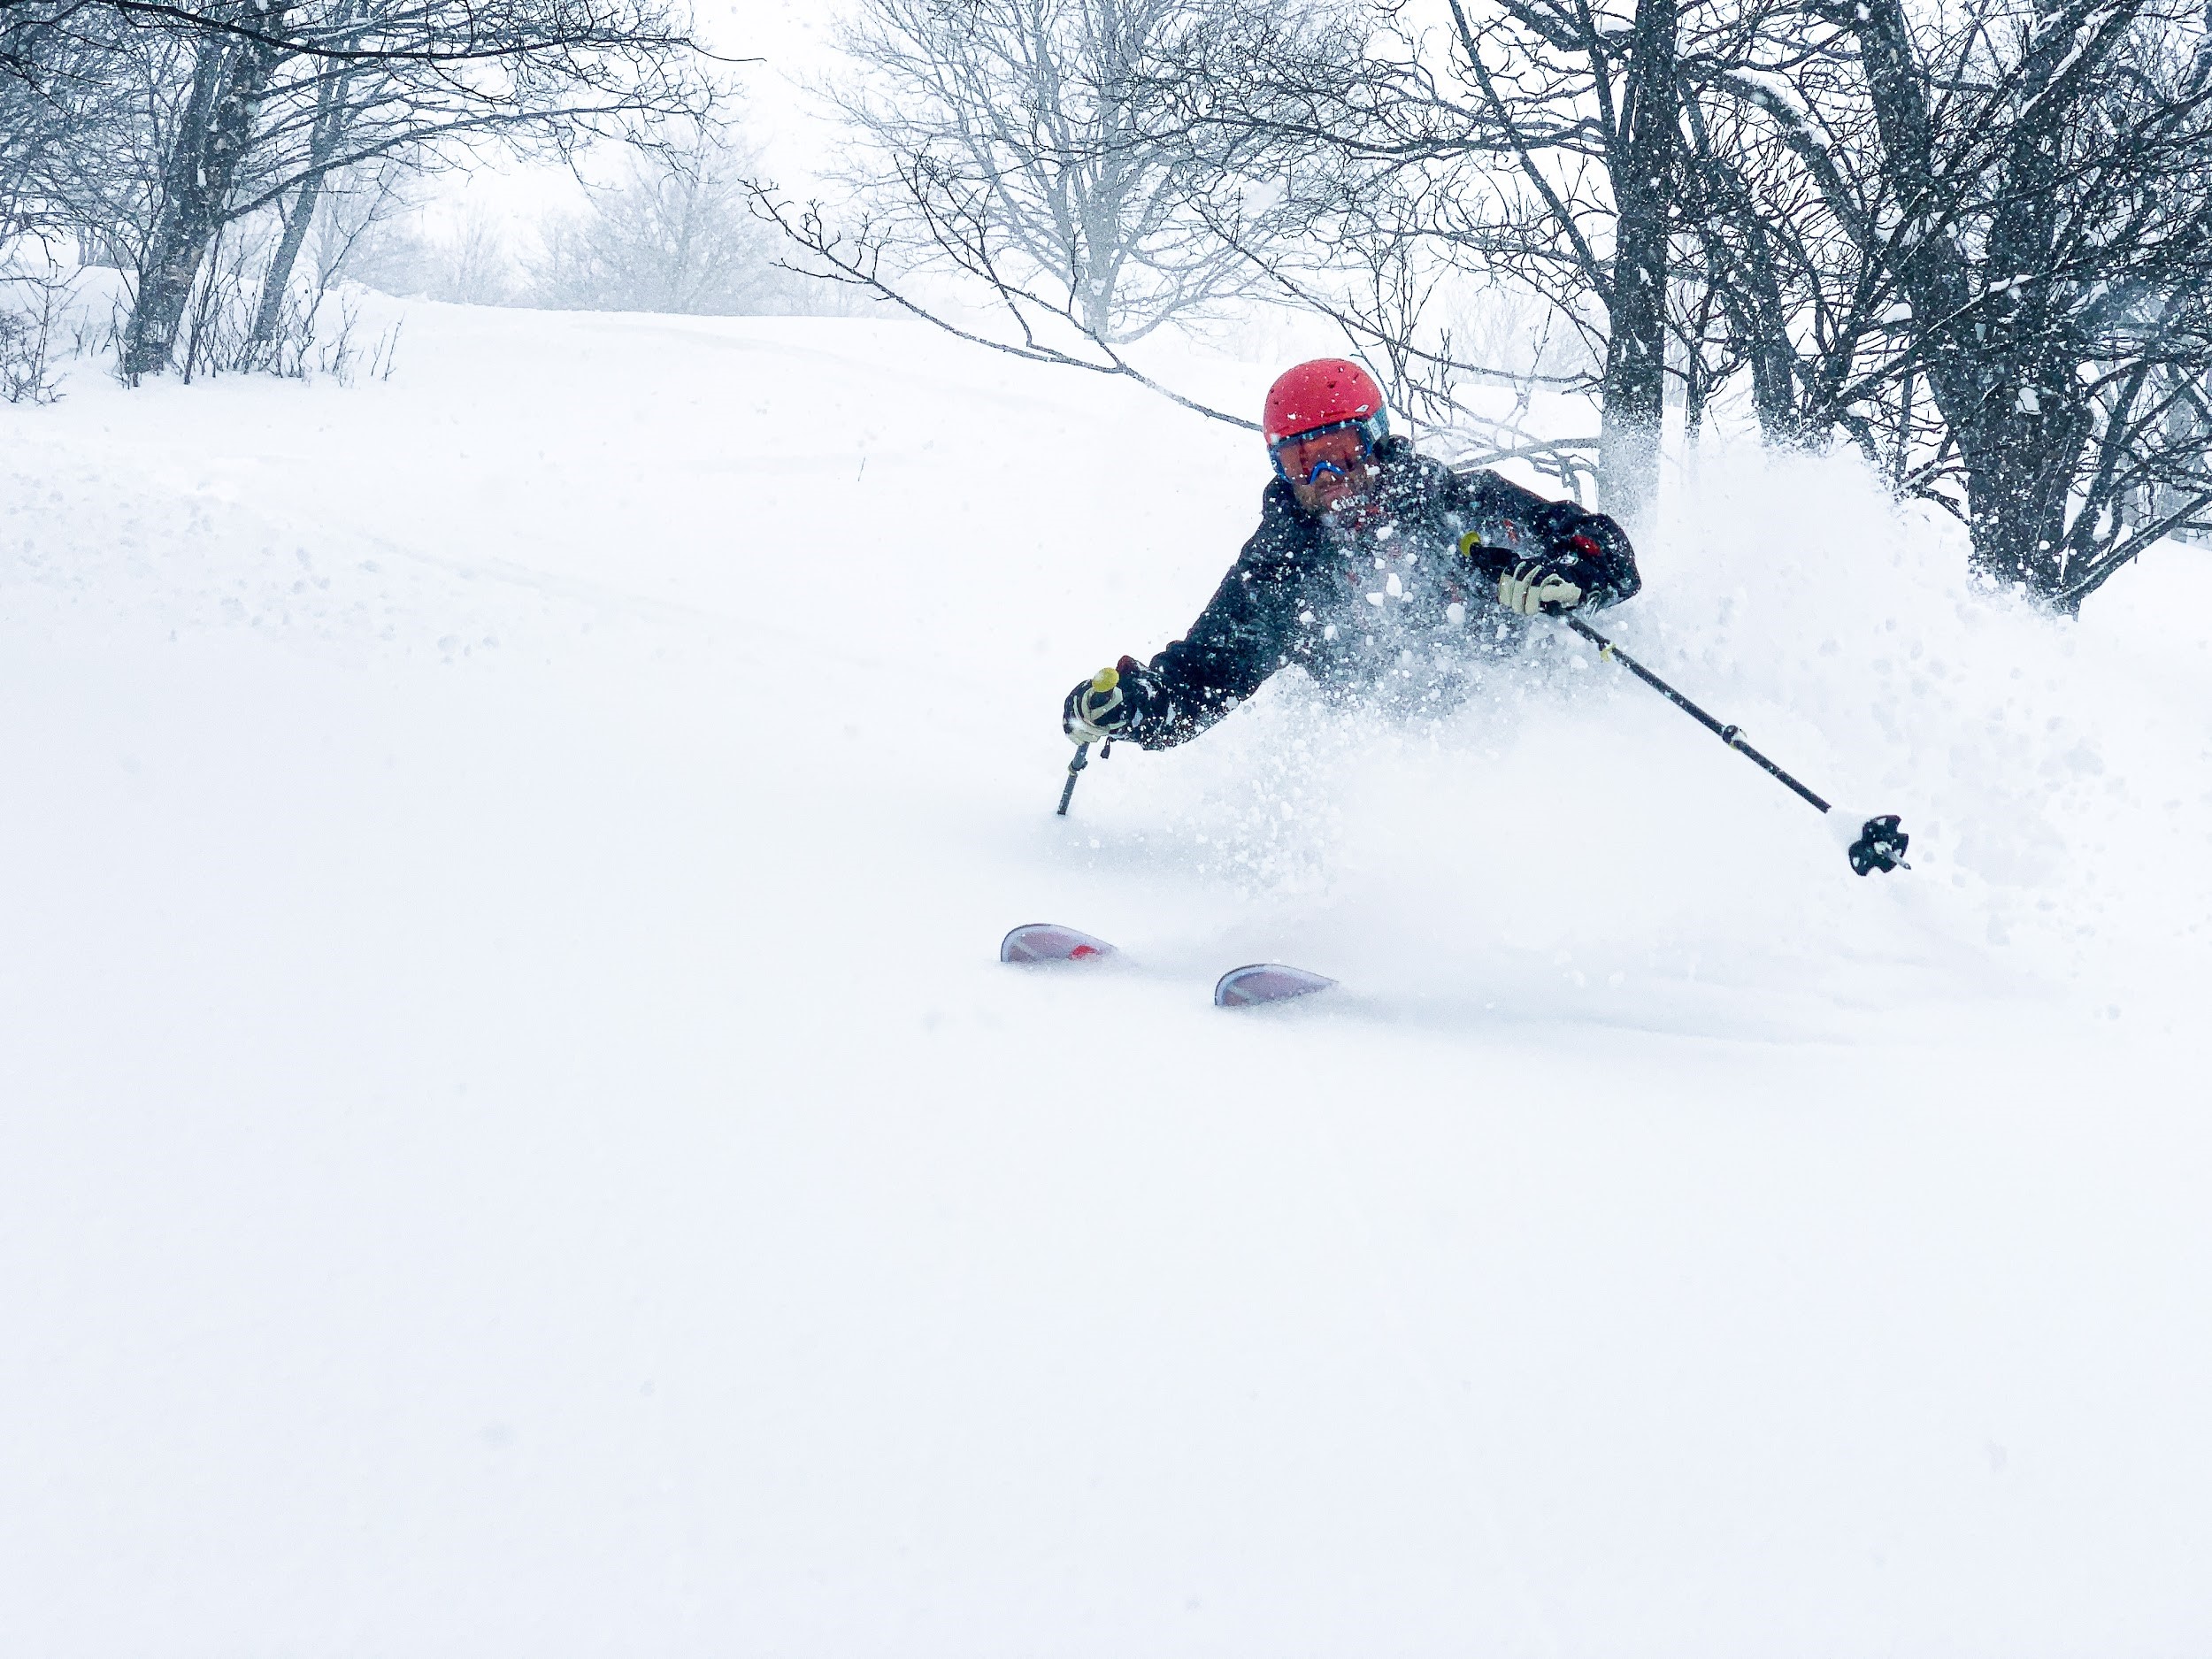
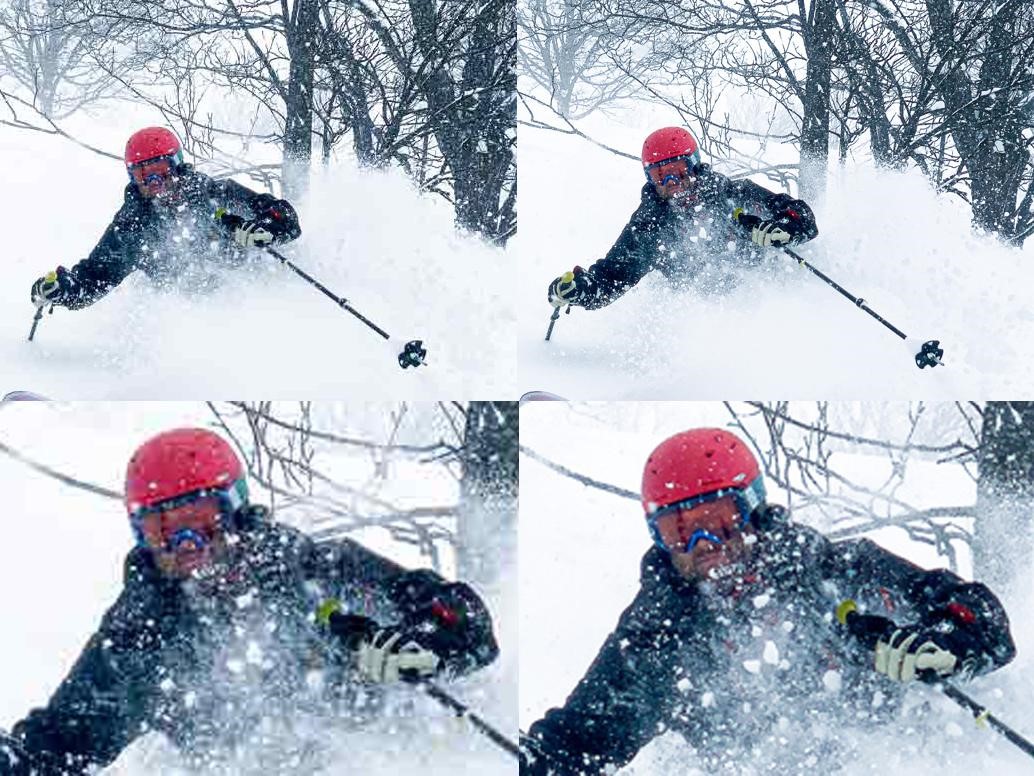
With lossy compression, details are actively thrown away to get a condensed file size. Similar colors get blended together, sharp lines get blurred, and small details vanish. Just look at these two photos. The first one has been compressed with aggressive lossy compression.

The version below has been hit with less aggressive compression.

Now look at the quality difference. In the close-up crops you can see that a huge amount of detail has been lost. My helmet is basically a single splodge of red and the snow looks awful, especially in the background. But the file is 12 percent the size.
When it comes to compressing your own photos, it’s about balance. You don’t want to go too far and end up with unusable mush, but at the same time, you want to reduce the file size a meaningful amount.
So, to sum up it up, compressing your photos is a three-step process:
- Resize the file to whatever dimensions you want. If that gives you a file size small enough for your needs, awesome.
- If not, try lossless compression or file optimization. It won’t always make a huge difference, but try it and see.
- If that doesn’t do it, it’s time to go lossy. Pick a target file size and go with the level of lossy compression that gets you to it. Just be aware, the more you compress, the worse the photo will look.
Of course, to do all that, you need the right tools.
Find your go-to
There are apps on every platform that you can use to compress your photos in either a lossless or lossy way. They all have their own quirks and personal algorithms, but they mostly do the same job.
FileOptimizer (Windows)
Free and open-source, FileOptimizer can compress over 400 different file types—including JPEGs. By default, it will choose lossless; you can enable lossy compression in the settings menu.
ImageOptim (Mac)
Another free and open source app, ImageOptim specializes in compressing images without losing quality. You can enable lossy here, too, and control how far it goes in the Preferences.
ImageResizer.com or ImageOptim Online (web)
If you don’t want to bother installing an app for your occasional compression needs, ImageResizer.com handles the job well, even though it doesn’t cede much control. The online version of ImageOptim is a bit more basic, but lets you decide to go the lossy route if you want.
Image Size (iOS and Android)
This app, which I mentioned earlier for your resizing needs, works for both lossy and lossless compression.. For lossless, leave the quality at 100 percent; for lossy, reduce it. Just make sure not to change the file dimensions unless you want to resize, too.
