Update 5/14/2020: With millions of people staying put during the COVID-19 pandemic, we’re experiencing some of the clearest skies in decades. “Any smog, or even haze, in the sky can reflect light pollution,” which can affect your images says professional photographer Jack Fusco. While night sky photography is a fantastic outdoor activity, it’s important to maintain social distancing practices when out in the field. -SH
It’s a familiar story for those of a certain generation: As a kid growing up in the 1960s, Roger N. Clark was inspired by the NASA space program. By the time he was in junior high, he built his own reflecting telescope (grinding the primary mirror himself, no less). Clark pursued a career in astronomy, earning a doctorate in planetary science from M.I.T. He has been on the science team of the Cassini-Huygens mission to Saturn since its inception over 20 years ago, and has worked with scopes as big as UKIRT, the U.K. infrared reflector on Mauna Kea, Hawaii, with its 150-inch primary mirror.
But over the past few years, his personal 8-inch and 12.5-inch reflector scopes have been gathering stardust. To get images of the nighttime sky, he uses common, off-the-shelf DSLR equipment. “I’m having so much fun with regular cameras and lenses, and very simple tracking devices,” Clark says. You can too.
Get (or rent) the best camera and lenses
Long, low-light exposures can benefit a lot from sensor technology on newer (i.e. post-2008), higher-end DSLRs. Called on-sensor dark-current suppression, the tech substantially reduces noise due to heat issues.
Faster lenses—that is, those with wide apertures that allow in more light—will perform better under very dim conditions. Clark recommends telephoto lenses with fixed focal lengths; the Sigma 300mm f/2.8 EX fits the bill.
These are all big-ticket items, but you don’t have to buy them. Most high-end camera gear is available for rental online or from a local dealer. If you have a cheaper telephoto lens, you can still get interesting results; although you will probably have to use slightly different settings than what we lay out below, and make concessions because of it. A higher ISO setting, for instance, will give you more image noise, and a longer shutter speed may introduce some motion blur as the stars move across the sky.

Find a place to stand
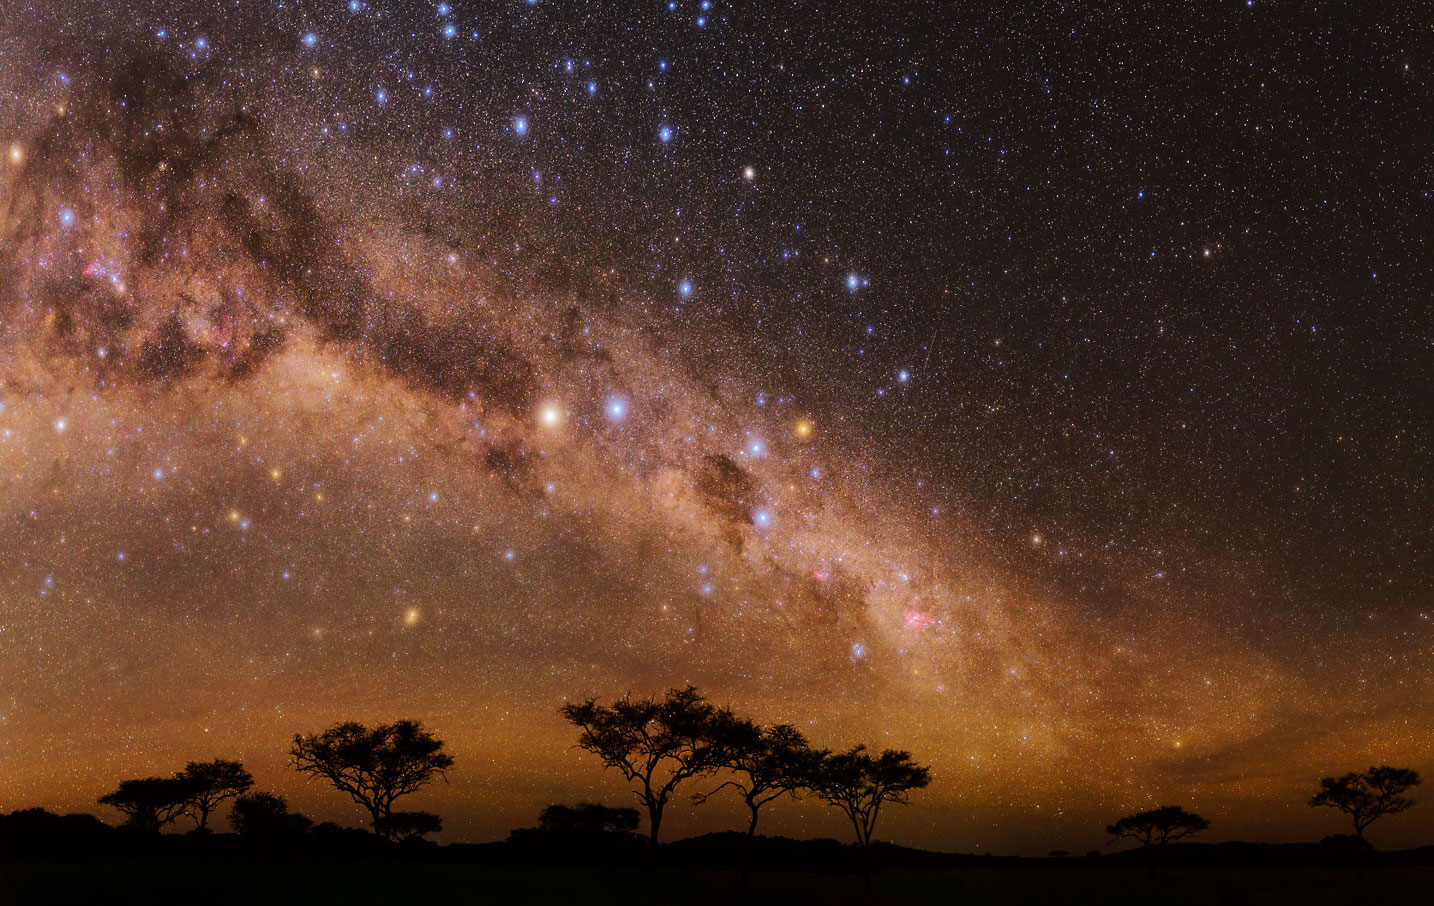
Light pollution—the obscuring of night-sky objects by the bright lights of urban areas—is the enemy of celestial photography. Clark notes, though, that many urban dwellers can travel to a dark-sky area within a few hours; you can find suitable locations at darksitefinder.com. The weather also needs to cooperate: The general rule is that there should be no clouds within 100 miles of your shooting site, which you can check at cleardarksky.com. Finally, use stellarium.org‘s free desktop, iOS, or Android software to find and identify celestial objects.
No matter where you wind up, you’ll need a very sturdy tripod setup to hold the camera steady. Clark favors carbon fiber tripods over aluminum alloy ones; carbon fiber is lighter weight less prone to vibration than aluminum. As for tripod heads (the mounts to which the camera attaches), Clark recommends a gimbal type—especially for longer lenses. Thanks to a seesaw-like design that balances the weight of the camera and lens, a gimbal head has the unique ability to maintain precise positioning. “With the weight of a big lens, if you try to position it with a ballhead or a three-way pan head, when you tighten it and let go, the whole thing sags and it changes position, Clark says.
Dial in your settings
Getting your camera ready to shoot in extremely low light requires a deep dive into settings. Right off the bat, two tweaks will help prevent shakes that can ruin your images: First, set your shutter on a two-second self-timer delay, so the camera won’t wobble with your button-press. Second, turn on mirror lockup, which stops the mirror inside the camera body from flipping—and causing vibrations—when the shutter clicks; be aware that locking out the mirror cuts off the viewfinder, so you’ll have to compose all your images on the camera’s LCD.
Adjustments to image settings are vital as well. Shoot images in Raw, or Raw + JPEG mode; Raw images are not compressed in-camera, which preserves image data that would otherwise be lost during JPEG compression process. Raw files also offer much greater flexibility during post-processing (more on that later). Set your ISO to 1600, white balance to the daylight setting, shutter speed to manual or bulb exposure, and focus to manual. Turn off any high-ISO and long-exposure noise reduction features that may be built into the camera. And, finally, set the lens aperture (the width of its open iris) as wide as it will go, allowing it to take in as much light as possible.
Set the light right
If you want to keep close tabs on your exposure, turn on your camera’s histogram display. This chart tells you how many light and dark pixels are in any given image. In typical, daytime shooting situations, you want the peak of the graph in the center or off to the right, but that’s not the case for night photography. Here, we want the peak to stay one quarter to one third from the left to maintain detail in the dark areas, and to prevent bright sky objects from blowing out or “clipping.” Reviewing the histogram will often give you a much more accurate idea of your exposure than trying to eyeball it from a preview image on an LCD screen.
Start bright and simple
“For beginners, I wouldn’t suggest going for really dim, faint stuff,” Clark says. “Go more for the showpieces that will give [you] a better chance of getting something nice.” Staying with brighter objects, such as a solar eclipse, early on can enable you to make images with relatively short single exposures.

Stay on track with the rotation
It won’t take you long doing night-sky photography to discover that the earth’s rotation will cause images of stars to blur. The simplest solution is a tracking mount, a device that keeps your camera moving in sync with the Earth’s rotation. Clark suggests the iOptron StarTracker. With it, you sight through a small scope to aim it at Polaris, the North Star, and the device tracks accordingly.
If you prefer to not invest in extra hardware, there are techniques to compensate for rotation in-camera or with software after the fact. Clark suggests the 200 Rule as a general guideline for keeping stars sharp: divide 200 by the focal length of your lens, in millimeters, to determine the longest shutter speed in seconds your shot will tolerate before stars turn into oblongs or outright streaks. You run out of leeway pretty quickly: With a 200mm lens, your lower limit is 1 second. The rule works for full-frame cameras, such as the Sony A7; if you’re using a camera with a smaller sensor like APS-C or Micro Four-Thirds, the smaller sensor size will affect the calculation, leading to shorter exposure times before the stars start to creep across the sky.
If you plan on compensating for blur in software, take several shots in quick sequence using an exposure for pinpoint stars. For this, Clark uses a freeware program, DeepSkyStacker, as well as commercial program ImagesPlus.
Avoid the blues when image processing
“The night sky is not blue,” Clark says sternly. (Note that the so-called blue hour is pre-nighttime.) He disdains the post-processing done by many photographers that turns the night sky into a brilliant cerulean, with stars rendered as colorless dots. The night sky can come in many colors, due to “airglow” and other atmospheric phenomena. The key to accurate color, he says, is to use the right black reference point when editing image color in post-processing.
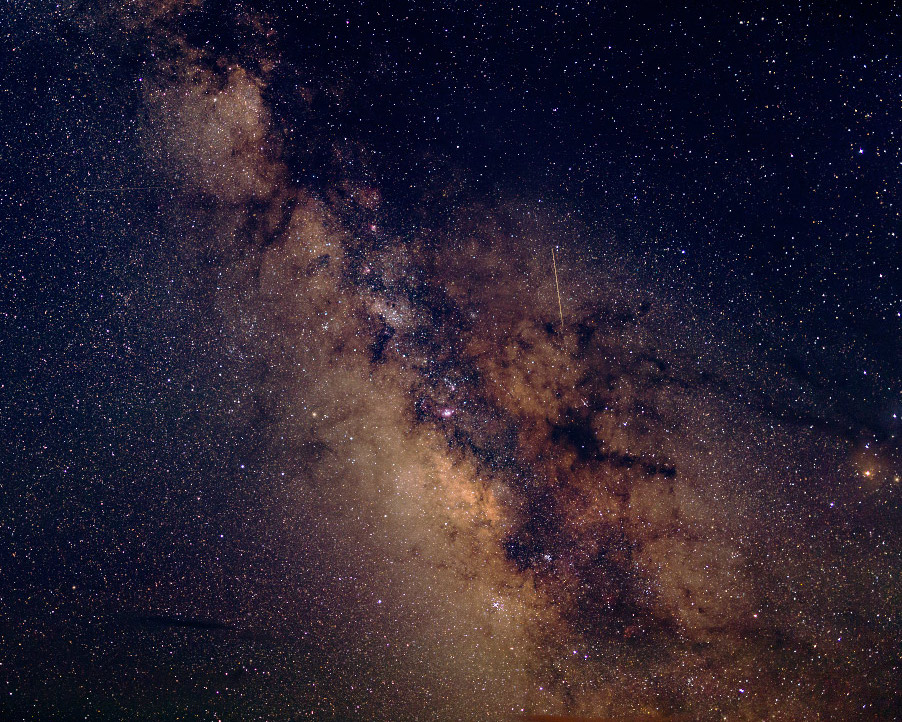
All the photos in this story are natural color, with the exception of the Milky Way image below. “The Milky Way has no such gradients to blue colors,” Clark says. He processed it to demonstrate a subtle way of adding the popular blue (but false) color to an image—the correct way to produce incorrect color, so to speak, while keeping natural color in the brighter parts of the Milky Way. Read all about the Photoshop work required on his website, where you can also download Mc-color-stretch (a free, open source program) to help extract more color and detail in astrophotographs.
Extra Credit: Combine land and sky in one shot
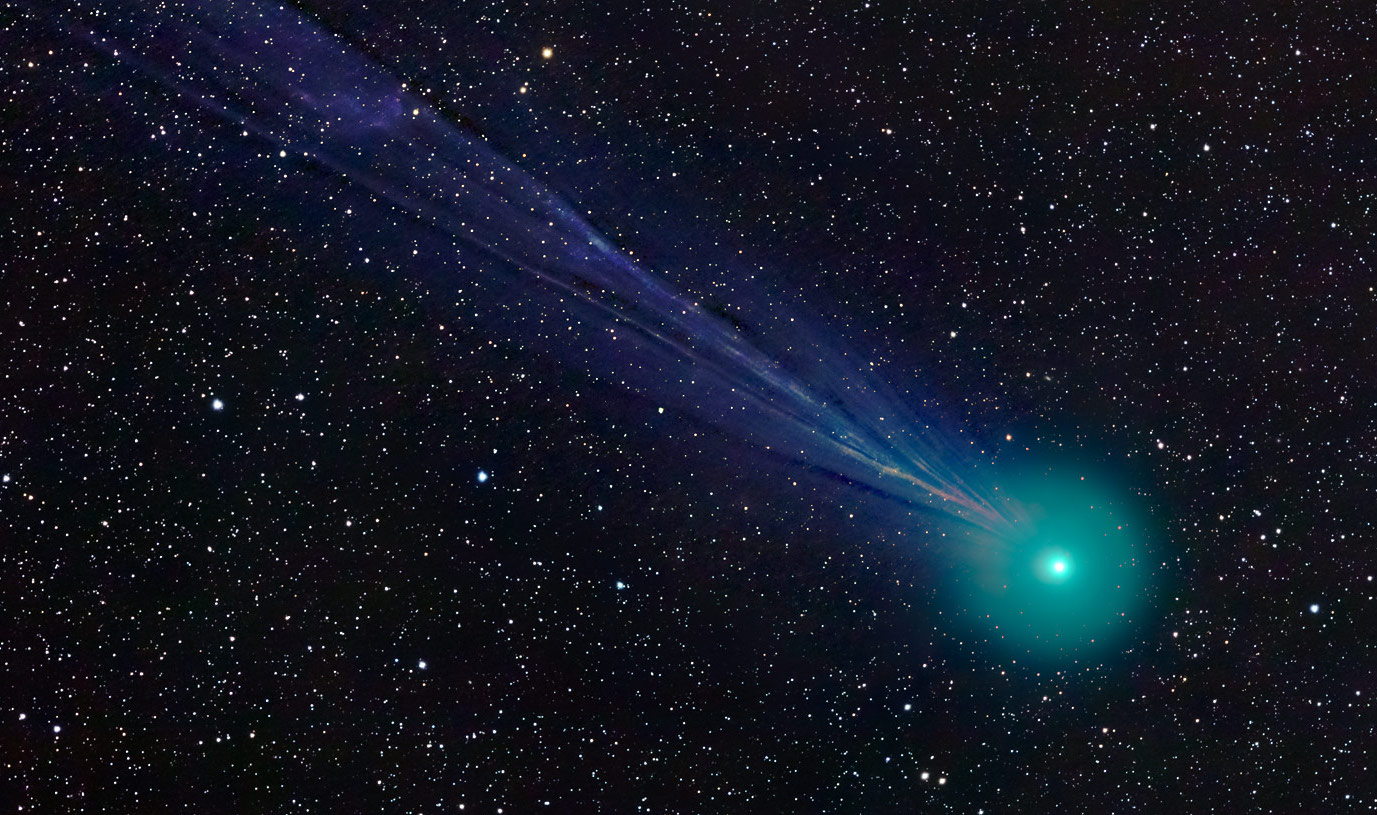
In images that combine a landscape with a night sky, another issue comes up: The night sky is moving (relative to the earth) but the landscape is not. Clark uses a technique in which he takes tracking shots of the sky and stationary images of the landscape, then combines them in software. This method can also be used for purely celestial photos, such as that of the Comet Lovejoy—the comet was moving faster relative to the star field. Clark made tracking images of both, then combined them in separate layers in Photoshop.
Yet another technique is the mosaic or panorama, in which you take of number of individual “panels” of a scene and combine them later in software. This allows shorter exposures for individual panels, and gives you a very high-resolution image. Clark uses PTGui Pro software for this. Finally, another technique is to take multiple sequential images of an event, such as the lunar eclipse, and combine the images in post.
