The Romans invented the crossbow, but after this promising start, it disappeared from most Western armories. Nearly 700 years later, Europeans rediscovered the technology—and it became a game changer.
Unlike longbows, which required years of practice to use effectively, crossbows could be used immediately. A longbow’s power came from the bowman’s arm: He had to bend the heavy bow by hand, which could require him to apply more than a hundred pounds of force. With crossbows, an iron lever called a “goat’s foot” allowed a bowman to apply leverage, which made it much easier to pull back and cock the heavy bowstring. This made crossbows easy to use. Too easy, according to medieval European government and religious officials.
If ready-to-use weapons like this got into the hands of insurgents or heretics, well, that could shake the foundations of government and religion. This fear led to perhaps the first enactment of “gun control” laws: In 1139, Pope Innocent III issued a papal bull that outlawed the use of crossbows. They were, he said, “Hateful to God and unfit for Christians.” Fearing the crossbow’s destabilizing potential, the Christian countries of Europe obeyed Innocent’s proclamation.
However, English and Frankish armies soon embarked on the Crusades, fighting pitched battles against Turkish troops—who had no such ban. The Turkish defenders’ effective fusillades of crossbow bolts made the Crusaders reconsider the weapon. Eventually, England’s Richard the Lionhearted reintroduced the crossbow to rank-and-file Crusaders. (He might have come to regret that decision—Richard eventually died from a crossbow-inflicted wound while fighting in France.)
Once Europeans re-adopted crossbows, they didn’t look back. Because the weapons were expensive, infantrymen who owned these bows, particularly the highly regarded crossbows manufactured in Genoa, became valuable assets. Medieval leaders across Europe hired Genoese crossbowmen as mercenaries.
Naturally, this got me thinking about how to craft a weapon of my own. Designing and constructing a crossbow of military or sporting quality requires great skill, in addition to fairly sophisticated metal and woodworking tools. The results were impressive: Medieval Italian crossbows, weighing a very hefty 18 pounds, could shoot ¼-pound arrows capable of penetrating armor at a range of 100 yards.
However, my DIY crossbow didn’t need to pack that much firepower—or require that much work. I designed a model crossbow that you can make using basic tools. Sure, medieval engineers layered animal ligaments and wood fibers and laminated the layers together with glue made from river sturgeon. But for my materials, I stuck to plain wood and twine. This model crossbow won’t take down a Genoese mercenary, but it should defend your castle against all sorts of imaginary marauders.
How to build your own (model) crossbow
The crossbow isn’t hard to make, especially if you have access to power tools such as a jigsaw and power drill. Even if all you have are simple hand tools, you can get the job done.
WARNING: You’re building a device that shoots a projectile. Using it safely is the most important part of the project. Don’t aim at things you don’t want to shoot and wear safety glasses as appropriate.
Tools
- Jig saw or coping saw
- Electric drill
- Drill bits: ¾-spade bit; ½-inch, 5/16-inch, and 3/16-inch bits
- Wood chisel and mallet
- Sand paper
Materials
You have quite a bit of latitude in building this project—you can make the stock, bow, and trigger a bit longer or shorter, and the bow will still work. The dimensions below and in the instructions are the ones that worked well for me. However, feel free to experiment with the dimensions and perhaps get even better performance!
- One 2-by-4 piece of wood, 17 inches long
- Two 3-inch-by-3-inch pieces of hardwood, ½-inch thick
- Two 5/16-inch-diameter hardwood dowels, 2 inches long
- Three 3/16-inch-diameter hardwood dowels, 2 inches long
- One half-round or full-round dowel, 3/8-inch-diameter, 30 inches long
- 40 inches of mason twine
- One or more 5/16-inch-diameter dowels, 3 inches long
- One or more rubber stoppers
Instructions

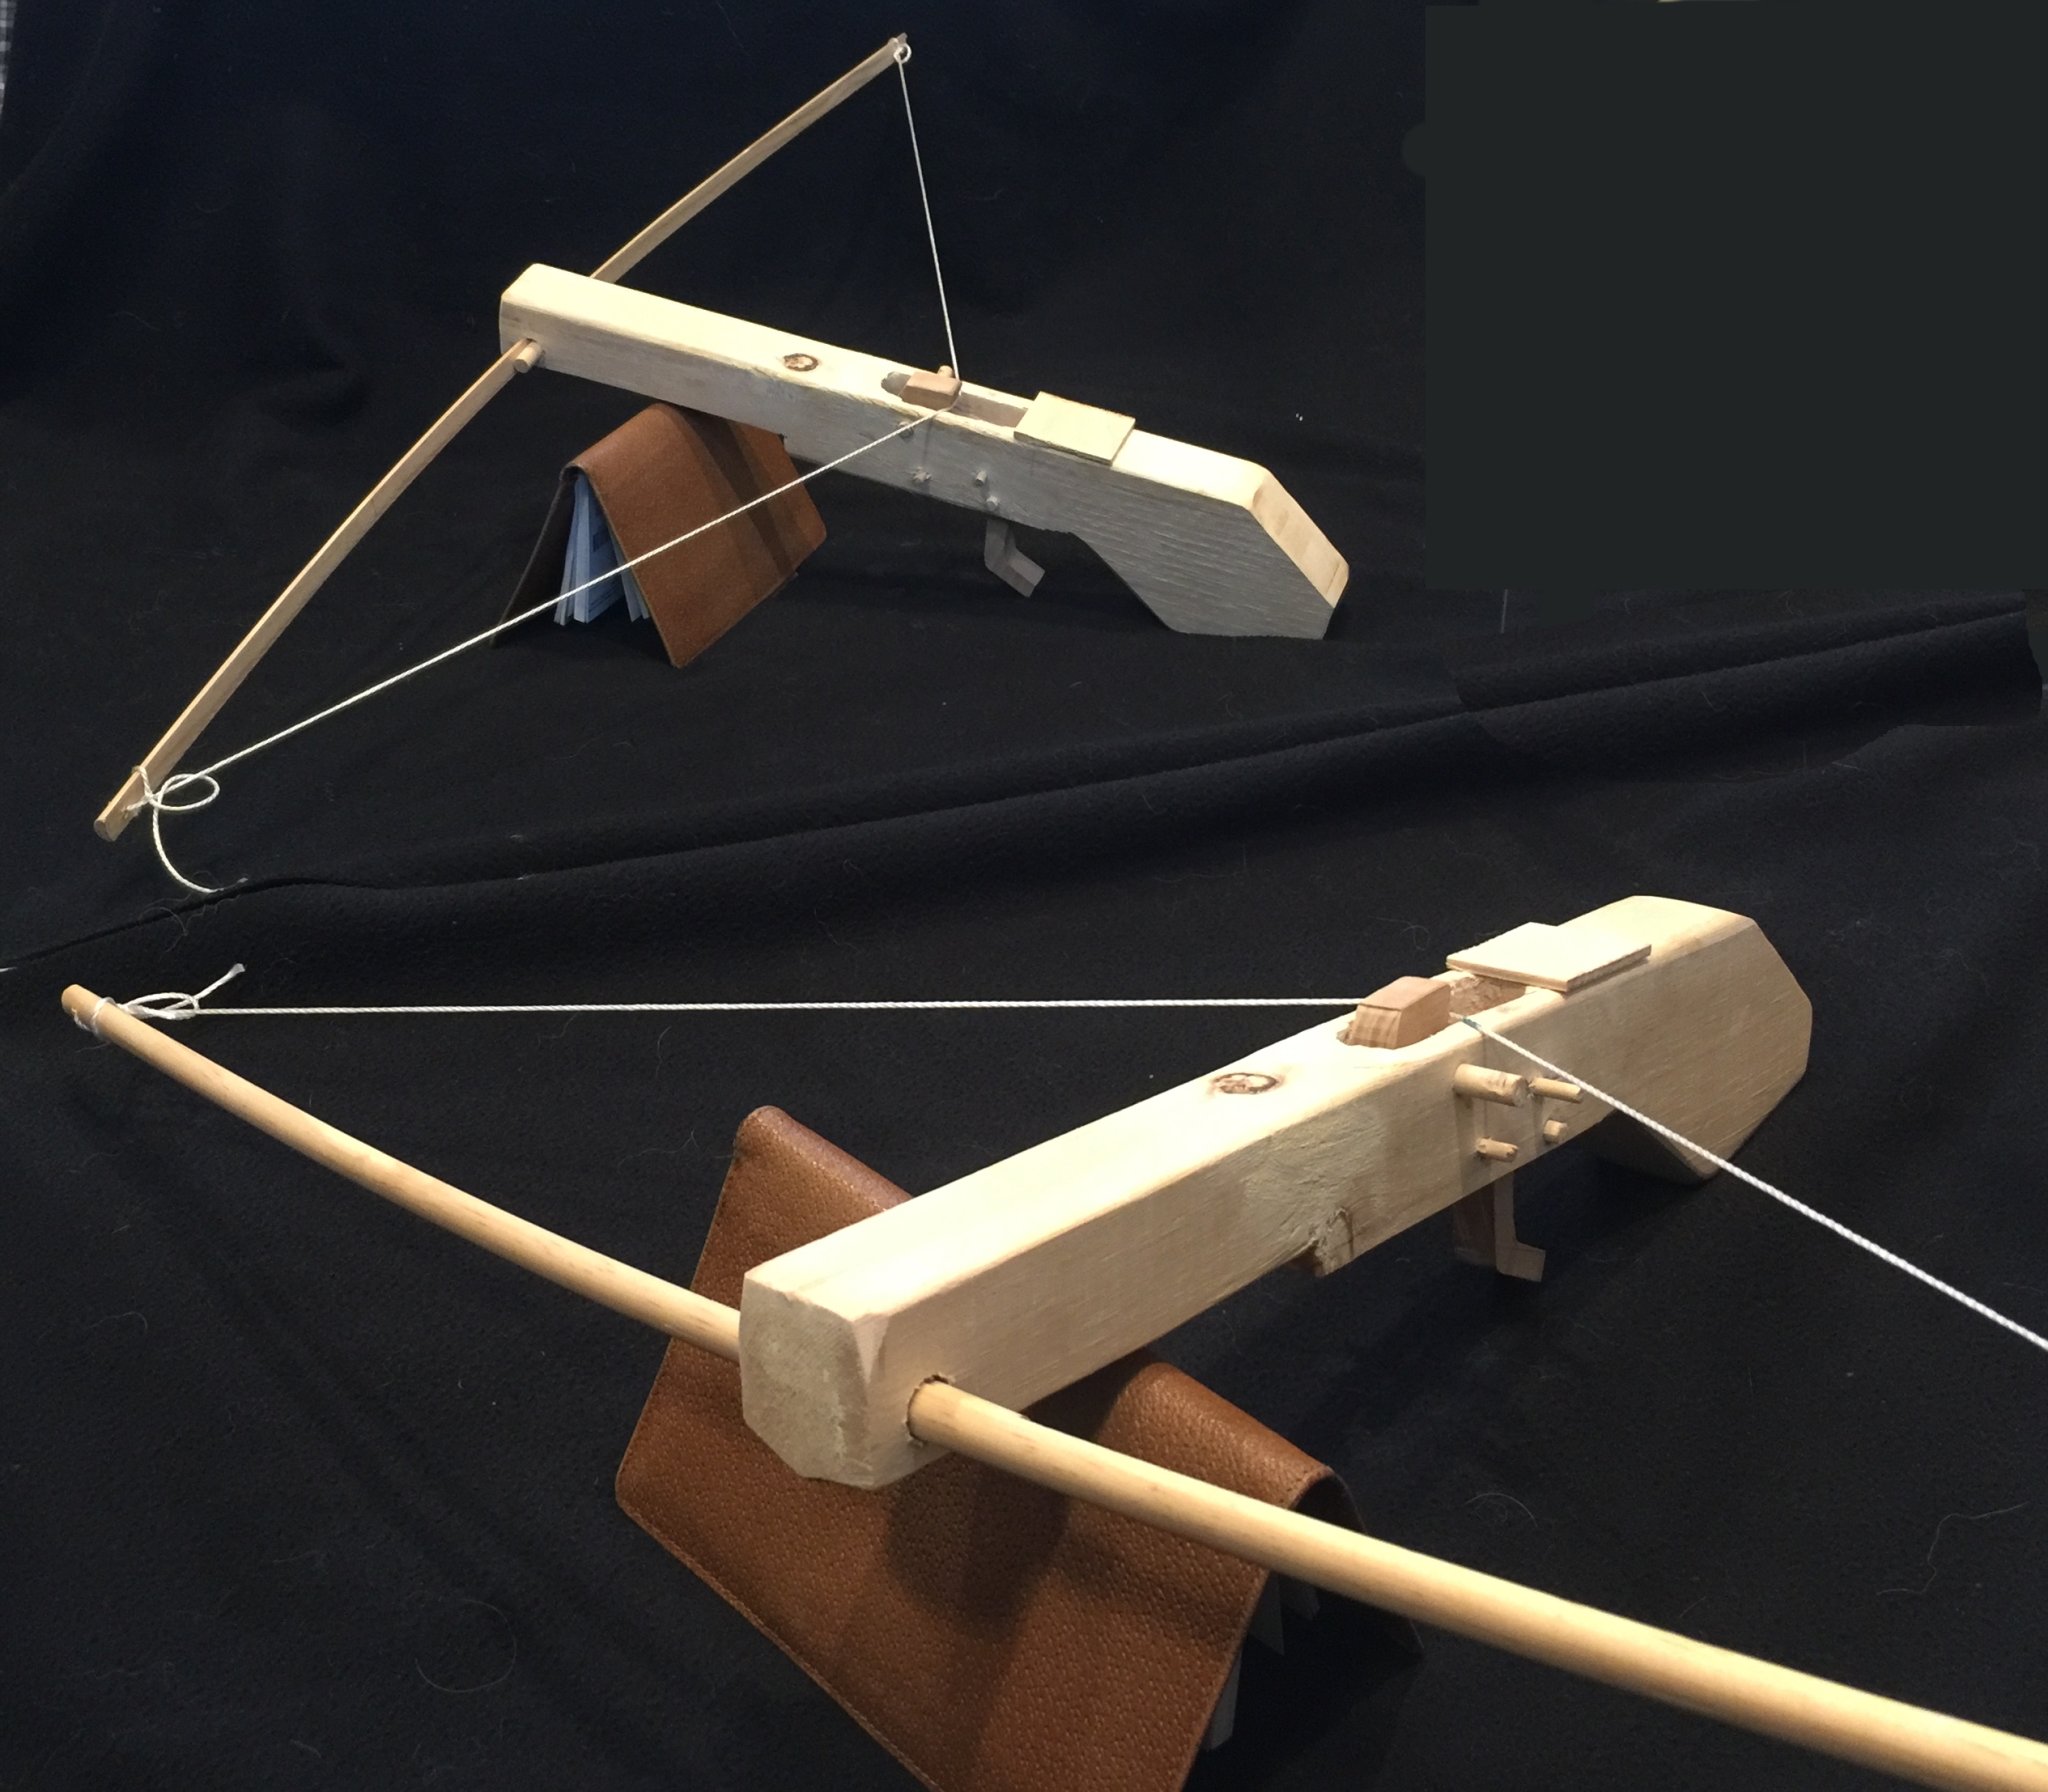
With the above diagram as a guide, use the jigsaw to cut out the body of the crossbow from the two by four. Drill a ½-inch-diameter hole as shown: This is where the 30-inch-long dowel will fit, becoming the bow.

Use the ¾-inch spade drill to fashion a 3½-inch-long slot in the crossbow body (see photo). Begin by drilling holes abutting one another. Then use the chisels to remove additional wood, shaping the holes into a slot. Sand the interior until it’s smooth.

Following the diagram, use the jig saw to cut the trigger—or the tickler, as medieval crossbowmen called it—and roller from the two hardwood pieces. Use a 5/16-inch drill to cut a pivot hole in each piece.

You will need to carefully align the trigger and the roller so that the roller can only move forward when the trigger is pressed. Use the diagram above to position the roller and trigger inside the slot in the crossbow’s body.
As indicated by the diagram, drill 5/16-inch and 3/16-inch holes in the crossbow body. Insert two 5/16-inch dowels to hold the trigger and roller in place, and two 3/16-inch dowels to act as stoppers.

Drill two 3/16-inch holes in the bow (the 30-inch-long dowel), each about ½-inch from one end. Insert the bow into the ½-inch-diameter hole in the crossbow body, until it is centered halfway.
To fix the bow in place, take the remaining 3/16-inch-diameter dowel and sand one side flat (see photo above). Push it into the ½-inch-diameter hole until the sanded dowel holds the bow tightly in place.
Attach the mason twine to the bow, inserting its ends through the holes in the bow and tying it off securely.

Make crossbow bolts out of 3-inch-long dowels: Cut a slot on one end for the string to rest, and place a rubber stopper on the other end. Place the blunt end of the bolt against the roller, draw back on the bow string, and place the string against the back end of the bolt.
Test out the tension and adjust the length of the twine accordingly: Too much tension can crack the bow, but too little will reduce the crossbow’s power. You should experiment to find the level of tautness that works best for you.
Finally, take careful aim and press the tickler to fire. As always—be careful, and don’t shoot anyone’s eye out.
