Outdoors, most plants reproduce through flowering, pollination, fertilization, and seed production. But inside our homes, the process looks a lot different. In an enclosed space with often limited light, it can be hard to achieve the conditions many houseplants require for propagation. The beloved pothos, for example, needs to grow to about 35 feet before it will bloom—a height or length it’s unlikely to approach indoors.
But most houseplants, including pothos, can be propagated from a small piece of an established plant. Plant cells have a capacity known as totipotency: even a single cell can grow into a full-fledged organism. This type of reproduction isn’t relegated to a laboratory or conservatory, either—you can make it happen in your own home.
Grow a new pothos in water
Although you may not have 20, 30, or 40 feet of space to grow a mature pothos, you probably have water, and this plant is one of the easiest to propagate in good old H2O. Stick the cuttings in clear glass cups or vases and you can watch the roots as they form, too. It can be an educational experience, especially if you have young kids or are a first-time plant parent. Before you start, make sure you have sharp scissors and, says Lindsay Pangborn, a gardening expert at online plant retailer Bloomscape.
First, find a growing end of the pothos vine, count two or three leaves down from the tip, and make a cut about a half-inch below the nearest node—a small, raised bump on the stem opposite a leaf, Pangborn says. Fill your container with fresh water and place the cut end of the cutting in the water, deep enough that the water covers the node. Top up the vessel as needed and keep the cutting out of direct sunlight, as pothos prefer low light conditions. While you wait for roots to form, replace the water every two to three days to ensure it’s oxygenated and free of any pests or bacteria that could harm the roots. You should see roots in two to six weeks, Pangborn says. Wait until the roots reach 1 to 3 inches long before you transfer the cutting to soil. When you do, carefully place the baby plant in a small hole and cover its roots with soil. Care is crucial, as the cutting’s roots will be delicate.
Cut a leaf to propagate a begonia
Begonias, such as the common Rex Begonia, are among a small group of plants that can be propagated from a single leaf. All you need to do, according to Raymond Carter, lead horticulturist at Maryland’s Ladew Topiary Gardens, is cut off a large healthy leaf where it meets the stem. Then turn the leaf over and use a clean, sharp knife to make an incision across one of the larger veins. Your cut should go all the way through the vein, but be careful not to tear the leaf apart, Carter says. Be sure to have a pot of fresh, moist soil nearby, as well as a sheet of plastic wrap large enough to cover the surface of the pot.
Now, lay the leaf flat on the surface of the soil and cover it with the plastic wrap or a propagation or humidity dome to keep the air moisture level high around your cut leaf, Carter says. Keep the leaf and soil in an area with bright indirect light, but be careful: too much light can dry out your cutting, preventing it from growing roots. Depending on the species of your Begonia, you should have a tiny version of the parent plant within a month, he says.
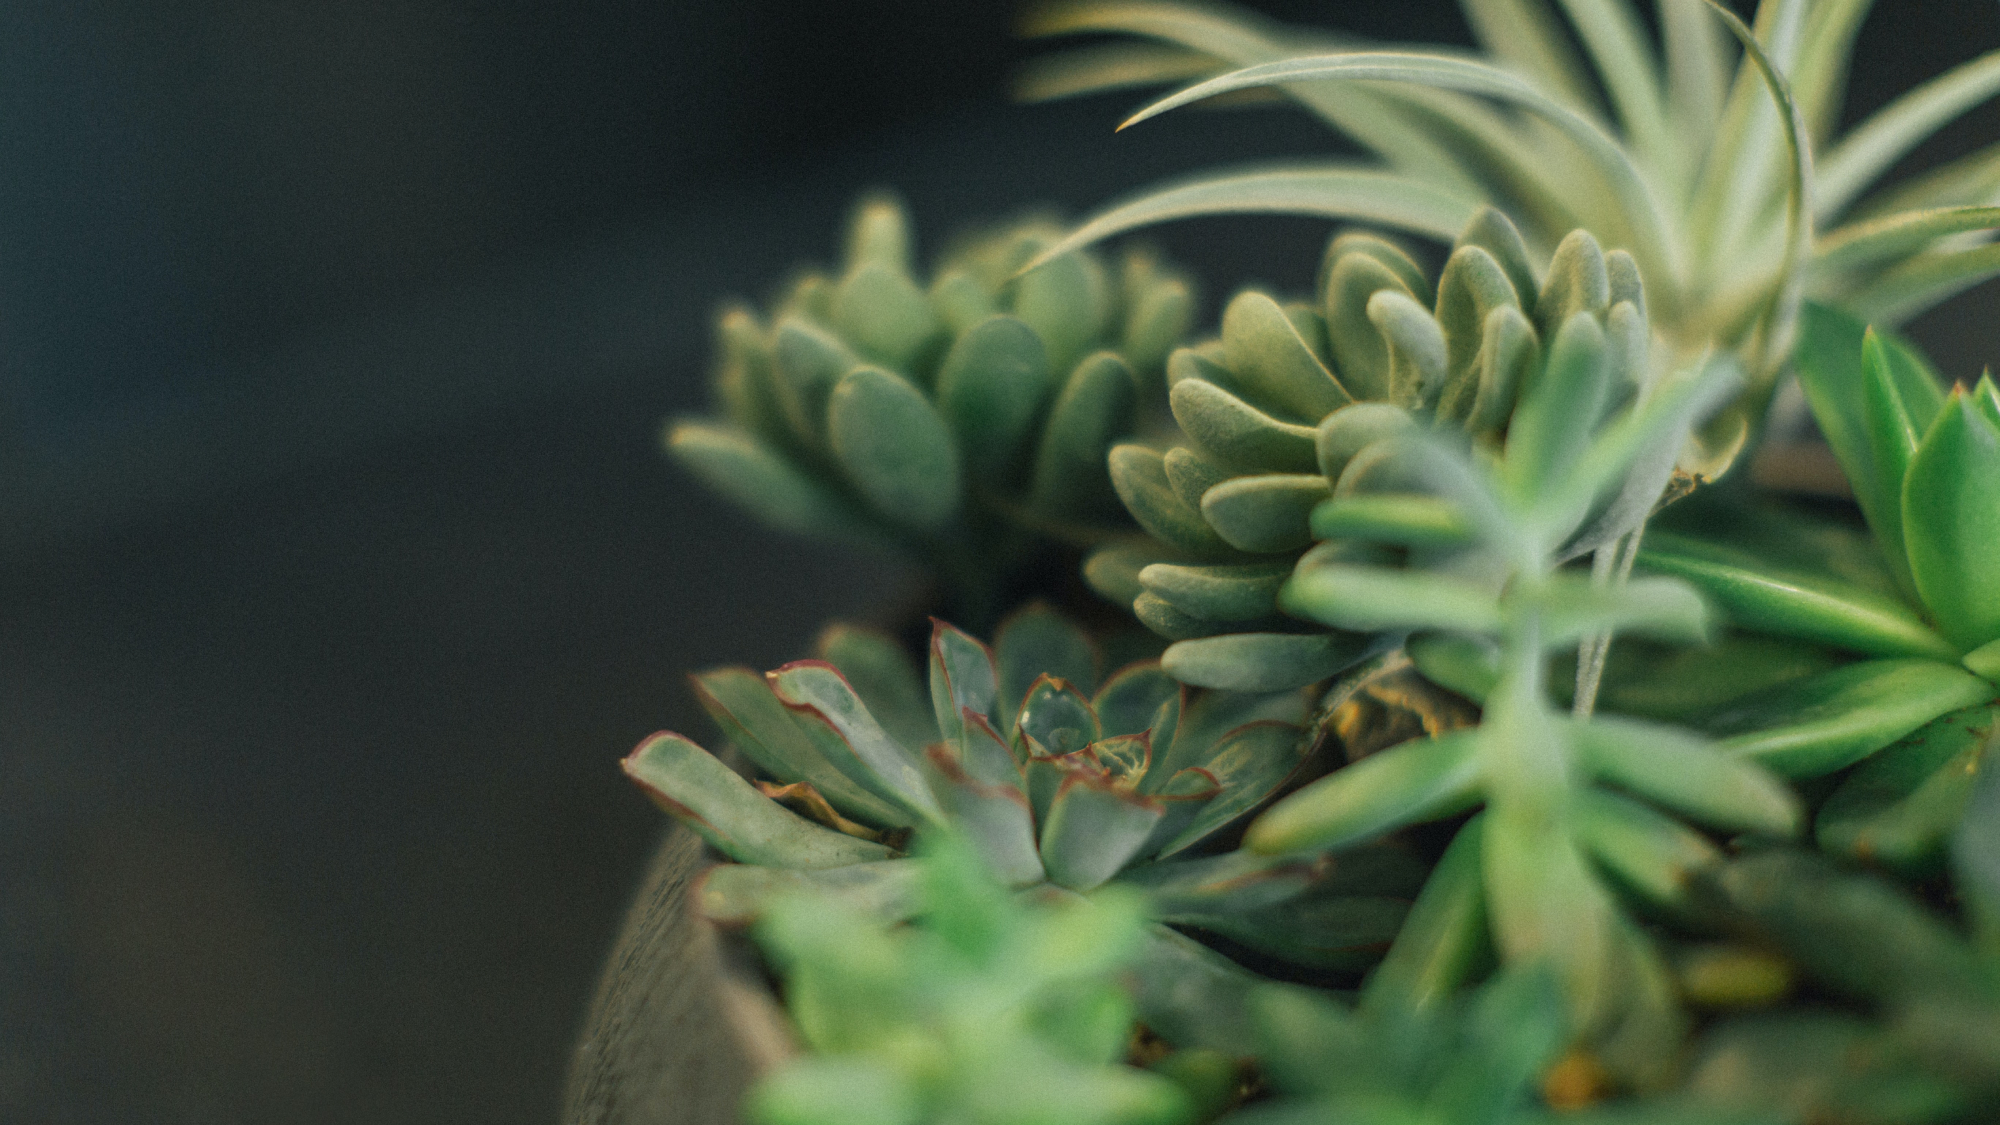
Start a succulent or cactus growing in soil
Succulents are resilient plants. In their natural habitat, little pieces—known as offsets—may break away, fall off, or spread across the land via wind, storms, or wildfires, says Liam Heeks, store manager at Tula House, a houseplant shop in New York City. Absent those natural factors, they are fairly easy to grow from cuttings. Even so, it is best to propagate succulents during the year’s warmer months, he says. They are, after all, desert plants.
Succulents with big, thick leaves are the easiest to propagate from cuttings, says James Mertke, a plant influencer who goes by The Simple Succulent on Instagram. These hefty leaves can hold a lot of water, which helps them sustain themselves as they grow new roots. Sedums, graptopetalums, and some echeverias are all great choices for propagation in soil, he says.
To start, remove a single leaf from your succulent and place it in a pot or saucer filled with soil, says Pangborn. The leaves usually come off fairly easily, so you should just be able to pinch one and pull carefully. Make sure the broken surface of the leaf—where it once attached to the main plant—touches the soil, and leave your cutting in a brightly lit space. Because succulents don’t need a lot of water, you’ll really only need to mist it once a week to sprout a new plant, says Matt Aulton, cofounder of Plant Proper, a nursery that ships plants out of Florida.
No matter what happens, be careful not to overwater your cutting. You can expect the original leaf to dry up or shrivel as the plant uses its nutrients and water reserves to push out roots and new growth, says Heeks. He recommends letting the original leaf dry up completely before pulling it off.
Like succulents, cactuses can also be propagated by placing cuttings in soil. “While it may seem violent and risky at first, you can use a knife to make a clean, horizontal cut to ‘behead’ the top of a cactus,” says Mertke. Then place the cactus top about 1 inch deep in some cactus and succulent soil, and it will send out roots, forming another plant. The base of the original cactus will also shoot off new heads at its severed end, “sort of like the Hydra,” he explains.
Divide a fern
If you have ferns, they can be propagated by division. These plants have rhizomes, or horizontal growing stems, under the soil, and each can sprout a new plant, says Aulton. To start the process, cut the rhizomes by gently pulling up a 3-inch section of the stem, making a cut, and then placing it in a shallow hole (about 3 inches deep) in some fresh soil. This method works well with ferns such as rabbit’s foot, kangaroo paw, Kimberly queen, or Boston fern, says Heeks.
And although we’ve been talking about indoor plants, it’s worth mentioning potted outdoor ferns here. If you’ve gotten in the habit of throwing them out as they turn brown heading into winter, you don’t have to do that, says Dustin Stillinger, landscape manager at Indiana’s Oliver Winery. Both Boston and Kimberly ferns can get a little messy as houseplants during the winter, but if you put them in a garage or some other area that stays between freezing and 90 degrees Fahrenheit, you can let them go dormant until the spring, when you can bring them back out and divide them into more plants, he explains.
Watch an air plant propagate itself
For those unfamiliar with air plants, these slender-leaved plants attach themselves to host trees. And they’re easy to propagate: they’ll do it themselves as long as you’ve created the right conditions to help them grow offsets—smaller versions of themselves.
Heeks likes to give his air plants a few hours of sun in an East-facing window every day, soaking each entire plant in a bowl of fresh, clean water for 20 minutes every two weeks, and misting them with water every week. While soaking, he’ll add fertilizer to the water (1 teaspoon per 1 cup of water) and set the plants upside down in front of a fan to dry.
But even in the best conditions, air plants only flower once in their lifetime, Carter says. At the end of a bloom cycle, these plants create clonal basal offsets, or “pups.” When these pups reach about a third of the size of the parent plant, they can be removed to live on their own, or left in place to grow a cluster, he explains.
Correction July 28, 2022: A previous version of this story suggested 1 tablespoon of air plant fertilizer instead of 1 teaspoon.
