The first time I held a gold pan in my hands, I knew what I would find. The employees at Gold Dredge 8 in Fairbanks, Alaska, had given me and all the other guests palm-sized bags of sandy dirt the moment we disembarked the train that had carried us from the parking lot to the historic site.
I didn’t need to be told that the crew had sprinkled each pouch with gold flakes so we all could experience the joy of discovery. But I still lined up at the troughs as a bearded old man taught us simple techniques for swirling and sifting the dirt in our pans to reveal any gold hidden within. I almost believed he could have been present when the dredge was still operating back in 1959.
And while the tourist attraction was a fun experience, nothing quite compares to the anticipation of the hunt and the thrill of success when you head out on your own to pan for gold. You’ll need the right tools and a whole lot of patience; bushy beard and old-timey prospecting attire are optional.
Where to look for gold
The key to successful gold panning, also known as placer mining, begins with location. After all, while precious minerals can be found just about anywhere, gold, especially in discoverable concentrations, is rare indeed. It exists naturally in three to four parts per billion within the earth’s crust, but you’ll need to find a spot where it’s at least 100 times more available (about three to four hundred parts per billion), explains Mickey Fulp, a field geologist and mining analyst who goes by the title “Mercenary Geologist.”
According to Fulp, those areas are mostly located on major tectonic and structural boundaries (like volcanoes and fault lines) where gold is transported and deposited, along with other minerals, by hydrothermal fluids through faults in the earth’s crust. When rocks that contain gold reach the surface, weathering starts to break them down. As they disintegrate, water transports loose materials, including gold, downhill, where everything ends up in the soil deposited by rivers and streams: alluvial deposits. These waterways are the perfect places to pan for gold.
To try your hand at panning in the wild, find a water source coming out of some mountains where gold is known to occur, like the Sierra Nevada range, says Holly Thane, an interpreter at Marshall Gold Discovery State Historic Park, where the California Gold Rush began in 1848. In fact, visitors can still pan in the park and participate in a demonstration to learn how to do it—a common feature of gold-related attractions.
Once you find a promising location, pick a spot that offers the best chance of discovery. Thane and Fulp both recommend panning behind rocks, natural dams, drop-offs, vegetation, and roots where water flows more slowly. Gold, which is 19 times heavier than water, will sink and accumulate in these places while less dense material, mostly sand and gravel, will continue downstream. Alternatively, set up in the bend of a river where erosion and weathering will create alluvial deposits along the banks.
Know the rules and regulations
If setting out on your own, don’t expect to show up at any riverbed with a pan and be able to get to work. There are rules and restrictions in many places regarding whether you are allowed to pan for gold and what tools you are allowed to use.
For example, in California, there are still privately-owned claims that are off-limits to the public and frequently fiercely defended, often with guns, Thane says.
[Related: There’s a new gold rush in the American West. But is it safe?]
To avoid any problems, call the county or Bureau of Land Management in the region you’re headed to. Ask them where panning is permitted and what tools you’re allowed to use. Marshall Gold Park, for example, has a public beach where you can pan, but only allows visitors to do so using “pans and hands,” Thane says. No tools like shovels, sluice boxes, or metal detectors are allowed.
Learn the proper tools and technique
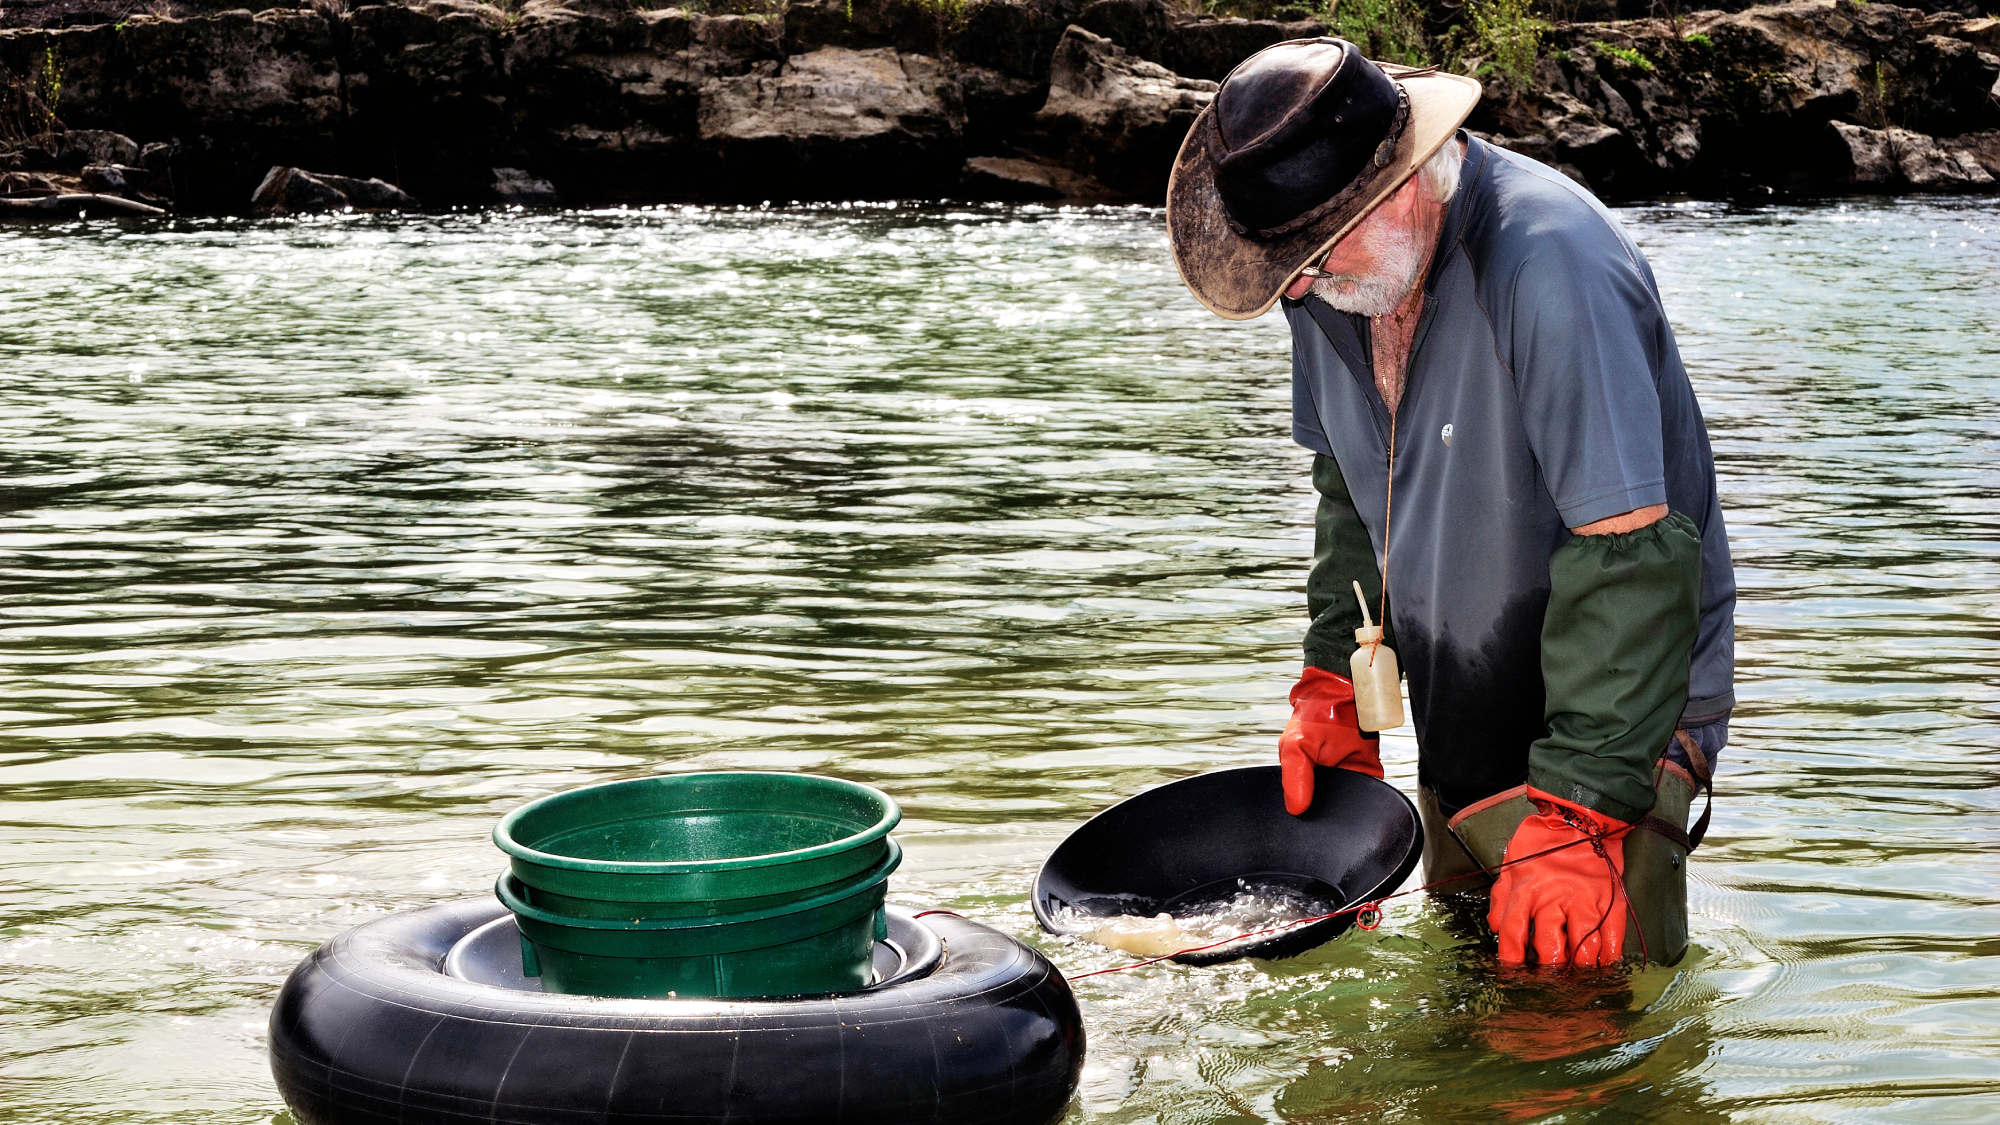
Every panning adventure requires the right tools. You can go all-in with a sluice box, shovel, and metal detector, but the most portable tool is a simple gold pan.
But not just any bowl will do: a specially-designed gold pan is the perfect tool for the job. These plastic or metal pans have two or three raised ridges on one side that are meant to trap heavier materials like gold while letting lighter ones like sand wash away. And don’t forget a vessel like a small plastic bottle to contain whatever gold you find.
Once you have the tools, it’s time to master the technique. There are nearly as many gold-panning methods as there are people who pan, but this is how Thane and the employees at Marshall Gold Park teach visitors in daily classes.
Take your pan and gently dig down into the sand. Fill the pan no more than halfway with sediment, then fill it to the 3/4 mark with water. Gently shake the pan and swirl the water—you don’t want to slosh all the solids out with the water yet. Since gold is so heavy, this action will give it a chance to sink to the bottom.
Next, tilt the pan away from you at a 45-degree angle and dip it slowly into the waterway you’re prospecting until water reaches the ridge in the pan closest to the edge (the one closest to the top). Jiggle the pan while the edge is in the water or dip it repeatedly three or four times. This will allow the water to wash out the lightest sand and dirt.
[Related: America thrived by choking its rivers with dams. Now it’s time to undo the damage.]
When no more sand and dirt flows out of the pan, level the pan and shake it gently again so everything still inside settles back to the bottom. There should be just enough water to cover the remaining material. Repeat the process, but dip the pan to the second ridge.
Gold pans have two to three ridges. Only dip as many times as there are ridges.
The goal of all this dipping and swirling is to get rid of all the lighter materials in the pan until you have only a thin layer of black sand, which is mostly iron. That’s where gold hides. Once you do, slowly swirl the pan in a circular motion. There should be just enough water in the pan to cover the sand. At this point, you’re no longer trying to get rid of excess material, you’re trying to separate the gold from whatever is still in the pan.
As the water moves, it will carry the lighter material—the sand—with it and leave the gold where it sits. Once you’ve sufficiently separated the sand and gold flakes, you can pick them out with your fingertips and deposit them in your storage vessel.
Flakes are all you are likely to find in rivers, too, though small nuggets aren’t unheard of. “Gold is a soft metal, so as it is tumbled around the rocks in the river, it’ll get smoothed out,” Thane explains. Over time, this creates smooth yellow pieces of flat flake gold. Don’t expect what you find to be pure, either; gold is always mixed with varying amounts of silver in a metallic alloy called “electrum.” It might also contain minor amounts of other metals such as copper and mercury.
Patience is key
Your chances of striking it rich are slim—most valuable nuggets are discovered via mining, not panning—but the activity can nonetheless be fun and rewarding, especially if you happen to find a few flakes. “Don’t rush it. Have fun with it. Enjoy it,” Thane recommends. “And don’t expect to get rich.”
