Right out of the box, you’ll notice that Apple’s macOS is sleek and elegant in its appearance. But there are numerous ways to tweak the operating system’s look, if you want something more in line with your tastes.
After all, you’re likely to spend a lot of time staring at macOS if you have a Mac, so it makes sense to get it looking the way you like. (You can also apply a similar set of customizations to Windows, by the way.)
Even if you don’t want to give your Mac a pixel-by-pixel makeover, it’s handy to know what customization options are available. And if you’re wary of change, note that any edits you make can be easily undone.
Change themes and colors in macOS

If you open up the Apple menu and then choose System Settings and Appearance, you’ll see you can pick between three main visual themes for macOS: Light, Dark, and Auto (which switches between Light and Dark automatically, depending on the Night Shift settings under Displays in System Settings).
You can then tweak the look of the theme in smaller ways:
- Select an Accent color to set the color used for emphasis on menus and in dialogs (the default multicolor option uses different colors in different programs).
- Click the Highlight color to set the color you see when text is highlighted in macOS—again this can be set to multicolor, which means it will vary between applications.
There are also options here for controlling when scroll bars appear on screen and how they behave when they do. Enable Allow wallpaper tinting in windows, and some apps will use a subtle shading effect in places, based on the colors in the wallpaper image you’ve set, which brings us neatly to…
Choose different Mac wallpapers

If you open the Apple menu then pick System Settings and head to the Wallpaper section, you can customize the backdrop image used by macOS. This will often be visible around the sides of your open program windows, so you want to choose something you find easy on the eye. Use something inspiring, or soothing, or fun—it’s up to you.
- Click any of the thumbnails shown to use images or videos provided by Apple—the videos are marked with a small playback button, and some of the images change their colors as your system changes between light and dark modes.
- Select Add Photo if you want to pick out an individual image from your system, or Add Folder or Album if you’d like to import a bunch of pictures at once. These are then available as thumbnails you can select.
- Pick any of the static colors if you’d rather use a single color as your wallpaper. If the shade you want isn’t there, click the + (plus) button to open a more detailed color selector.
With a wallpaper selected, you can use the options at the top of the dialog box to change how the picture is resized to fill the screen, if needed. If you’ve picked a video, you can also have it appear as the macOS screensaver—a static image is used for the desktop backdrop, and then the animated version shows up when the screensaver is enabled.
Modify text size and pointer size
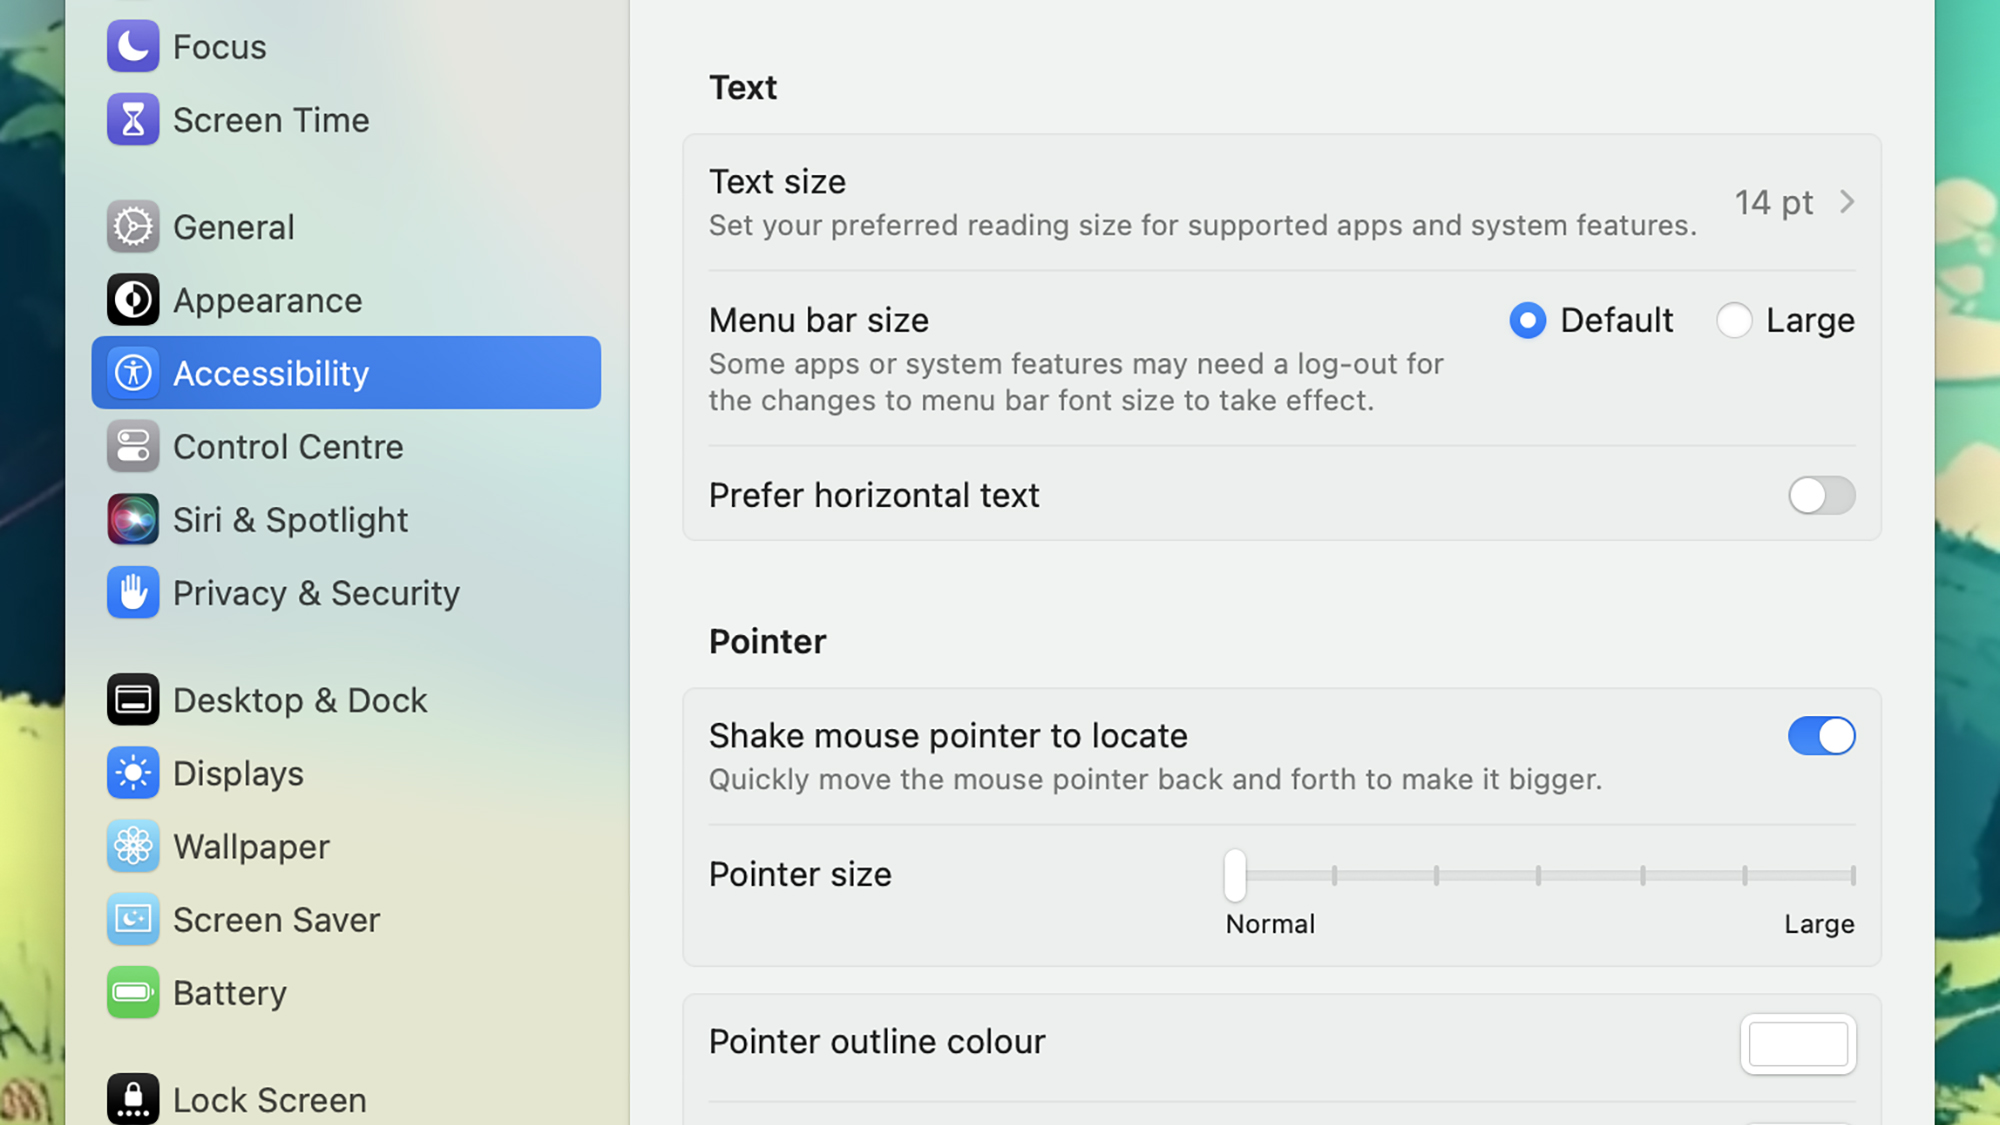
Text and pointer formatting might not be the most exciting customizations you can make use of on your Mac, but it makes a big difference to the visual experience, and can also be really useful if you’re struggling to see the text at its default size on screen—something that’s more likely if you’ve got a high-resolution monitor hooked up. Open the Apple menu, then System Settings, then pick Accessibility and Display.
- Click on Text size (which will say Default if you haven’t changed it) to configure the size of text on screen. As well as setting an overall text size, you can apply a different setting for individual apps including Mail and Notes.
- Use the Pointer size slider to change the size of the mouse or trackpad pointer on screen (note you can also shake the pointer to make it larger, if you use it). There are also options for changing the pointer outline and fill color.
Other options on the same screen control the menu bar size, and the contrast and transparency used for various elements in macOS. You’re also able to adjust the overall display contrast, and this can all make items on screen easier to see.
Tweak the dock and menu bar
Besides the desktop, the dock (at the bottom) and the menu bar (at the top) are the other key elements that make up the macOS interface. You can make changes to the dock by opening the Apple menu, then choosing System Settings and Desktop & Dock.
- Right at the top you can change the size of items in the dock, and the magnification used when you hover over them.
- Click Position on screen to move the dock—it can be on the left or the right of the screen, as well as at the bottom.
- Use the Automatically hide and show the Dock toggle switch to set whether the dock stays visible permanently, or only when you hover over the relevant screen edge.
- Enable Show suggested and recent apps in Dock if you want to have these apps included in the list, as well as open apps and those you pin (right click on an icon in the dock and choose Options to do this).
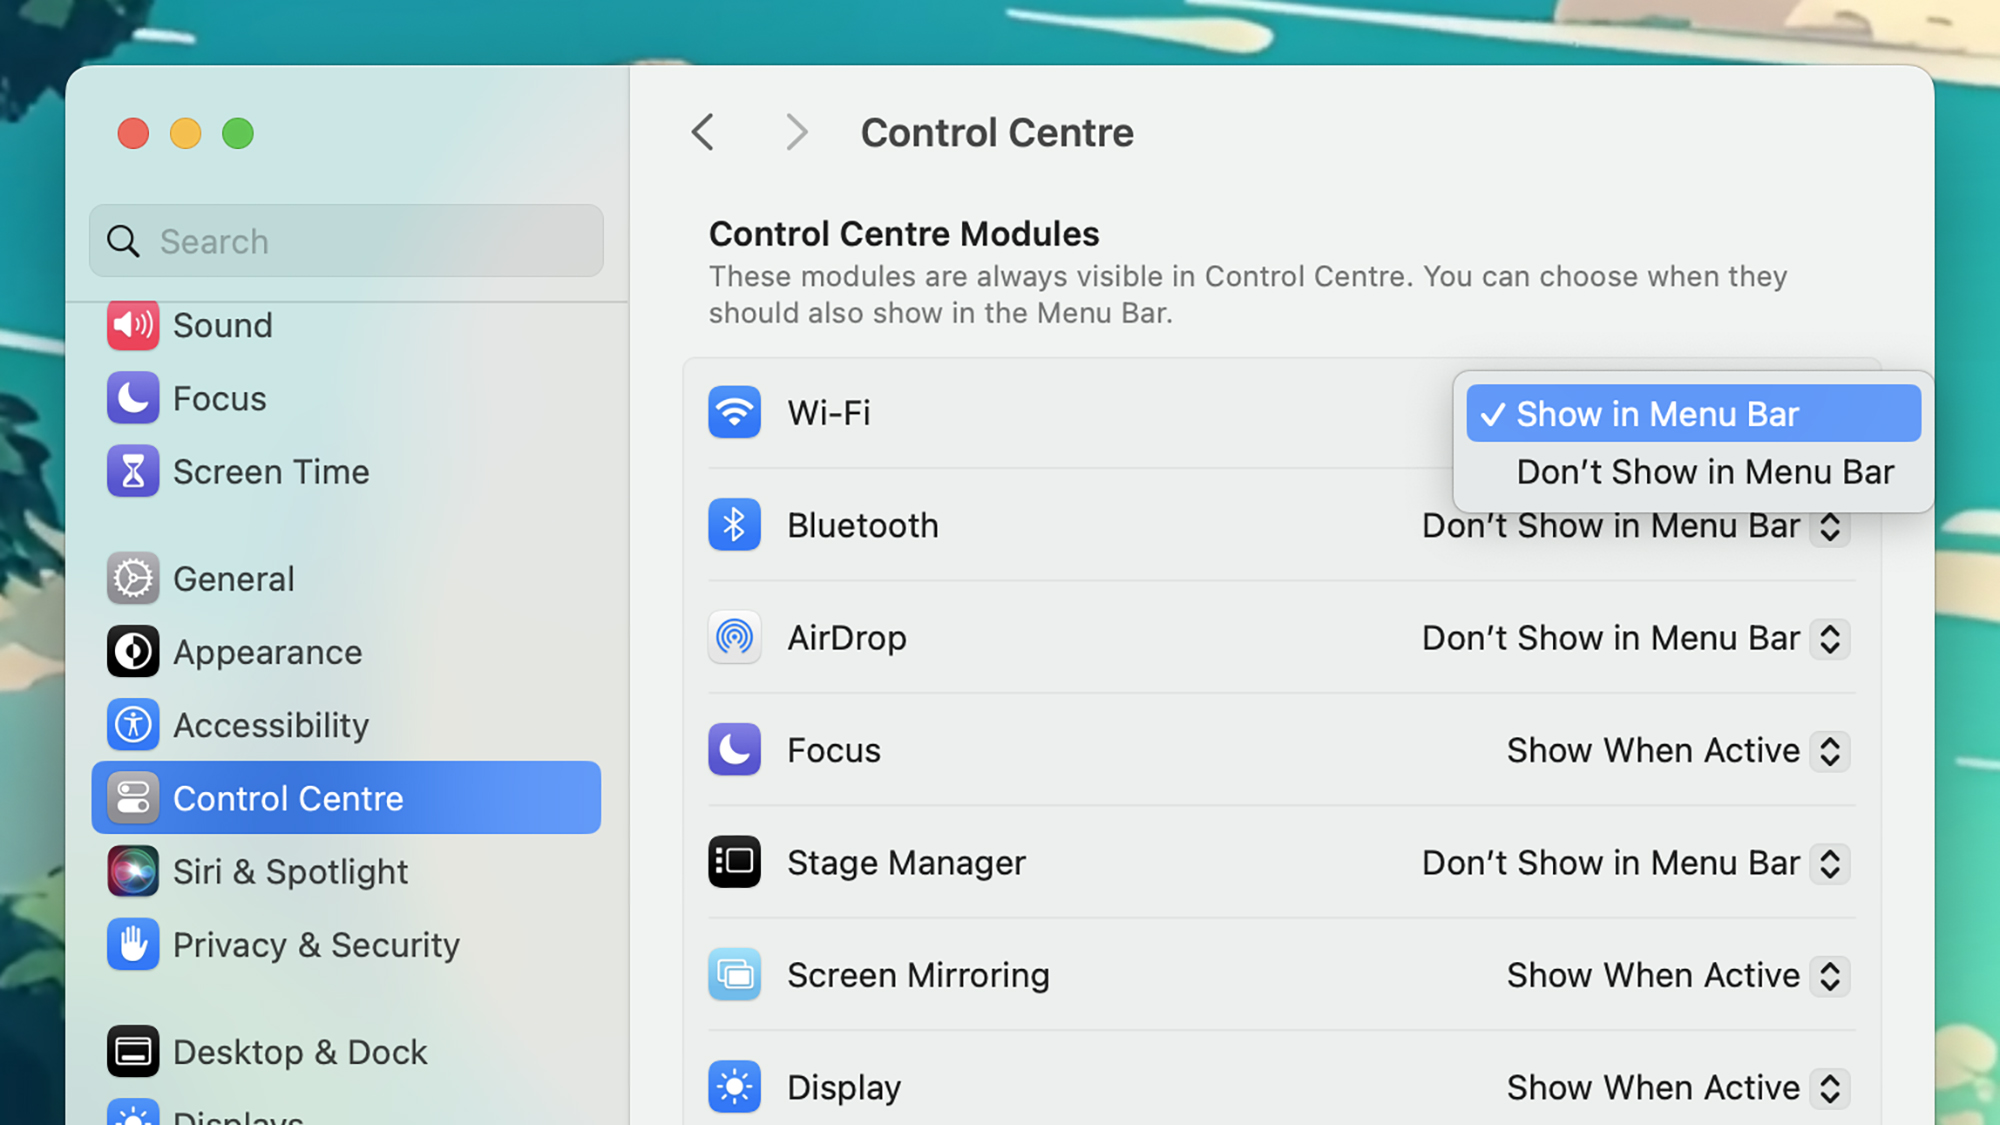
There are fewer options for the menu bar, but if you open up Control Center from System Settings, you can choose which app and shortcut icons get shown in the menu bar, as well as have it automatically hide itself when not in use, like the dock.
