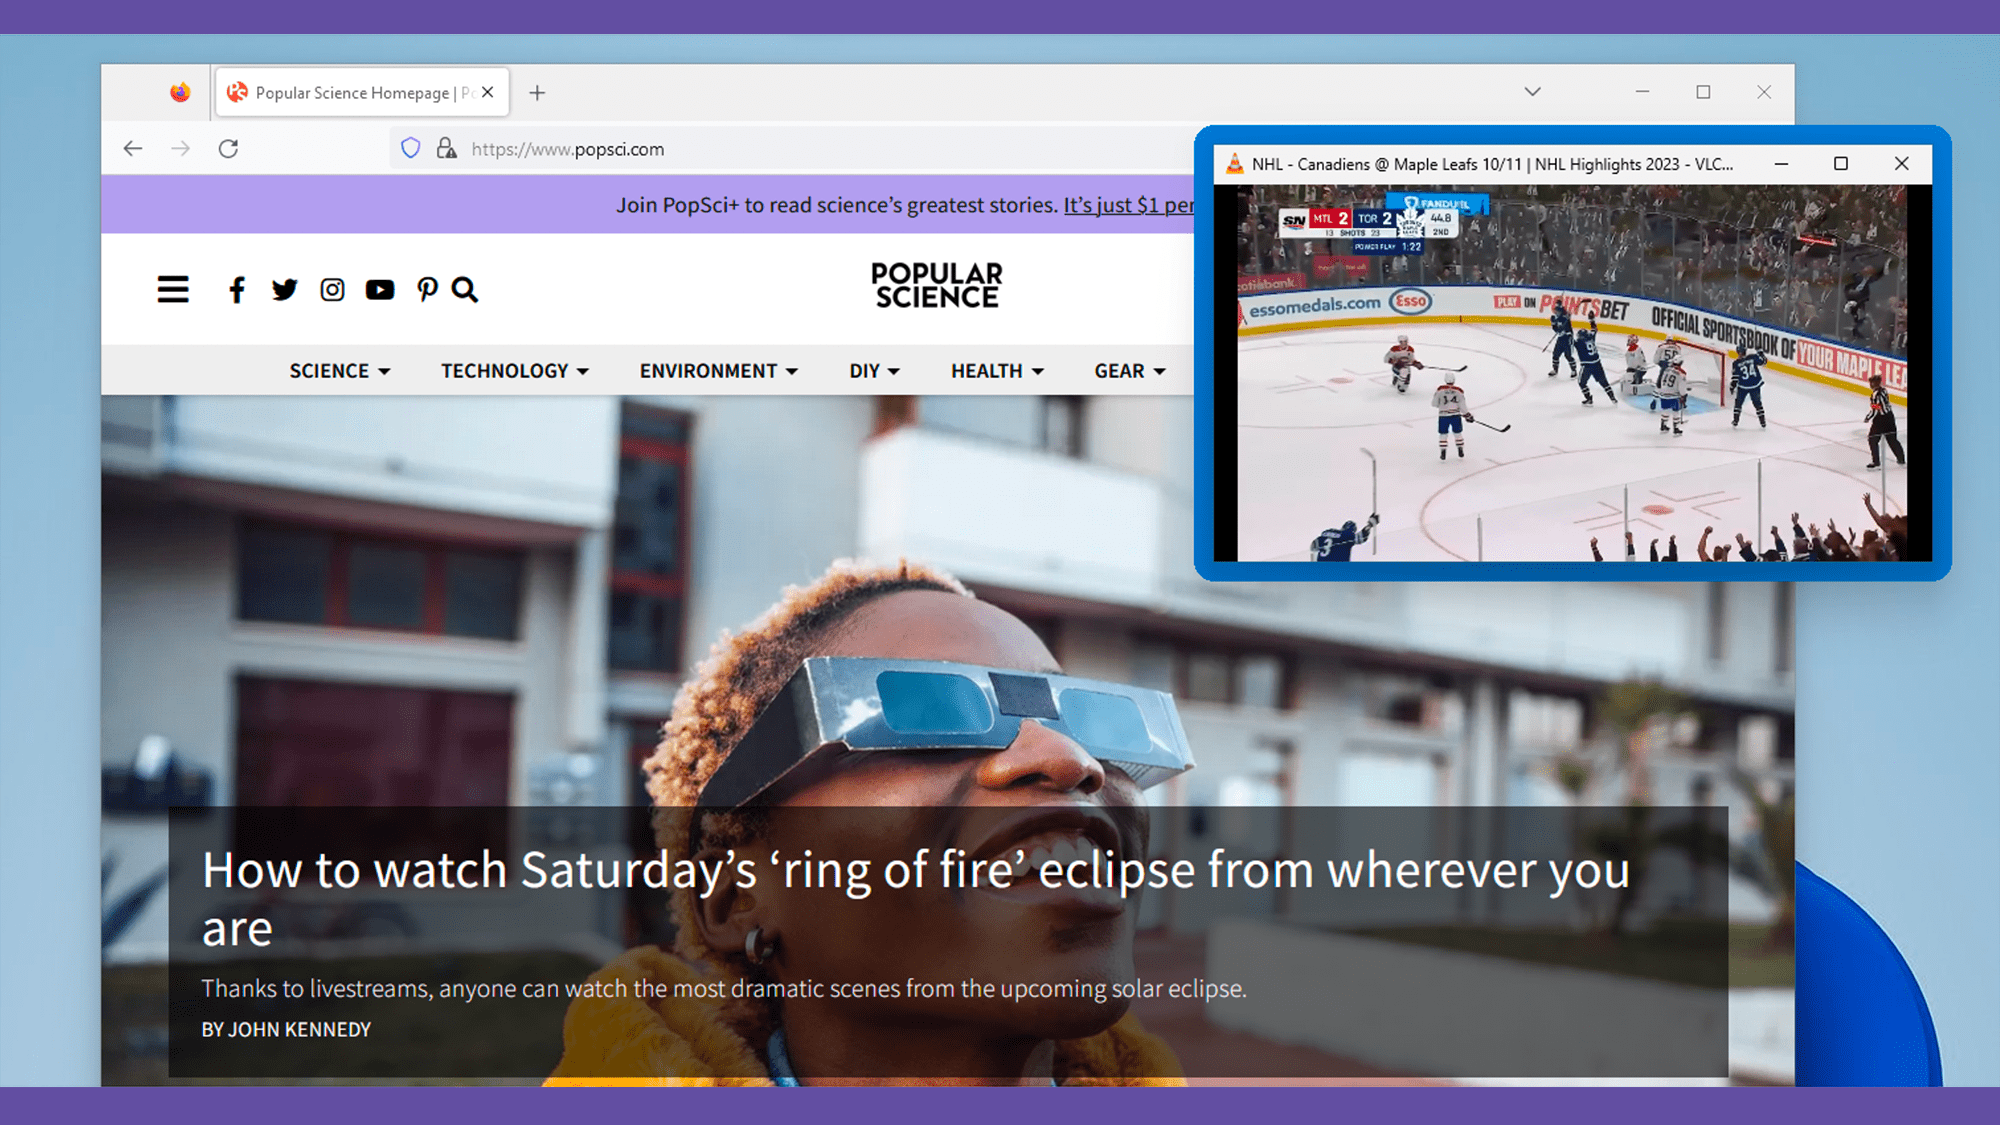
When you’re working on your PC, sometimes it’s handy to pin a window so that it’s always on top of the programs you’re using. Maybe you want to keep the calculator app or a text document visible at all times, or maybe your favorite team is playing and you want to make sure you don’t miss out on all the action.
Windows doesn’t offer this ability by default but you can add it through the Powertoys app. This tool brings with it a bunch of great features to Microsoft’s OS, including Always On Top, which can pin any window so that it stays right in front of everything else in your workspace. Here’s how to set it up.
How to set up Always On Top
1. Download the Powertoys app from the Microsoft Store. Once the program is installed, it should open automatically.

2. On the left sidebar, click Always on Top to configure it. By default, you’ll be able to trigger the feature by using the keyboard shortcut Windows + Ctrl + T, but you can change it to something else—more on that later.
[Related: 7 hidden Windows features you should be using]
3. That’s it—Always on top is ready to use. Now, open whatever app or window you want to keep in front and hit the keyboard shortcut to pin it in place. Use the same shortcut unpin it.
How to customize Always On Top
By default, there will be a thick blue border around the window you pin, but you can change or remove it.
1. Open Powertoys and head to the Always On Top section in the sidebar.
- Pro tip: If you can’t find the app, click the Windows logo on the Start bar and use the search field at the top of the emerging window.
2. Click Open Settings. Scroll down and under Appearance & Behavior, you’ll be able to remove the border entirely, if you like—just toggle the switch next to Show border around the pinned window.
If you don’t want to get rid of the border, you can change its color. By default, the feature will use the current system color (Windows default), which is defined by your wallpaper, but you can switch it to any hue you want. Just open the drop down menu next to Color mode, and click Custom color. A new entry named Color will appear on the menu, and you can play around with the color picker on the right to choose whatever tone you like.

You can also make the border transparent by dragging the slider next to Opacity to the left or right. Unfortunately, there’s no preview to guide you on how the different opacity levels will look, but you’ll see the changes in real time if you’ve got a window pinned to the top of your workspace already. Drag the slider all the way to the left, and the pinned window frame will become totally see-through.
[Related: 10 new features to get you started with Windows 11]
Another element you can customize is the border thickness. Just play around with the slider next to Thickness. Again, you’ll need to have a window already pinned in place to see how the changes look in real time.

Finally, by default there is a sound every time you pin and unpin a window—you can turn this on and off in the Sound section of the settings.
Other options include the ability to exclude certain apps from being pinned and changing the keyboard shortcut to activate Always on Top. Click the pencil icon under Activation and type whatever shortcut you like. Just make sure the key combo you use is not taken by another action, or things can get pretty confusing and annoying pretty fast.
