
At some point, every builder progresses beyond the “eyeball it” method of measurement, and as you build more complex projects, the tape measure is often not precise enough. If you’re assembling an engine or machining parts, for instance, you often need to be accurate to within a few thousandths of an inch or parts fail and bad things happen. Unfortunately, most of the tools that can provide this kind of precision don’t survive well in a gritty, messy, all-purpose shop. Except the vernier caliper, a device that looks intimidating (especially to those who spy it in your shirt pocket) until you crack its basic code. Here’s how to be as exacting as an engineer in anything you build.
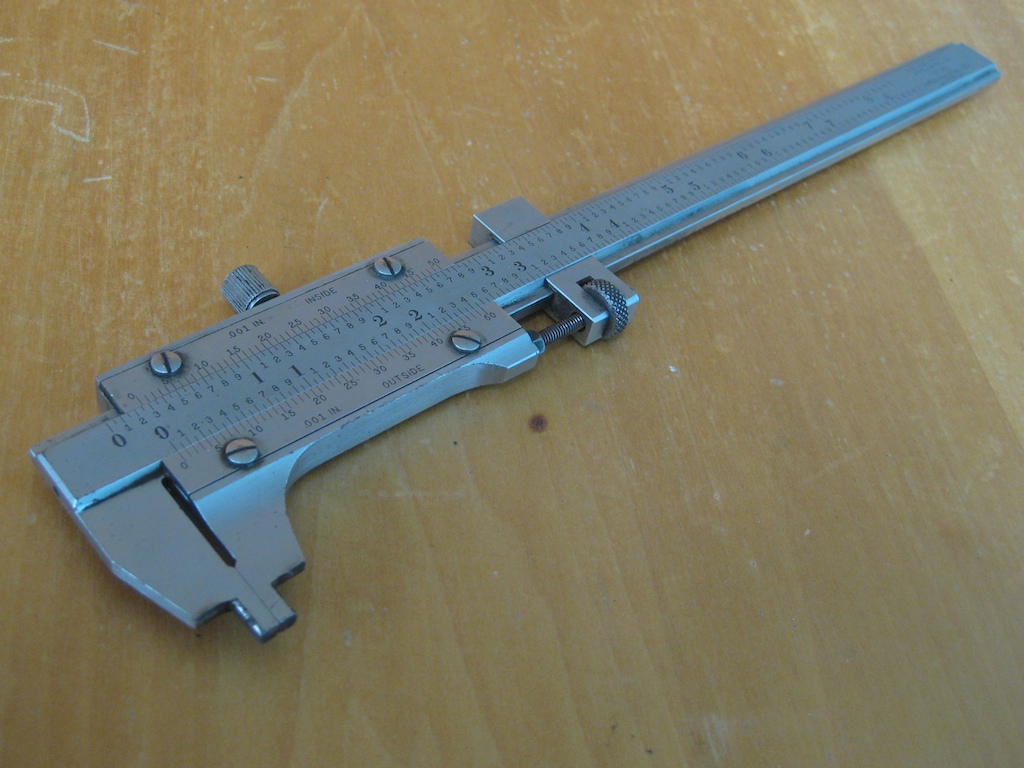
Vernier calipers embody a clever trick invented by Pierre Vernier. Lacking the precise and delicate mechanism of a dial caliper, the vernier caliper is a rugged and affordable way to make accurate measurements. But first, you have to understand how a vernier scale works. Looking at the calipers pictured, it should be obvious that there are two marked scales, one of which slides past the other. What is less obvious is that there is a precise relationship between the sizes of the divisions marked on each scale. This precise relationship is what allows a simple device, marked only to 1/20th or 1/40th of an inch and with no gears or screws, to measure accurately up to 1/1000th of an inch.
Why does this size relationship matter? The size of each division marked on the sliding scale is 1/1000th of an inch smaller than the divisions marked on the main scale. So, for example, when the calipers are closed and the 0 marks are aligned, the first mark on the sliding scale is 1/1000th of an inch short of the first mark on the main scale, the second mark on the sliding scale is 2/1000th of an inch short of the second mark on the main scale, and so forth. The difference in sizes of the divisions adds up. On the calipers pictured, the 50th mark on the sliding scale will be a full division short of the 50th mark on the main scale, lining up directly with the 49th mark. This difference in relative division sizes is the key point.
Here’s an example: Imagine first that the calipers are closed and the “0” marks are aligned. Arbitrarily picking a number, lets consider the 14th mark on the sliding scale. Given what we know about the relative sizes of the divisions on the sliding scale and the main scale, we can reason that this mark is 14 * 1/1000 inches = 14/1000th of an inch short of the 14th mark on the main scale. Now let’s imagine that we open the jaws of the calipers slightly and move the sliding scale such that its 14th mark lines up perfectly with the 14th mark on the main scale. The caliper jaws have just opened 14/1000th of an inch.
This fundamental concept is what is applied when a vernier caliper is used to measure an object. The main scale, which is marked in units that actually correspond to units in our system of measurement, is used to measure up to 1/20th or 1/40th of an inch, depending on the variety of vernier scale in question. The sliding scale then, which is marked in divisions 1/1000th of an inch smaller than those on the main scale, is used to calculate the remainder of the measurement, giving this tool it’s 1/1000th of an inch accuracy. So you read the main scale first. Then, reading the sliding scale indicates how many thousandths of an inch larger the measurement is than the reading on the main scale. Adding these two sizes gives the measurement.

For the sake of completeness, it should be mentioned that there are two types of vernier scales commonly found in calipers, known as 25-division verniers and 50-division verniers. While the details differ, the fundamental concept remains the same. Each has divisions on the sliding scale that are 1/1000th of an inch smaller than the divisions on the main scale. In the case of the 25-division verniers, the main scale divisions are every 1/40th of an inch and the sliding scale has 25 divisions, each 1/25th smaller than the divisions on the main scale (1/40 * 1/25 = 1/1000). For the 50-division verniers, like those pictured here, the main scale divisions are 1/20th of an inch and the sliding scale has 50 divisions, each 1/50th smaller than the divisions on the main scale (1/20 * 1/50 = 1/1000). They are both used in the same way and give the same accuracy.
But enough math. Let’s look at how these are used.

Though vernier calipers may seem confusing at first, they are actually dead simple. Adjust the sliding jaws of the caliper so they’re snugly positioned against the part to be measured. First read the number of full divisions on the main scale. in the photo above, 1.25. Next, find the first marking on the sliding scale that lines up directly with a marking on the main scale. Take that number as thousandths of an inch (for example, 14 on the sliding scale would be 0.014 inches) and add it to the number from the first step. In this example, the measurement is 1.39 inches.
To learn more, a great reference is The Starrett Book For Student Machinists.
