How To Turn A Leftover Candy Cane Into A Sound Machine
Make sweet music

In 2007, electrical engineer Jay Silver discovered how to turn anything into a musical instrument. While tinkering with an electronic-organ kit, he accidentally spilled lentils on the kit’s circuit, which produces musical notes. “As I was trying to dry it out,” he says, “I noticed the noise was changing.” He realized that touching the device shifted the sound.
The next day, Silver took the circuit to the summer camp where he taught and showed the campers how it worked. When it came in contact with conductive objects, they acted as extensions of the device: Users could touch the object to create different sounds, like pressing the keys on a keyboard. Silver’s campers tested it out, making music with everything from apples to bicycles. Later, a co-worker suggested that Silver hook up the circuit to a pencil, since electricity can pass through its graphite core. The result was Drawdio, a pencil that plays “music” when you draw.
Silver published instructions for Drawdio online, and he loves when people use his idea to create something new. With that in mind, Popular Science built a caroling candy cane—and so can you.
This article was originally published in the December 2015 issue of Popular Science, under the title “Make Sweet Holiday Music.”
WARNING: Don’t get milk—or any other liquids—on the circuit or battery.
Stats
- Time: 2 hours
- Cost: $55
- Difficulty: Medium
Tools
- Utility knife
- Wire stripper
- Soldering iron
- Scissors
Materials
We purchased these materials from Jameco Electronics, Home Depot, and a local grocery store.
- Perfboard
- TLC555CP LinCMOS timer, eight- pin DIP
- 1⁄4-watt resistors, 5% (10, 10K, 10M, 270K ohm)
- 0.1 uF, 50-volt, 20% ceramic disc capacitor
- 100 uF, 35-volt, 20% radial capacitor
- 820 pF ceramic disc capacitor
- PNP general-purpose amplifier, 2N3906
- 22 AWG hook-up wire in red, black, and green
- 2 x AAA battery clip
- Mini speaker with wire leads
- Double-sided foam tape
- 2 AAA batteries
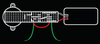
- Candy cane
- Aluminum foil
- Electrical tape
Instructions
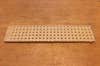
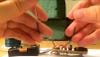
1. Cut your perfboard
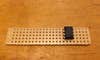
2. Add the timer
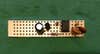
3. Add resistors, capacitors, and amplifier
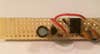
4. Add jumper wires
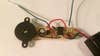
5. Add candy cane leads, battery clip, and speaker
6. Solder
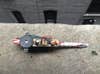
7. Test your circuit

8. Attach circuit to candy cane
9. Complete the candy cane

10. Make music!