Drowning is the number one cause of accidental deaths in national parks in the U.S., which means that to safely cross a body of water in the wilderness, you should approach every creek, stream, and river crossing with caution and reverence.
That’s how my husband and I made it across an aggressively running river swollen by three days of rain at Denali National Park. With a few mnemonics and the right technique you, like us, can cross rushing streams unscathed and without soaking all your gear.
When water wets your way, remember WADE
In the outdoor community, guides, instructors, and trip leaders love a good acronym. And the first one Shannon Rochelle, curriculum director, and field instructor at the National Outdoor Leadership School, cites when it comes to water crossings is WADE: Watch, assess, decide, and execute.
Applying WADE in real-life scenarios means taking the time to scan your surroundings, and watch what the water is doing and how it changes. Try to figure out where the body of water is widest and deepest—wide crossings can mean more time in the water while deep water is more difficult to cross safely.
[Related: Some rivers suddenly change course, and we may finally know why]
Then, assess whether a crossing is feasible. You’re looking for water shallow enough to easily wade, slow-moving enough so you won’t fall, and far from dangers like waterfalls. If there are no safe conditions to cross at your location, it’s time to scout upstream or downstream for a better spot. After all, Rochelle says, just because the trail you’re on leads to water doesn’t mean you have to plow ahead in that exact spot. Instead, if the crossing looks sketchy, look for a braided section of the river, as these areas are often shallower and slower-moving. You might also want to wait and see if the flow ebbs, as a swollen river or creek could be the temporary result of recent heavy rain.
Rochelle has done both. She once spent three days and walked for many miles to find a safe place to cross a rushing river in the Wind River Range in Wyoming. On another occasion, she and her students set up camp next to a challenging crossing, placed markers along the bank, and watched for hours to see how the water rose and ebbed throughout the day to ascertain the time of lowest flow, which is often the safest time to cross.
In short, give yourself all the time you need to fully assess the situation and look for the best alternative, which sometimes might be to stay put or turn around. “You don’t have to cross now, you don’t have to cross here—you don’t have to cross at all,” says Rochelle.
Learn your water-crossing ABC’s
If you thought WADE was the only mnemonic you’d have to memorize to safely cross a body of water in the backcountry, think again. All hikers and backpackers should also know their water-crossing ABC’s: Access, bottom, current, depth and downstream, and exit.
Access
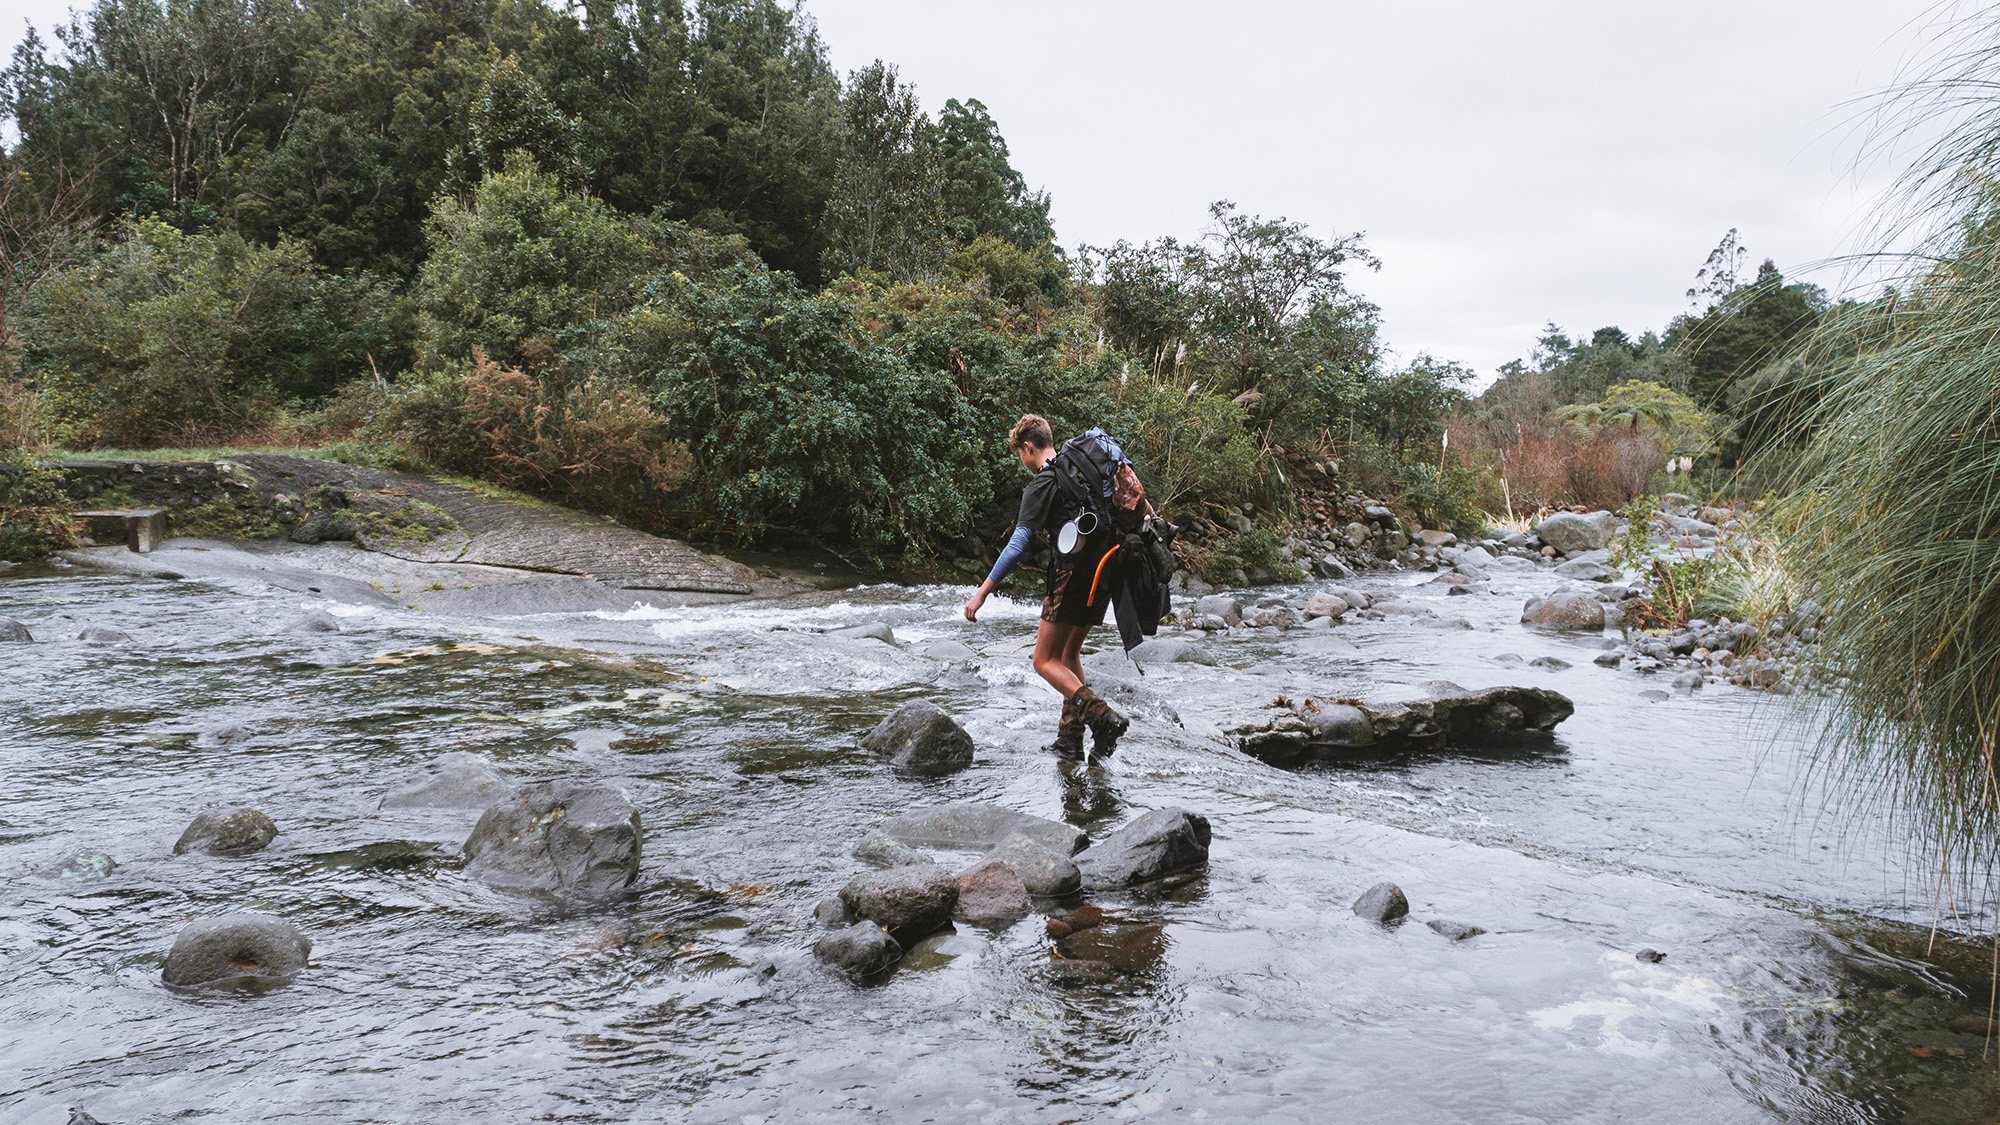
First, consider how you will physically access the creek, river, or other moving body of water. Look for an entry point that offers an easy approach to the water itself so your first step isn’t the one that sends you swimming. Prefer a shallow area without a steep drop-off. A clear path without too much debris will help get your crossing off to a good start.
Wherever you cross, keep your boots on, and don’t get tempted into looking for a log or stones to aid in your quest. Rochelle says you shouldn’t be so dedicated to keeping your feet dry, as trying to balance your way across a slippery log or attempting to hop from rock to rock could result in more injuries than just cold feet.
Bottom
Next, consider the bottom of the creek bed and what it’s made of. Rochelle explains that big rocks can be slippery and more prone to move and shift under your feet, so they aren’t ideal for safe crossing. A sand or pebble bottom will offer a more stable footing.
[Related: For a better hike, try swapping clunky boots for barefoot shoes]
If you can’t properly assess the bottom of the body of water from the bank, you or someone in your party should take a closer look in a shallow, slow-moving section of the river or creek. The scout should enter the water without a backpack, wander out and back, and take a closer look to find the safest route across. The rest of the group should help spot from the bank and be ready to assist in case the scout loses their footing.
Current
There’s also the current to consider. “If the water is flowing faster than you can walk, you’d be better off finding a different place [to cross],” Rochelle instructs. To determine speed, toss a stick into the water and walk at your normal speed alongside it on the bank. If the stick outpaces you, the water is moving too fast, which means it’s not safe to cross there. Start searching for a different spot and start from A.
Depth and downstream
As a general rule, you want to find a safe crossing area where the stream only comes up to below your knees. If that’s the case, and A through C all look good, leave your pack straps snug and your waist belt buckled for improved balance.
On the other hand, water that comes above the knees is much harder to walk through and can easily knock you off balance, especially if there’s a current. In that case, loosening your pack’s straps and unfastening your hip belt can make it easy to escape your pack if you fall into the water.
Unless there’s no current at all, Rochelle advises avoiding crossing areas where the water level is higher than your crotch. If that’s the case and you fall, you’re more likely to be swept downstream.
This is why you should also be aware of what awaits in that direction. If there’s a waterfall nearby, fallen branches or logs, boulders, or any obstacles that could trap you underwater or knock you unconscious, pick a new place to cross.
Exit
Finally, evaluate your exit. “You haven’t really found a good crossing until you’ve found a good spot to get out and actually gotten out on the other side,” Rochelle says. Here, the same rules to find an entry spot apply.
You may not always find the perfect crossing where all conditions are ideal, but with a bit of time and effort, you can hopefully locate an area with a balance you feel comfortable with. If you don’t feel confident you and your whole party can make it across safely, don’t make an attempt.
How did the hiker cross the creek?
Once you’ve found a suitable place to traverse, do so strategically, Rochelle says. Face upstream for the most stable position and use the tripod method to help keep your balance: hold a sturdy stick or trekking pole in both hands and lean onto it so there are three points of solid contact with the river bottom. Move only by moving one point at a time.
If there are others hiking with you, place the sturdiest and most sure-footed hiker in front, and have the others line up behind them facing upstream. Hold on tight to the waistband or backpack of the person in front of you and push down enough to help anchor yourself and them. The hiker in front creates a sort of eddy that enables everyone else to step sideways more easily, which you should do slowly and at the same time.
Remember, you haven’t successfully crossed until everyone in your group has safely arrived at the bank on the other side. And when you’re all finally safely across, congratulate yourself, dump out your boots, and think of the dry pair of socks waiting for you in your pack.
