With summer raging, it’s peak kitten season in the United States. Pet adoption rates that increased at the start of the pandemic have yet to ease up and return to normal levels, and there’s cat hair in the air.
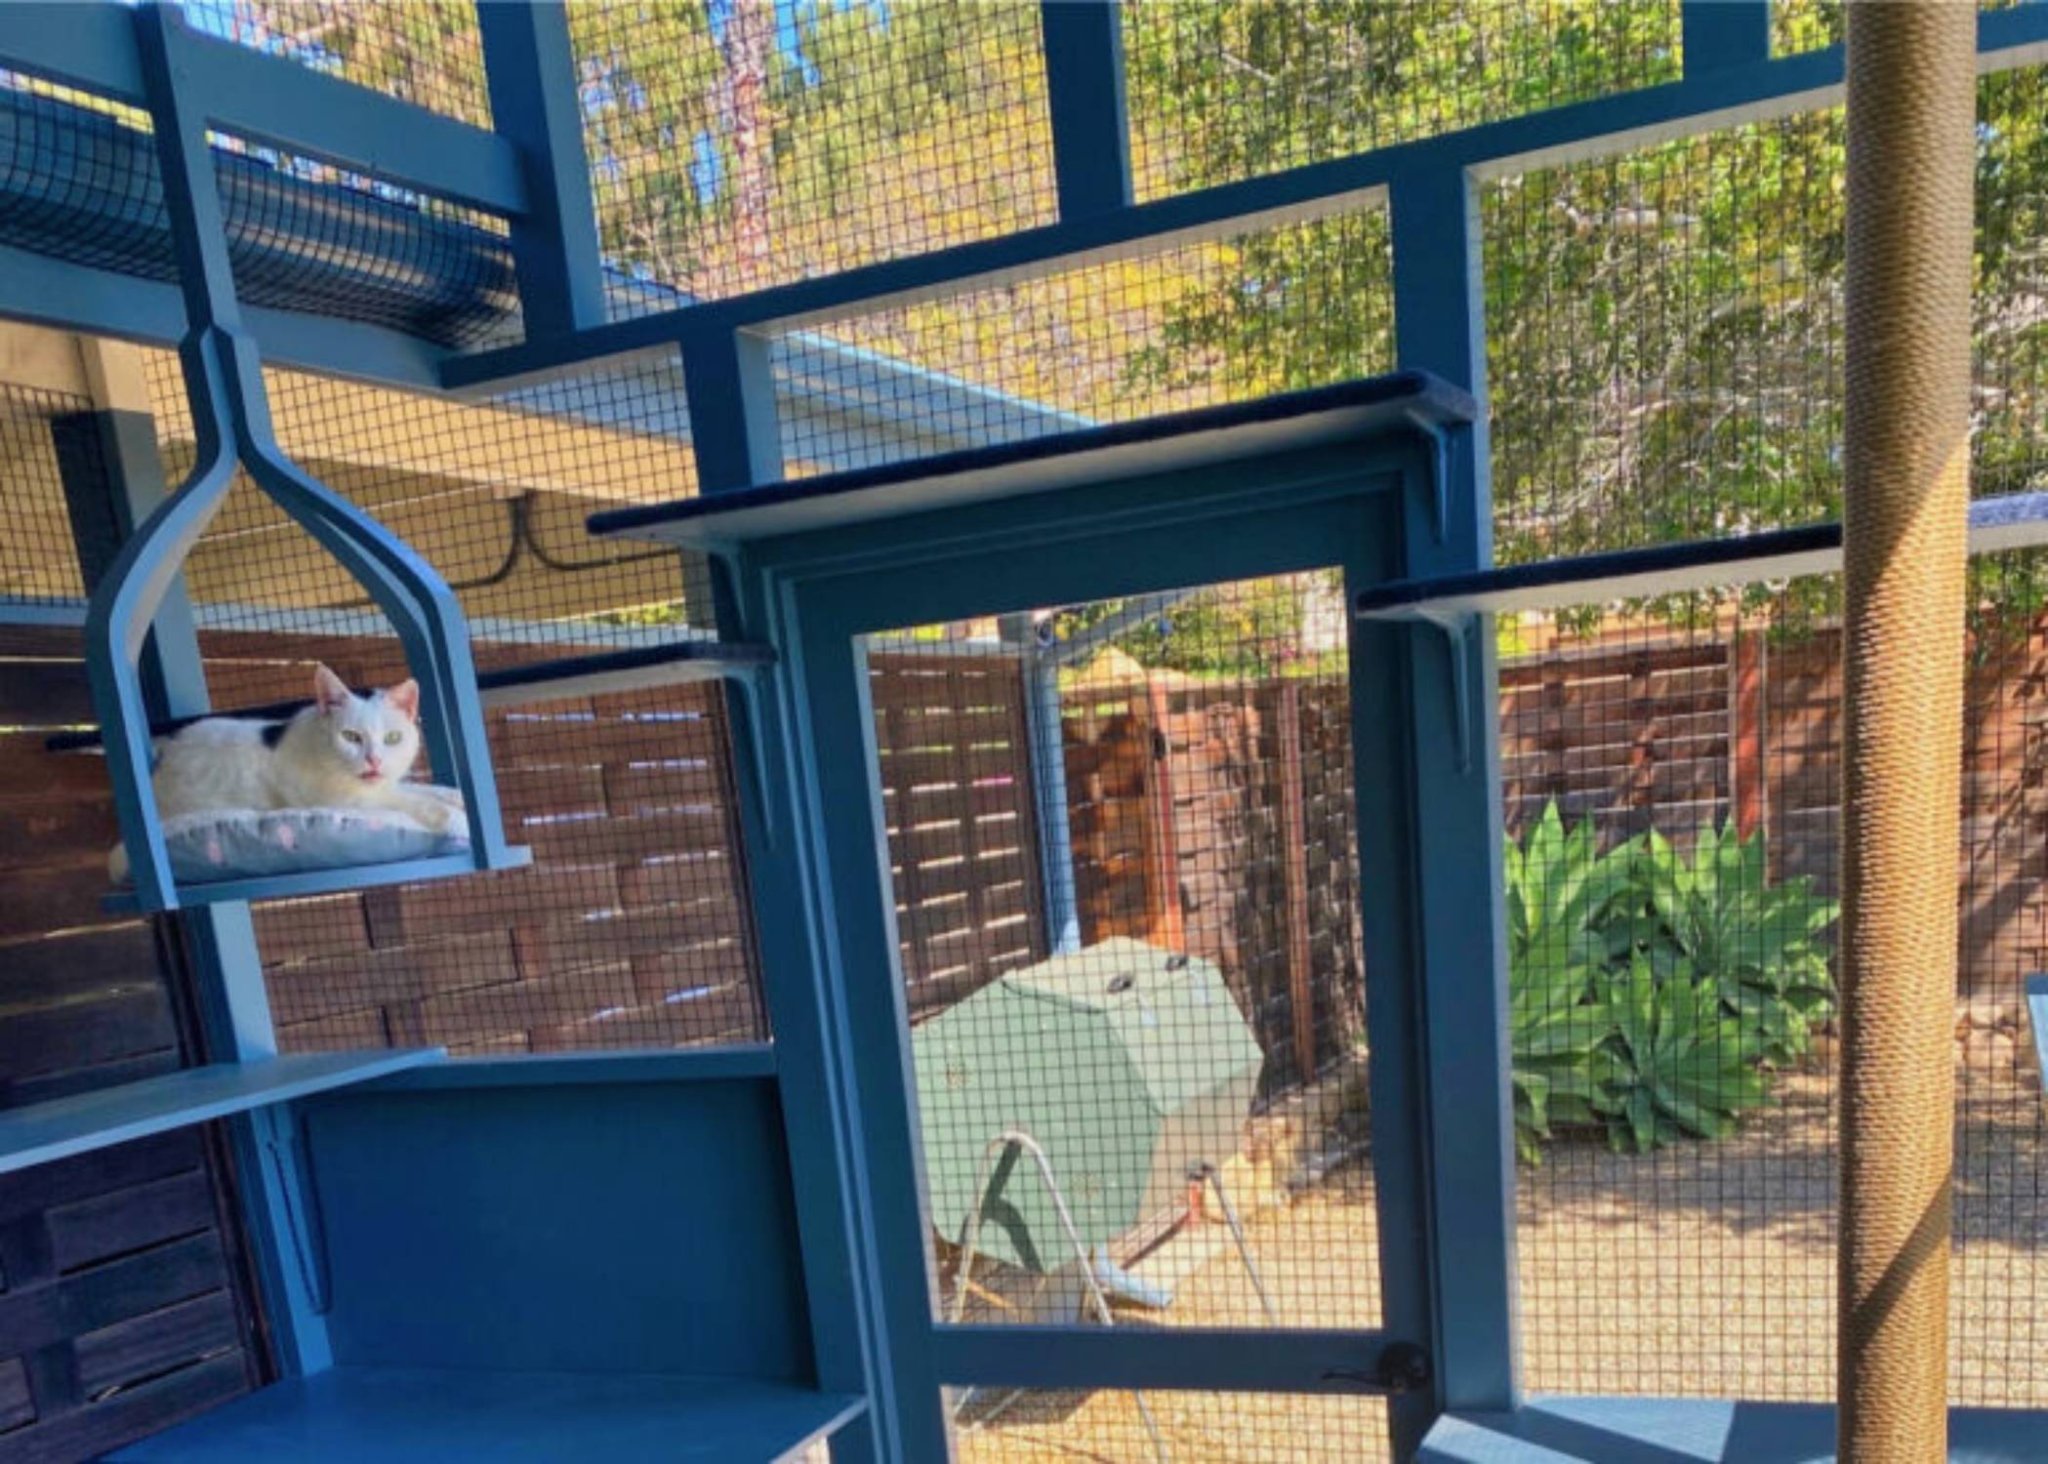
Thanks to the simultaneous lockdown DIY boom, “catios” (that’s patios, but for cats) are everywhere you look. The outdoor wood-framed and wire-walled enclosures are ideal for cat owners—or “guardians,” as Alan Breslauer of Los Angeles’ Custom Catios calls them—looking to give their feline friend a safe outdoor space for play and relaxation.
Indoor living provides cats a longer lifespan—10 to 15 years on average, as opposed to two to five—but lacks the rich stimuli of the outside world.
“They need to have their instincts satisfied,” says Heather Napolitano, a vet in Los Angeles who’s worked with catio construction groups.
Hunting behaviors, for example, include more than just stalking, and felines need an engaging environment to look, smell, and do “that slow little kitty-cat crawl.” Well-made catios, which bridge the safety of indoor spaces with the intellectual engagement of the outdoor world, are a great solution.
Giving your fur baby a playground of their own can also be a fun (and manageable) DIY project. Before you start, though, there are some factors that amateurs and construction experts alike should keep in mind.
Location is crucial
First, do some research about the region you live in, and the specific local flora and fauna that might come into contact with your cat’s newly-expanded environment.
Learn what plants you should avoid (the American Society for the Prevention of Cruelty to Animals has an extensive list), what insects might make their way into the enclosure, and what predators could lurk nearby. Napolitano recommends checking in with your cat’s veterinarian and telling them about your building plans—nobody’s a better expert on animals in your area than them.
A visit to the vet is also a great time to make sure your pet has all of the vaccines, medications, and other treatments necessary to prevent diseases they could be exposed to in the outdoors.
Once you’ve gotten all region-specific instructions, it’s time to find somewhere on the outside of your home to build your catio.
“Like all real estate, it’s about location, location, location,” Breslauer says.
Look for a spot with fresh air, a good balance of sunshine and shade throughout the day, and lots and lots of green—trees, bushes, grass, or even flowers. That’s the kind of spot that will attract things that fly and crawl, which will provide the best enrichment for your cat. Surrounding the enclosure with potted vegetation is a great solution if you live in a city or any other area with limited outdoor green space.
[Related: Build a garden that’ll have pollinators buzzin’]
Finally, get bonus points by building your catio close to a backyard or another outdoor space where humans in your home spend their time. That way, your cat will always be able to join you.
Once you’ve found the spot for your catio, it’s time to make sure you have an entrance point for your furry friend. Whether you live in a house or an apartment building, windows are great to build around, as are any patio doors that you don’t mind losing your own access to, Breslauer says. In that case, it’s just a matter of knocking a pane or two out of it and replacing it with a custom cat door.
The third option, and the one most people choose, is an entrance through your home’s exterior wall. Unfortunately, this option is the least suited to DIY: you run the risk of damaging pipes and wires, losing insulation, and struggling with refinishing the inside and outside of your home. If this is what you had in mind, consider paying someone for just that part of the project.
All three of these options allow you to use a side of your own home as one of the four walls for the enclosure, a key factor in ensuring stability and safety for your cat to go in and out as they please.
If you’re not as worried about your cat going out, but of other creatures—namely, mice and rats—coming into your home, Breslauer has reassuring words.
“They’re not going to come in,” he says. “They’re going to smell the cat, and they’re not coming near that area.”
Get a blueprint and some materials
When you’ve locked in a location, it’s time to design your build. For the more hesitant DIYer, you can find pre-drawn layouts online that include material lists and step-by-step instructions. Catio Spaces, for example, charges between $40 and $70 for each plan, while My Outdoor Plans offer theirs for free. Look around the web—you may find others.
If you’re taking a more freehand approach, start by considering your cat’s unique needs. Breslauer suggests you start by aiming high. Literally.
“It’s best to go up to the eave of the house, up to around 10 feet high,” he recommends. This approach maximizes safe vertical space for cats without sacrificing structural integrity.
Once you have a plan, it’s time to choose your materials. In California, catio builders gravitate toward abundant and weather-resilient redwood, while in colder areas, cedar’s a better bet. Douglas fir is inexpensive, but doesn’t last as long when exposed to the outdoors. Pressure-treated wood may seem the obvious choice for an outdoor structure, but Breslauer suggests staying away from it. This type of “weatherproof” lumber gets some of its durability from chemical coatings that stand up against the elements, but can include arsenic and copper compounds that your cat may be better off not chewing on or rubbing against.
Along with wood, you’ll need a hefty supply of wire mesh. A quick Google search will show you plenty of catios wrapped in chicken wire, which is an inexpensive, adequate option for those who don’t live in areas with larger predators. But if you live around coyotes, raccoons, or anything bigger, you’ll need something stronger, as those animals can easily tear their way through chicken wire, warns Breslauer.
A safer option, no matter where you live, is weatherproof galvanized steel mesh, with spaces no wider than 2 by 4 inches. For those with smaller cats or less willingness to clean up avian casualties, 2-by-2-inch is tight enough to keep paws in check. Breslauer’s preference is 1×1 inch, which he thinks looks better.
Before you check out, don’t forget to pick up a few extra planks of wood for interior shelves, and, if you live in an area where your cat might want more shade outside, a fully covered roof.
Do some interior design
There are lots of ways to turn a catio into a bespoke paradise for your pet, and most of them require getting in touch with their specific needs. For example, if your cat is a climber, stack those shelves high. If they’re more of a lounger, try adding a bed or a hammock.
If your feline buddy is somewhere in between, Breslauer has a short list of easy rules he takes into account while designing spaces for the average cat. This includes making all shelves between 18 and 20 inches apart for safe but exciting jumping, coating all elevated surfaces in industrial-strength outdoor carpeting to prevent slippage, and making sure all poles lead right to a shelf for an easy dismount, since paws aren’t equipped for downward climbing.
Napolitano also recommends adding a litter box to your catio layout, since more bathroom options generally mean more kitty comfort (not to mention less litter smell in your house). Some catio plans even include a separate shelf and trapdoor for easy litter box cleaning, but keep in mind that every additional opening you build is another potential exit point you’ll have to remember to keep closed.
And, of course, any catio, no matter how small, should have plentiful fresh water for your furry pal. They’ve got a lot of exploring to do out there.
Assemblying your catio
Even for the experts, catios can take a team of two to three people up to a full week to put together, depending on the design. To be on the safe side, make sure to budget at least a few days for assembly—more if you’re not an experienced builder.
Set up the catio’s entry point before cutting and constructing the wooden frame. If you’re building on concrete or any other preexisting structure, make sure you include a sturdy way to fasten your frame to the ground, like specialized anchors or a line of roofing cement.
If your catio will sit on grass, you’ll have one extra step before you build your structure—and it’s one of the most important. If you live in an area with more aggressive predators, Breslauer explains, animals might attempt to dig their way into the enclosure at the perimeter and attack your pet.
[Related: How cats and dogs see the world]
To prevent this, you’ll need to dig a trench around where the walls will stand. This will later allow you to extend the wire mesh that will cover the walls of the catio underground by burying the bottom edge of the wire 12 to 18 inches below the surface. If you want to be extra cautious, you can extend the trench 6 inches away from the perimeter in every direction, then use tie wire to fix a horizontal piece of mesh to each side’s underground mesh border, leaving a sort of wire mat buried outside the walls to prevent digging downward anywhere near the catio. This approach will keep other animals out of the catio no matter how much they dig.
If you’re adding any sort of door or trap door to your structure, don’t forget to leave a place for a lock. Napolitano says she freaks out every time she sees a DIY catio without a safe, locked entrance, as latches and other simple mechanisms can be fiddled open by cats and visiting critters.
Safety first
Once you have the skeleton built, it’s time to add any interior elements like shelves and ramps. Take extra care while attaching them to ensure no sharp nails, screws, or other edges are left exposed where a cat could injure themselves.
If you’re building out a full roof, take the same care, and if you’re not, you’ll still need to attach a few beams across the top of the structure so you can cover the top with mesh. An uncovered roof is an open invitation for a skyward escape
The final piece of the construction puzzle is cutting and attaching your wire mesh to the outside of your frame. Breslauer recommends a staple gun, as industrial staples are a safe and reliable way to ensure the wire won’t rip off the frame if a cat pushes on it. As with the interior, be on the lookout for exposed staples or sharp wire that could hurt your cat, and cut them down if you find some.
Before you let your cat into their new playpen, have a friend, preferably another cat owner, come help you thoroughly check your work. Assume your cat is going to explore every last inch of the enclosure, so take time to ensure no sharp objects or edges remain. If you find any, make sure to cut them down or sand them. A pair of outside eyes, especially one that’s familiar with the exact ways your cat likes to get into trouble, could be your best bet at catching a stray nail or loose ramp.
“It’s hard to notice the details that need fixing if you’ve been focusing on a project like that for so long,” Napolitano says.
Once you’ve made sure it’s safe, you can invite your companion to enjoy their perfect catio. If you want to add a cherry on top, hang a hummingbird feeder somewhere near the structure, but far enough away so your cat can’t hunt them. This will keep your cat stimulated and allow you to do some bird watching together.
