Sponsored Post: Radioshack Music Maker DIY Project
Contributing editor Vin Marshall, takes on a second Radioshack DIY project, focusing on his musical side

I’d never given much thought to the idea of making a musical instrument before I set out on this project. Nor would I have had reason to expect much success, really, given that I’m practically tone deaf. But then I started to look at the waveforms involved – and that put sound into a framework with which I’m more familiar. In the end, I built a 5 note keyboard that I think actually sounds half decent.
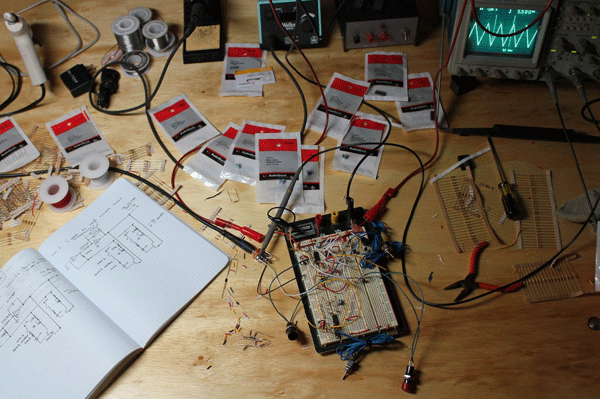
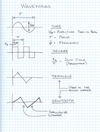
I dove into this by listening to different waveforms – sine waves, square waves, triangle waves, and sawtooth waves – created by a function generator and played through a guitar amplifier. I changed the characteristics of the waves – things like the duty cycle – and listened to how the sound changed. Watching the signals on an oscilloscope as I listened to them allowed me to match waveforms with sounds – putting a name to a face, so to speak.
That brief self-taught introduction to sound was enough to start narrowing down what I wanted the instrument to do. I wanted to build something a little bit different than a regular keyboard, so I opted for a smaller keyboard with each note capable of playing a chord – two waves of different frequencies mixed together. I liked the sound of the triangle waves the best, so I based the circuit around oscillators that would generate triangular waveforms. I also liked the sound of the sawtooth wave – a triangle wave in which the slope of the rising part of the signal is shallower than that of the falling part of the signal. I particularly liked how that wave sounded mixed with a regular triangle wave.
Once I knew what I wanted, I worked out a circuit based around three oscillators – two triangle wave oscillators, one with a higher frequency range and the other with a lower range, and a sawtooth wave oscillator. I implemented the circuit with Op Amps – the LM324 Quad Op Amp working well for the oscillators and the trusty LM741 as a final mixer stage. Each “key” on the keyboard can play any or all of the oscillators – the three tones are enabled or disabled with the toggle switches for each key and the individual frequencies are tuned with the potentiometers.
Not being a musician by any stretch I’m not entirely sure what I’m going to do with it, but I’m pleasantly surprised by how well it turned out. If you’d like to build one of your own, here is the schematic and board layout for the PCB https://github.com/vinmarshall/Radio-Shack-Music-Maker/. I had the enclosure laser cut out of acrylic. The CAD drawings for the top and bottom panels are also in that download.

Waveforms Side Image

Final Music Maker
Radio Shack Music Maker Parts List
Push Button Switches – 5x p/n 275-609
SPST Mini Toggle Switches – 15x p/n 275-634
5K Potentiometers (cut shaft to length) – 10x p/n 271-1714
100K Potentiometers (cut shaft to length) – 5x p/n 271-092
Knobs – 4x p/n 274-415
DPDT Mini Toggle Switch – 1x p/n 275-636
1/4″ Audio Jack – 1x p/n 274-252
9V Batteries – 2x p/n 23-853
9V Battery Holders – 1x p/n 270-326
9V Battery Clips – 1x p/n 270-324
1N4001 Rectifier Diodes – 1x p/n 276-1101
1N4148 Signal Diodes – 1x p/n 276-1122
Resistor Assortment – 1x p/n 271-312
LED Assortment – 2x p/n 276-1622
LM324 Quad Op Amp – 2x p/n 276-1711
LM741 Op Amp – 1x p/n 276-007
2N2222 NPN Transistors – 3x p/n 276-1617
0.01uF Capacitors – 2x p/n 272-1065
Wire Assortment – p/n 278-1224
Acrylic Panels – Source from Pololu.com using our CAD file.