This story was originally featured on Outdoor Life.
One of the top survival priorities in an emergency is to find and disinfect enough drinking water to supply your needs. Whether your crisis situation is unfolding in the desert after becoming lost or in your own home after a natural disaster, the human body can only last three days without any drinking water at all.
Good thing there are abundant water sources across most of the globe, and multiple ways to disinfect the water. Which method of water processing is right for different situations? Follow along here and find out.
Finding a water source
Before you can disinfect the water, you have to find it. Depending on your location and situation, water can be abundant or virtually non-existent. Water can come from freshwater surface sources like streams, creeks, ponds, and lakes. If you are able to distill the water, you can even use brackish or salty water as a source.
Let’s not forget precipitation as an emergency water supply. Rain, snow, sleet, hail, ice, and dew can be collected for water. Fresh rain that didn’t fall through a jungle or forest canopy should be safe enough to drink as-is. New snow can be melted for drinking without processing as well.
Water issuing from springs and other underground sources can also be safe in most areas. Water coming from tapped trees like maple and birch can be safe to drink and abundant in late winter. But most other water sources should be considered dirty and must be disinfected with one of the following methods.
Boiling

In order to kill the parasites, bacteria, and other pathogens in water, the most reliable thing to do is boil the water. Boiling will not evaporate all forms of chemical pollution, but it is still one of the safest methods of disinfection. Five minutes of a rolling boil will kill most organisms, but 10 minutes is safer. Elevations high enough to affect boiling and cooking times will require slightly more time over the flame.
Boiling can be done over a campfire or stove in a metal, ceramic, or glass container. If no fireproof container is available, heat rocks for 30 minutes in the fire and place them into your container of water. This container could be a rock depression, a bowl burned out of wood, a folded bark container, a hide, or an animal stomach. Don’t use quartz or any river rocks as these can explode when heated.
Distillation

Radiation, lead, salt, heavy metals, and many other contaminants can taint your water supply after a disaster, and trying to filter them out will only ruin your expensive water filter.
In a scenario where the only water available is dangerous water, there aren’t many options. The safest solution is water distillation. Water can be heated into steam, and the steam can then be captured to create relatively clean water, despite its prior forms of contamination—including radioactive fallout. Distillation won’t remove all possible contaminants, like volatile oils and certain organic compounds, but most heavy particles will stay behind. For home-based disaster survival situations, a quick way to make a steam distiller is with a pressure canner and some small-diameter copper tubing. The best part of this operation (aside from safe water) is that the canner stays intact. This allows you to easily shift gears from water distillation to food preservation (providing you are not dealing with radiation). The only tricky part is getting the copper line fitted to the steam vent on the canner’s lid.
If in the field, try your luck with a solar still, a simple invention that collects and distills water in a hole in the ground. To build one, place a square of clear or milky plastic (5 by 5 or 6 by 6 feet) over a 3-foot-deep hole with a clean container centered in the bottom. (Run a drinking tube from the container so you can drink your gathered water without taking apart the whole still.) Place dirt around the edge of the plastic at the rim of the hole to seal off the still. Place a rock in the middle of the plastic to create a roughly 45-degree cone over the container. Dig the still in a sunny location and in the dampest dirt or sand available. Add green vegetation and even urine to the hole to increase its water production. A transpiration bag is a smaller and less productive version of this set-up, involving a clear plastic bag tied around live vegetation.
Survival straws

One of the smallest, lightest of water disinfecting tools to hit the marketplace lately is the straw style of water filter. Newer models can be used as you would a drinking straw and can also connect to the drain valve on a water heater to clean up the water you might find in a water heater after a disaster. They can also fit onto a garden hose to filter the water running through it. Don’t expect it to filter out every single virus or bacteria that could be growing in there, though—especially a hose that’s been laying in the sun, or a water heater full of tepid water after a prolonged power outage. Most of these filters contain an activated carbon filter element, which not only filters out larger bacteria and pathogens, but also removes odd flavors and odors from the water.
Filters

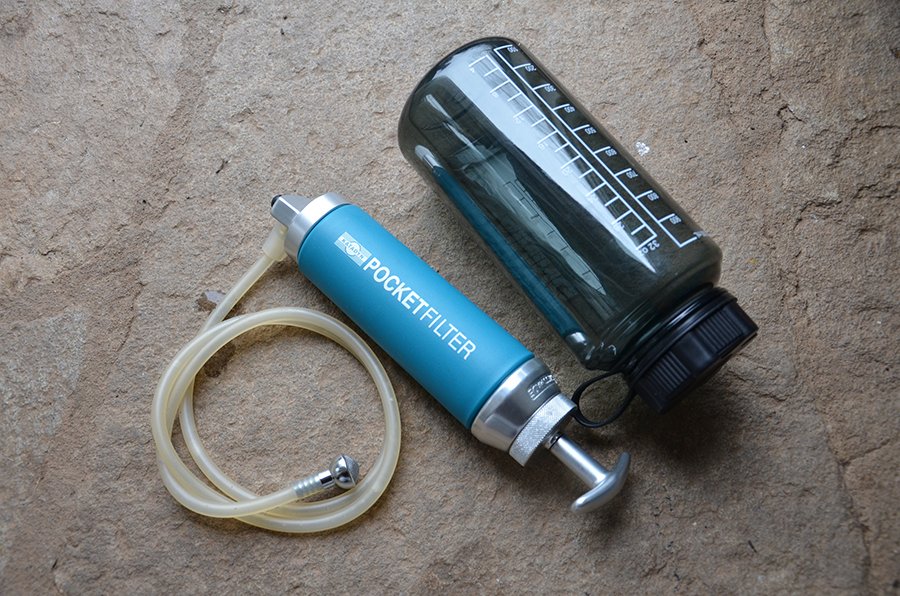
The two main types of water filters in use today are pump-action filters and drip/suction filters. The former utilize a pump to force raw water through a filter cartridge. The latter are filter cartridges that use a gravity drip action (like an IV bag) or are placed in line on hydration bladder hoses. When used on a hydration bladder, the user simply sucks water through the filter as needed. My favorite (for years now) is the Katadyn Pocket filter. It has a ceramic cartridge with silver imbedded inside. The ceramic filters out the larger pathogens, and the silver kills or disables smaller organisms like viruses. Most filters like this will pump about a quart per minute. If time isn’t an issue, you might opt for a gravity-fed system like the one shown here.
Ultraviolet light devices

Ultraviolet light is very damaging to small organisms. When used as a disinfection method, it’s surprisingly effective. Devices like the Steripen Sidewinder are battery-free, hand-cranked water purification devices that disrupt the DNA of illness-causing microbes in mere seconds. There are also a few battery-powered Steripen products that pack the same punch on bad bugs, and have been field-proven around the globe. These are not 100 percent effective in water with large floating particles (which pathogens can hide behind or inside), but for clear water of questionable origin these devices will do the trick.
Solar water disinfection

Solar water disinfection (SODIS for short) is a water treatment method that uses the sun’s energy for disinfection. The most common technique is to expose plastic bottles full of contaminated water to the sun for a minimum of one day. The sun’s abundant UV light kills or damages almost all biological hazards in the water. The advantages to this way of treating water are plentiful. It’s easy to use; it’s inexpensive or free; and it offers good (but not complete or guaranteed) bacterial and viral disinfection. Furthermore, the method uses no dangerous chemicals, and it does not require constant attention.
But there are some problems with the method. You need sunny weather or two days of overcast sky to reach the maximum effectiveness. You cannot use it in rain; it offers no residual disinfection; it may be less effective against bacterial spores and cyst stages of some parasites; the water and the bottle need to be clear; and the bottle shouldn’t be glass. If that wasn’t bad enough, this method does nothing to help with chemical contamination, and only small bottles (2 liters, max) can be processed.
Disinfecting tablets

Two of the most common and popular water disinfection tablets are Katadyn’s Micropur tablets and Potable Aqua’s iodine tablets. They can both work effectively, but there are some differences. If you’re stocking a cabin, cave, or bug-out bag with purification tablets, you’ll certainly want to consider the life span of the product. The iodine tablets from Potable Aqua have a one-year shelf life. That’s not bad, but Katadyn’s Micropur tablets last for two years or more. While these two products are using different chemicals, they both seem to be better than 99 percent effective against water-borne pathogens.
Potable Aqua is the clear winner when it comes to speed. Water treated with those tablets is ready to drink 35 minutes after treatment begins. The Micropur tablets take a full four hours to achieve their maximum disinfecting action. One final thought to consider are the side effects.
The toxicity and flavor of iodine can be a little problematic. The iodine tablets are generally not a good choice for pregnant women or anyone with thyroid issues or shellfish allergies. Picky children are also notorious for failing to drink the iodine-infused water, which could lead to dehydration and other serious repercussions in an already dicey emergency. The Katadyn product is chlorine based, most of which dissipates over the allotted four-hour waiting period, so that product is widely tolerated and tastes much better.
To summarize, the Katadyn Micropur tablets cost more and take longer to work, but they last longer and are widely tolerated. Potable Aqua’s iodine tablets are cheaper and work faster, but taste worse and don’t store as long.
Household chemicals

Either bleach or iodine can be carefully used to disinfect water with good results. Generally speaking, the amount of the chemical you use will depend on the water quality and temperature. Cold or murky water needs a little more disinfectant (four drops per quart) than warm or clear water (two drops). After adding the chemical, put the lid back on your water container and shake it for a minute. Then turn the bottle upside down, and unscrew the cap a turn, or two. Let a small amount of water flow out to clean the bottle threads and cap. Screw the lid back on tight, and wipe the exterior of the bottle to get the chlorine on all surfaces. Set the bottle in a dark place, or at least in the shade, and let it sit for 30 minutes if the water is clear and at room temperature. When you open the bottle after the allotted time, it should smell like chlorine. If not, add another drop or two and wait another 30 minutes. Don’t take chances or shortcuts with water safety. The last thing you need in an emergency is dysentery.
You can also use the two common forms of iodine to disinfect your water. Iodine is a more harmful substance than bleach in most people’s bodies, but it is an option. To use iodine, it is critical to identify which type you are using. Tincture of iodine 2% is actually much stronger than 10% povidone-iodine solution. Use five to 10 drops of tincture of iodine 2% in 1 quart of water and allow it to sit in the shade for 30 minutes. Again, flush the threads and wipe down the bottle. Use five drops for clear or warm water, and up to 10 for cold or cloudy water. Since 10% povidone-iodine solution is weaker, you’ll need eight to 16 drops per quart of water. Again, use fewer drops for nice-looking water and 16 drops for swamp water. Clean the bottle and wait. An added benefit to iodine products is that you can use them for wound disinfection too. Chlorine does not serve double duty like this, and you should never put bleach on wounds. Never blend iodine and chorine for water disinfection.
Build your own filter

We’ve all seen the survival books displaying a water filter made from charcoal-filled pants hanging from a tripod. Sorry to burst your bubble, but that is not a reliable system. It will screen out larger particles, but don’t expect bacteria-free and virus-free water to shoot from this contraption. What could work, however, is a filter made from some flexible hose, glue, and a chunk of pine sapwood. The sapwood’s structure already performs a filtering action in the living wood, screening out air bubbles from the tree sap. Unchecked, these air bubbles would lead to tissue damage.
This type of filter has some humanitarians looking hard at conifer wood as a readily available material for water filtration devices in developing nations. Researchers have successfully used a 1-cubic-inch block of pine sapwood as a water filter. This chunk of wood was attached to a water supply by using a PVC pipe and some epoxy to prevent water from bypassing the wood filter. Flow rates of several quarts a day were reached in their trials, and E. coli was eliminated by 99.9 percent. These are the same numbers you’ll see from straw-style water filters. Though the wood might allow viruses to pass through (since they are much smaller than bacteria), some water filtration is better than none.
Drink it raw

Drinking raw water is certainly a gamble. Even in pristine wilderness areas, the water can be contaminated with all kinds of bowel-churning pathogens. Unless you are lucky enough to find a spring that is issuing clean water out of the natural water table, drinking unprocessed water is risky at best. If there’s any way to process the water, it should be attempted before you say “bottoms up” to unprocessed water. But there are always exceptions. If death from dehydration is near, and you cannot treat the water, drink it anyway. It’s better to be alive and sickened with pathogens, than dead and pathogen-free.
Bonus: build a water bottle survival kit

A bottle of water can be a valuable commodity to a thirsty person, but it’s not just the water that has worth; the bottle itself can serve many purposes. One of the best uses is as a container for a survival kit. Whether you choose a plastic or metal bottle, here are some items to toss inside.
The gear
The guts of your water bottle survival kit can be complex and diverse, or down to business. Whatever you stock in the kit, it’s a good idea to include a fair bit of redundancy. Back-ups are always a smart idea when your life may depend on such a small assortment of equipment.
- Folding knife and/or mini multitool
- Liquid-filled button compass
- Small LED flashlight or squeeze light with a spare set of batteries
- Lighter, ferrocerium rod, and tinder tabs
- 40 water purification tablets
- Signal mirror and whistle
- A space blanket
- A magnifying lens (back-up fire starter)
- 50 feet of 550 cord
- Fishing kit, including: 30 yards of monofilament line, 10 bait keeper hooks of various sizes, and split shot
- 4 steel safety pins—2 large and 2 small
- Small first aid kit
- Several feet of duct tape (could be wrapped around the bottle itself)
- A small pouch to hold all of this gear when the bottle is being used to hold liquid
The bottle
One of the best pieces of gear to hit the outdoor marketplace in recent years is the stainless steel, single-wall water bottle. This rugged vessel is not only crack-proof and crush-resistant, but it can be used to boil your water to make it safe to drink.
Important note, though—if you are using a metal bottle to boil water, the bottle needs to be made of either single-wall stainless steel or some other fire-friendly metal, like titanium, with no paints or coatings. Do not put an insulated bottle or double-wall bottle in the fire. The heat won’t go through properly, and the vessel will probably explode. Skip the aluminum bottles, too, as the metal and the coatings can leach bad stuff into your water.
If you go the plastic route, choose a wide-mouth bottle for easy removal of the items. Also, make sure the bottle is made of Lexan plastic, which can handle higher temperatures without melting, and add a metal cup that fits over the bottle. This gives you the boiling option in an easy and versatile container.
